

We’re going to program using OpenCV and C++ under VS Code. Configuring VS Code and the libraries for certain languages can be complicated. In this tutorial, we’ll look at how to set up a computer and VS Code so you can develop with OpenCV and C++.
Prerequisites
VS Code installation and configuration of Code Runner and C\ extensions
Installing the GCC and OpenCV pre-compiled compiler
For the compilation chain to work, you must choose the compiler version (gcc or other) that corresponds to the OpenCV pre-compiled version.
Precompiled OpenCV version for Mingw64: OpenCV-4.5.5-x64
Install the corresponding GCC version with MSYS2
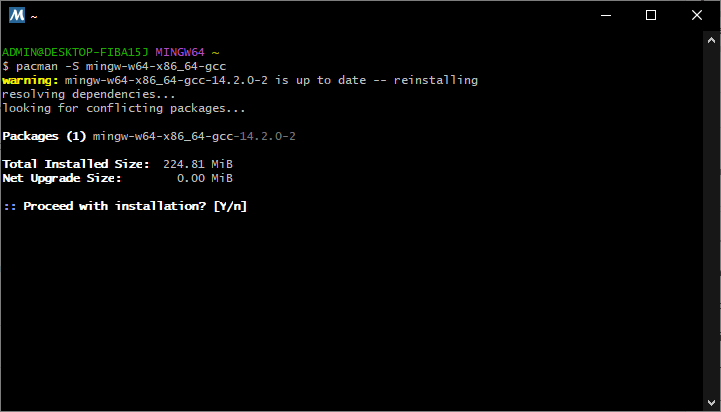
GCC version for Mingw64: mingw-w64-x86_64-gcc‘>mingw-w64-x86_64-gcc (to be installed with MSYS MINGW64 terminal)
Open the MSYS MINGW64 terminal and enter the command
pacman -S mingw-w64-x86_64-gcc

N.B.: it can be difficult to maintain different compiler versions or pre-compiled software. Don’t hesitate to remove what you don’t need from what you’re installing.
We now have the compiler and OpenCV in the Mingw64 version.
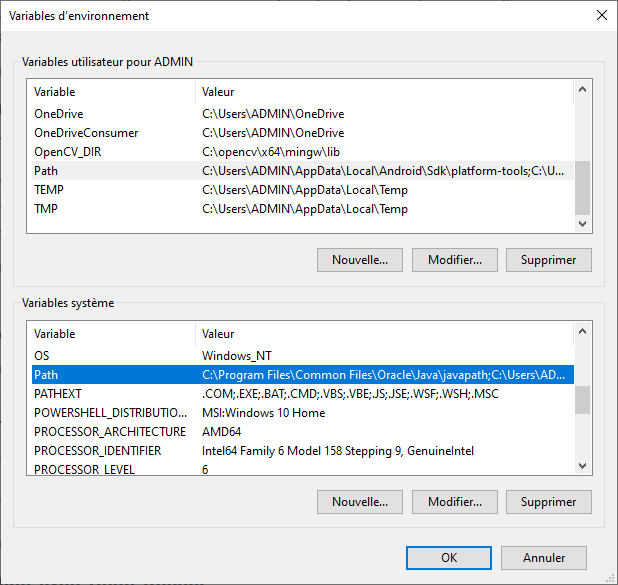
Configuring environment variables
To ensure that the computer knows where the various source codes, executables and libraries are located, you need to add the access paths to the system’s Path environment variable.
For the compiler, we add the path to the g++.exe executable ( ex: C:\msys64\mingw64\bin )
Then add the path to the OpenCV pre-compiled libraries (e.g. C:\opencv\x64\mingw\bin).

You can then restart the computer to take account of the modified environment variables.
Compiling and testing the OpenCV project
At this point, you can compile and run C++ code using OpenCV from the VS Code terminal (or any terminal).
Let’s take the basic code for reading the camera, which we save in the file test_opencv.cpp
#include<opencv2/opencv.hpp> //OpenCV header to use VideoCapture class//
#include<iostream>


using namespace std;
using namespace cv;


int main() {
   Mat myImage;//Declaring a matrix to load the frames//
   namedWindow("CAM Player");//Declaring the video to show the video//
   VideoCapture cap(0);//Declaring an object to capture stream of frames from default camera//
   if (!cap.isOpened()){ //This section prompt an error message if no video stream is found//
      cout << "No video stream detected" << endl;
      system("pause");
      return-1;
   }
   while (true){ //Taking an everlasting loop to show the video//
      cap >> myImage;
      if (myImage.empty()){ //Breaking the loop if no video frame is detected//
         break;
      }
      imshow("CAM Player", myImage);//Showing the video//
      char c = (char)waitKey(25);//Allowing 25 milliseconds frame processing time and initiating break condition//
      if (c == 27 || c == 'q'){ //If 'Esc' or 'q' is entered break the loop//
         break;
      }
   }

   cap.release();//Releasing the buffer memory//

   return 0;
}
To compile and run the code you can use the following command
g++ test_opencv.cpp -o test_opencv -IC:\opencv\include -LC:\opencv\x64\mingw\bin -llibopencv_calib3d455 -llibopencv_core455 -llibopencv_dnn455 -llibopencv_features2d455 -llibopencv_flann455 -llibopencv_highgui455 -llibopencv_imgcodecs455 -llibopencv_imgproc455 -llibopencv_ml455 -llibopencv_objdetect455 -llibopencv_photo455 -llibopencv_stitching455 -llibopencv_video455 -llibopencv_videoio455 && ./test_opencv.exe
You can run the code without recompiling with the command
./test_opencv.exe
Next, we use VS Code to compile and run the code.
Running code with Code Runner on VS Code
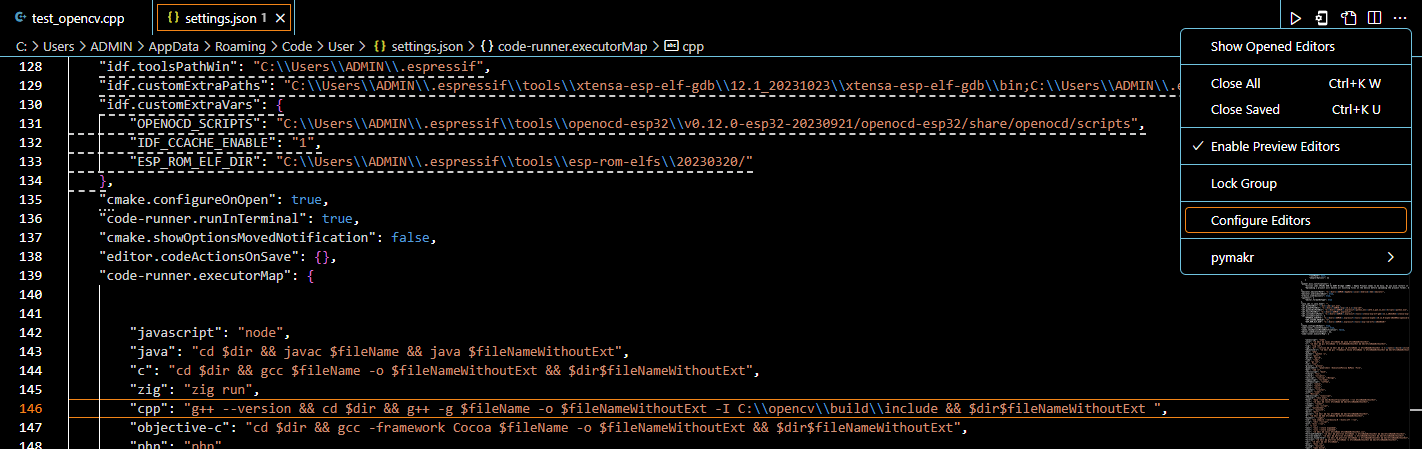
To modify the launch commands, go to the Code Runner extension configuration, search for “Code Runner: Executor Maps” and modify the line of interest (here, cpp). We’re now going to add all the libraries that enable us to compile C++ code including OpenCV on VS Code.
"cpp": "g++ --version && cd $dir && g++ -g $fileName -o $fileNameWithoutExt -I C:\\opencv\\include\\ -LC:\\opencv\\x64\\mingw\\bin -llibopencv_calib3d455 -llibopencv_core455 -llibopencv_dnn455 -llibopencv_features2d455 -llibopencv_flann455 -llibopencv_highgui455 -llibopencv_imgcodecs455 -llibopencv_imgproc455 -llibopencv_ml455 -llibopencv_objdetect455 -llibopencv_photo455 -llibopencv_stitching455 -llibopencv_video455 -llibopencv_videoio455 && $dir$fileNameWithoutExt ",

You can now run the program with Code Runner under VS Code
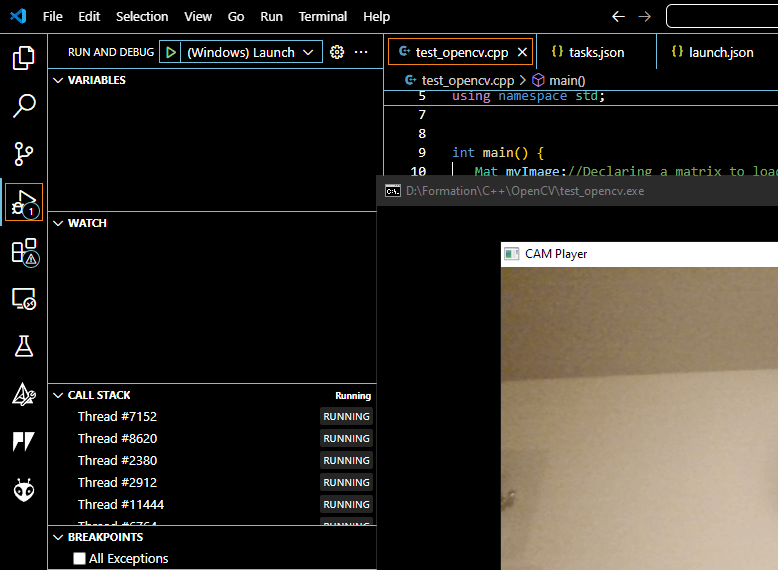
Run code with Run and Debug on VS Code
Under VS Code, you can configure the run and debug procedure, which allows you to run and debug code using F5.
To do this, we’ll set up a compilation task in the tasks.json file. This task contains the path to the C++ compiler and the OpenCV libraries.
{
    "tasks": [
        {
            "type": "cppbuild",
            "label": "C/C++: g++.exe build opencv",
            "command": "C:\\msys64\\mingw64\\bin\\g++.exe",
            "args": [
                "-g",
                "${file}",
                "-o",
                "${workspaceFolder}\\${fileBasenameNoExtension}.exe",
                "-I",
                "C:\\opencv\\include",
                "-L",
                "C:\\opencv\\x64\\mingw\\bin",
                "-l",
                "libopencv_calib3d455",
                "-l",
                "libopencv_core455",
                "-l",
                "libopencv_dnn455",
                "-l",
                "libopencv_features2d455",
                "-l",
                "libopencv_flann455",
                "-l",
                "libopencv_highgui455",
                "-l",
                "libopencv_imgcodecs455",
                "-l",
                "libopencv_imgproc455",
                "-l",
                "libopencv_ml455",
                "-l",
                "libopencv_objdetect455",
                "-l",
                "libopencv_photo455",
                "-l",
                "libopencv_stitching455",
                "-l",
                "libopencv_video455",
                "-l",
                "libopencv_videoio455"

                ],
            "options": {
                "cwd": "${workspaceFolder}"
            },
            "problemMatcher": [
                "$gcc"
            ],
            "group": {
                "kind": "build",
                "isDefault": true
            },
            "detail": "Task generated by Debugger."
        },
    ],
    "version": "2.0.0"
}
This task can be performed using the keyboard shortcut CTRL+SHIFT+B
Next, we’ll tell VS Code how to launch the code in the launch.json file. This file will tell VS Code to execute the ./${workspaceFolder}/${fileBasenameNoExtension}.exe i.e. test_opencv.exe
{
    // Use IntelliSense to learn about possible attributes.
    // Hover to view descriptions of existing attributes.
    // For more information, visit: https://go.microsoft.com/fwlink/?linkid=830387
    "version": "0.2.0",
    "configurations": [
        {
            "name": "(Windows) Launch",
            "type": "cppvsdbg",
            "request": "launch",
            "program": "${workspaceFolder}/${fileBasenameNoExtension}.exe",
            "args": [],
            "stopAtEntry": false,
            "cwd": "${workspaceFolder}",
            "environment": [],
            "console": "externalTerminal",
            "preLaunchTask": "C/C++: g++.exe build opencv"
        }
    ]
}
When you modify the file, you need to compile it again to apply the changes. This task is taken into account in launch.json with the preLaunchTask option, which calls up the “C\” compilation task label.
You can now launch an OpenCV project in C++ using the F5 command or the “Run and Debug” menu in VS Code.

MSYS2 packages
Rather than the compiled version of OpenCV, you can install the corresponding MSYS2 package
Choose packages in the same version on MSYS2 , MinGw64
- GCC version: mingw-w64-x86_64-gcc
- OpenCV version: mingw-w64-x86_64-opencv
pacman -S mingw-w64-x86_64-opencv
For my part, I have encountered compatibility problems with Qt6. If anyone has been able to get it working, please let me know.