


In this tutorial, we’ll look at how to program an ESP32 using the ESP-IDF environment with VSCode. ESP-IDF, or Espressif IoT Development Framework, is the official programming environment for ESP32s, enabling the programming of high-quality applications in C and C++.
ESP-IDF vs ESP Arduino Core
In a previous article, we looked at how to program an ESP32 NodeMCU using the Arduino IDE. The ESP Arduino environment has been developed to simplify ESP32 programming. It enables beginners and hobbyists who are already Arduino users to use the same tools to develop ESP32-based projects. However, it should be remembered that the Arduino IDE uses a simplified and incomplete version of the C\ language.
The ESP-IDF environment is fully compatible with C\ standards.
- Wifi and Bluetooth management
- OTA programming
- Real-time function with FreeRTOS
- Management of the most common sensors and communication protocols
ESP-IDF also offers compatibility with all versions of ESP32 microcontrollers.
Installing and configuring VSCode
Download and install VSCode
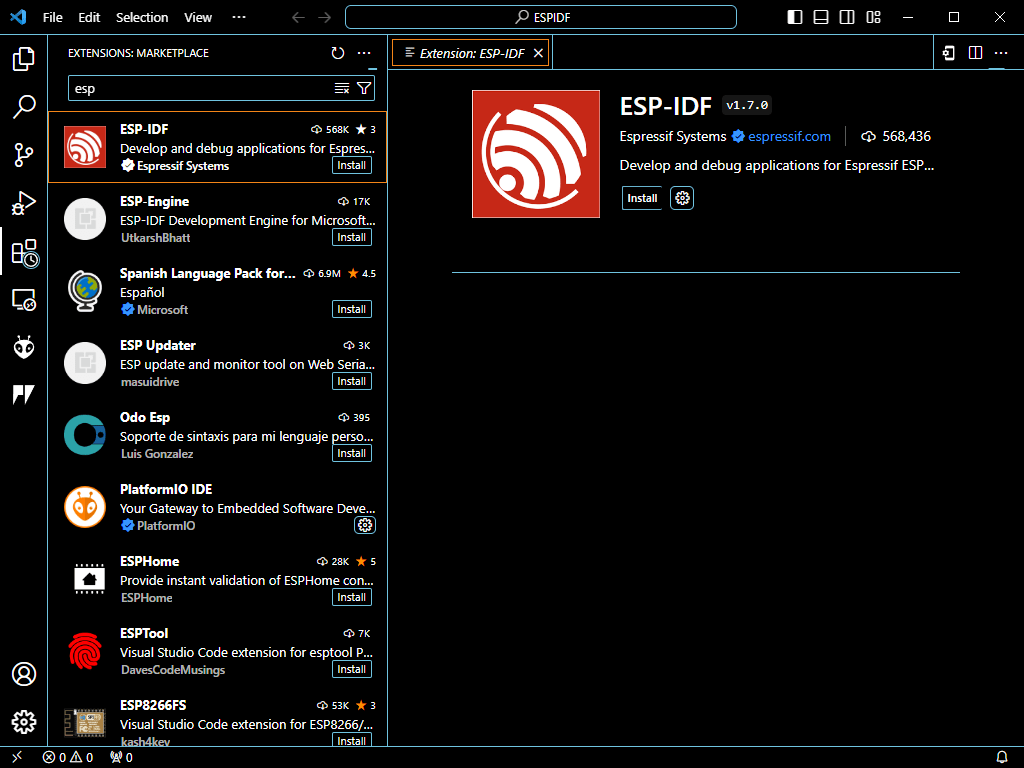
Find and install the ESP-IDF extension for VSCode, which contains libraries and basic configuration for ESP32 programming.

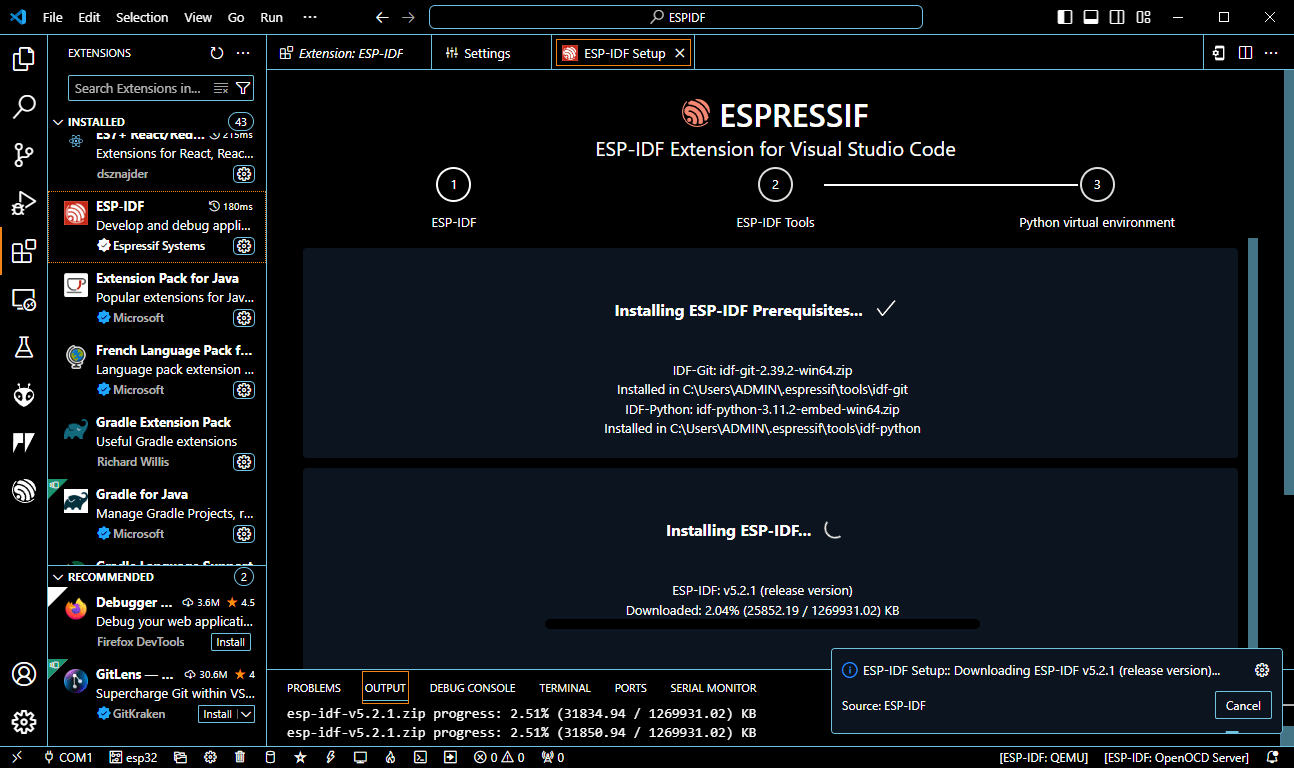
Once the extension has been installed, you can configure it using the command palette. In the menu, View>Command Palette…, search for “ESP-IDF Configure”. Select the ESP-IDF version you wish to install. The configuration will install the following modules:
- ESP-IDF
- ESP-IDF tools
- Python venv for ESP-IDF

Setting up a project for ESP32
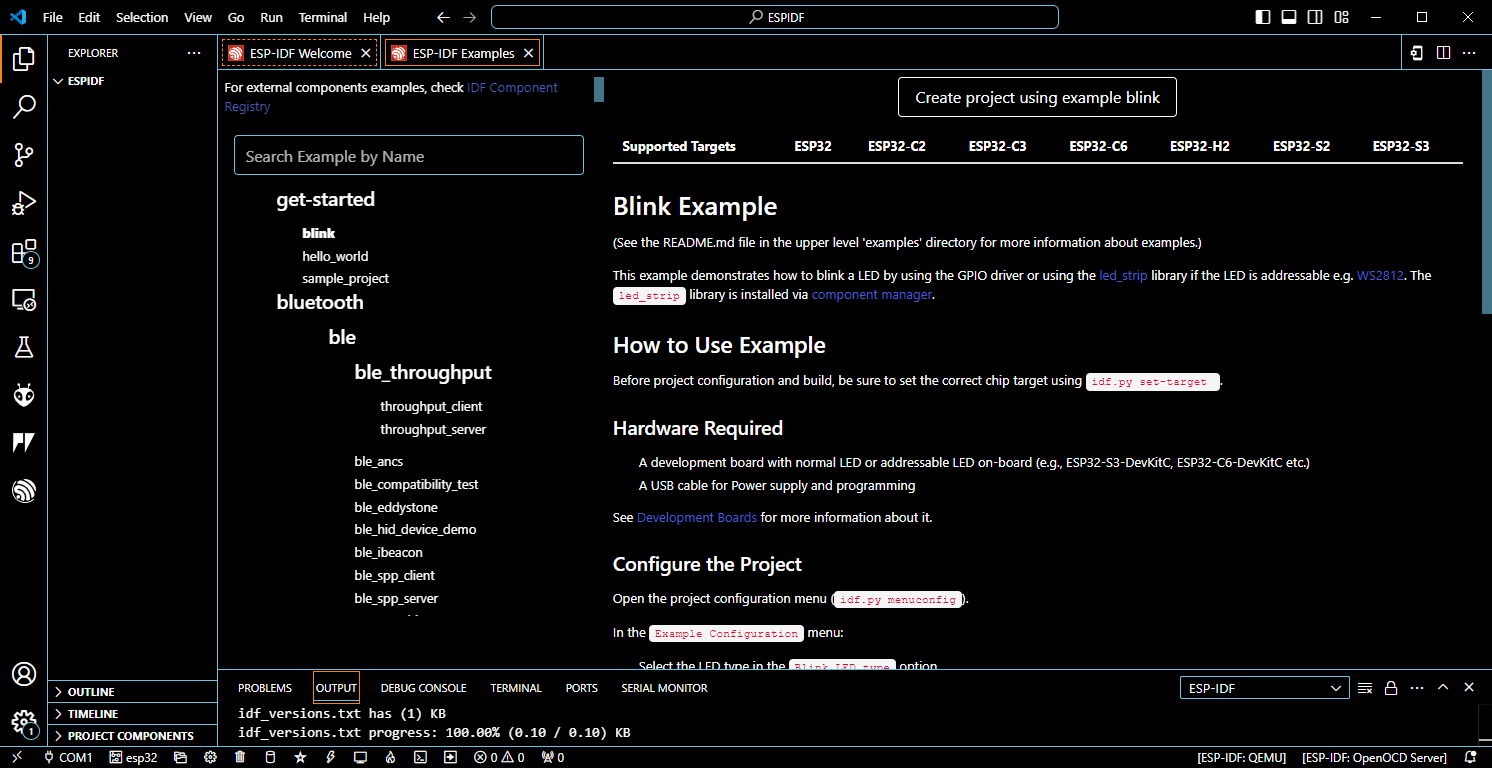
To load your first code, you can use the Blink example
Select View -> Command Palette… and enter ESP-IDF: Show Examples Projects. On the page that opens, find and press the Show Examples button. You will then be asked to select the previously installed framework.
From the list of examples, you can then select Blink and press the “Create project using example Blink” button.

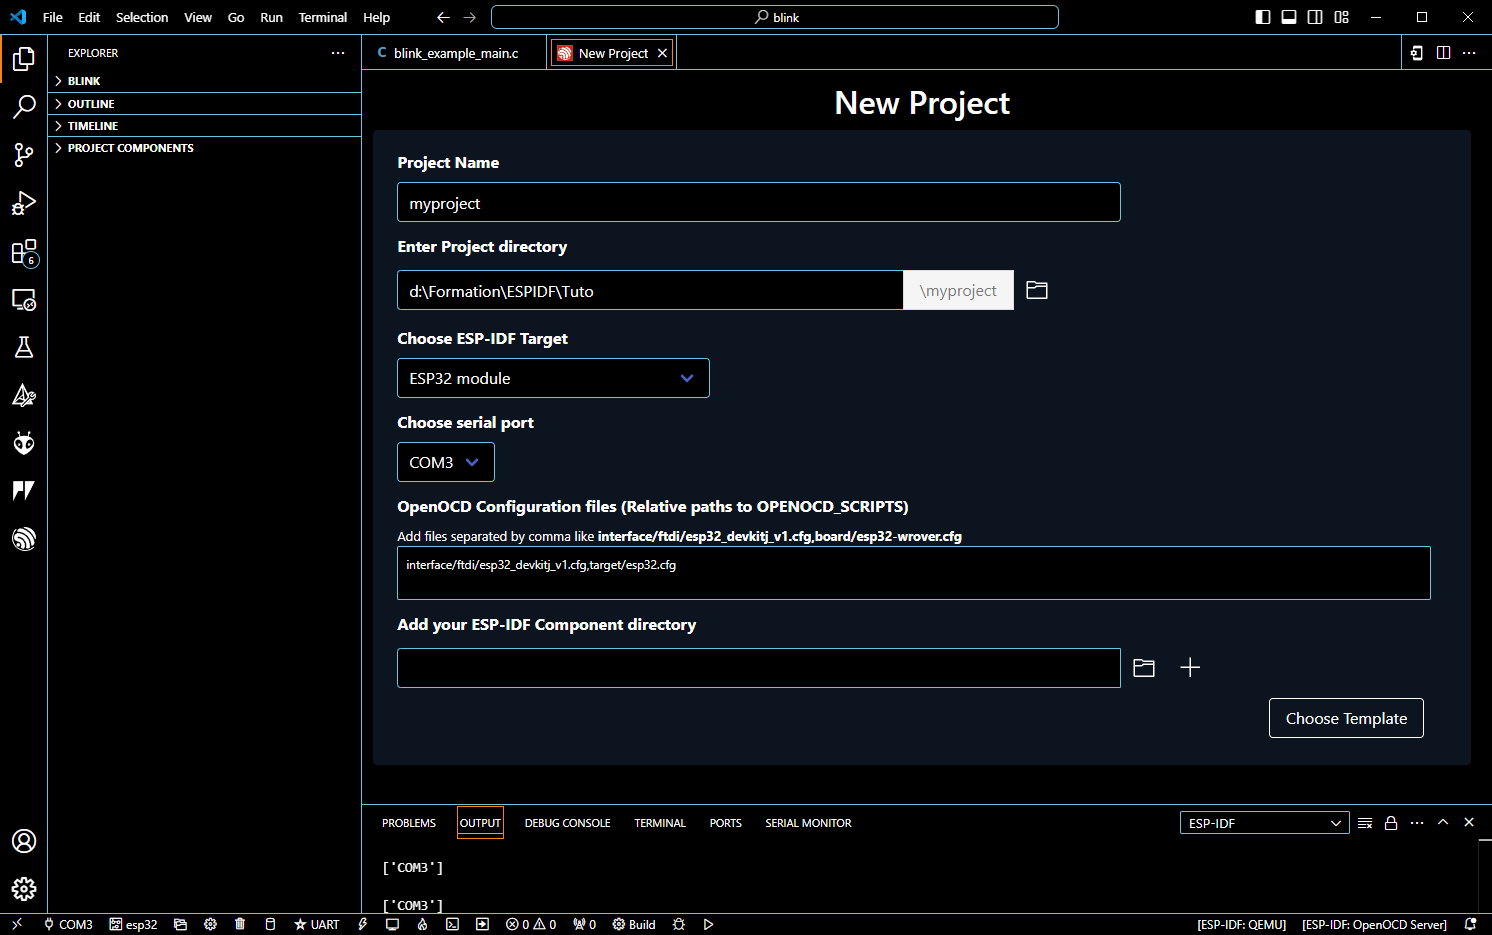
You can also create a new project. ESP-IDF: New Project . Then select Extensions>template-app for a blank project. The main file can be found under myproject/main/main.c
N.B.: with the template arduino-as-a-component, you can write with the Arduino language in the ESP-IDF framework.

Here’s a Hello world example, to test the project configuration.
#include <stdio.h>
#include "freertos/FreeRTOS.h"
#include "freertos/task.h"
#include "driver/gpio.h"
#include "esp_log.h"

static const char *TAG = "myproject example";

void app_main(void)
{

    while (1) {
        ESP_LOGI(TAG, "Hello World!");

        vTaskDelay(1000 / portTICK_PERIOD_MS);
    }

}
Once the project files have been edited, you can follow these steps to configure the project
- select ESP-IDF card type: Set Espressif device target
- select ESP-IDF serial port: Select port to use (COM, tty, usbserial)
To select the type and card used. In Command Palette, enter Set Espressive device target. In our case, ESP32-WROOM-32, esp32 then ESP32 chip (via ESP USB bridge).
N.B.: once you have selected a card, you can use the basic libraries
Select the serial port using the ESP-IDF command: Select port to use (COM, tty, usbserial)
Compile and upload code to ESP32
Once the project has been configured and the code created, we’ll follow a number of steps to upload the code to the ESP32 card:
- compile the ESP-IDF project: Build your project
- download ESP-IDF code: Flash your project
- unlock ESP-IDF code: Monitor your device
The last 3 commands can be combined with ESP-IDF: Build, Flash and start a Monitor on your device
Now that the programming environment is ready, you can compile the program. In Command Palette, search for ESP-IDF: Build your project.
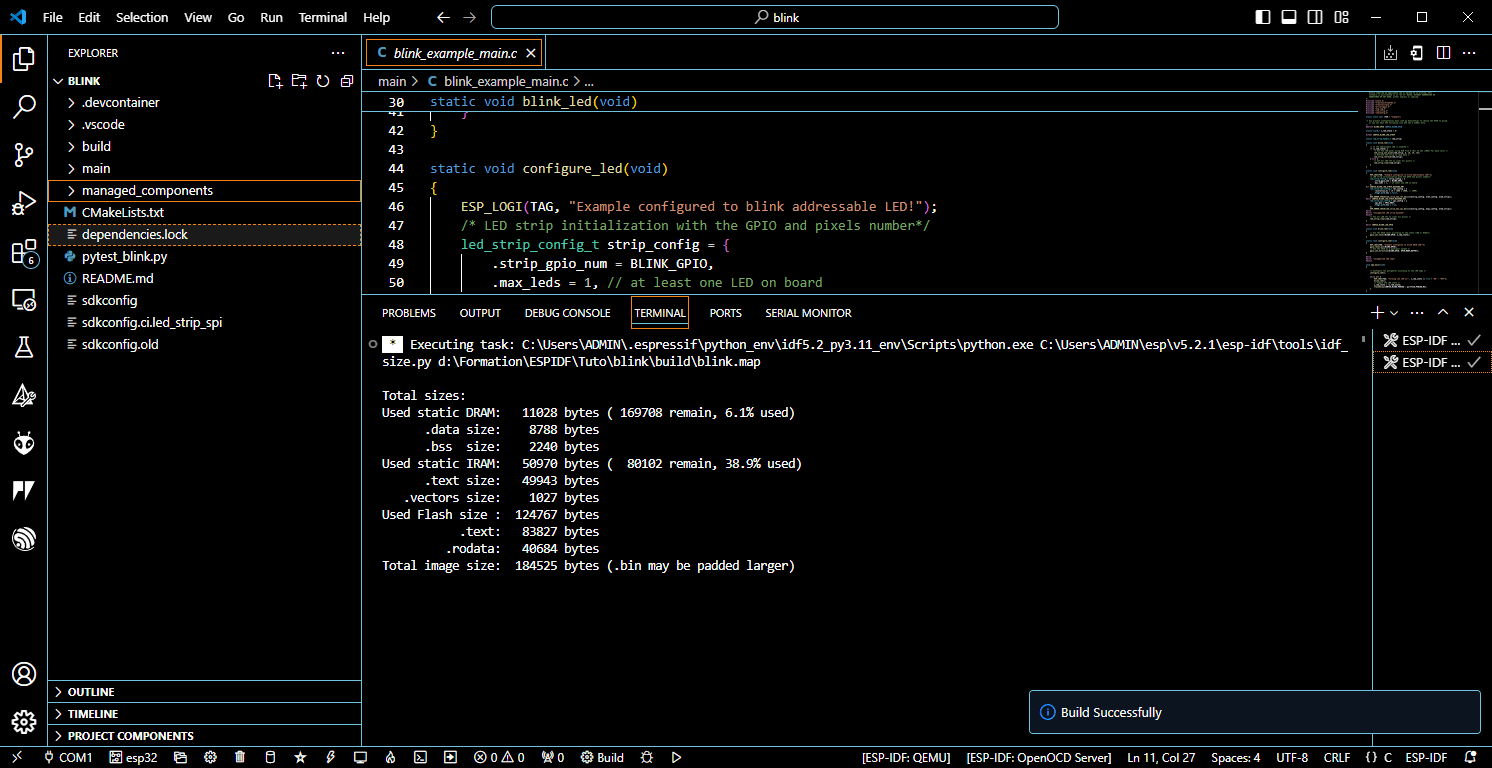
To flash the program to the board, check the selected serial port and then flash the ESP-IDF code: Flash your project. In our case, programming is carried out via the USB port, so we use the UART mode.
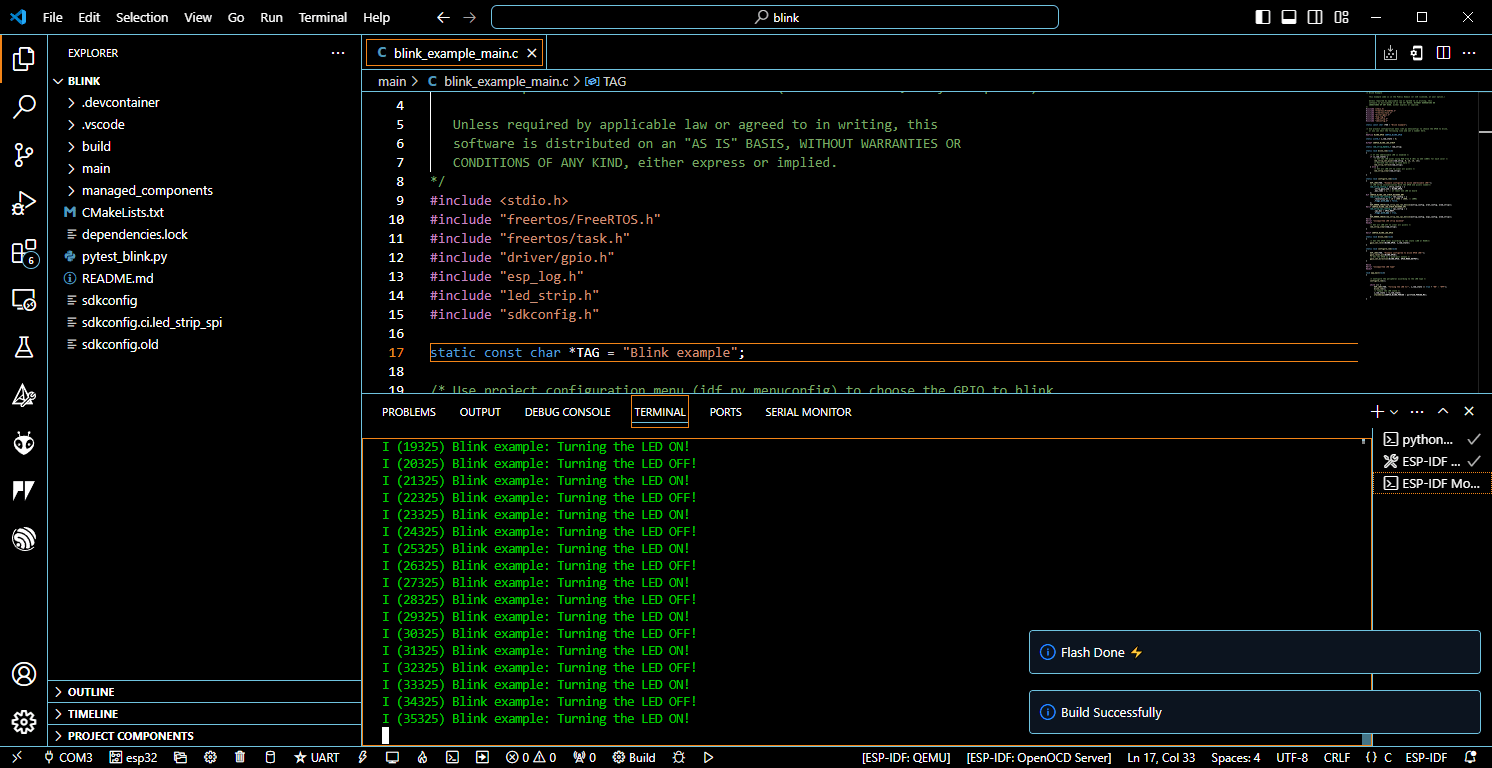
Once the code has been uploaded, you can observe the output on the serial port using the ESP-IDF monitor: Monitor your device
Adding libraries to your code
Some libraries exist in the ESP-IDF framework, to find available components you can enter ESP-IDF: Show Component Registry in Command Palette.

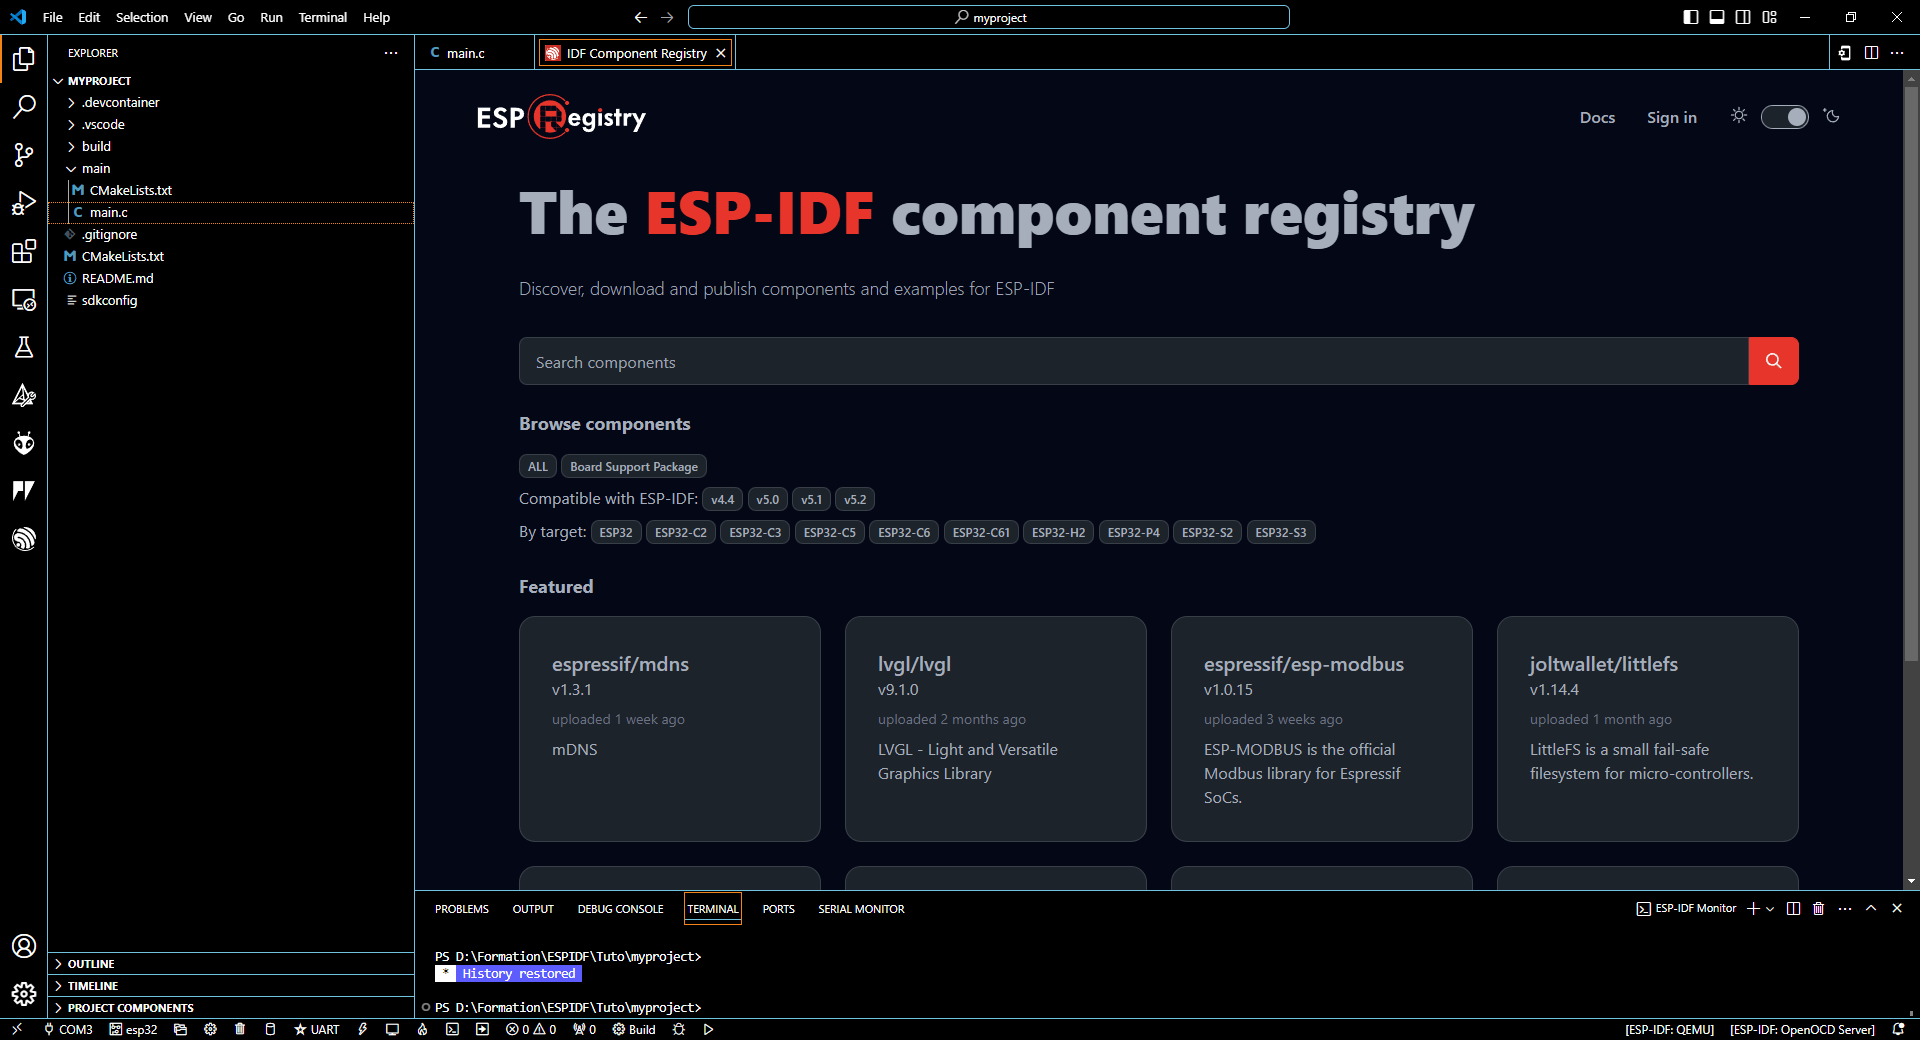
Once you’ve found your component, you can add it to your project using the “install” button or the command line
idf.py add-dependency "espressif/button^3.2.0"
N.B.: once the component is installed, you can access an example in managed_components>espressif_button> examples.
You can then develop your own code using the
#include <stdio.h>
#include "freertos/FreeRTOS.h"
#include "freertos/task.h"
#include "driver/gpio.h"
#include "esp_log.h"
#include "iot_button.h"

#define BOOT_BUTTON_NUM         0 // boot button attached to GPIO0
#define BUTTON_ACTIVE_LEVEL     0

static const char *TAG = "myproject example";
int8_t btn_status=0;

const char *button_event_table[] = {
    "BUTTON_PRESS_DOWN",
    "BUTTON_PRESS_UP",
    "BUTTON_PRESS_REPEAT",
    "BUTTON_PRESS_REPEAT_DONE",
    "BUTTON_SINGLE_CLICK",
    "BUTTON_DOUBLE_CLICK",
    "BUTTON_MULTIPLE_CLICK",
    "BUTTON_LONG_PRESS_START",
    "BUTTON_LONG_PRESS_HOLD",
    "BUTTON_LONG_PRESS_UP",
};

static void button_event_cb(void *arg, void *data)
{
    ESP_LOGI(TAG, "Button event %s (%d)", button_event_table[(button_event_t)data],(button_event_t)data);
    switch ((button_event_t)data){
        case 4:
            ESP_LOGI(TAG, "Execute code if single click");
            break;
        case 5:
            ESP_LOGI(TAG, "Execute code if double click");
            break;
        default:
            //nothing
    }
}

void button_init(uint32_t button_num)
{
    button_config_t btn_cfg = {
        .type = BUTTON_TYPE_GPIO,
        //.long_press_time = CONFIG_BUTTON_LONG_PRESS_TIME_MS,
        //.short_press_time = CONFIG_BUTTON_SHORT_PRESS_TIME_MS,
        .gpio_button_config = {
            .gpio_num = button_num,
            .active_level = BUTTON_ACTIVE_LEVEL,
#if CONFIG_GPIO_BUTTON_SUPPORT_POWER_SAVE
            .enable_power_save = true,
#endif
        },
    };
    button_handle_t btn = iot_button_create(&btn_cfg);
    assert(btn);
    esp_err_t err = iot_button_register_cb(btn, BUTTON_PRESS_DOWN, button_event_cb, (void *)BUTTON_PRESS_DOWN);
    err |= iot_button_register_cb(btn, BUTTON_PRESS_UP, button_event_cb, (void *)BUTTON_PRESS_UP);
    err |= iot_button_register_cb(btn, BUTTON_PRESS_REPEAT, button_event_cb, (void *)BUTTON_PRESS_REPEAT);
    err |= iot_button_register_cb(btn, BUTTON_PRESS_REPEAT_DONE, button_event_cb, (void *)BUTTON_PRESS_REPEAT_DONE);
    err |= iot_button_register_cb(btn, BUTTON_SINGLE_CLICK, button_event_cb, (void *)BUTTON_SINGLE_CLICK);
    err |= iot_button_register_cb(btn, BUTTON_DOUBLE_CLICK, button_event_cb, (void *)BUTTON_DOUBLE_CLICK);
    err |= iot_button_register_cb(btn, BUTTON_LONG_PRESS_START, button_event_cb, (void *)BUTTON_LONG_PRESS_START);
    err |= iot_button_register_cb(btn, BUTTON_LONG_PRESS_HOLD, button_event_cb, (void *)BUTTON_LONG_PRESS_HOLD);
    err |= iot_button_register_cb(btn, BUTTON_LONG_PRESS_UP, button_event_cb, (void *)BUTTON_LONG_PRESS_UP);
    ESP_ERROR_CHECK(err);
}

void app_main(void)
{
    button_init(BOOT_BUTTON_NUM);

}
When executing the code, if you press the boot button once or twice to see the specific code displayed
I (341) main_task: Returned from app_main()
I (3611) myproject example: Button event BUTTON_PRESS_DOWN (0)
I (3821) myproject example: Button event BUTTON_PRESS_UP (1)
I (4011) myproject example: Button event BUTTON_SINGLE_CLICK (4)
I (4011) myproject example: Execute code if single click
I (4011) myproject example: Button event BUTTON_PRESS_REPEAT_DONE (3)
I (12231) myproject example: Button event BUTTON_PRESS_DOWN (0)
I (12371) myproject example: Button event BUTTON_PRESS_UP (1)
I (12461) myproject example: Button event BUTTON_PRESS_DOWN (0)
I (12461) myproject example: Button event BUTTON_PRESS_REPEAT (2)
I (12601) myproject example: Button event BUTTON_PRESS_UP (1)
I (12781) myproject example: Button event BUTTON_DOUBLE_CLICK (5)
I (12781) myproject example: Execute code if double click
I (12781) myproject example: Button event BUTTON_PRESS_REPEAT_DONE (3)
I (14051) myproject example: Button event BUTTON_PRESS_DOWN (0)
I (14171) myproject example: Button event BUTTON_PRESS_UP (1)
I (14261) myproject example: Button event BUTTON_PRESS_DOWN (0)
You can create your own libraries using the command ESP-IDF: Create New ESP-IDF component. This will create a components folder