
It is possible to add the sense of hearing to your microcontroller by connecting it to a microphone. The microphone picks up vibrations in the air and transforms them into an electrical signal that can be analysed and processed using an algorithm. In this tutorial we will see how to detect a sound level using the microcontroller.
Hardware
- Computer
- Arduino UNO
- USB cable A Male to B Male
- Microphone
Principle of operation
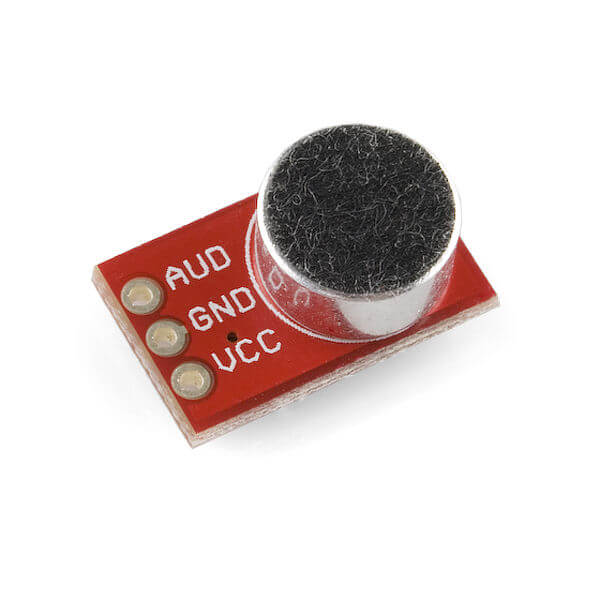
The sensor used in this tutorial is an electric condenser microphone. It consists of two plates, one fixed and the other mobile. The vibrations of the air are transformed into a displacement of the mobile diaphragm which creates a variation in electrical potential detected by the sensor and which sends an electrical signal to the microcontroller. There are several models of microphone with different sensitivities to detect louder or quieter sounds. One model may be more suitable than another depending on what you want to do. Check the documentation of the module carefully.
Those sensors cannot be used for voice or sound recording nor voice recognition.
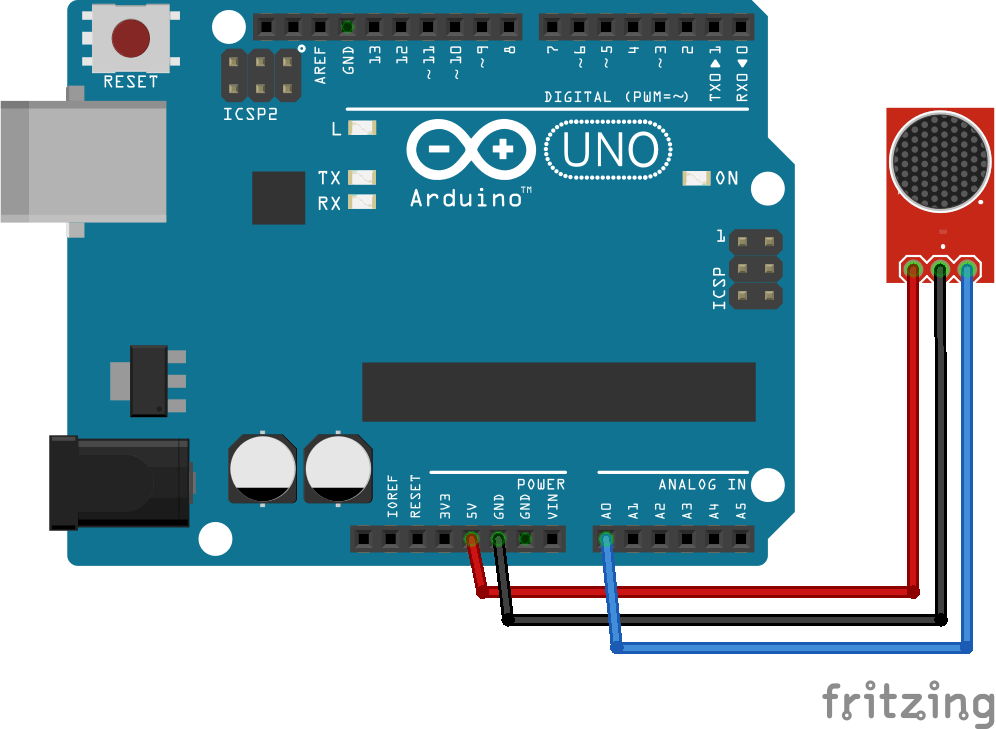
Schematics
The microphone requires low power and can be powered directly on the 5V pin of the Arduino. It returns an analogue value which will be sent to an analogue input of the microcontroller. Depending on the model used, a potentiometer is present on the module to adjust the microphone sensitivity.
- AUD to pin A0
- Vdc at pin 5V
- GND to pin GND

Code
To measure the sound level, we use the AnalogRead() function as for most Analog sensors.
//Parameters
const int micPin = A0;
//Variables
int micVal = 0;
void setup() {
//Init Serial USB
Serial.begin(9600);
Serial.println(F("Initialize System"));
//Init Microphone
pinMode(micPin, INPUT);
}
void loop() {
readMicrophone();
}
void readMicrophone( ) { /* function readMicrophone */
////Test routine for Microphone
micVal = analogRead(micPin);
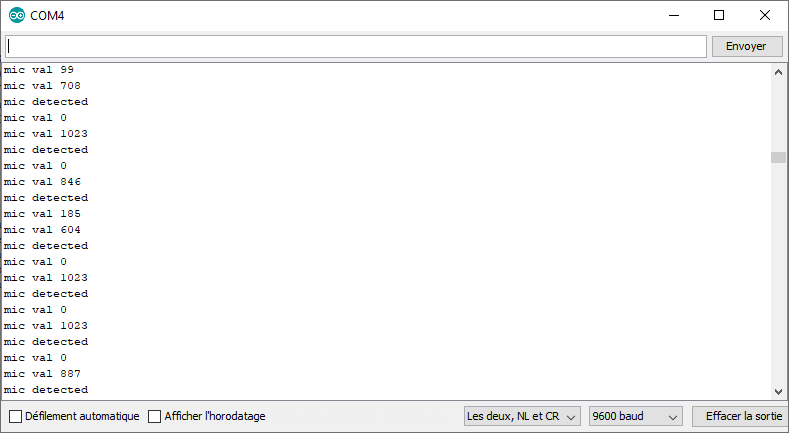
Serial.print(F("mic val ")); Serial.println(micVal);
if (micVal > 600) {
Serial.println("mic detected");
}
}
Result
Once the code has been loaded into the microcontroller you should see the analogue value change according to the ambient noise. Try clapping your hands, snapping your fingers or talking to see how the microphone behaves. This will allow you to determine the level needed to trigger an action.

Applications
- Activate a lamp with a clap of the hands
- Creating a noise-activated alarm
Sources
- https://www.arduino.cc/reference/en/language/functions/analog-io/analogread/
- Sensor management with Arduino
Find other examples and tutorials in our Automatic code generator
Code Architect