

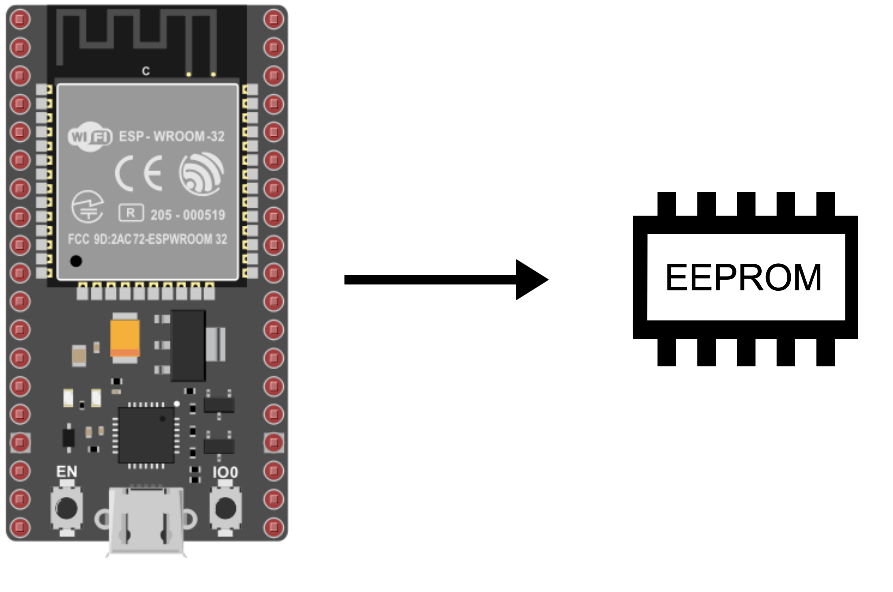
The EEPROM is an internal memory of the ESP32 microcontroller that allows to keep in memory data after restarting the board. When working with microcontrollers, it is interesting to keep data in memory especially when the card turns off whether it is wanted or not, as in the case of a loss of electrical power.
Material
- Computer
- NodeMCU ESP32
- USB A Male/Micro B Male Cable
Principle of operation
The ESP32 microcontroller has a Flash memory area that can be interfaced with like the EEPROM of an Arduino to keep data in memory even after the board is turned off. An important thing to note is that EEPROM has a limited size and life span. The memory cells can be read as many times as necessary but the number of write cycles is limited to 100,000. It is advisable to pay close attention to the size of the stored data and how often you want to update it. The EEPROM memory can store 512 values from 0 to 255 or 128 IP addresses or RFID tags.
If you want to record real-time data from a fleet of sensors to plot curves, it is best to go for an SD card module to store the data.
Code with the EEPROM library
To interface with the EEPROM of the ESP32, we can use the EEPROM.h library as for Arduino with two differences. Before using the function, we have to initialize the size of the memory with begin() and the update function does not exist but the write function has the same function as update. That is to say that a value is modified only if the value is different from the one recorded.
- begin() to initialize the memory size
- write(), to be adapted according to the type of variable, to write
- read() to read memory
- the put() and get() functions can be used in the same way.
Other functions of the library can be used depending on the use you have of the EEPROM
//Libraries
#include <EEPROM.h>//https://github.com/espressif/arduino-esp32/tree/master/libraries/EEPROM
//Constants
#define EEPROM_SIZE 12
void setup() {
//Init Serial USB
Serial.begin(115200);
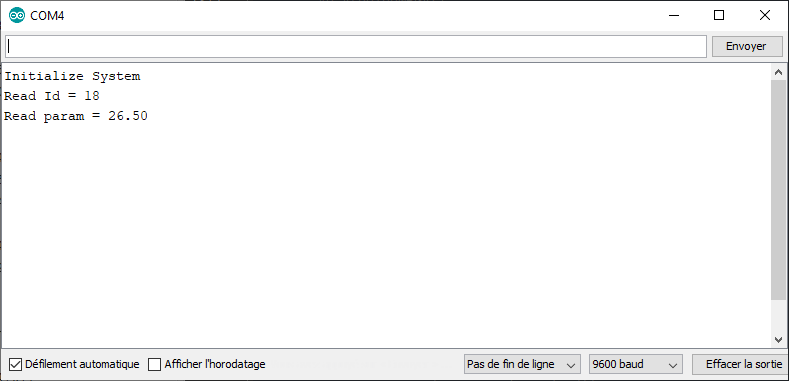
Serial.println(F("Initialize System"));
//Init EEPROM
EEPROM.begin(EEPROM_SIZE);
//Write data into eeprom
int address = 0;
int boardId = 18;
EEPROM.write(address, boardId);//EEPROM.put(address, boardId);
address += sizeof(boardId); //update address value
float param = 26.5;
EEPROM.writeFloat(address, param);//EEPROM.put(address, param);
EEPROM.commit();
//Read data from eeprom
address = 0;
int readId;
readId = EEPROM.read(address); //EEPROM.get(address,readId);
Serial.print("Read Id = ");
Serial.println(readId);
address += sizeof(readId); //update address value
float readParam;
EEPROM.get(address, readParam); //readParam=EEPROM.readFloat(address);
Serial.print("Read param = ");
Serial.println(readParam);
EEPROM.end();
}
void loop() {}
Result
The read values correspond to the stored values. You can remove the writing part and run the code again to check that the values are well kept in memory.

Bonus: Using the Preferences library
A more recent solution to interface with EEPROM for ESP32 is to use the Preferences library. The big difference with the EEPROM library is that instead of using memory addresses, we use keywords to address the variables. The keywords must be at most 15 characters long and must be unique.
The functions to know are:
- putInt (depending on the type of variable) to write the variable in memory
- getInt( depending on the variable type) to read the variable
#include <Preferences.h> //https://github.com/espressif/arduino-esp32/tree/master/libraries/Preferences

Preferences preferences;

void setup() {
  Serial.begin(115200);
  Serial.println();
  Serial.println(F("Initialize System"));
  int boardId = 18;
  float param = 26.5;

  //init preference
  preferences.begin("myfile", false);
  //preferences.clear(); // remove all preferences in namespace myfile
  //preferences.remove("varname");// remove varname in the namespace


  preferences.putUInt("boardId", boardId);
  preferences.putFloat("param", param);

  unsigned int readId = preferences.getUInt("boardId", 0); // get boardId or if key doesn't exist set variable to 0
  Serial.print("Read Id = ");
  Serial.println(readId);

  float readParam = preferences.getFloat("param", 0); //
  Serial.print("Read param = ");
  Serial.println(readParam);

  preferences.end();

}

void loop() {}
Applications
- Keep in memory the ssid and password of the Wifi network on an ESP32
Sources
Retrouvez nos tutoriels et d’autres exemples dans notre générateur automatique de code
La Programmerie