

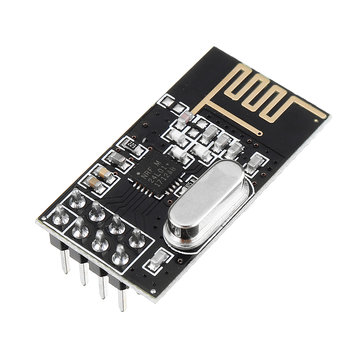
El módulo de radio NRF24L01 es un transceptor para establecer una conexión y transferir datos de un dispositivo a otro a través de ondas de radio.
Hardware
- Computadora
- Arduino UNO x2
- Cable USB A macho a B macho
- NRF24L01 x2
Principio de funcionamiento
El módulo nRF24l01 es un transceptor de baja potencia que permite el intercambio de datos inalámbricos en la banda de radiofrecuencia de 2,4GHz. Permite una comunicación eficaz entre dos dispositivos a media distancia (50m) cuando están a la vista, es decir, sin obstáculos. Si desea comunicarse a mayores distancias en el exterior, se debe preferir un módulo RF433 o LoRa. En el interior, si hay una o más paredes entre el transmisor y el receptor, será preferible utilizar la comunicación WiFi o Bluetooth.
Esquema
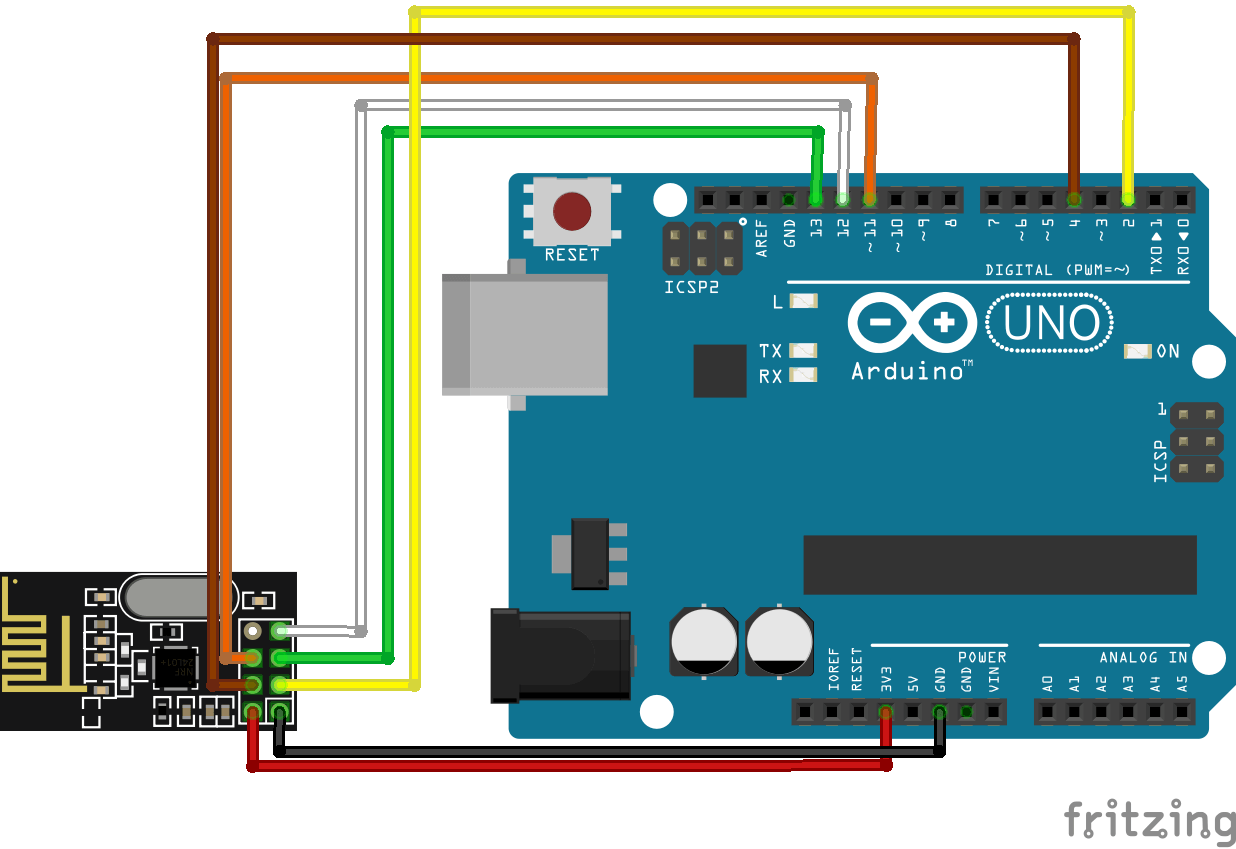
El módulo nRF24L01 utiliza el protocolo SPI para comunicarse con el microcontrolador y debe ser alimentado entre 1,9 y 3,6V. La comunicación SPI utiliza cajas específicas, el pinout es el siguiente (lado izquierdo NRF24L01, lado derecho Arduino UNO):
- Vcc (alimentación) <-> 3V3
- CE (Reset) <-> 2
- GND (Masse) <-> GND
- MOSI (Master Output Slave Input) <-> 11
- MISO (Master Input Slave Output) <-> 12
- SCK (Serial Clock) <-> 13
- CS (chip select) <-> 4
Para mejorar el alcance y la estabilidad de la conexión, es aconsejable soldar un condensador entre los ladrillos de Vcc y GND en algunos módulos.

Código
Para gestionar el módulo NRF24L01 utilizamos las bibliotecas RF24.h, nRF24L01.h y SPI.h. En el siguiente código, que funciona para el maestro (role=0) y el esclavo (role=1), definimos un nodo para cada módulo, uno que enviará datos y otro que los recibirá.
//Libraries
#include <RF24.h>//https://github.com/nRF24/RF24
#include <nRF24L01.h>//https://github.com/nRF24/RF24/blob/master/nRF24L01.h
#include <SPI.h>//https://www.arduino.cc/en/reference/SPI

//Parameters
byte addresses[2] [6] = {"Node1", "Node2"};
bool radioNumber  = 0;
bool role  = 0;

//Variables
int masterStatus  = 0;
byte cmd  = 0;
int slaveStatus  = 0;
unsigned long myData  = 0;

//Objects
RF24 radio(2,4);

void setup() {
  //Init Serial USB
  Serial.begin(9600);
  Serial.println(F("Initialize System"));
  //Init radio rf24

  radio.begin();
  //radio.setChannel(125);
  radio.setPALevel(RF24_PA_LOW); // Set the PA Level low to prevent power supply related issues. RF24_PA_MAX is default.
  //radio.setDataRate(RF24_250KBPS);//(RF24_250KBPS);//(RF24_2MBPS);
  //radio.setAutoAck(1);                    // Ensure autoACK is enabled
  //radio.enableAckPayload();               // Allow optional ack payloads
  //radio.setRetries(2,15);                 // Smallest time between retries, max no. of retries
  //radio.setAddressWidth(3);
  //radio.setCRCLength(RF24_CRC_8);          // Use 8-bit CRC for performance
  //radio.setPayloadSize(16);                // Here we are sending 1-byte payloads to test the call-response speed
  //radio.printDetails();                   // Dump the configuration of the rf unit for debugging. Not working on nano


  // Open a writing and reading pipe on each radio, with opposite addresses
  if (radioNumber) {
    radio.openWritingPipe(addresses[1]);
    radio.openReadingPipe(1, addresses[0]);
  } else {
    radio.openWritingPipe(addresses[0]);
    radio.openReadingPipe(1, addresses[1]);
  }

  myData = 1.22;
  // Start the radio listening for data
  radio.startListening();
}

void loop() {
  testRF24();
}

void testRF24( ) { /* function testRF24 */
  ////Test RF24communication change radioNumber and radio to 0(receiver) or 1(transmitter)
  if (role == 1) {
    masterRole();
  } else {
    slaveRole();
  }
}

void masterRole( ) { /* function masterRole */
  ////emit data
  radio.stopListening();                                    // First, stop listening so we can talk.


  Serial.println(F("Now sending"));

  myData = micros();
  if (!radio.write( &myData, sizeof(myData) )) {
    Serial.println(F("failed"));
  }
  //Serial.print("width :  ");Serial.println(radio.R_RX_PL_WID );
  radio.startListening();                                    // Now, continue listening

  unsigned long started_waiting_at = micros();               // Set up a timeout period, get the current microseconds
  boolean timeout = false;                                   // Set up a variable to indicate if a response was received or not

  while ( ! radio.available() ) {                            // While nothing is received
    if (micros() - started_waiting_at > 200000 ) {           // If waited longer than 200ms, indicate timeout and exit while loop
      timeout = true;
      break;
    }
  }

  if ( timeout ) {                                            // Describe the results
    Serial.println(F("Failed, response timed out."));
  } else {
    // Grab the response, compare, and send to debugging spew
    radio.read( &myData, sizeof(myData) );
    myData = micros();

    // Spew it
    Serial.print(F("Sent "));
    Serial.print(myData);
    Serial.print(F(", Got response "));
    Serial.print(myData);
    //Serial.println(myData.value);
  }

  // Try again 1s later
  delay(1000);
}

void slaveRole( ) { /* function slaveRole */
  ////recieve data
  if ( radio.available()) {
    // Variable for the received timestamp
    while (radio.available()) {                          // While there is data ready
      radio.read( &myData, sizeof(myData) );             // Get the payload
    }

    radio.stopListening();                               // First, stop listening so we can talk
    Serial.print(F("Transmission "));
    Serial.println(myData);
    //myData.value += 0.01;                                // Increment the float value
    radio.write( &myData, sizeof(myData) );              // Send the final one back.
    radio.startListening();                              // Now, resume listening so we catch the next packets.
    Serial.print(F(" - Sent response "));
    Serial.println(myData);
    //Serial.print(F(" : "));
    //Serial.println();
  }
}
Aplicaciones
- Crear un control de radio para dirigir su proyecto de Arduino
- Intercambio de datos entre dos Arduinos
Fuentes
- https://github.com/nRF24/RF24
- https://github.com/nRF24/RF24/blob/master/nRF24L01.h
- https://www.arduino.cc/en/reference/SPI
Encuentre otros tutoriales y ejemplos en el generador de código automático
Arquitecto de Código