

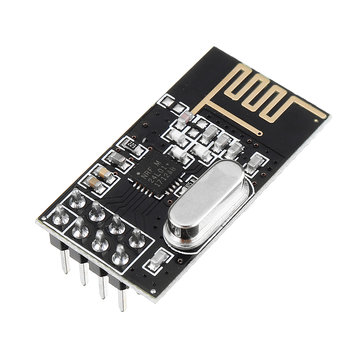
O módulo de rádio NRF24L01 é um transceptor que permite estabelecer uma comunicação por ondas de rádio entre dois dispositivos e possibilitar a transferência de dados entre eles.
Material
- Computador
- 2 x Arduino UNO
- Cabo USB A Macho/B Macho
- 2 x NRF24L01
Princípio de funcionamento
O módulo NRF24l01 é um transceptor de baixa potência que permite a troca de dados sem o uso de cabos na faixa de radiofrequência de 2,4GHz. Ele estabelece uma comunicação eficaz entre dispositivos posicionados a distâncias médias (50 m) e em vista direta, ou seja, sem obstáculos interpostos. Para comunicar a longas distâncias ao ar livre, é preferível usar um módulo RF433 ou LoRa. Em ambientes fechados, se houver uma ou mais paredes entre o transmissor e o receptor, é melhor optar pela comunicação WiFi ou Bluetooth.
Esquema
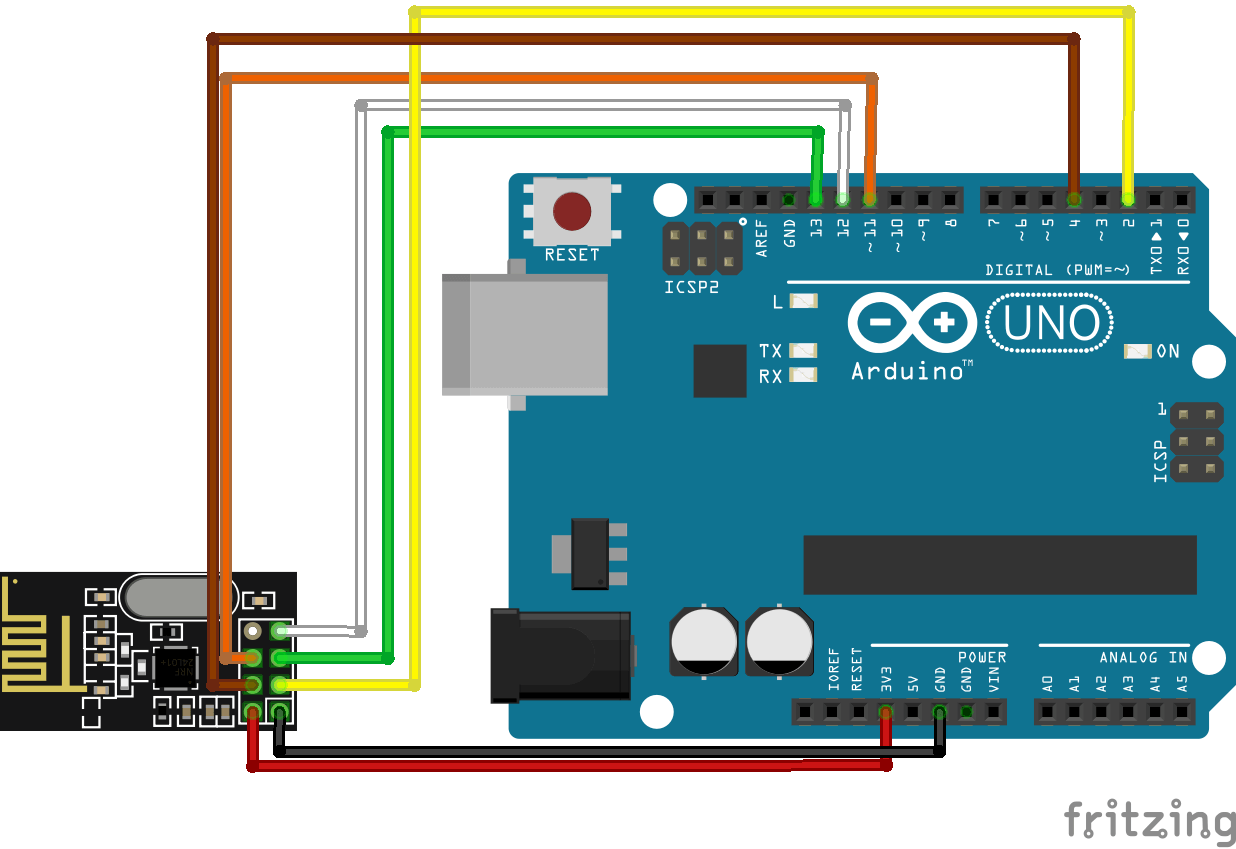
O módulo NRF24L01 utiliza o protocolo SPI para comunicar com o microcontrolador e deve ser alimentado entre 1,9 e 3,6V. A comunicação SPI usa pinos específicos ligados da seguinte forma (lado esquerdo NRF24L01, lado direito Arduino UNO):
- Vcc (Fonte de alimentação) <-> 3V3
- CE (Reinicialização) <-> 2
- GND (Terra) <-> GND
- MOSI (Master Output Slave Input) <-> 11
- MISO (Master Input Slave Output) <-> 12
- SCK (Serial Clock) <-> 13
- CS (chip select) <-> 4
Em alguns módulos, para melhorar o alcance e a estabilidade da comunicação, é recomendado soldar um condensador entre os pinos Vcc e GND.

Código
Para gerir o módulo NRF24L01, utilizamos as bibliotecas RF24.h, nRF24L01.h e SPI.h. No código a seguir, que funciona para o master (role=0) e para o slave (role=1), definimos um nó para cada módulo, sendo um para enviar os dados e outro para recebê-los.
//Libraries
#include <RF24.h>//https://github.com/nRF24/RF24
#include <nRF24L01.h>//https://github.com/nRF24/RF24/blob/master/nRF24L01.h
#include <SPI.h>//https://www.arduino.cc/en/reference/SPI

//Parameters
byte addresses[2] [6] = {"Node1", "Node2"};
bool radioNumber  = 0;
bool role  = 0;

//Variables
int masterStatus  = 0;
byte cmd  = 0;
int slaveStatus  = 0;
unsigned long myData  = 0;

//Objects
RF24 radio(2, 4);

void setup() {
  //Init Serial USB
  Serial.begin(9600);
  Serial.println(F("Initialize System"));
  //Init radio rf24

  radio.begin();
  //radio.setChannel(125);
  radio.setPALevel(RF24_PA_LOW); // Set the PA Level low to prevent power supply related issues. RF24_PA_MAX is default.
  //radio.setDataRate(RF24_250KBPS);//(RF24_250KBPS);//(RF24_2MBPS);
  //radio.setAutoAck(1);                    // Ensure autoACK is enabled
  //radio.enableAckPayload();               // Allow optional ack payloads
  //radio.setRetries(2,15);                 // Smallest time between retries, max no. of retries
  //radio.setAddressWidth(3);
  //radio.setCRCLength(RF24_CRC_8);          // Use 8-bit CRC for performance
  //radio.setPayloadSize(16);                // Here we are sending 1-byte payloads to test the call-response speed
  //radio.printDetails();                   // Dump the configuration of the rf unit for debugging. Not working on nano


  // Open a writing and reading pipe on each radio, with opposite addresses
  if (radioNumber) {
    radio.openWritingPipe(addresses[1]);
    radio.openReadingPipe(1, addresses[0]);
  } else {
    radio.openWritingPipe(addresses[0]);
    radio.openReadingPipe(1, addresses[1]);
  }

  myData = 1.22;
  // Start the radio listening for data
  radio.startListening();
}

void loop() {
  testRF24();
}

void testRF24( ) { /* function testRF24 */
  ////Test RF24communication change radioNumber and radio to 0(receiver) or 1(transmitter)
  if (role == 1) {
    masterRole();
  } else {
    slaveRole();
  }
}

void masterRole( ) { /* function masterRole */
  ////emit data
  radio.stopListening();                                    // First, stop listening so we can talk.


  Serial.println(F("Now sending"));

  myData = micros();
  if (!radio.write( &myData, sizeof(myData) )) {
    Serial.println(F("failed"));
  }
  //Serial.print("width :  ");Serial.println(radio.R_RX_PL_WID );
  radio.startListening();                                    // Now, continue listening

  unsigned long started_waiting_at = micros();               // Set up a timeout period, get the current microseconds
  boolean timeout = false;                                   // Set up a variable to indicate if a response was received or not

  while ( ! radio.available() ) {                            // While nothing is received
    if (micros() - started_waiting_at > 200000 ) {           // If waited longer than 200ms, indicate timeout and exit while loop
      timeout = true;
      break;
    }
  }

  if ( timeout ) {                                            // Describe the results
    Serial.println(F("Failed, response timed out."));
  } else {
    // Grab the response, compare, and send to debugging spew
    radio.read( &myData, sizeof(myData) );
    myData = micros();

    // Spew it
    Serial.print(F("Sent "));
    Serial.print(myData);
    Serial.print(F(", Got response "));
    Serial.print(myData);
    //Serial.println(myData.value);
  }

  // Try again 1s later
  delay(1000);
}

void slaveRole( ) { /* function slaveRole */
  ////recieve data
  if ( radio.available()) {
    // Variable for the received timestamp
    while (radio.available()) {                          // While there is data ready
      radio.read( &myData, sizeof(myData) );             // Get the payload
    }

    radio.stopListening();                               // First, stop listening so we can talk
    Serial.print(F("Transmission "));
    Serial.println(myData);
    //myData.value += 0.01;                                // Increment the float value
    radio.write( &myData, sizeof(myData) );              // Send the final one back.
    radio.startListening();                              // Now, resume listening so we catch the next packets.
    Serial.print(F(" - Sent response "));
    Serial.println(myData);
    //Serial.print(F(" : "));
    //Serial.println();
  }
}
Aplicações
- Criar um controle remoto para controlar o seu projeto Arduino
- Troca de dados entre dois Arduinos
Fontes
- https://github.com/nRF24/RF24
- https://github.com/nRF24/RF24/blob/master/nRF24L01.h
- https://www.arduino.cc/en/reference/SPI
- Protocolos de comunicação
Retrouvez nos tutoriels et d’autres exemples dans notre générateur automatique de code
La Programmerie