

One of the main objectives in robotics is to make things move on their own. To give motion to a robot, electrical motors are oftenly used such as direct current (DC) motors especially for mobile robots. In this tutorial, we will see how to control such a motor using Arduino and an H-bridge.
prerequisit: Programming with Arduino
Material
- Computer
- Arduino UNO
- USB cable to connect Arduino to computer
- SN754410
- Breadboard
- DC motor
- jumper cables
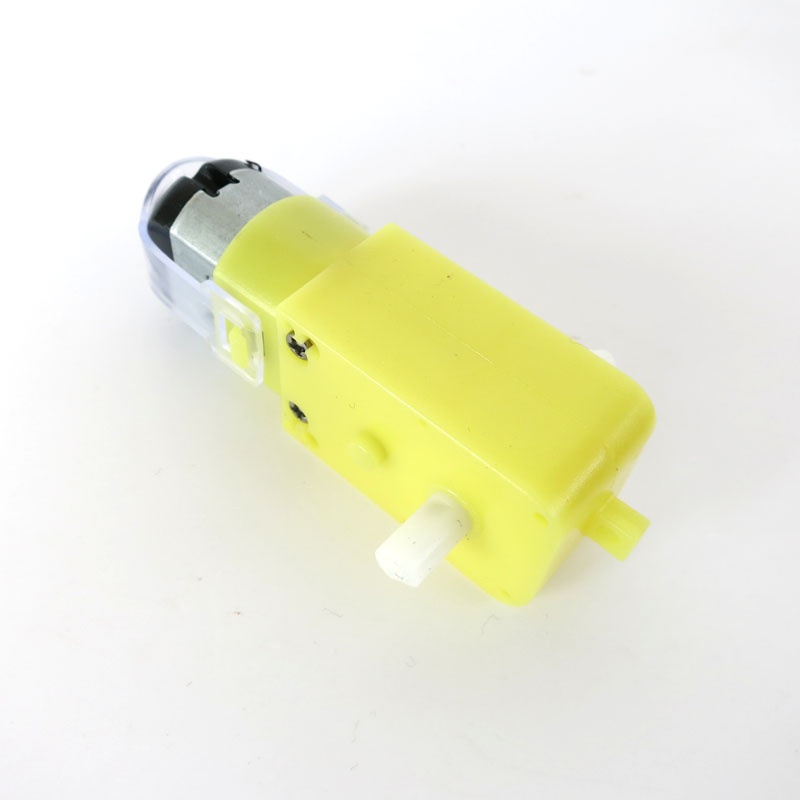
DC Motor
Direct Current motors are oftenly used with a gearbox to increase the torque while keeping small dimensions. DC Motor is quite simple to use. To make it run, the only thing to do is to apply voltage to it. Sign and level of the voltage will determine the speed and direction of rotation.

To modulate the votage applied to the motor, an electrical relay or H-bridge can be used.
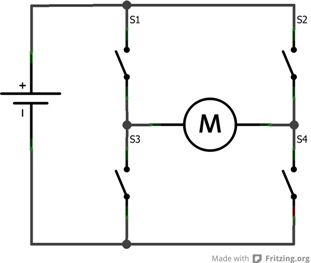
H-bridge
An H-bridge distributes power to electrical motor and modulate the voltage accroding to signals sent to its inputs. It can be drawn as four switches that will redirect current depending on the command from the microcontroller.

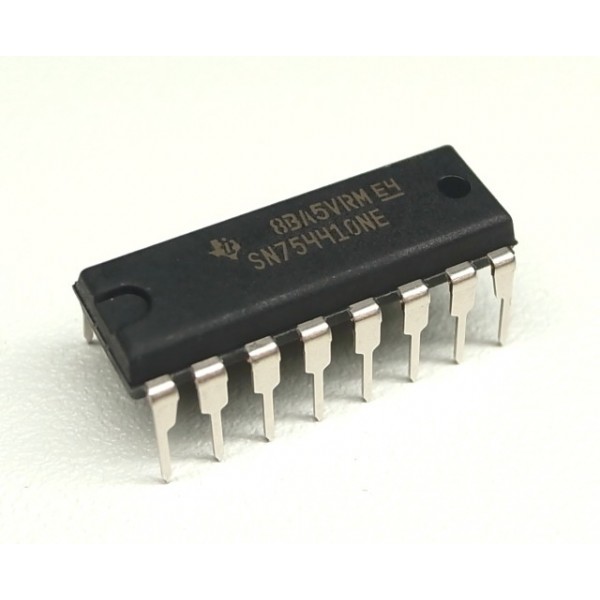

The device we use for this project is a SN754410NE. It can drive two dc motors and has several pins that have their own purpose.

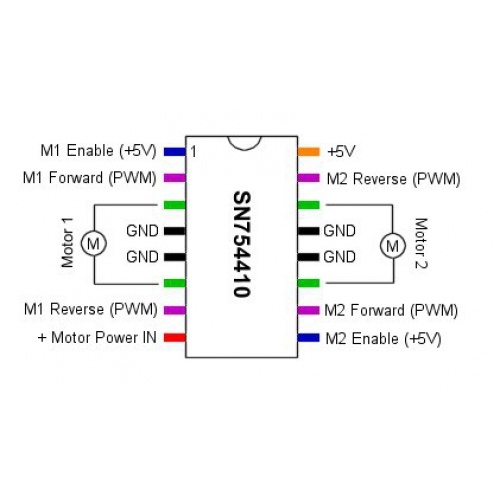
Little reminder on the pinout:
- GND are connected between them and need to be connected to the ground of the project.
- +5V recieve the power for the logic circuit, usually provided by the output 5V from Arduino
- M1 Enable and M2 Enable are used to activate the bridges. They recieved a HIGH/LOW voltage from the Arduino.
- M1/M2 Forward, M1/M2 Reverse recieve the PWM signals and correspond to the motor directions.
- +Motor Power IN recieve the motor power supply (5,6, 7V and sometimes 24V or more)
- Motor 1 and Motor 2 are connected to the motor’s wires.
When selecting a component, always be careful regarding nominal voltage ane current limitations.
N.B.: There are cards available to facilitate the connection such as the L298N module.
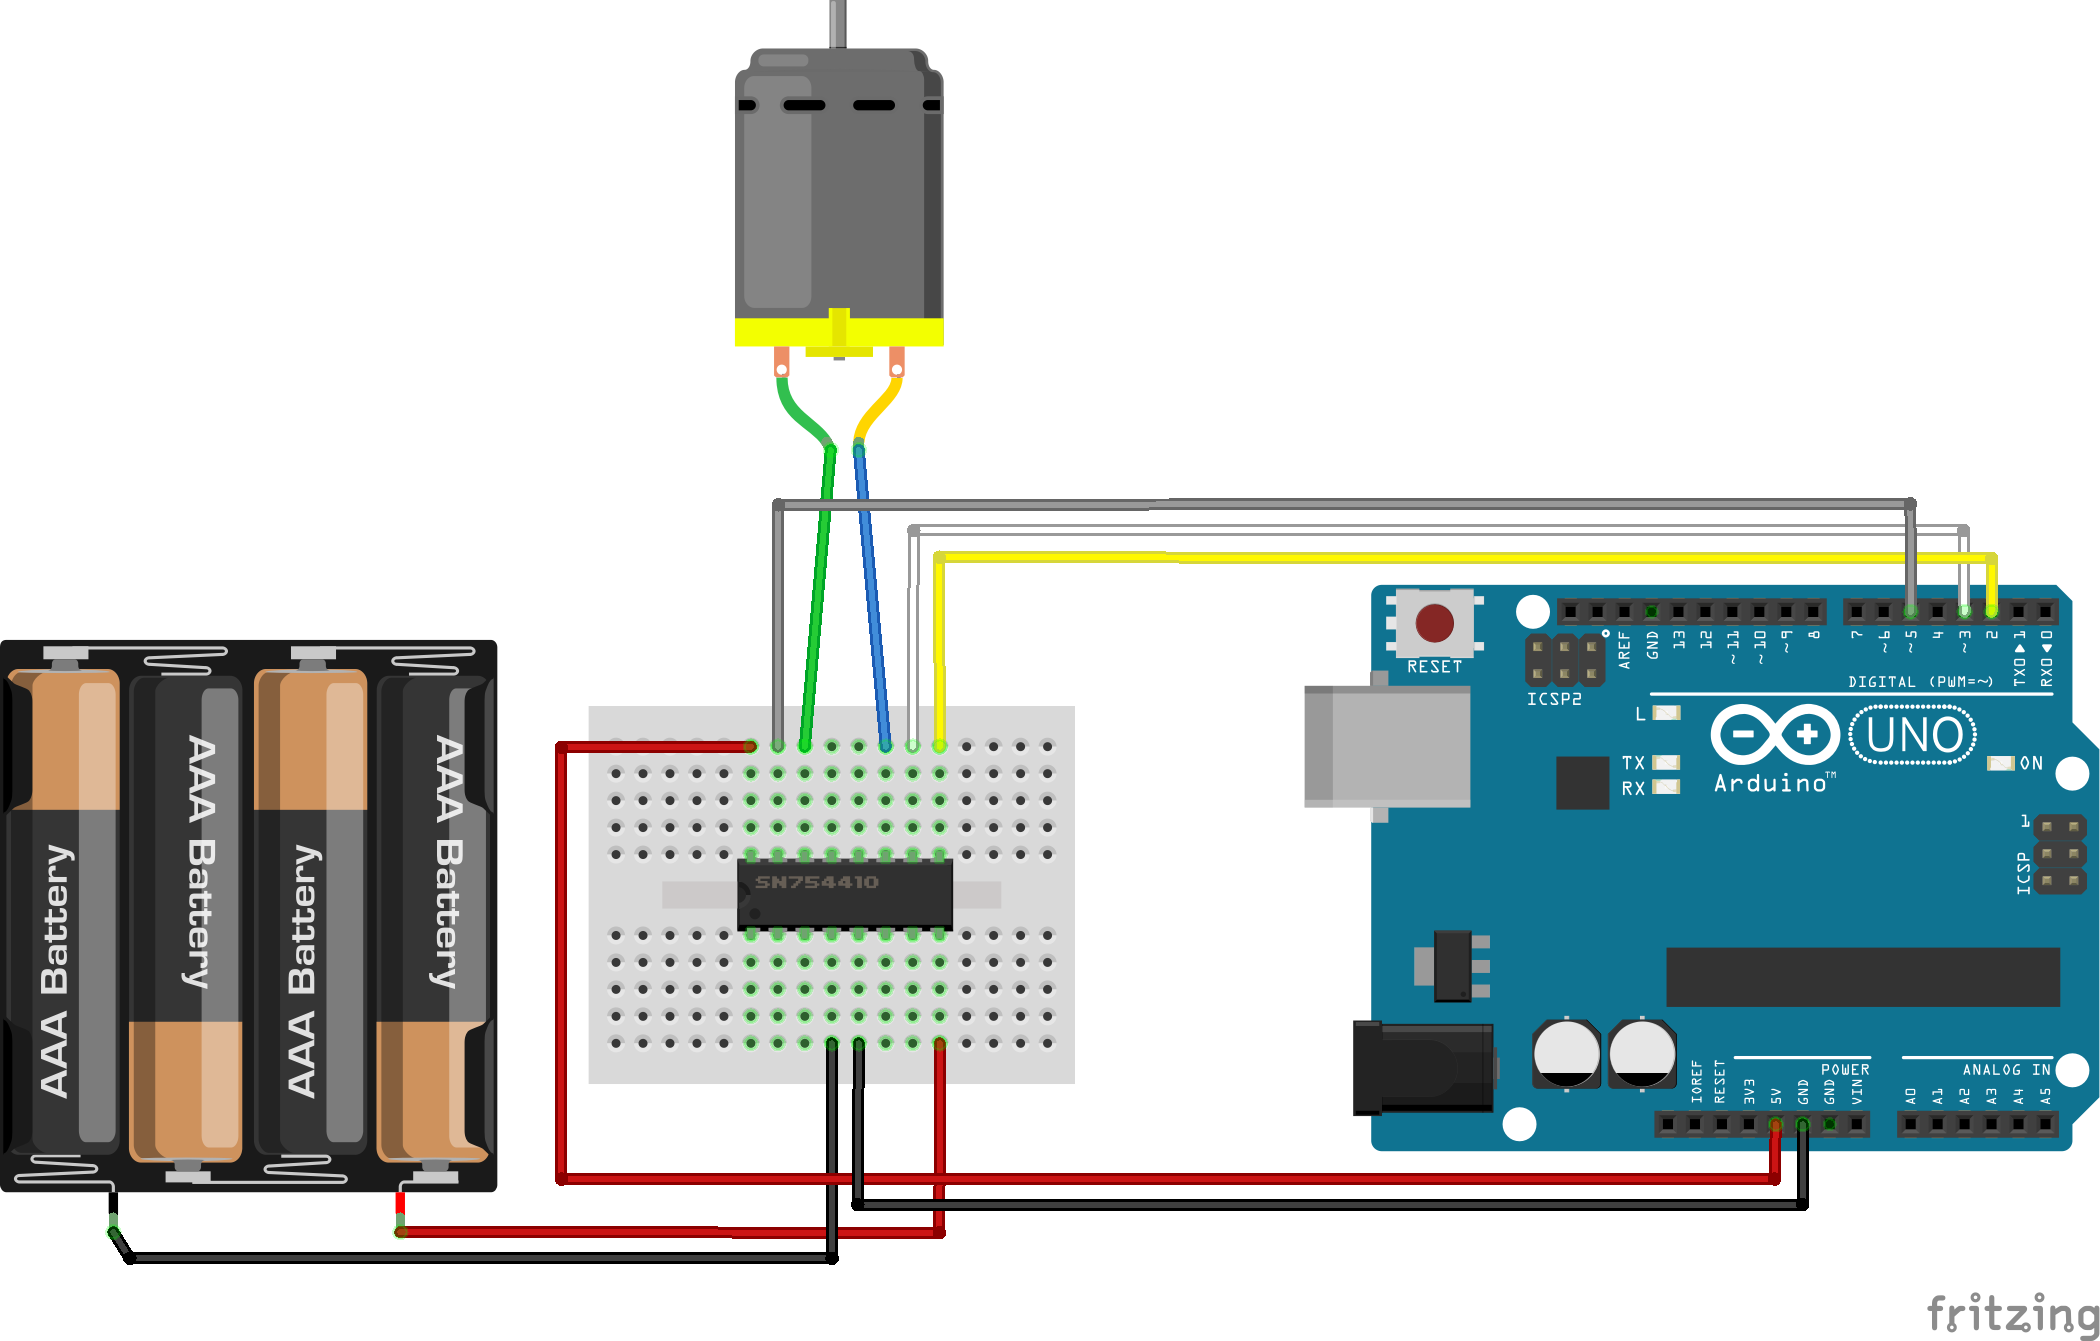
Scheme
Arduino can be powered by the computer.
Programming
Base code
To drive the motor, Hbridge should be enabled and a PWM signal should be sent to Forward or Reverse depending on the rotation direction.
// Constants
const int enableBridge1 = 2;
const int MotorForward1 = 3;
const int MotorReverse1 = 5;

// Variables
int Power = 80; //Motor velocity between 0 and 255

void setup(){
  pinMode(MotorForward1,OUTPUT);
  pinMode(MotorReverse1,OUTPUT);
  pinMode(enableBridge1,OUTPUT);
}

void loop(){
  digitalWrite(enableBridge1,HIGH); // Active pont en H

  // Tourne dans le sens direct pendant 2 secondes

  analogWrite(MotorReverse1,0);
  analogWrite(MotorForward1,Power);
  delay(2000);

  // Tourne dans le sens indirect pendant 3 secondes
  analogWrite(MotorForward1,0);
  analogWrite(MotorReverse1,Power);
  delay(3000);

  //Arrête le moteur pendant 1 seconde
  analogWrite(MotorForward1,0);
  analogWrite(MotorReverse1,0);
  digitalWrite(enableBridge1,LOW);
  delay(1000);
}
Functions
When a system is composed of several devices, it is generally a good call to create subfunctions to clarify the main code.
// Constants
const int enableBridge = 2;
const int MotorForward = 3;
const int MotorReverse = 5;

// Variables
int Power = 80; //Vitesse du moteur entre 0 et 255

void setup(){
  dcBegin();
}

void loop(){
  dcForward(Power);
  delay(2000);

  dcReverse(Power);
  delay(3000);

  dcStop();
  delay(1000);
}

void dcBegin(){
  // Initialise les pines utilisées pour le moteur
  pinMode(MotorForward,OUTPUT);
  pinMode(MotorReverse,OUTPUT);
  pinMode(enableBridge,OUTPUT);
  }

void dcForward(int P){
  digitalWrite(enableBridge,HIGH); // Active pont en H
  // Tourne dans le sens Forward à la vitesse spécifiée par P
  analogWrite(MotorReverse,0);
  analogWrite(MotorForward,P);
}

void dcReverse(int P){
  digitalWrite(enableBridge,HIGH); // Active pont en H
  // Tourne dans le sens Reverse à la vitesse spécifiée par P
  analogWrite(MotorForward,0);
  analogWrite(MotorReverse,P);
}

void dcStop(){
  // Arrête le moteur et désactive le pont en H
  analogWrite(MotorForward,0);
  analogWrite(MotorReverse,0);
  digitalWrite(enableBridge,LOW);
}
You can now drive any DC motors with this simple code.
Sources
Find other examples and tutorials in our Automatic code generator
Code Architect