

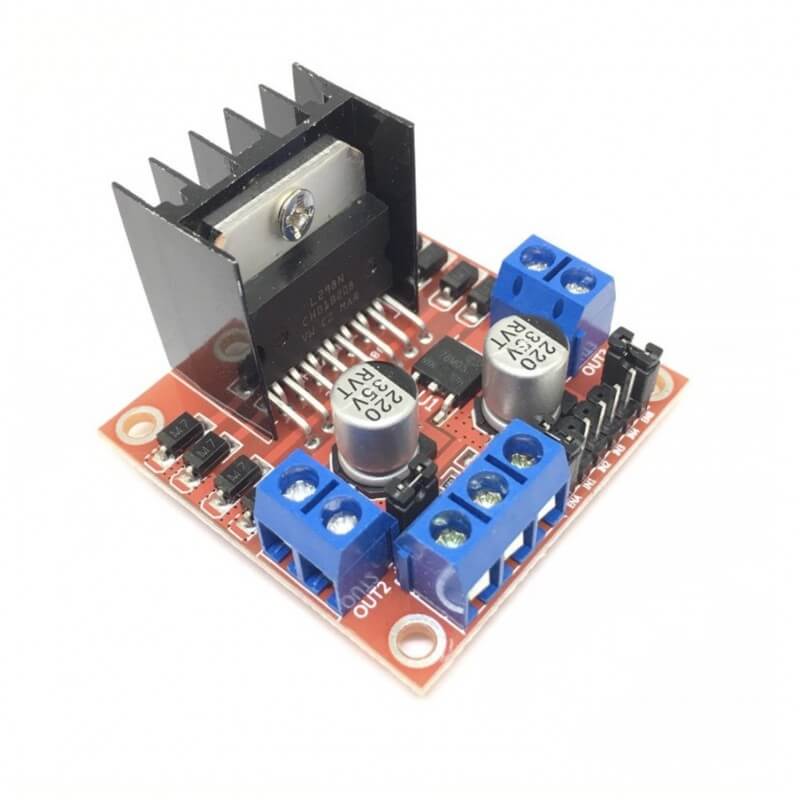
The L298N module is a development board based on the L298N integrated circuit allowing the driving of a DC motor or a stepper motor. We have already seen the use of the H-bridge. It can be found as a convenient module to use with different performances depending on the components used. We will see in this tutorial the use of the L298N module with an Arduino microcontroller.
Material
- Computer
- Arduino UNO (or other microcontroller)
- USB cable A Male/B Male
- Module L298N
Principle of operation
The L298N module is based on the integrated circuit of the same name. The L298N circuit is a double H-bridge allowing to modify the direction and the intensity of the voltage at the terminal of two electric loads.
The characteristics of the L298N module are:
- Motor control with nominal voltage from 5 to 35V
- 2A maximum current (peak)
- 5V voltage accepted on the Input pins

Wiring diagram
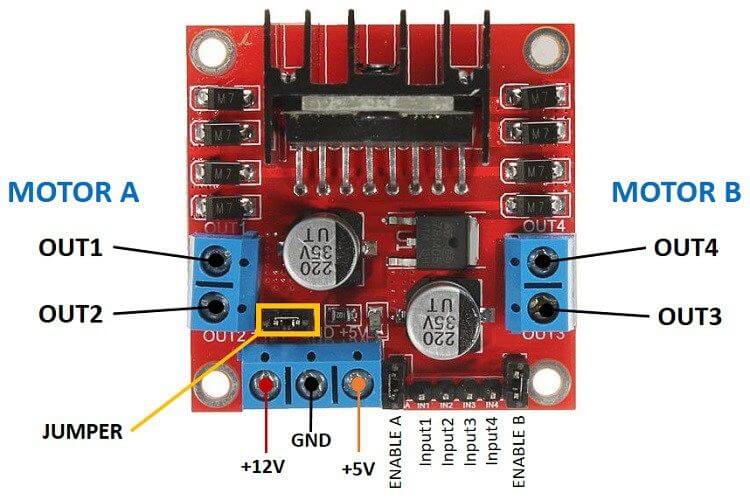
The L298N module is powered by an external voltage source. Each half-bridge requires 3 output pins of a microcontroller.
- GND integrated circuit ground connected to the microcontroller ground and to the power supply ground
- ENA enable of motor M1 connected to pin 2
- Input1 front direction of the motor M1 connected to pin 3
- Input2 rear direction of the motor M1 connected to pin 5
- ENB enable of motor M2 connected to pin 4
- Input3 front direction of the motor M2 connected to pin 6
- Input4 motor rear direction M2 connected to pin 9

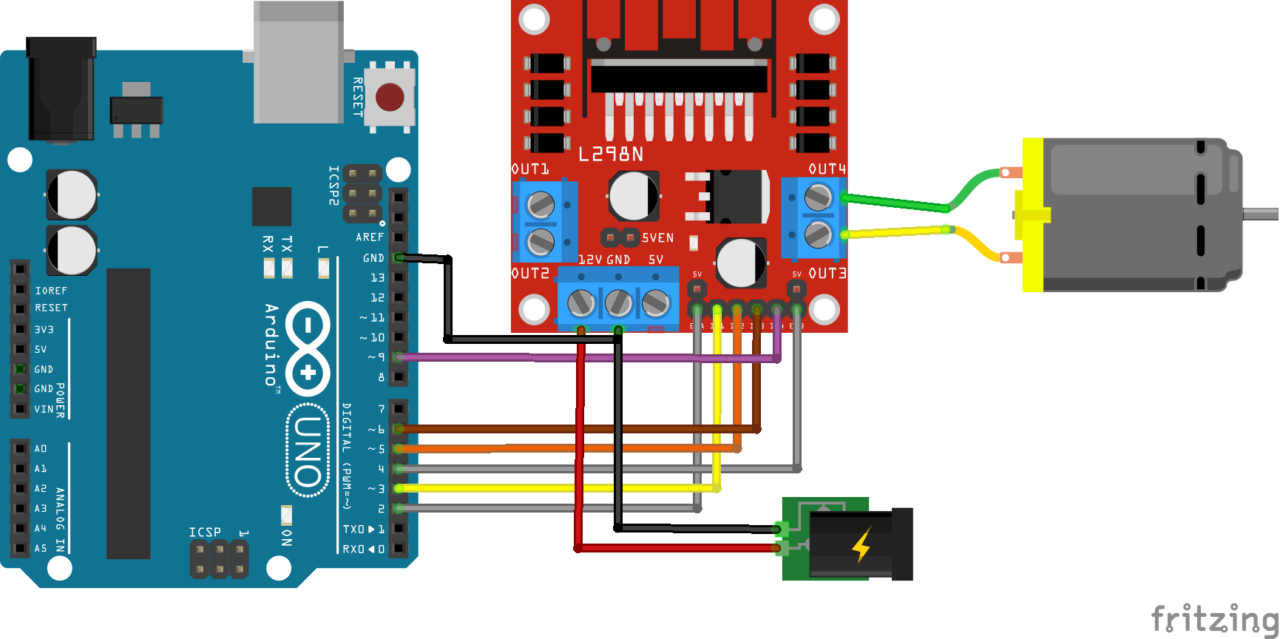
On some models of this module, it is possible to add two jumpers to directly connect the enable pins (ENA and ENB) to 5V. This allows to always activate the H-bridge and to save two outputs of the microcontroller
Module L298N management code
To use the L298N module, you have to activate the H-bridge by applying a 5V voltage on the EN pin. Then, send a PWM signal to the Forward (Input1/4) or Reverse (Input2/3) pin to control the direction and speed of rotation. The forward or reverse direction of rotation depends on the direction of the motor connection.
//Constants
#define nbL298N 2

//Parameters
const int enaL298NPin[2] = {2, 4};
const int fwdL298NPin[2] = {3, 5};
const int bwdL298NPin[2] = {6, 9};

//Variables
int Power = 200;

void setup() {
  //Init Serial USB
  Serial.begin(9600);
  Serial.println(F("Initialize System"));
  //Init DCmotor
  for (int i = 0; i < nbL298N; i++) {
    pinMode(fwdL298NPin[i], OUTPUT);
    pinMode(bwdL298NPin[i], OUTPUT);
    pinMode(enaL298NPin[i], OUTPUT);
  }
}

void loop() {
  testL298N();
}

void testL298N() { /* function testL298N */
  ////Scenario to test H-Bridge
  for (int i = 0; i < nbL298N; i++) {
    digitalWrite(enaL298NPin[i], HIGH);
    analogWrite(bwdL298NPin[i], 0);
    for (int j = 0; j <= Power; j = j + 10) {
      analogWrite(fwdL298NPin[i], j);
      delay(20);
    }
    for (int j = Power; j >= 0; j = j - 10) {
      analogWrite(fwdL298NPin[i], j);
      delay(20);
    }
    delay(2000);
  }
}
Result
Once the code is uploaded, you should see the motors turning one way and then the other.
Applications
- Control the speed and direction of rotation of two DC motors or one stepper motor
Sources
Retrouvez nos tutoriels et d’autres exemples dans notre générateur automatique de code
La Programmerie