

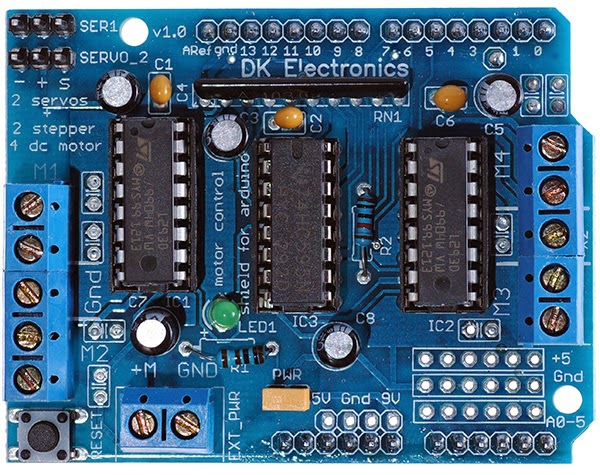
The Motor Shield V1 is an expansion board for Arduino UNO and Mega microcontrollers for DC and stepper motor control. We have seen how to control a DC motor using H bridge which may require a lot of connections when using the simple integrated circuit. In an embedded application, such as a Rovy robot, you will have to control several motors in parallel. Shields exist for this purpose, to simplify programming and installation.
The Shield used in this tutorial is the Motor Shield V1 from Adafruit. A new version of this shield exists, the Motor Shield V2.
Prerequisite : Programming with Arduino, Control a DC Motor with Arduino, Control a stepper with Arduino
Hardware
- Computer
- ArduinoUNO
- USB A Male/B Male
- MotorShieldV1
- DC motor or stepper motor x1
Operating principle
The Motor Shield uses the H-bridge L293D and 74HC595N integrated circuit. It uses the following pins:
- Digital Pin 11: Motor # 1 DC/Stepper # 1 (on/speed)
- Digital pin 3: # 2 DC Motor/Stepper # 1 (on/speed)
- Digital pin 5: DC Motor # 3/# 2 Stepper (activation/speed)
- Digital pin 6: # 4 DC Motor/Stepper # 2 (activation/speed)
- Digital pin 4, 7, 8 and 12 for communication with the 74HC595
- Digital pin 9 and 10 for the actuators 1 and 2
In the case of a shield, the connections are predefined. Make sure to check in the component’s technical documentation how to use it (Motor Shield V1 datasheet).
Schematics
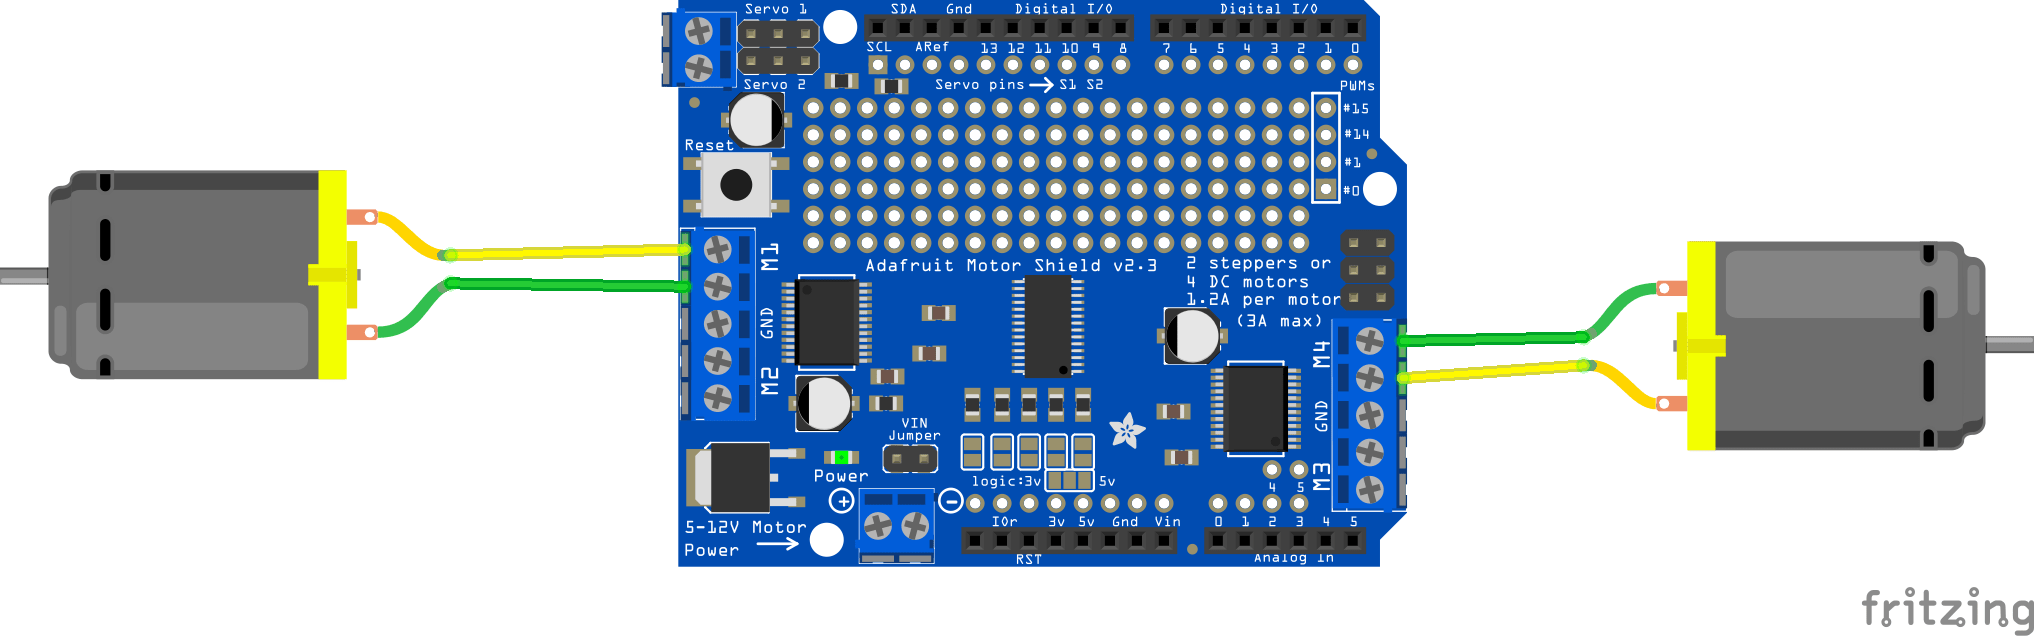
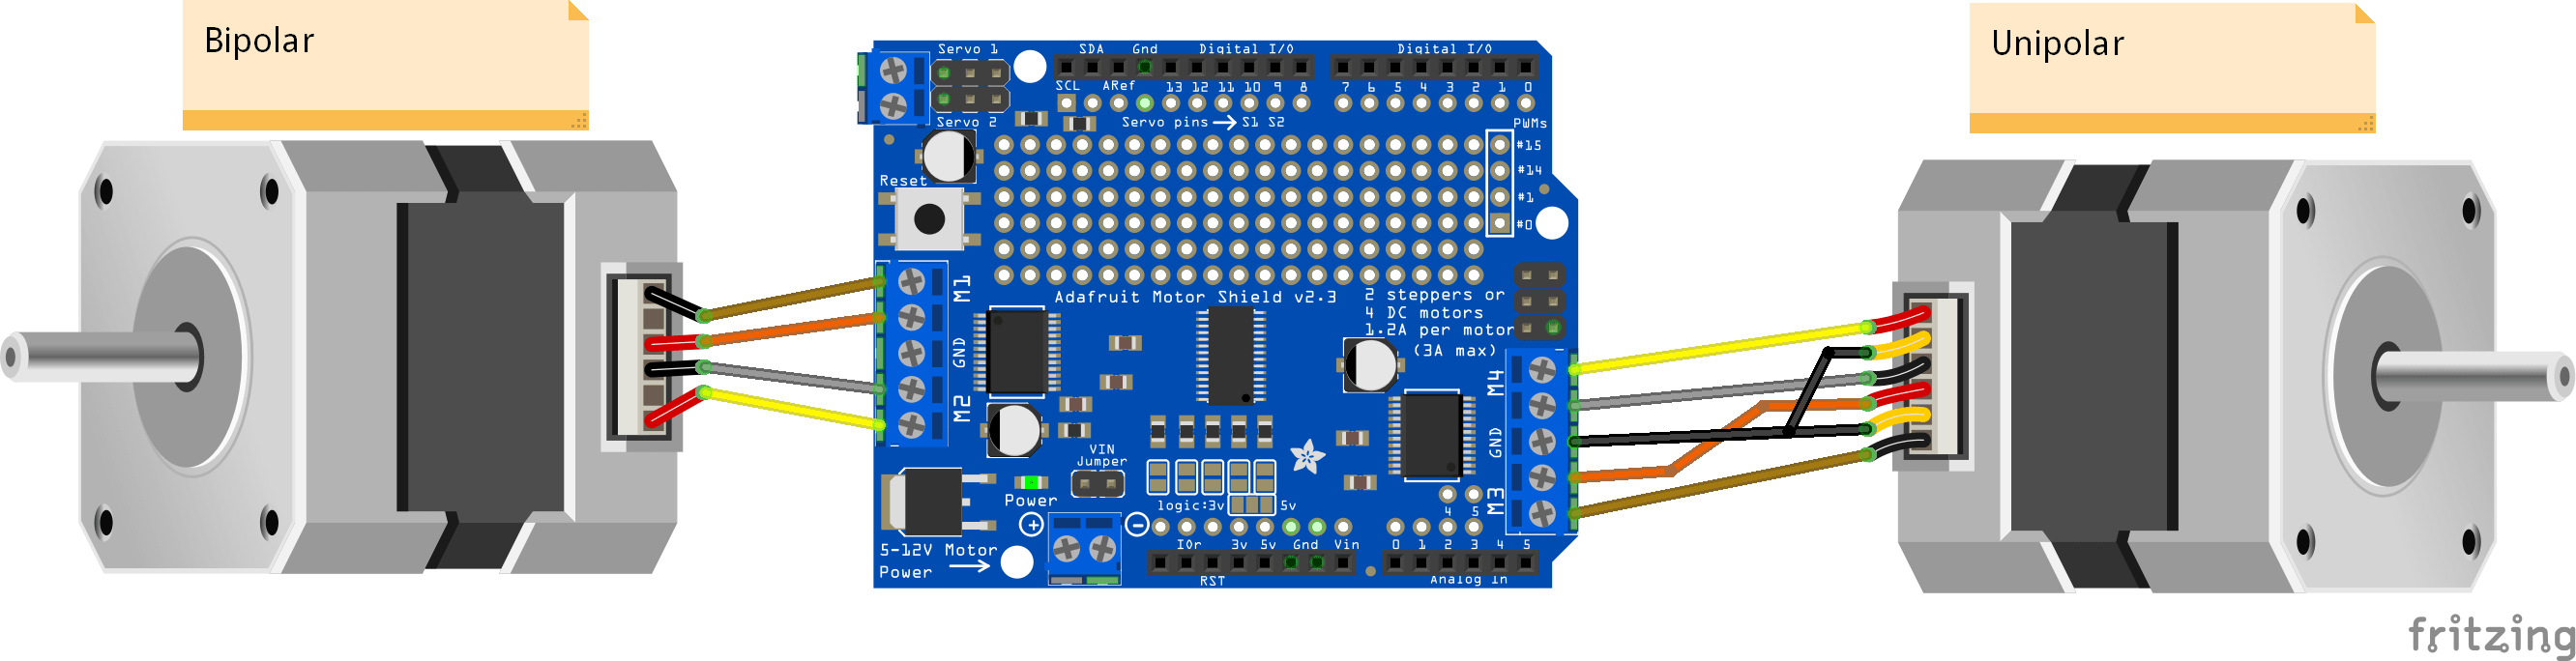
Compatible with UNO and Mega card, the shield is placed directly on the Arduino board. Power connects to Power terminal block. The motors are connected to the terminals M1 to M4. Three types of motors can be connected to this shield (excluding servomotors):
- DC motor
- Unipolar stepper
- Bipolar stepper
The connections of these engines are described in the following schemes.
Warning: the shield depicted in the diagram is the Motor Shield V2 but the connection at the terminal remains the same.


Code for driving DC motors
In order to interact with the Motor Shield V1, we use AFMotor.h library. To drive a DC motor, we will use the AF_DCMotor class whose functions are to know:
- motor.run() to activate the motor in one direction or the other (RELEASE, BACKWARD, FORWARD).
- motor.setSpeed() to set the speed of the motor
/*----------------------------------------------------------------------
  * Summary : Permet de tester un moteur CC
  * Hardware :
   - Arduino UNO x1
   - Motor Shield V1 x1
   - Moteur CC x1
* www.aranacorp.com
----------------------------------------------------------------------*/
//Librairies
#include <AFMotor.h>
//Constants
const int motorspeed=200;
//Parameters
AF_DCMotor motorG(1);

void setup() {
  // Code d'initialisation :s'exécute une seule fois
  Serial.begin(9600);
  Serial.println("Test moteur");

  motorG.setSpeed(motorspeed);
  motorG.run(RELEASE);

}

void loop() {
  // Code principal: s'exécute de manière répétitive
  Serial.println("-------------------------------------");
  Serial.println("Avant ");
  motorG.run(FORWARD);
  delay(500);
  Serial.println("Arrière ");
  motorG.run(BACKWARD);
  delay(500);
  Serial.println("Arrêt ");
  motorG.run(RELEASE);
  delay(1000);
}
Code for controlling stepper motors
For motors step by step we use AF_Stepper class whose functions are to know:
- stepper.step (nombre_de_pas, MANAGEMENT, MODE) to perform a number of steps in one direction and a given mode.
- stepper.setSpeed() to set the speed of the motor
#include <AFMotor.h>
#define NB_OF_STEPS 100
// Connect a stepper motor with 48 steps per revolution (7.5 degree)
// to motor port #1 (M1 and M2)
AF_Stepper motor(48, 1);

void setup() {
  Serial.begin(9600);           // set up Serial library at 9600 bps
  Serial.println("Stepper test!");

  motor.setSpeed(10);  // 10 rpm
}

void loop() {
  Serial.println("Single coil steps");
  motor.step(NB_OF_STEPS, FORWARD, SINGLE);
  motor.step(NB_OF_STEPS, BACKWARD, SINGLE);

  Serial.println("Double coil steps");
  motor.step(NB_OF_STEPS, FORWARD, DOUBLE);
  motor.step(NB_OF_STEPS, BACKWARD, DOUBLE);

  Serial.println("Interleave coil steps");
  motor.step(NB_OF_STEPS, FORWARD, INTERLEAVE);
  motor.step(NB_OF_STEPS, BACKWARD, INTERLEAVE);

  Serial.println("Micrsostep steps");
  motor.step(NB_OF_STEPS, FORWARD, MICROSTEP);
  motor.step(NB_OF_STEPS, BACKWARD, MICROSTEP);
}
Applications
- Manage stepper motors, DC motors and actuators of a robot
Sources
- https://cdn-learn.adafruit.com/downloads/pdf/adafruit-motor-shield.pdf
- https://learn.adafruit.com/adafruit-motor-shield
- https://github.com/adafruit/Adafruit-Motor-Shield-library
Find other examples and tutorials in our Automatic code generator
Code Architect