Nous allons voir dans ce tutoriel comment mettre en place une cartographie avec un capteur Lidar sous Python. Le capteur lidar permet de se repérer dans l’espace et de cartographier.
Description du capteur Lidar
Le capteur lidar YLidarX4 est un capteur laser de distance couplé à un moteur qui le fait tourner. Il se comporte comme un radar permettant la détection d’obstacles à 360 degrés et de se fait une cartographie de l’espace. Il s’utilise souvent en robotique pour cartographier, se repérer dans un environnement et permettre un déplacement autonome.
Le capteur Lidar utilise une carte d’interface série permettant de le connecter à un ordinateur via un port USB.
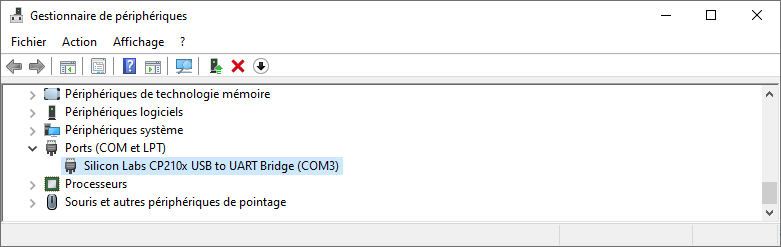
Pour savoir sur quel port se connecte l’appareil, vous pouvez aller dans le gestionnaire de périphérique dans la section Ports (COM et LPT) (ici com3)
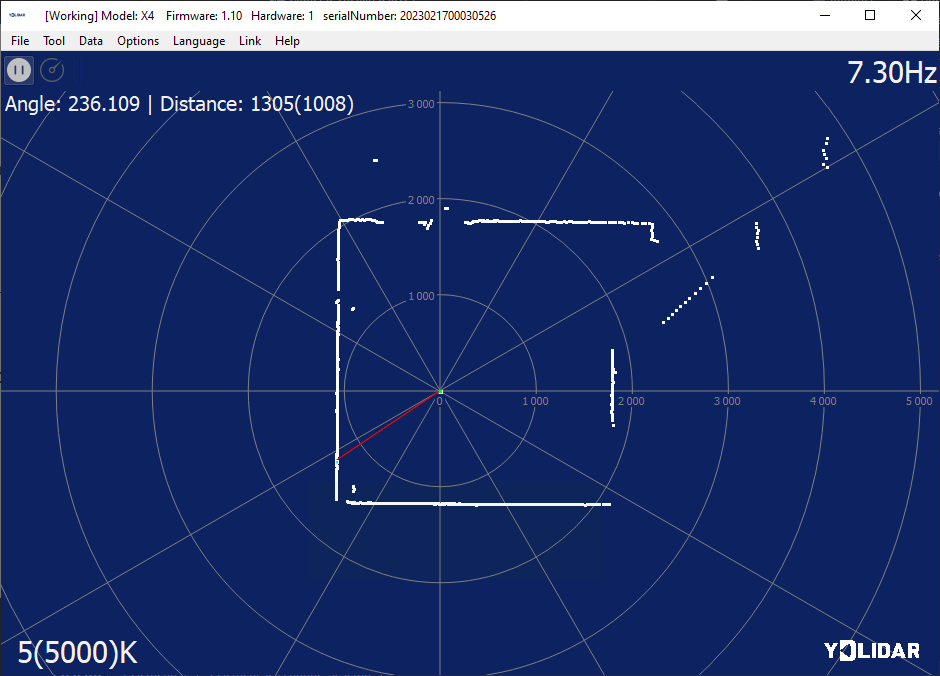
Test du Lidar avec l’outil officiel Tool
Vous pouvez télécharger l’interface Tool sur le site officiel. Cet outil permet de visualiser la cartographie obtenu à l’aide du Lidar.
Une fois le logiciel lancé, il suffit de sélectionner le port du périphérique et le modèle de Lidar. Une fois le Lidar connecté, vous pouvez lancer l’acquisition.
Installation du paquet Python
Pour utiliser le capteur Lidar avec Python, nous utilisons la librairie PyLidar3
python -m pip install Pylidar3Script de test du Lidar
Pour vérifier l’installation de Pylidar, vous pouvez utiliser le script suivant qui affiche simple les informations de l’appareil.
import PyLidar3
port = "COM3" #input("Enter port name which lidar is connected:") #windows
Obj = PyLidar3.YdLidarX4(port)
print("connecting to {}".format(port))

ret = Obj.Connect()
if(1):
	print(ret)
	print("device info: ",Obj.GetDeviceInfo())
	Obj.Disconnect()
else:
	print("Error connecting to device")
Affichage du résultat du scan
Pour notre première cartographie, nous allons initialiser l’objet PyLidar3 et nous allons nous connecter à l’appareil
Obj = PyLidar3.YdLidarX4(port)
ret = Obj.Connect()
Nous allons ensuite définir quelques paramètres du scan:
- durée du scan scanDuration
- seuil de donnée à enregistrer dataThr
- limite de la fenêtre winLim
Enfin nous allons lancer la mesure lidar et afficher l’acquisition avec matplotlib
import PyLidar3
import matplotlib.pyplot as plt
import math
import time

#init lidar
port =  "COM3" #input("Enter port name which lidar is connected:") #windows
Obj = PyLidar3.YdLidarX4(port) #PyLidar3.your_version_of_lidar(port,chunk_size)

ret = Obj.Connect()
print(ret)
#ret = Obj.Connect()
#print(ret)

#parameters
scanDuration = 30 #scan for 30 seconds
dataThr = 1000 # disgard data below this value
winLim = 5000 # window limit in X and Y

#init data list on 360deg
x=[]
y=[]
for _ in range(360):
	x.append(0)
	y.append(0)

if(1):
	deviceInfo = Obj.GetDeviceInfo()
	print("device info : ",deviceInfo)

	gen = Obj.StartScanning()
	t = time.time() # start time
	while (time.time() - t) < scanDuration:
		data = next(gen)
		for angle in range(0,360):
			if(data[angle]>dataThr):
				#x[angle] = data[angle] * math.cos(math.radians(angle))
				#y[angle] = data[angle] * math.sin(math.radians(angle))
				x[angle] = (x[angle] + data[angle] * math.cos(math.radians(angle))) / 2
				y[angle] = (y[angle] + data[angle] * math.sin(math.radians(angle))) / 2

		plt.clf()
		plt.axis([-winLim,winLim,-winLim,winLim])
		plt.title("Model: X4 Firmware: {} Hardware: {} SN: {}".format(deviceInfo['firmware_version'], deviceInfo['hardware_version'],deviceInfo['serial_number']))
		plt.scatter(y, x, c='r', s=8)
		plt.draw()
		plt.pause(0.1)

	Obj.StopScanning()
	Obj.Disconnect()
else:
	print("Error connecting to device")

plt.show()
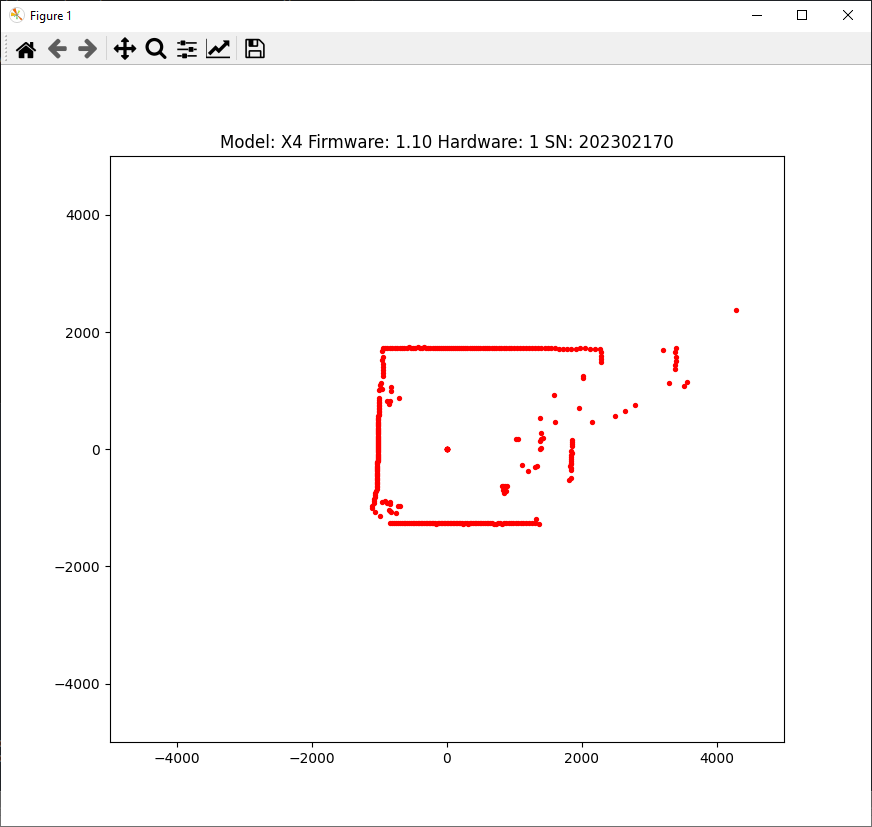
Résultat
Une fois le script lancer, nous pouvons voir le process de cartographie en action et la carte se mettre à jour en temps réel.
Gestion du lidar avec threading
Il est possible de gérer la mesure dans un process différent de l’affichage pour une meilleure fluidité. A titre d’exemple, nous utilisons la librairie threading. Nous allons créer une fonction d’acquisition des données scan() que nous plaçons ensuite dans un thread.
threading.Thread(target=scan).start()
Nous pouvons ainsi traiter les données de cartographie sans perturber l’acquisition de la mesure.
import PyLidar3
import matplotlib.pyplot as plt
import math
import time
import numpy as np
import threading


#init lidar
port =  "COM3" #input("Enter port name which lidar is connected:") #windows
Obj = PyLidar3.YdLidarX4(port) #PyLidar3.your_version_of_lidar(port,chunk_size)

ret = Obj.Connect()
print(ret)
#ret = Obj.Connect()
#print(ret)

#parameters
scanDuration = 30 #scan for 30 seconds
dataThr = 1000 # disgard data below this value
winLim = 5000 # window limit in X and Y
buffnum = 1 # matrix size to average position

#init data list on 360deg
x = np.zeros((buffnum, 360))
y = np.zeros((buffnum, 360))

def scan():
	nb=0
	while is_scanning:
		data = next(gen)
		if nb>=buffnum-1:
			nb=0
		else:
			nb+=1

		for angle in range(0,360):
			if(data[angle]>dataThr):
				x[nb][angle] = data[angle] * math.cos(math.radians(angle))
				y[nb][angle] = data[angle] * math.sin(math.radians(angle))


if(1):
	deviceInfo = Obj.GetDeviceInfo()
	print("device info : ",deviceInfo)

	gen = Obj.StartScanning()
	t = time.time() # start time
	is_scanning = True
	threading.Thread(target=scan).start()
	while (time.time() - t) < scanDuration:
		xmean = np.mean(x, axis=0)
		ymean = np.mean(y, axis=0)
		plt.clf()
		plt.axis([-winLim,winLim,-winLim,winLim])
		plt.title("Model: X4 Firmware: {} Hardware: {} SN: {}".format(deviceInfo['firmware_version'], deviceInfo['hardware_version'],deviceInfo['serial_number']))
		#plt.scatter(y,x,c='r',s=8)
		plt.scatter(ymean,xmean,c='r',s=8)
		plt.draw()
		plt.pause(0.05)

	is_scanning = False
	Obj.StopScanning()
	Obj.Disconnect()
else:
	print("Error connecting to device")

plt.show() #keep figure open at the end
Application
- Cartographie d’un espace
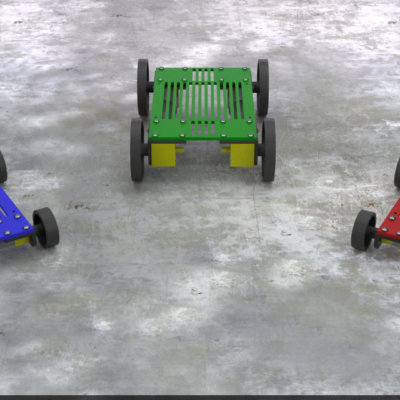
- Positionnement d’un robot dans l’espace et évitement d’obstacle


Bonjour, vous utilisez quel référence de lidar?
J’aimerais utiliser un lidar ld06 pour un projet de tondeuse autonome. Votre code peut il fonctionner avec?
Bonjour, YlidarX4. Il faut vérifier avec la datasheet ou tester le lidar ld06. Il y a certainement d’autre code qui doivent fonctionner avec ce capteur.