Para certas aplicações, pode ser útil incorporar o OpenCV numa interface PyQt. Neste tutorial, veremos como integrar e gerenciar corretamente um vídeo capturado pelo OpenCV em um aplicativo PyQt.
N.B.: Utilizamos o Pyside, mas a conversão para PyQt é bastante simples.
Pré-requisitos:
- Instalar o Python
- Instalação do OpenCV (pip install opencv-python)
- PySide ou PyQt (pip install pyside6 ou pip install PyQt5)
Código para capturar um vídeo com OpenCV
Eis o código básico para apresentar um vídeo de webcam com o openCV
import sys
import cv2

def main(args):

	cap = cv2.VideoCapture(0) #default camera

	while(True):
		ret, frame = cap.read()
		if ret:
			frame=cv2.resize(frame, (800, 600))
			cv2.imshow("Video",frame)

		if cv2.waitKey(1) & 0xFF == ord('q'): #click q to stop capturing
			break

	cap.release()
	cv2.destroyAllWindows()
	return 0

if __name__ == '__main__':

    sys.exit(main(sys.argv))
Para o integrar numa aplicação PyQt, vamos criar um objeto QThread que será responsável por reproduzir o vídeo sem bloquear a aplicação.
- A função run é a função que contém o código openCV que será executado num ciclo quando a função QThread.start for chamada.
- A função de paragem é utilizada para parar a linha de forma limpa
- O sinal changePixmap é utilizado para informar a aplicação de que está disponível uma nova imagem.
class Thread(QThread):
	changePixmap = pyqtSignal(QImage)

	def run(self):
		self.isRunning=True
		cap = cv2.VideoCapture(0)
		while self.isRunning:
			ret, frame = cap.read()
			if ret:
				rgbImage = cv2.cvtColor(frame, cv2.COLOR_BGR2RGB)
				h, w, ch = rgbImage.shape
				bytesPerLine = ch * w
				convertToQtFormat = QImage(rgbImage.data, w, h, bytesPerLine, QImage.Format_RGB888)
				p = convertToQtFormat.scaled(640, 480, Qt.KeepAspectRatio)
				self.changePixmap.emit(p)

	def stop(self):
		self.isRunning=False
		self.quit()
		self.terminate()
Criar a aplicação PyQt
Para a aplicação, criaremos um QLabel num QWidget simples que conterá a imagem de vídeo e instanciaremos o QThread. O vídeo será atualizado automaticamente utilizando a função setImage, que é chamada quando o sinal changePixmap é recebido.
- função setImage
	@pyqtSlot(QImage)
	def setImage(self, image):
		#update image
		self.label.setPixmap(QPixmap.fromImage(image))
- sinal changePixmap
self.th.changePixmap.connect(self.setImage)
class VideoContainer(QWidget):
	def __init__(self):
		super().__init__()
		self.title = 'PySide Video'
		self.left = 100
		self.top = 100
		self.fwidth = 640
		self.fheight = 480
		self.initUI()

	@pyqtSlot(QImage)
	def setImage(self, image):
		#update image
		self.label.setPixmap(QPixmap.fromImage(image))

	def initUI(self):
		self.setWindowTitle(self.title)
		self.setGeometry(self.left, self.top, self.fwidth, self.fheight)
		self.resize(1200, 800)

		# create a label
		self.label = QLabel(self)
		self.label.resize(640, 480)
		self.th = Thread(self)
		self.th.changePixmap.connect(self.setImage)
		self.th.start()
		self.show()
Código completo para exibir um vídeo em uma janela do PyQt
import cv2
import sys
#from PyQt5.QtWidgets import  QWidget, QLabel, QApplication
#from PyQt5.QtCore import QThread, Qt, pyqtSignal, pyqtSlot
#from PyQt5.QtGui import QImage, QPixmap

from PySide6.QtWidgets import  QWidget, QLabel, QApplication
from PySide6.QtCore import QThread, Qt, Signal, Slot
from PySide6.QtGui import QImage, QPixmap
pyqtSignal = Signal
pyqtSlot = Slot

class Thread(QThread):
	changePixmap = pyqtSignal(QImage)

	def run(self):
		self.isRunning=True
		cap = cv2.VideoCapture(0)
		while self.isRunning:
			ret, frame = cap.read()
			if ret:
				# https://stackoverflow.com/a/55468544/6622587
				rgbImage = cv2.cvtColor(frame, cv2.COLOR_BGR2RGB)
				h, w, ch = rgbImage.shape
				bytesPerLine = ch * w
				convertToQtFormat = QImage(rgbImage.data, w, h, bytesPerLine, QImage.Format_RGB888)
				p = convertToQtFormat.scaled(640, 480, Qt.KeepAspectRatio)
				self.changePixmap.emit(p)

	def stop(self):
		self.isRunning=False
		self.quit()
		self.terminate()

class VideoContainer(QWidget):
	def __init__(self):
		super().__init__()
		self.title = 'Video'
		self.left = 100
		self.top = 100
		self.fwidth = 640
		self.fheight = 480
		self.initUI()

	@pyqtSlot(QImage)
	def setImage(self, image):
		#update image
		self.label.setPixmap(QPixmap.fromImage(image))

	def initUI(self):
		self.setWindowTitle(self.title)
		self.setGeometry(self.left, self.top, self.fwidth, self.fheight)
		self.resize(1200, 800)

		# create a label
		self.label = QLabel(self)
		self.label.resize(640, 480)
		self.th = Thread(self)
		self.th.changePixmap.connect(self.setImage)
		self.th.start()
		self.show()

if __name__ == '__main__':

		app = QApplication(sys.argv)
		ex = VideoContainer()
		sys.exit(app.exec())
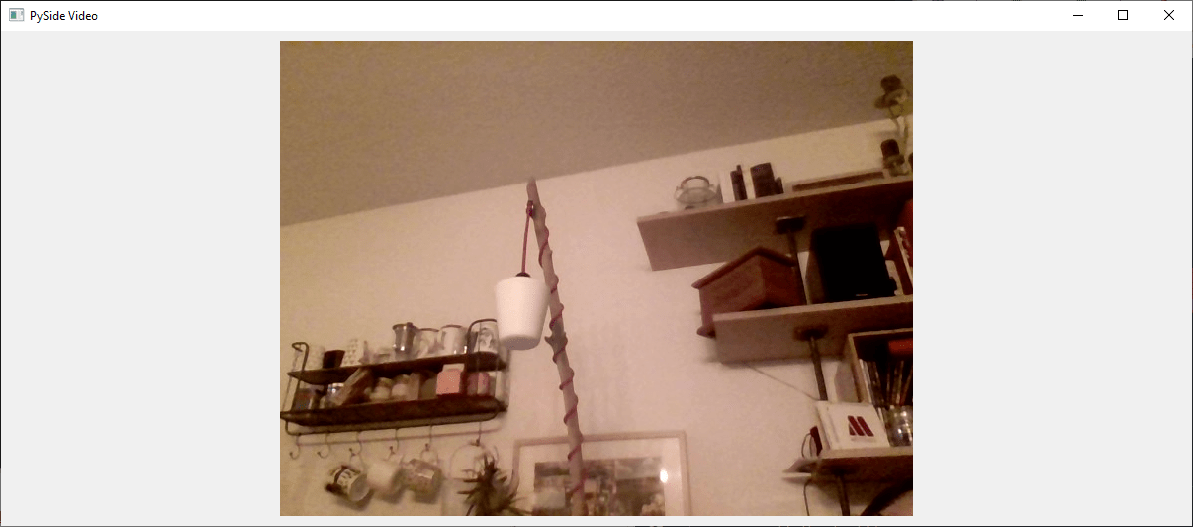
Aparece uma janela “Vídeo” com a imagem da Webcam.
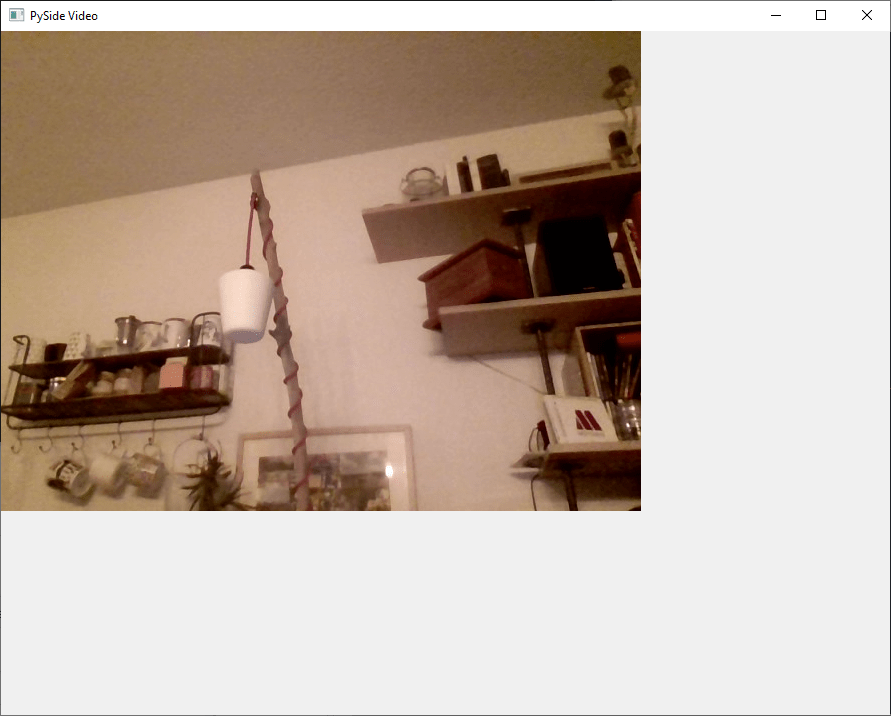
Bónus: interface de fecho melhorada
O código funciona bem e pode ser suficiente, mas existem alguns problemas com esta implementação:
- A aplicação não pode ser fechada com Ctrl+C (Interrupção do teclado)
- Quando se fecha a janela, a Qthread não pára
- Se redimensionar a janela, o tamanho do vídeo não se altera
Para fechar a aplicação com Ctrl+C, pode utilizar o sinal de interrupção adicionando o seguinte código antes de chamar a aplicação (existem métodos mais limpos)
import signal #close signal with Ctrl+C
signal.signal(signal.SIGINT, signal.SIG_DFL)
Para terminar o QThread quando a janela é fechada, pode utilizar o sinal aboutToQuit da aplicação para chamar a função stop do QThread
app.aboutToQuit.connect(ex.th.stop) #stop qthread when closing window
Por fim, para redimensionar o vídeo com a janela sempre que esta é actualizada, utilizamos o tamanho da janela para calcular o tamanho da imagem e a posição da etiqueta, de modo a que esta fique centrada e o vídeo mantenha as suas proporções.
	@pyqtSlot(QImage)
	def setImage(self, image):
		#resize image with window and center
		imWidth=self.width()-2*self.padding
		imHeight=self.height()-2*self.padding
		image = image.scaled(imWidth, imHeight, Qt.KeepAspectRatio) # remove Qt.KeepAspectRatio if not needed
		self.label.resize(image.width(), image.height()) #(640, 480)
		self.label.move((self.width()-image.width())/2, (self.height()-image.height())/2)

		#update image
		self.label.setPixmap(QPixmap.fromImage(image))
Aqui está o código completo com melhorias
import cv2
import sys
#from PyQt5.QtWidgets import  QWidget, QLabel, QApplication
#from PyQt5.QtCore import QThread, Qt, pyqtSignal, pyqtSlot
#from PyQt5.QtGui import QImage, QPixmap

from PySide6.QtWidgets import  QWidget, QLabel, QApplication
from PySide6.QtCore import QThread, Qt, Signal, Slot
from PySide6.QtGui import QImage, QPixmap
pyqtSignal = Signal
pyqtSlot = Slot

class Thread(QThread):
	changePixmap = pyqtSignal(QImage)

	def run(self):
		self.isRunning=True
		cap = cv2.VideoCapture(0)
		while self.isRunning:
			ret, frame = cap.read()
			if ret:
				# https://stackoverflow.com/a/55468544/6622587
				rgbImage = cv2.cvtColor(frame, cv2.COLOR_BGR2RGB)
				h, w, ch = rgbImage.shape
				bytesPerLine = ch * w
				convertToQtFormat = QImage(rgbImage.data, w, h, bytesPerLine, QImage.Format_RGB888)
				p = convertToQtFormat.scaled(640, 480, Qt.KeepAspectRatio)
				self.changePixmap.emit(p)

	def stop(self):
		self.isRunning=False
		self.quit()
		self.terminate()

class VideoContainer(QWidget):
	def __init__(self):
		super().__init__()
		self.title = 'PySide Video'
		self.left = 100
		self.top = 100
		self.fwidth = 640
		self.fheight = 480
		self.padding = 10
		self.initUI()

	@pyqtSlot(QImage)
	def setImage(self, image):
		#resize image with window and center
		imWidth=self.width()-2*self.padding
		imHeight=self.height()-2*self.padding
		image = image.scaled(imWidth, imHeight, Qt.KeepAspectRatio) # remove Qt.KeepAspectRatio if not needed
		self.label.resize(image.width(), image.height()) #(640, 480)
		self.label.move((self.width()-image.width())/2, (self.height()-image.height())/2)

		#update image
		self.label.setPixmap(QPixmap.fromImage(image))

	def initUI(self):
		self.setWindowTitle(self.title)
		self.setGeometry(self.left, self.top, self.fwidth, self.fheight)
		self.resize(1200, 800)

		# create a label
		self.label = QLabel(self)
		self.label.resize(self.width()-2*self.padding,self.height()-2*self.padding) #(640, 480)
		self.th = Thread(self)
		self.th.changePixmap.connect(self.setImage)
		self.th.start()
		self.show()

import signal #close signal with Ctrl+C
signal.signal(signal.SIGINT, signal.SIG_DFL)

if __name__ == '__main__':

		app = QApplication(sys.argv)
		ex = VideoContainer()
		app.aboutToQuit.connect(ex.th.stop) #stop qthread when closing window

		sys.exit(app.exec())