Pour certaines applications, il vous sera peut-être utile d’embarquer OpenCV dans une interface PyQt. Nous allons voir dans ce tutoriel comment intégrer et gérer correctement une vidéo capturée par OpenCV dans une application PyQt.
N.B.: Nous utilisons Pyside mais la conversion vers PyQt se fait assez simplement.
Pré-requis:
- Installation de Python
- Installation OpenCV (pip install opencv-python)
- PySide ou PyQt (pip install pyside6 ou pip install PyQt5)
Code pour capturer une vidéo avec OpenCV
Voici le code de base pour afficher la vidéo d’une webcam avec openCV
import sys
import cv2

def main(args):

	cap = cv2.VideoCapture(0) #default camera

	while(True):
		ret, frame = cap.read()
		if ret:
			frame=cv2.resize(frame, (800, 600))
			cv2.imshow("Video",frame)

		if cv2.waitKey(1) & 0xFF == ord('q'): #click q to stop capturing
			break

	cap.release()
	cv2.destroyAllWindows()
	return 0

if __name__ == '__main__':

    sys.exit(main(sys.argv))
Pour l’intégrer dans une application PyQt, nous allons créer un objet QThread qui sera chargé de lire la vidéo sans bloquer l’application.
- La fonction run est la fonction contenant le code openCV qui va tourner en boucle à l’appel de la fonction QThread.start
- La fonction stop permet d’arrêter proprement le thread
- Le signal changePixmap permet de signaler à l’application qu’une nouvelle image est disponible
class Thread(QThread):
	changePixmap = pyqtSignal(QImage)

	def run(self):
		self.isRunning=True
		cap = cv2.VideoCapture(0)
		while self.isRunning:
			ret, frame = cap.read()
			if ret:
				rgbImage = cv2.cvtColor(frame, cv2.COLOR_BGR2RGB)
				h, w, ch = rgbImage.shape
				bytesPerLine = ch * w
				convertToQtFormat = QImage(rgbImage.data, w, h, bytesPerLine, QImage.Format_RGB888)
				p = convertToQtFormat.scaled(640, 480, Qt.KeepAspectRatio)
				self.changePixmap.emit(p)

	def stop(self):
		self.isRunning=False
		self.quit()
		self.terminate()
Création de l’application PyQt
Pour l’application, nous allons créer un QLabel dans un simple QWidget qui va contenir l’image de la vidéo et instancier le QThread. La vidéo se mettra à jour automatiquement à l’aide de la fonction setImage qui est appelée à la réception du signal changePixmap.
- fonction setImage
	@pyqtSlot(QImage)
	def setImage(self, image):
		#update image
		self.label.setPixmap(QPixmap.fromImage(image))
- signal changePixmap
self.th.changePixmap.connect(self.setImage)
class VideoContainer(QWidget):
	def __init__(self):
		super().__init__()
		self.title = 'PySide Video'
		self.left = 100
		self.top = 100
		self.fwidth = 640
		self.fheight = 480
		self.initUI()

	@pyqtSlot(QImage)
	def setImage(self, image):
		#update image
		self.label.setPixmap(QPixmap.fromImage(image))

	def initUI(self):
		self.setWindowTitle(self.title)
		self.setGeometry(self.left, self.top, self.fwidth, self.fheight)
		self.resize(1200, 800)

		# create a label
		self.label = QLabel(self)
		self.label.resize(640, 480)
		self.th = Thread(self)
		self.th.changePixmap.connect(self.setImage)
		self.th.start()
		self.show()
Code complet pour afficher une vidéo dans une fenêtre PyQt
import cv2
import sys
#from PyQt5.QtWidgets import  QWidget, QLabel, QApplication
#from PyQt5.QtCore import QThread, Qt, pyqtSignal, pyqtSlot
#from PyQt5.QtGui import QImage, QPixmap

from PySide6.QtWidgets import  QWidget, QLabel, QApplication
from PySide6.QtCore import QThread, Qt, Signal, Slot
from PySide6.QtGui import QImage, QPixmap
pyqtSignal = Signal
pyqtSlot = Slot

class Thread(QThread):
	changePixmap = pyqtSignal(QImage)

	def run(self):
		self.isRunning=True
		cap = cv2.VideoCapture(0)
		while self.isRunning:
			ret, frame = cap.read()
			if ret:
				# https://stackoverflow.com/a/55468544/6622587
				rgbImage = cv2.cvtColor(frame, cv2.COLOR_BGR2RGB)
				h, w, ch = rgbImage.shape
				bytesPerLine = ch * w
				convertToQtFormat = QImage(rgbImage.data, w, h, bytesPerLine, QImage.Format_RGB888)
				p = convertToQtFormat.scaled(640, 480, Qt.KeepAspectRatio)
				self.changePixmap.emit(p)

	def stop(self):
		self.isRunning=False
		self.quit()
		self.terminate()

class VideoContainer(QWidget):
	def __init__(self):
		super().__init__()
		self.title = 'Video'
		self.left = 100
		self.top = 100
		self.fwidth = 640
		self.fheight = 480
		self.initUI()

	@pyqtSlot(QImage)
	def setImage(self, image):
		#update image
		self.label.setPixmap(QPixmap.fromImage(image))

	def initUI(self):
		self.setWindowTitle(self.title)
		self.setGeometry(self.left, self.top, self.fwidth, self.fheight)
		self.resize(1200, 800)

		# create a label
		self.label = QLabel(self)
		self.label.resize(640, 480)
		self.th = Thread(self)
		self.th.changePixmap.connect(self.setImage)
		self.th.start()
		self.show()

if __name__ == '__main__':

		app = QApplication(sys.argv)
		ex = VideoContainer()
		sys.exit(app.exec())
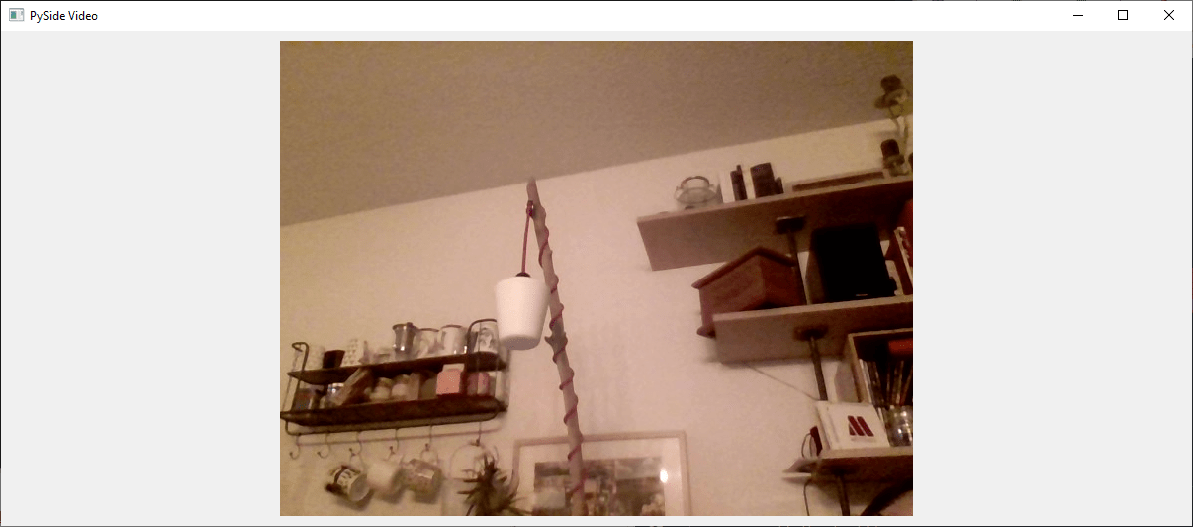
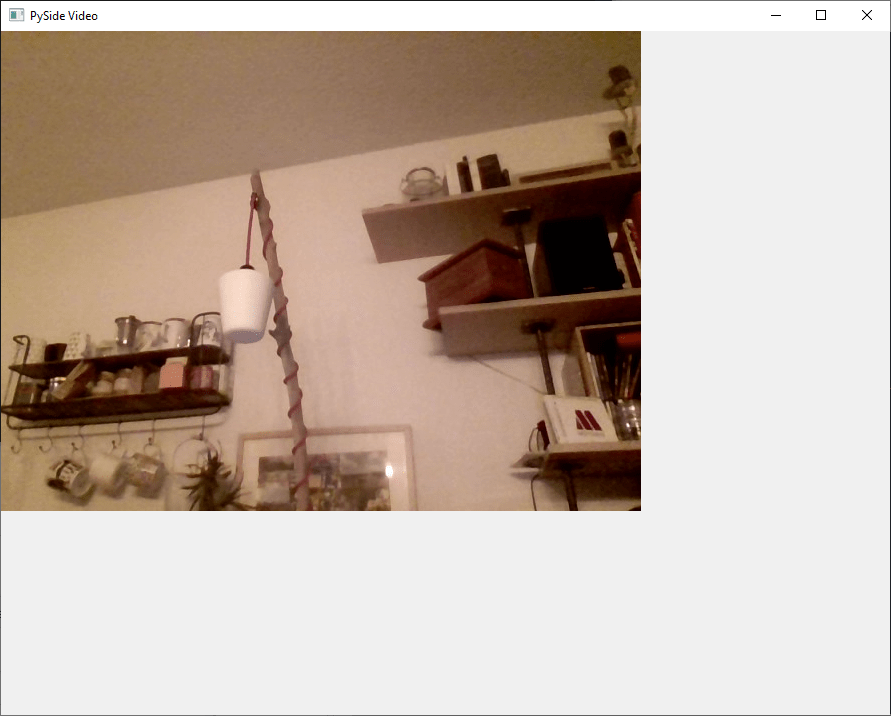
Une fenêtre « Video » apparait contenant l’image provenant de la webcam.
Vous pouvez adapter ce code simple pour intégrer une vidéo à un interface graphique qui permet de modifier les option vidéo ou travailler avec des filtres, par exemple.
Bonus:amélioration de l’interface fermeture/dimension
Le code fonctionne bien et peut être suffisant mais quelques problèmes sont présents avec cette implémentation:
- On ne peut pas fermer l’application avec Ctrl+C (KeyboardInterrupt)
- Lorsqu’on ferme la fenêtre le Qthread ne s’arrête pas
- Si on redimensionne la fenêtre la taille de la vidéo ne bouge pas
Pour fermer l’application avec Ctrl+C, il est possible d’utiliser le signal d’interruption pour cela il suffit de rajouter le code suivant avant l’appel de l’application (il existe des méthodes plus propres)
import signal #close signal with Ctrl+C
signal.signal(signal.SIGINT, signal.SIG_DFL)
Pour terminer le QThread à la fermeture de la fenêtre, on peut utiliser le signal aboutToQuit de l’application pour appeler la fonction stop du QThread
app.aboutToQuit.connect(ex.th.stop) #stop qthread when closing window
Enfin, pour redimensionner la vidéo avec le fenêtre à chaque rafraichissement, nous utilisons la taille de la fenêtre pour calculer la taille de l’image et la position du label pour qu’il soit centré et que la vidéo garde ses proportions.
	@pyqtSlot(QImage)
	def setImage(self, image):
		#resize image with window and center
		imWidth=self.width()-2*self.padding
		imHeight=self.height()-2*self.padding
		image = image.scaled(imWidth, imHeight, Qt.KeepAspectRatio) # remove Qt.KeepAspectRatio if not needed
		self.label.resize(image.width(), image.height()) #(640, 480)
		self.label.move((self.width()-image.width())/2, (self.height()-image.height())/2)

		#update image
		self.label.setPixmap(QPixmap.fromImage(image))
Voici le code complet avec amélioration
import cv2
import sys
#from PyQt5.QtWidgets import  QWidget, QLabel, QApplication
#from PyQt5.QtCore import QThread, Qt, pyqtSignal, pyqtSlot
#from PyQt5.QtGui import QImage, QPixmap

from PySide6.QtWidgets import  QWidget, QLabel, QApplication
from PySide6.QtCore import QThread, Qt, Signal, Slot
from PySide6.QtGui import QImage, QPixmap
pyqtSignal = Signal
pyqtSlot = Slot

class Thread(QThread):
	changePixmap = pyqtSignal(QImage)

	def run(self):
		self.isRunning=True
		cap = cv2.VideoCapture(0)
		while self.isRunning:
			ret, frame = cap.read()
			if ret:
				# https://stackoverflow.com/a/55468544/6622587
				rgbImage = cv2.cvtColor(frame, cv2.COLOR_BGR2RGB)
				h, w, ch = rgbImage.shape
				bytesPerLine = ch * w
				convertToQtFormat = QImage(rgbImage.data, w, h, bytesPerLine, QImage.Format_RGB888)
				p = convertToQtFormat.scaled(640, 480, Qt.KeepAspectRatio)
				self.changePixmap.emit(p)

	def stop(self):
		self.isRunning=False
		self.quit()
		self.terminate()

class VideoContainer(QWidget):
	def __init__(self):
		super().__init__()
		self.title = 'PySide Video'
		self.left = 100
		self.top = 100
		self.fwidth = 640
		self.fheight = 480
		self.padding = 10
		self.initUI()

	@pyqtSlot(QImage)
	def setImage(self, image):
		#resize image with window and center
		imWidth=self.width()-2*self.padding
		imHeight=self.height()-2*self.padding
		image = image.scaled(imWidth, imHeight, Qt.KeepAspectRatio) # remove Qt.KeepAspectRatio if not needed
		self.label.resize(image.width(), image.height()) #(640, 480)
		self.label.move((self.width()-image.width())/2, (self.height()-image.height())/2)

		#update image
		self.label.setPixmap(QPixmap.fromImage(image))

	def initUI(self):
		self.setWindowTitle(self.title)
		self.setGeometry(self.left, self.top, self.fwidth, self.fheight)
		self.resize(1200, 800)

		# create a label
		self.label = QLabel(self)
		self.label.resize(self.width()-2*self.padding,self.height()-2*self.padding) #(640, 480)
		self.th = Thread(self)
		self.th.changePixmap.connect(self.setImage)
		self.th.start()
		self.show()

import signal #close signal with Ctrl+C
signal.signal(signal.SIGINT, signal.SIG_DFL)

if __name__ == '__main__':

		app = QApplication(sys.argv)
		ex = VideoContainer()
		app.aboutToQuit.connect(ex.th.stop) #stop qthread when closing window

		sys.exit(app.exec())