,
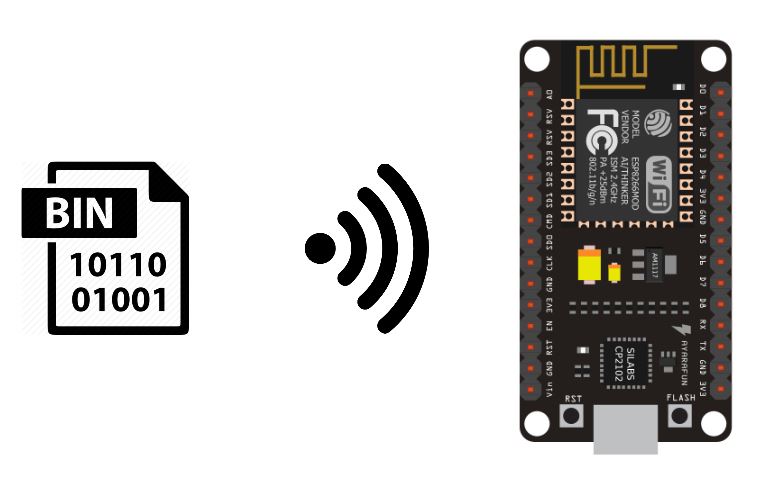
Uma característica muito útil no campo da IdC é a possibilidade de programar um microcontrolador ligado, tal como um ESP8266, via Wi-Fi. Esta técnica é chamada de Programação por Ar (OTA).
Material
- NóMCU ESP8266
- Cabo USB A Masculino
- Computador
- Rede WiFi
Como funciona
Em princípio, o ESP8266 NodeMCU é programado através da porta USB. O computador comunica o programa ao microcontrolador. Quando dois dispositivos estão ligados à mesma rede Wi-Fi, podem comunicar entre si. Isto significa que o código pode ser carregado através da rede Wi-Fi sem ter de se ligar a cada microcontrolador.
Também é possível carregar um código para o NodeMCU quando este é configurado como um Ponto de Acesso Wi-Fi. Neste caso, o computador utilizado para a programação deve estar ligado à rede do NodeMCU.
Adicionar o firmware ArduinoOTA
A biblioteca ArduinoOTA está disponível quando da instalação do driver ESP8266. Para poder implementar a programação OTA, é necessário instalar o firmware. Para isso, pode utilizar o exemplo BasicOTA.ino disponível na IDE Arduino.
Certifique-se de que substitui ssid e password pelas credenciais da sua rede WiFi.
#include <ESP8266WiFi.h>
#include <ESP8266mDNS.h>
#include <WiFiUdp.h>
#include <ArduinoOTA.h>

#ifndef STASSID
#define STASSID "your-ssid"
#define STAPSK  "your-password"
#endif

const char* ssid = STASSID;
const char* password = STAPSK;

void setup() {
  Serial.begin(115200);
  Serial.println("Booting");
  WiFi.mode(WIFI_STA);
  WiFi.begin(ssid, password);
  while (WiFi.waitForConnectResult() != WL_CONNECTED) {
    Serial.println("Connection Failed! Rebooting...");
    delay(5000);
    ESP.restart();
  }

  // Port defaults to 8266
  // ArduinoOTA.setPort(8266);

  // Hostname defaults to esp8266-[ChipID]
  // ArduinoOTA.setHostname("myesp8266");

  // No authentication by default
  // ArduinoOTA.setPassword("admin");

  // Password can be set with it's md5 value as well
  // MD5(admin) = 21232f297a57a5a743894a0e4a801fc3
  // ArduinoOTA.setPasswordHash("21232f297a57a5a743894a0e4a801fc3");

  ArduinoOTA.onStart([]() {
    String type;
    if (ArduinoOTA.getCommand() == U_FLASH) {
      type = "sketch";
    } else { // U_FS
      type = "filesystem";
    }

    // NOTE: if updating FS this would be the place to unmount FS using FS.end()
    Serial.println("Start updating " + type);
  });
  ArduinoOTA.onEnd([]() {
    Serial.println("\nEnd");
  });
  ArduinoOTA.onProgress([](unsigned int progress, unsigned int total) {
    Serial.printf("Progress: %u%%\r", (progress / (total / 100)));
  });
  ArduinoOTA.onError([](ota_error_t error) {
    Serial.printf("Error[%u]: ", error);
    if (error == OTA_AUTH_ERROR) {
      Serial.println("Auth Failed");
    } else if (error == OTA_BEGIN_ERROR) {
      Serial.println("Begin Failed");
    } else if (error == OTA_CONNECT_ERROR) {
      Serial.println("Connect Failed");
    } else if (error == OTA_RECEIVE_ERROR) {
      Serial.println("Receive Failed");
    } else if (error == OTA_END_ERROR) {
      Serial.println("End Failed");
    }
  });
  ArduinoOTA.begin();
  Serial.println("Ready");
  Serial.print("IP address: ");
  Serial.println(WiFi.localIP());
}

void loop() {
  ArduinoOTA.handle();
}
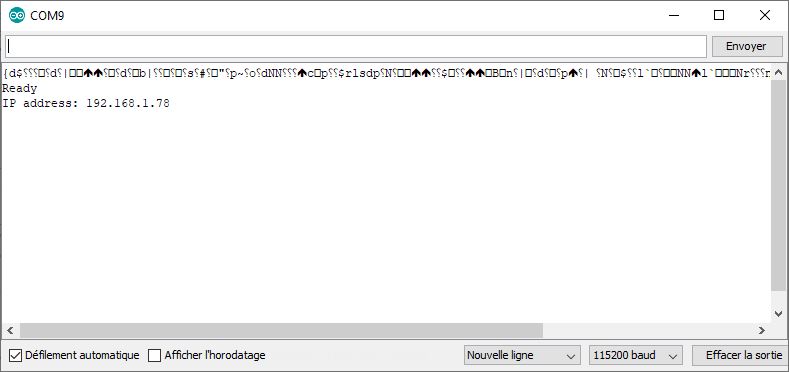
Não se esqueça de anotar o endereço IP local do dispositivo (aqui: 192.168.1.78).
Depois de ter carregado este código via série, poderá carregar um código via Wifi. Prima o botão RST ou EN no seu ESP e reinicie o IDE Arduino.
Edite o seu programa antes de o carregar
Colocamos o código de inicialização na função initOTA(). Será então fácil de o copiar para outros projectos. E adicionaremos um visor na porta de série para verificar se o código foi modificado.
AVISO: O código para a inicialização do ArduinoOTA deve estar presente em todos os códigos que carregar ou perderá a possibilidade de fazer uma transmissão aérea.
#include <ESP8266WiFi.h>
#include <ESP8266mDNS.h>
#include <WiFiUdp.h>
#include <ArduinoOTA.h>

const char* ssid = "*******";
const char* password = "********";

unsigned long previousMillis;

void setup() {
  Serial.begin(115200);
  Serial.println("Booting");
  WiFi.mode(WIFI_STA);
  WiFi.begin(ssid, password);
  while (WiFi.waitForConnectResult() != WL_CONNECTED) {
    Serial.println("Connection Failed! Rebooting...");
    delay(5000);
    ESP.restart();
  }

  initOTA();

  Serial.println("Ready");
  Serial.print("IP address: ");
  Serial.println(WiFi.localIP());
}

void loop() {
  ArduinoOTA.handle();

  if (millis() - previousMillis >= 500) {
    previousMillis = millis();
    Serial.println(F("Code has been update"));
  }
}

void initOTA() {
  // Port defaults to 8266
  // ArduinoOTA.setPort(8266);

  // Hostname defaults to esp8266-[ChipID]
  // ArduinoOTA.setHostname("myesp8266");

  // No authentication by default
  // ArduinoOTA.setPassword("admin");

  // Password can be set with it's md5 value as well
  // MD5(admin) = 21232f297a57a5a743894a0e4a801fc3
  // ArduinoOTA.setPasswordHash("21232f297a57a5a743894a0e4a801fc3");

  ArduinoOTA.onStart([]() {
    String type;
    if (ArduinoOTA.getCommand() == U_FLASH) {
      type = "sketch";
    } else { // U_FS
      type = "filesystem";
    }

    // NOTE: if updating FS this would be the place to unmount FS using FS.end()
    Serial.println("Start updating " + type);
  });
  ArduinoOTA.onEnd([]() {
    Serial.println("\nEnd");
  });
  ArduinoOTA.onProgress([](unsigned int progress, unsigned int total) {
    Serial.printf("Progress: %u%%\r", (progress / (total / 100)));
  });
  ArduinoOTA.onError([](ota_error_t error) {
    Serial.printf("Error[%u]: ", error);
    if (error == OTA_AUTH_ERROR) {
      Serial.println("Auth Failed");
    } else if (error == OTA_BEGIN_ERROR) {
      Serial.println("Begin Failed");
    } else if (error == OTA_CONNECT_ERROR) {
      Serial.println("Connect Failed");
    } else if (error == OTA_RECEIVE_ERROR) {
      Serial.println("Receive Failed");
    } else if (error == OTA_END_ERROR) {
      Serial.println("End Failed");
    }
  });
  ArduinoOTA.begin();
}
Depois de ter modificado o seu código, em “Tool> Port”, seleccione a sua placa nas portas de rede. (se a porta de rede não for apresentada, ver o capítulo seguinte)
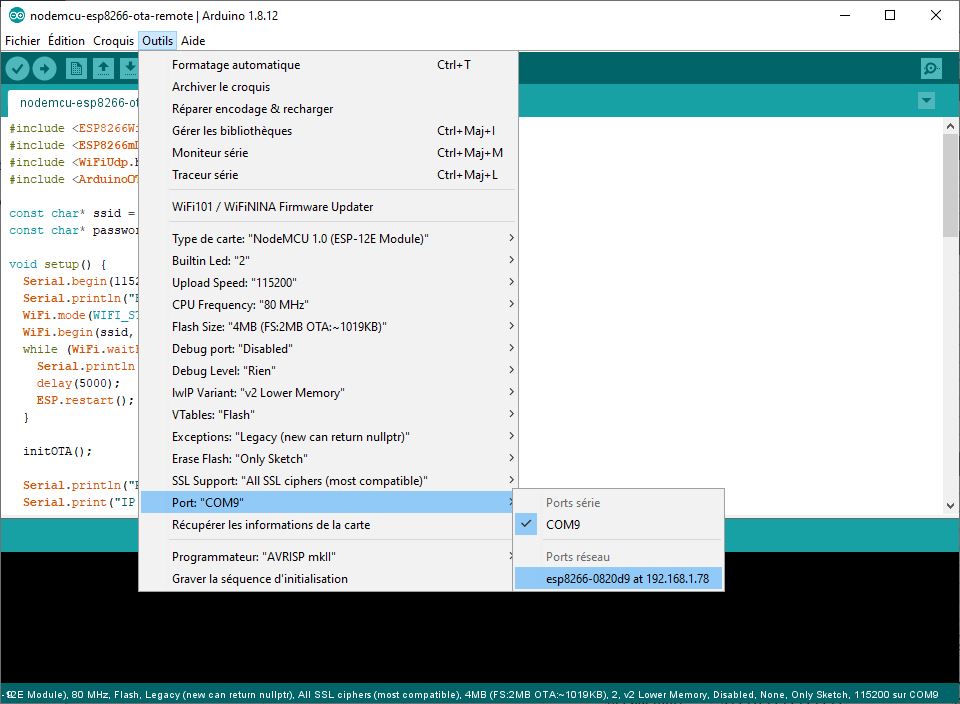
Pode então carregar o seu código como faria com a comunicação em série.
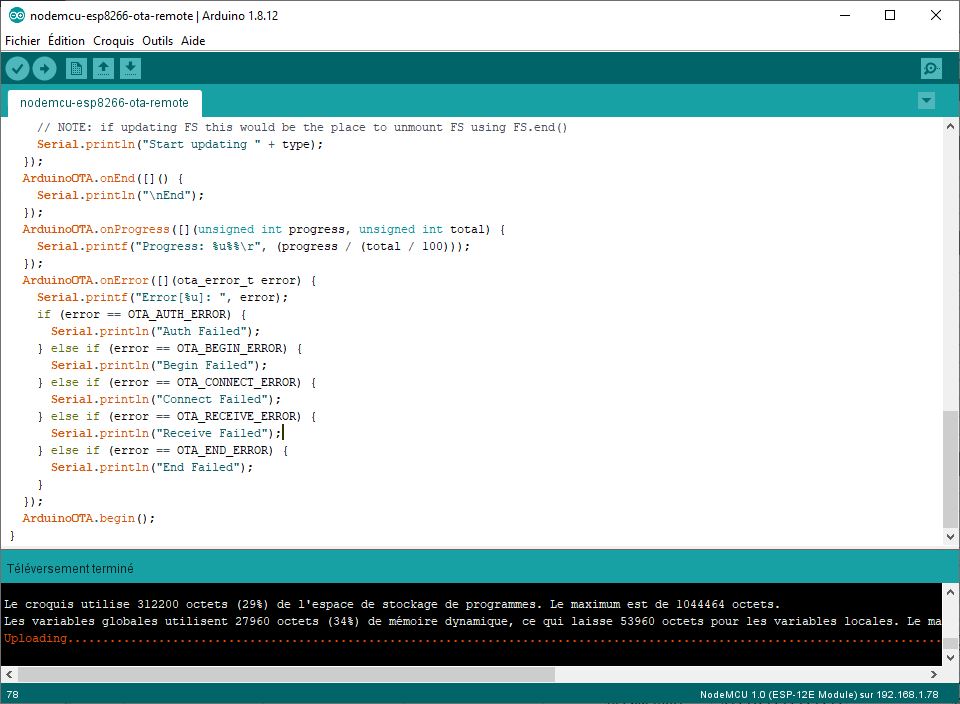
Seleccione novamente a porta de série e abra o monitor de série para verificar se o código foi alterado.

Se a porta de rede não for exibida na IDE Arduino
Se a porta de rede não estiver presente nas opções da IDE Arduino, terá de fazer uma pequena manipulação. Deverá ir ao Network and Sharing Center
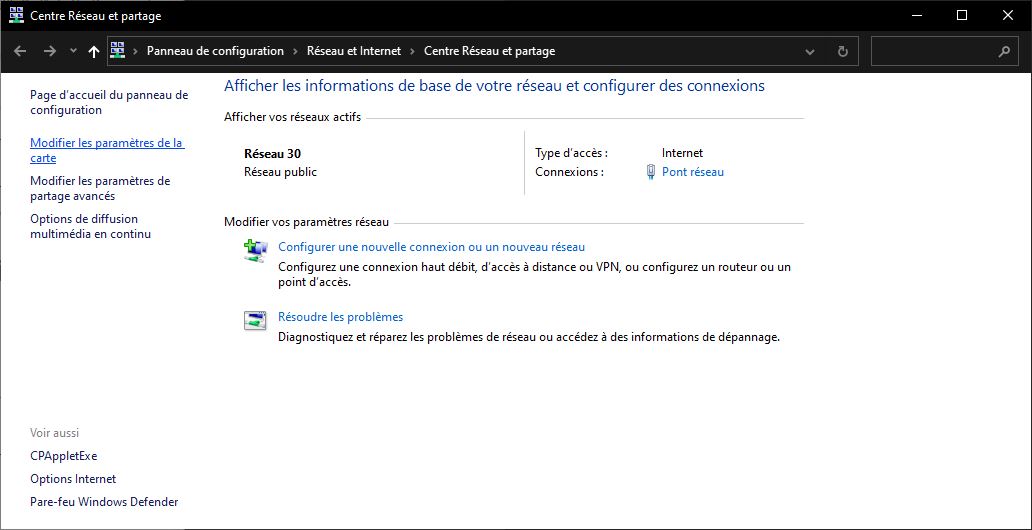
Depois ir para “Modificar configurações do mapa”.
Clique com o botão direito do rato na sua rede e vá às propriedades
Pode então desmarcar o “Internet Protocol versão 6 (TCP
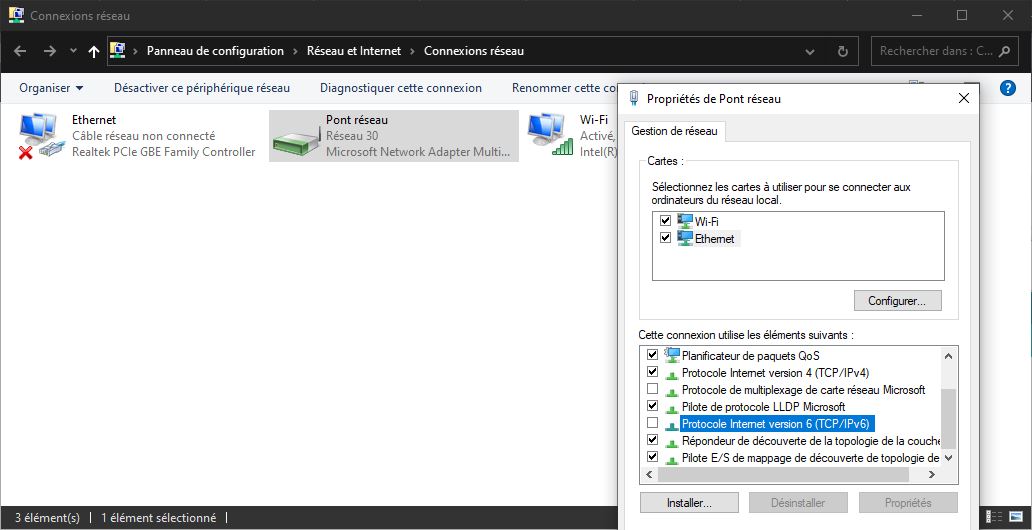
Se voltar ao Arduino IDE, em “Tool > Port” (Ferramenta > Porta) deve ver a opção de porta de rede.
Pode verificar novamente o IPv6 assim que a sua porta de rede for reconhecida.
Bónus: Exibição de mensagem em série na OTA
A possibilidade de carregar um programa via Wi-Fi é muito útil, mas é de notar que se perde a possibilidade de depurar com o monitor de série. É possível criar uma interface Web para visualizar as informações do NodoMCU ESP8266.
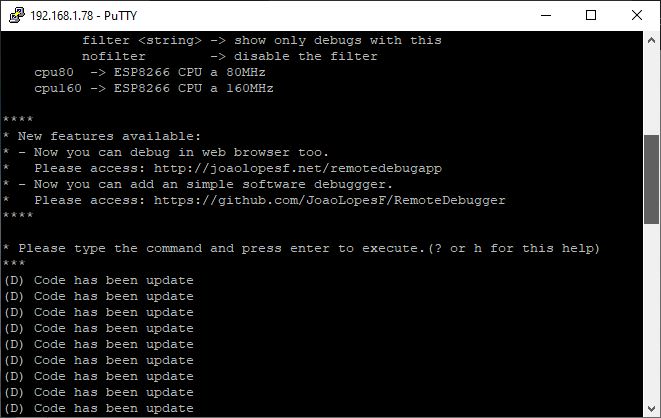
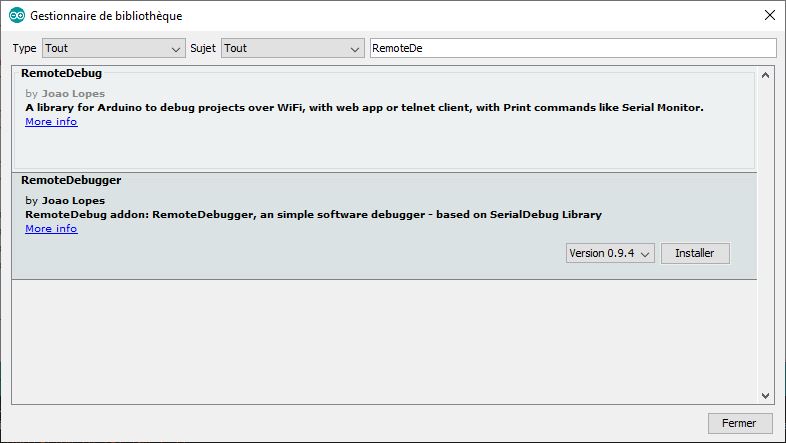
Veremos aqui a utilização da biblioteca RemoteDebug que nos permitirá ligar em telnet ao microcontrolador e recuperar as mensagens enviadas.
- Comece por instalar a biblioteca descarregando o ZIP ou através do gestor da biblioteca.
- Criar um objecto de Depuração Remota; depois de incluir o
- Inicializar o debug com Debug.begin(“ESP8266”);
- Depois substituir todos os Serial.print por Debug.print
#include <ESP8266WiFi.h>
#include <ESP8266mDNS.h>
#include <WiFiUdp.h>
#include <ArduinoOTA.h>
#include <RemoteDebug.h>

const char* ssid = "******";
const char* password = "*******";

RemoteDebug Debug;

unsigned long previousMillis;

void setup() {
  Serial.begin(115200);
  Serial.println("Booting");
  WiFi.mode(WIFI_STA);
  WiFi.begin(ssid, password);
  while (WiFi.waitForConnectResult() != WL_CONNECTED) {
    Serial.println("Connection Failed! Rebooting...");
    delay(5000);
    ESP.restart();
  }

  // init remote debug
  Debug.begin("ESP8266");

  initOTA();

  Serial.println("Ready");
  Serial.print("IP address: ");
  Serial.println(WiFi.localIP());
}

void loop() {
  ArduinoOTA.handle();
  Debug.handle();

  if (millis() - previousMillis >= 500) {
    previousMillis = millis();
    Debug.println(F("Code has been update"));
  }
}

void initOTA() {
  // Port defaults to 8266
  // ArduinoOTA.setPort(8266);

  // Hostname defaults to esp8266-[ChipID]
  //ArduinoOTA.setHostname("ESP8266");

  // No authentication by default
  // ArduinoOTA.setPassword("admin");

  // Password can be set with it's md5 value as well
  // MD5(admin) = 21232f297a57a5a743894a0e4a801fc3
  // ArduinoOTA.setPasswordHash("21232f297a57a5a743894a0e4a801fc3");

  ArduinoOTA.onStart([]() {
    String type;
    if (ArduinoOTA.getCommand() == U_FLASH) {
      type = "sketch";
    } else { // U_FS
      type = "filesystem";
    }

    // NOTE: if updating FS this would be the place to unmount FS using FS.end()
    Serial.println("Start updating " + type);
  });
  ArduinoOTA.onEnd([]() {
    Serial.println("\nEnd");
  });
  ArduinoOTA.onProgress([](unsigned int progress, unsigned int total) {
    Serial.printf("Progress: %u%%\r", (progress / (total / 100)));
  });
  ArduinoOTA.onError([](ota_error_t error) {
    Serial.printf("Error[%u]: ", error);
    if (error == OTA_AUTH_ERROR) {
      Serial.println("Auth Failed");
    } else if (error == OTA_BEGIN_ERROR) {
      Serial.println("Begin Failed");
    } else if (error == OTA_CONNECT_ERROR) {
      Serial.println("Connect Failed");
    } else if (error == OTA_RECEIVE_ERROR) {
      Serial.println("Receive Failed");
    } else if (error == OTA_END_ERROR) {
      Serial.println("End Failed");
    }
  });
  ArduinoOTA.begin();
}
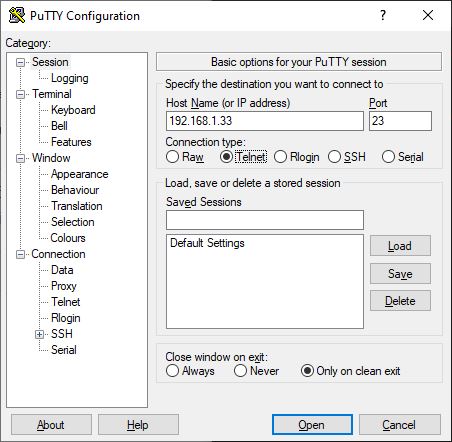
Para visualizar as mensagens enviadas via RemoteDebug, utilizaremos o software PuTTy que já vimos várias vezes antes. Para esta aplicação, configuraremos o PuTTy em telnet utilizando o endereço IP recuperado do monitor de série.