Neste tutorial, veremos como transmitir vídeo a partir de um Raspberry Pi usando o Gstreamer. Uma das ferramentas de streaming mais usadas é o FFMPEG. Estamos a testar o gstreamer aqui porque tem menos atraso na transmissão.
Tutorial de transmissão anterior: Transmissão de vídeo entre duas máquinas com FFMPEG
Hardware
- Raspberry Pi com Raspbian
- Câmara USB ou RPiCam
Instalando o Gstreamer no Raspberry Pi
Parte do Gstreamer é instalado por padrão no Raspbian. Nós simplesmente completaremos a instalação com algumas bibliotecas adicionais.
# install a missing dependency
$ sudo apt-get install libx264-dev libjpeg-dev
# install the remaining plugins
$ sudo apt-get install libgstreamer1.0-dev \
     libgstreamer-plugins-base1.0-dev \
     libgstreamer-plugins-bad1.0-dev \
     gstreamer1.0-plugins-ugly \
     gstreamer1.0-tools \
     gstreamer1.0-gl \
     gstreamer1.0-gtk3
# if you have Qt5 install this plugin
$ sudo apt-get install gstreamer1.0-qt5
# install if you want to work with audio
$ sudo apt-get install gstreamer1.0-pulseaudio
Para testar a instalação, introduza o seguinte comando
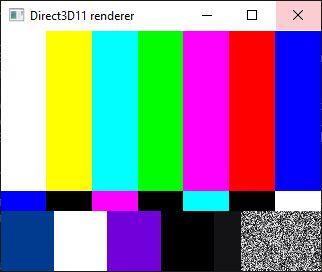
gst-launch-1.0 videotestsrc ! videoconvert ! autovideosink
Procurar dispositivos de vídeo e áudio disponíveis
gst-device-monitor-1.0
Transmissão de vídeo com o Gstreamer
Assim que tiver o nome do dispositivo, pode iniciar o fluxo com o comando
gst-launch-1.0 v4l2src device=/dev/video0 ! video/x-raw, width=640, height=480, framerate=30/1 ! videoconvert ! videoscale ! clockoverlay time-format="%D %H:%M:%S" ! autovideosink
Enviamos o fluxo de vídeo utilizando o protocolo UDP a partir de um Raspberry Pi
gst-launch-1.0 v4l2src device=/dev/video0 num-buffers=-1 ! video/x-raw, width=640, height=480, framerate=30/1 ! clockoverlay time-format="%D %H:%M:%S" ! videoconvert ! jpegenc ! udpsink host=192.168.1.70 port=5200
Recebemos o fluxo UDP do cliente (192.168.1.70) usando o comando
gst-launch-1.0 udpsrc port=5200 ! jpegdec ! videoconvert ! autovideosink
Para guardar o fluxo de vídeo num ficheiro
gst-launch-1.0 -e v4l2src device=/dev/video0 num-buffers=-1 ! 'image/jpeg,framerate=30/1,width=640,height=480' ! queue ! avimux ! filesink location=video.avi
Instalando o Gstreamer no Windows
Para receber o fluxo de vídeo do Raspberry Pi, utilizamos um computador Windows. Pode utilizar qualquer outro dispositivo (RPi, Android, iOS, macOS).
Para informação, o Gstreamer é instalado no Windows utilizando um instalador msi disponível no sítio.
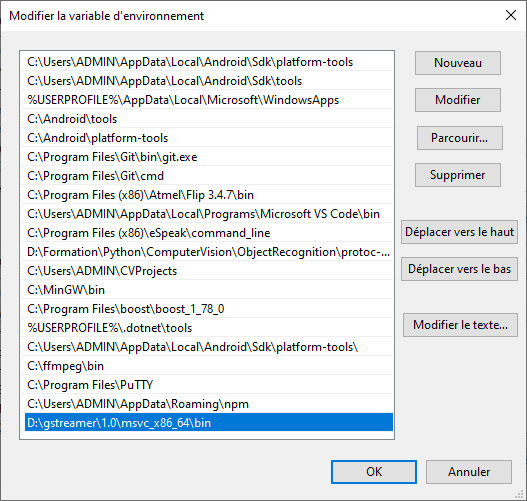
Depois de descarregar e instalar o Gstreamer, é necessário adicionar a pasta C:\gstreamer\1.0\msvc_x86_64\bin à variável de ambiente Path.
Para testar a instalação, introduza o seguinte comando
gst-launch-1.0 videotestsrc ! videoconvert ! autovideosink
Para transmitir vídeo a partir da câmara
gst-launch-1.0 mfvideosrc ! video/x-raw, width=1280, height=720, framerate=30/1 ! videoconvert ! videoscale ! clockoverlay time-format="%D %H:%M:%S" ! video/x-raw, width=640, height=360 ! autovideosink
É possível lançar um fluxo utilizando o protocolo UDP
gst-launch-1.0 mfvideosrc ! video/x-raw, width=1280, height=720, framerate=30/1 ! videoconvert ! videoscale ! clockoverlay time-format="%D %H:%M:%S" ! video/x-raw, width=640, height=360 ! jpegenc ! udpsink host=192.168.1.92 port=5200
Recebemos o fluxo UDP do cliente (192.168.1.92) usando o comando
gst-launch-1.0 udpsrc port=5200 ! jpegdec ! videoconvert ! autovideosink
Instalando o Gstreamer no Ubuntu ou no Debian
Para usar o Gstreamer nas melhores condições, precisamos da biblioteca v4l2
sudo apt install v4l-utils
Num terminal, introduza os seguintes comandos para instalar o gstreamer.
sudo apt-get install libgstreamer1.0-dev libgstreamer-plugins-base1.0-dev libgstreamer-plugins-bad1.0-dev gstreamer1.0-plugins-base gstreamer1.0-plugins-good gstreamer1.0-plugins-bad gstreamer1.0-plugins-ugly gstreamer1.0-libav gstreamer1.0-tools gstreamer1.0-x gstreamer1.0-alsa gstreamer1.0-gl gstreamer1.0-gtk3 gstreamer1.0-qt5 gstreamer1.0-pulseaudio
Para testar a instalação, introduza o seguinte comando
gst-launch-1.0 videotestsrc ! videoconvert ! autovideosink
Para iniciar o fluxo de vídeo a partir do Ubuntu, execute o seguinte comando
gst-launch-1.0 v4l2src name="/dev_video0" ! decodebin ! videoconvert ! videoscale ! clockoverlay time-format="%D %H:%M:%S" ! video/x-raw,format=RGB ! queue ! videoconvert !
N.B.: não se esqueça de adicionar decodebin
É possível lançar um fluxo utilizando o protocolo UDP
gst-launch-1.0 v4l2src name="/dev_video0" num-buffers=-1 ! decodebin ! videoconvert ! videoscale ! clockoverlay time-format="%D %H:%M:%S" ! video/x-raw,format=RGB ! queue ! videoconvert ! jpegenc ! udpsink host=192.168.1.70 port=5200
Recebemos o fluxo UDP do cliente (192.168.1.70) usando o comando
gst-launch-1.0 udpsrc port=5200 ! jpegdec ! videoconvert ! autovideosink
Fontes
- Transferências do GStreamer
- Qengineering ref