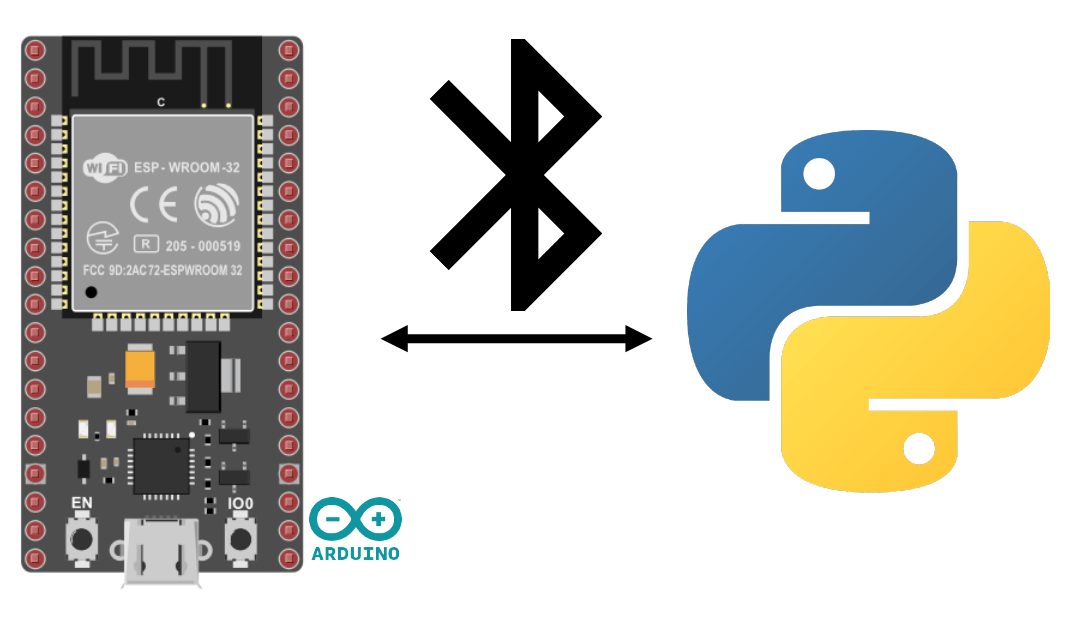
Dans ce tutoriel, nous allons apprendre comment activer et gérer le Bluetooth Low Energy(BLE) sur un ESP32 en utilisant le langage de programmation Arduino.
Le Bluetooth Low Energy est une version du bluetooth à faible énergie qui permet d’envoyer des petits paquets de données à intervalle régulier.
Matériels
- Un module ESP32 (Bluetooth+Wifi embarqué)
- Un ordinateur avec Python installé ou smartphone
- Câble USB pour la connexion ESP32-ordinateur
Environnement et Configuration de l’IDE
Pour programmer votre ESP32 avec l’IDE Arduino, vous pouvez suivre ce tutoriel précédent.
Communication Série via BLE
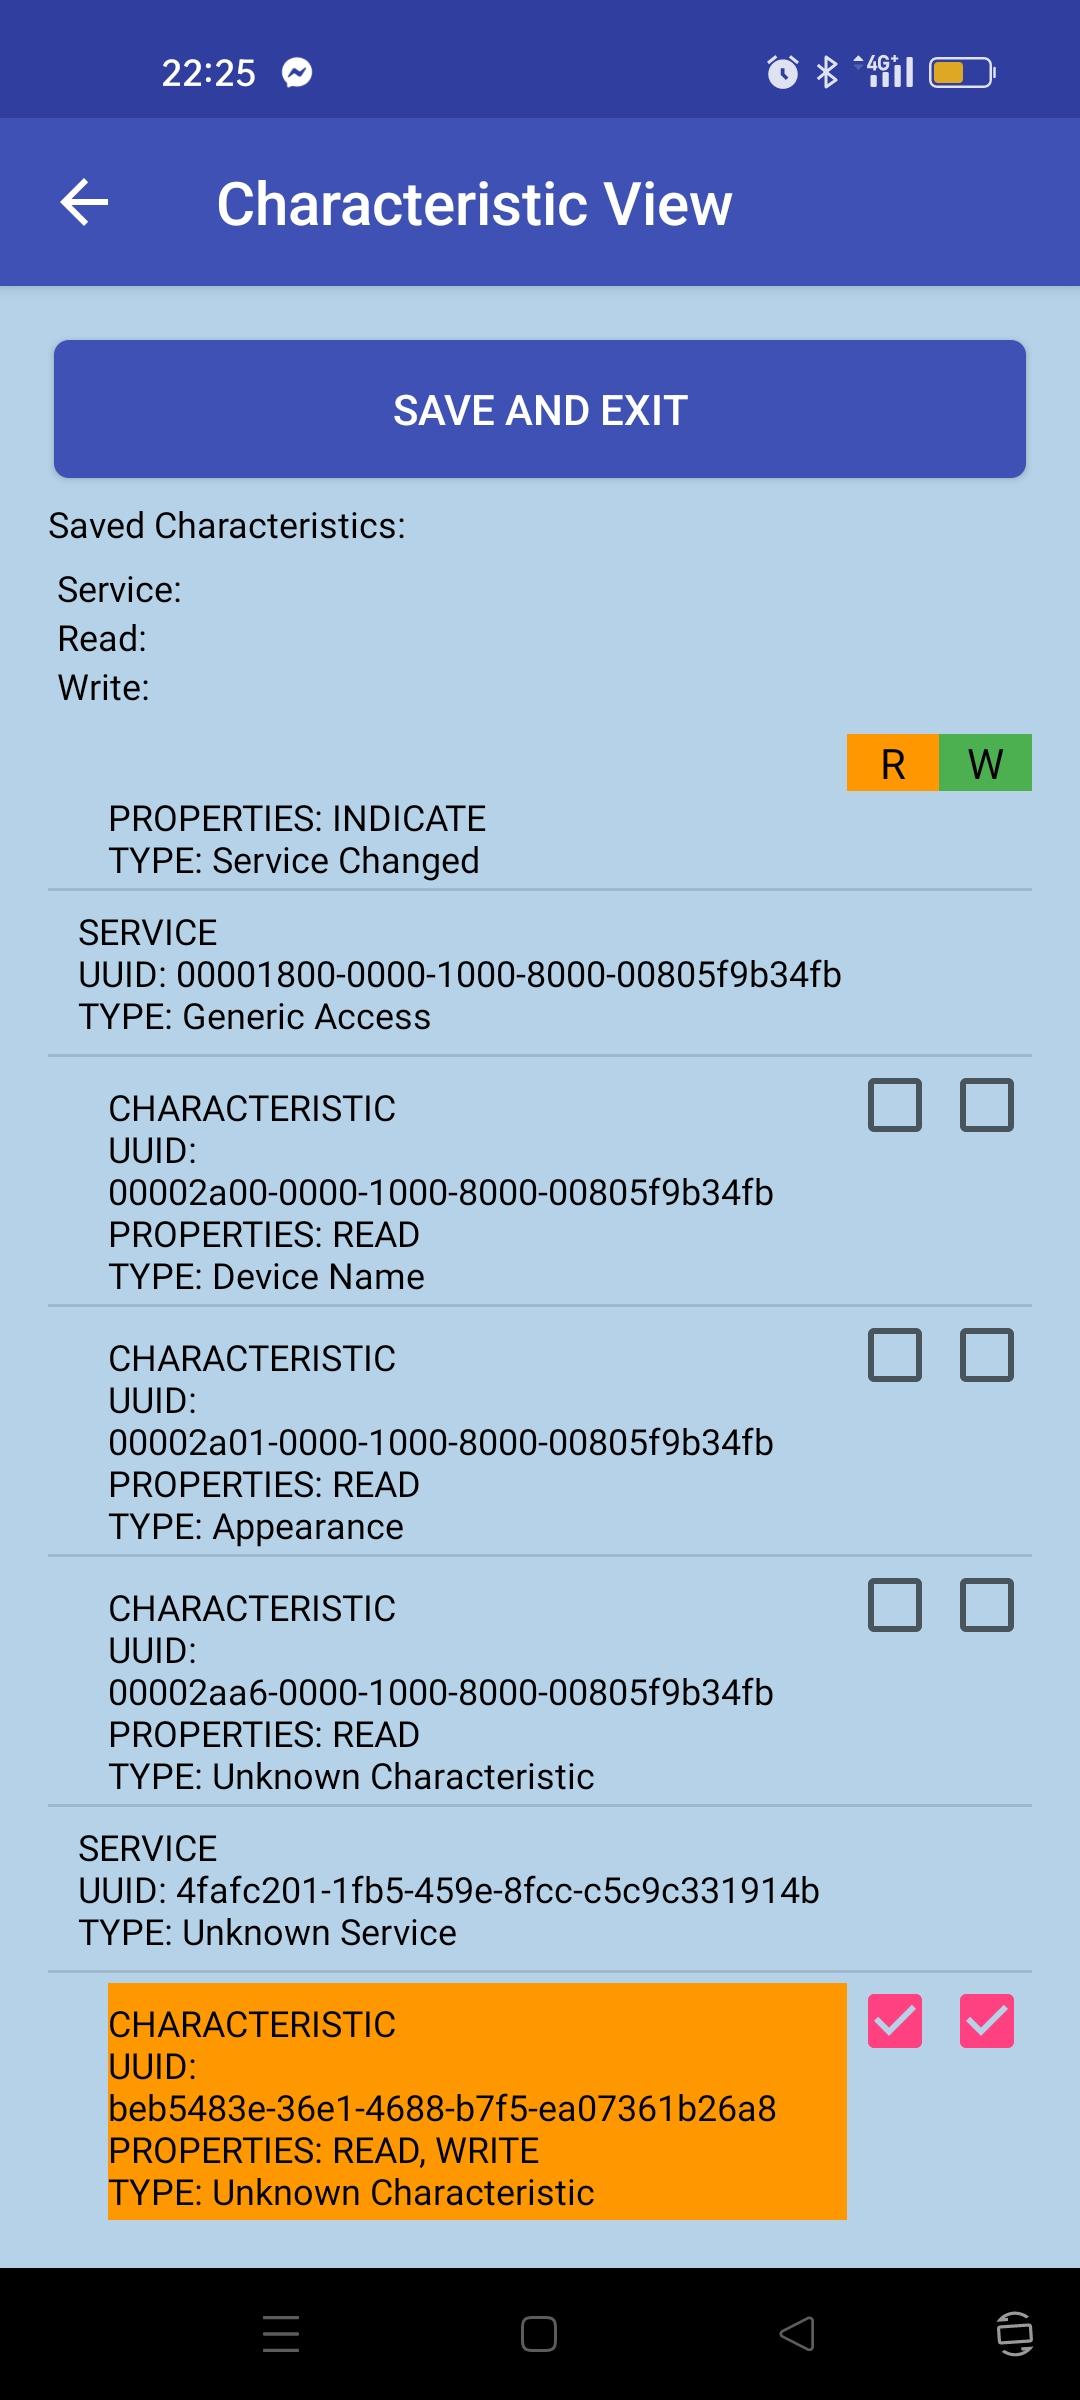
La communication BLE doit être configuré avec un certains nombre d’adresses (UIID) qui sont comme des registres mémoires dans lesquels nous allons pouvoir lire et/ou écrire. Dans l’exemple, nous définissons un service avec une caractéristique disponible en lecture et en écriture. Nous pourrons donc écrire et lire cette valeur en adressant directement l’uiid CHARACTERISTIC_UUID.
//https://github.com/espressif/arduino-esp32/tree/master/libraries/BLE

#include <BLEDevice.h>
#include <BLEUtils.h>
#include <BLEServer.h>

// See the following for generating UUIDs:
// https://www.uuidgenerator.net/

#define SERVICE_UUID        "4fafc201-1fb5-459e-8fcc-c5c9c331914b"
#define CHARACTERISTIC_UUID "beb5483e-36e1-4688-b7f5-ea07361b26a8"


class MyCallbacks: public BLECharacteristicCallbacks {
    void onWrite(BLECharacteristic *pCharacteristic) {
      std::string value = pCharacteristic->getValue();

      if (value.length() > 0) {
        Serial.println("*********");
        Serial.print("New value: ");
        for (int i = 0; i < value.length(); i++)
          Serial.print(value[i]);

        Serial.println();
        Serial.println("*********");
      }
    }
};

void setup() {
  Serial.begin(115200);

  Serial.println("1- Download and install an BLE Terminal FREE");
  Serial.println("2- Scan for BLE devices in the app");
  Serial.println("3- Connect to ESP32BLE");
  Serial.println("4- Go to CUSTOM CHARACTERISTIC in CUSTOM SERVICE and write something");

  BLEDevice::init("ESP32BLE");
  BLEServer *pServer = BLEDevice::createServer();

  BLEService *pService = pServer->createService(SERVICE_UUID);

  BLECharacteristic *pCharacteristic = pService->createCharacteristic(
                                         CHARACTERISTIC_UUID,
                                         BLECharacteristic::PROPERTY_READ |
                                         BLECharacteristic::PROPERTY_WRITE
                                       );

  pCharacteristic->setCallbacks(new MyCallbacks());

  pCharacteristic->setValue("Hello World");
  pService->start();

  BLEAdvertising *pAdvertising = pServer->getAdvertising();
  pAdvertising->start();

  Serial.print("Server address:");
  Serial.println(BLEDevice::getAddress().toString().c_str());
}

void loop() {
  // put your main code here, to run repeatedly:
  delay(2000);
}
N.B.: il est possible de récupérer l’adresse MAC de l’ESP32 avec la fonction BLEDevice::getAddress().toString().c_str()
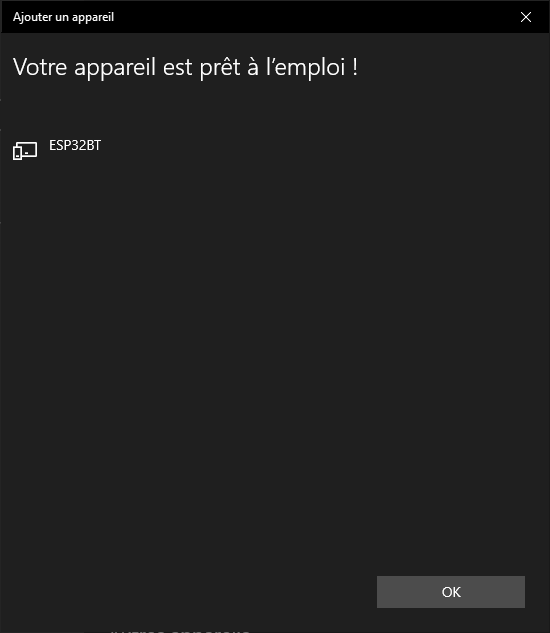
Appairage
Une fois la configuration du module effectuée comme vous le désirez, vous pouvez appairé l’ESP32 avec le système de votre choix comme n’importe quel périphérique Bluetooth. Sélectionnez le nom dans la liste des périphériques détectés (nom ESP32BLE)
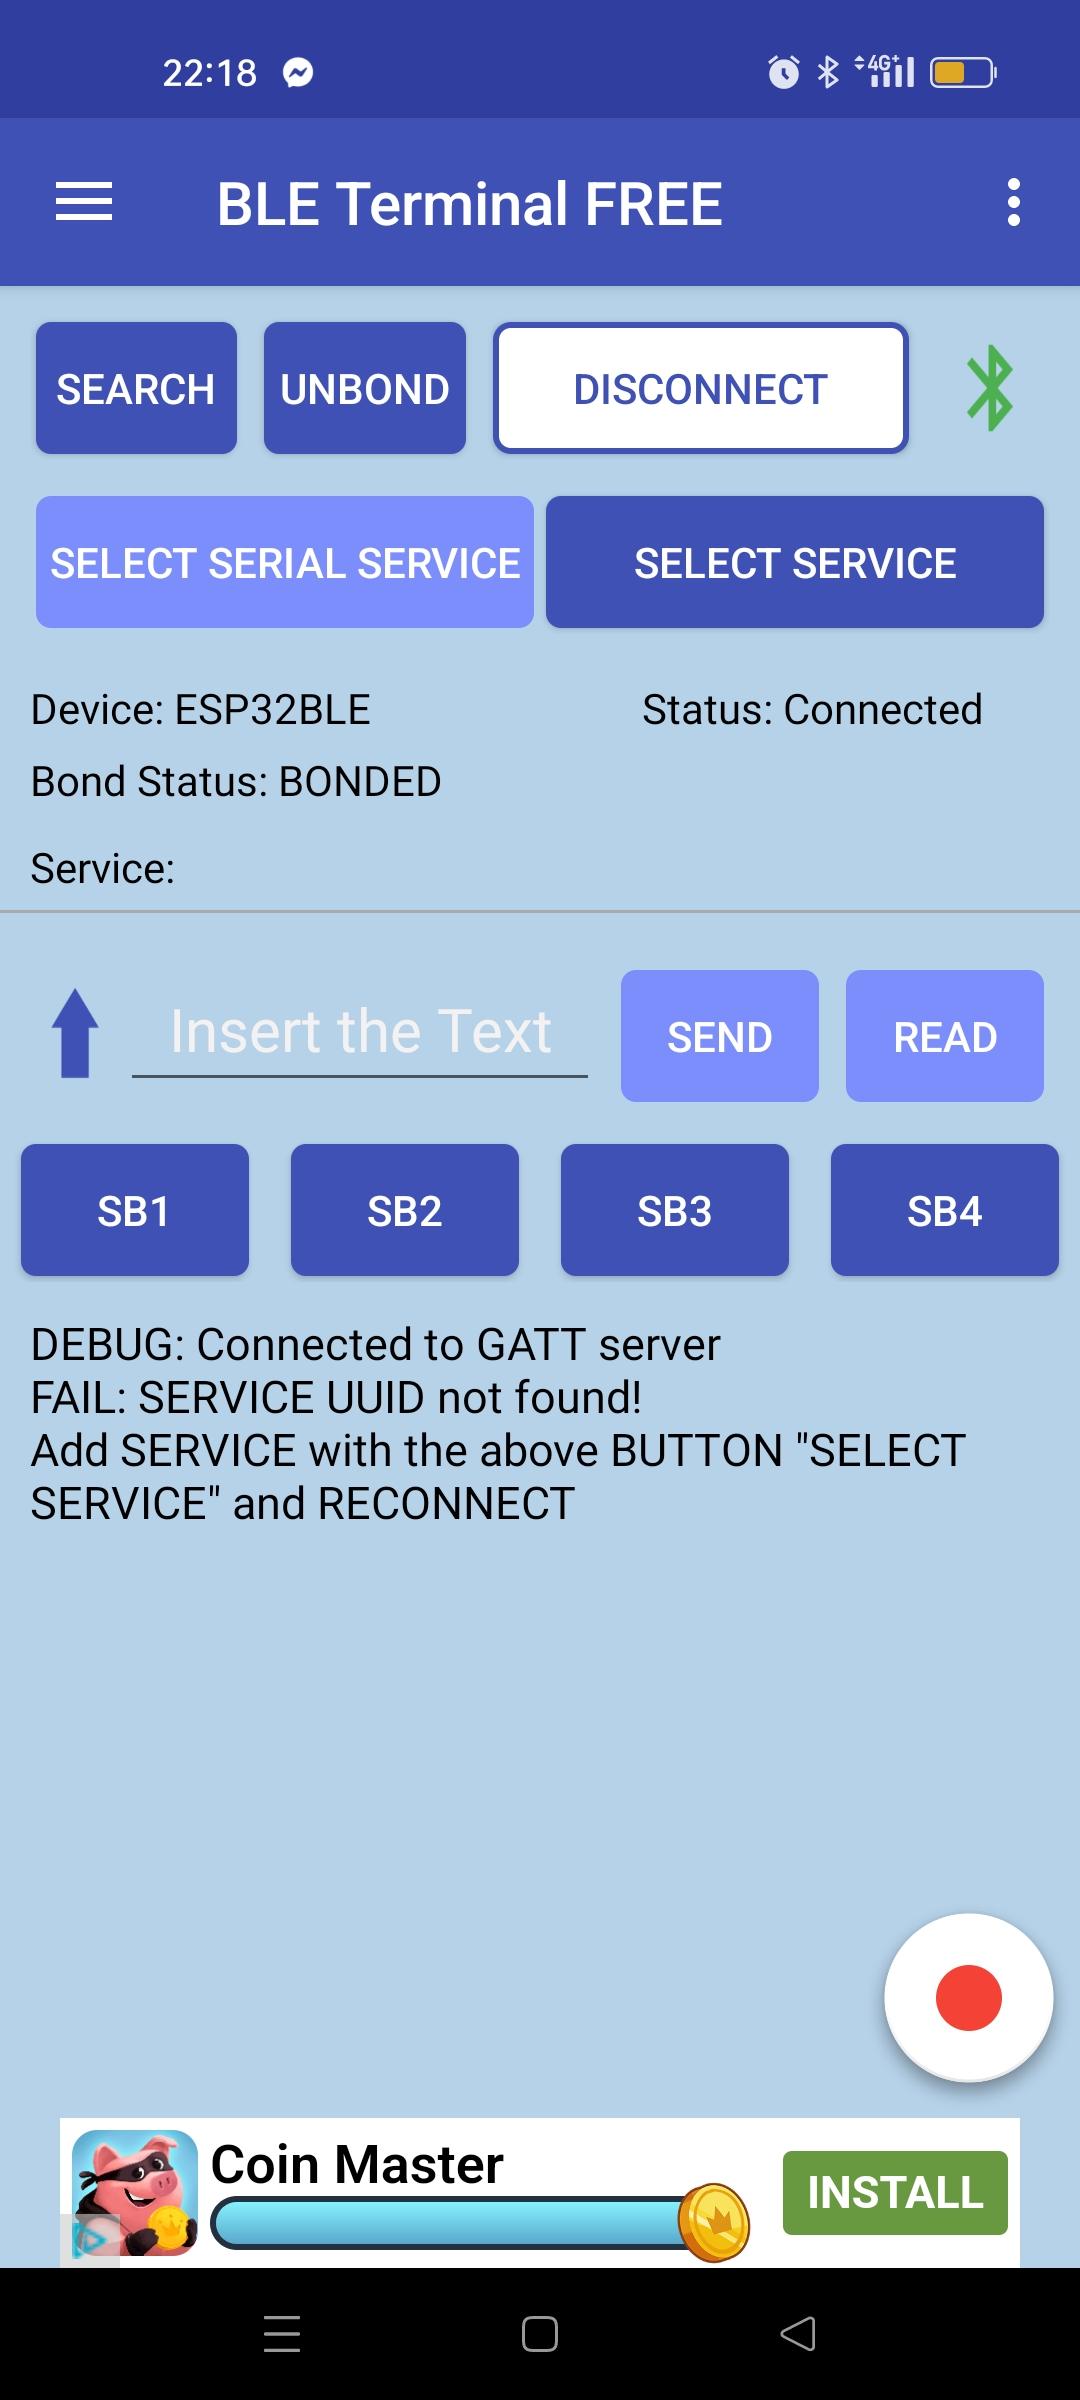
Test de la communication BLE à l’aide de BLE Terminal
Nous allons tester la communication BLE à l’aide de l’application BLE Terminal
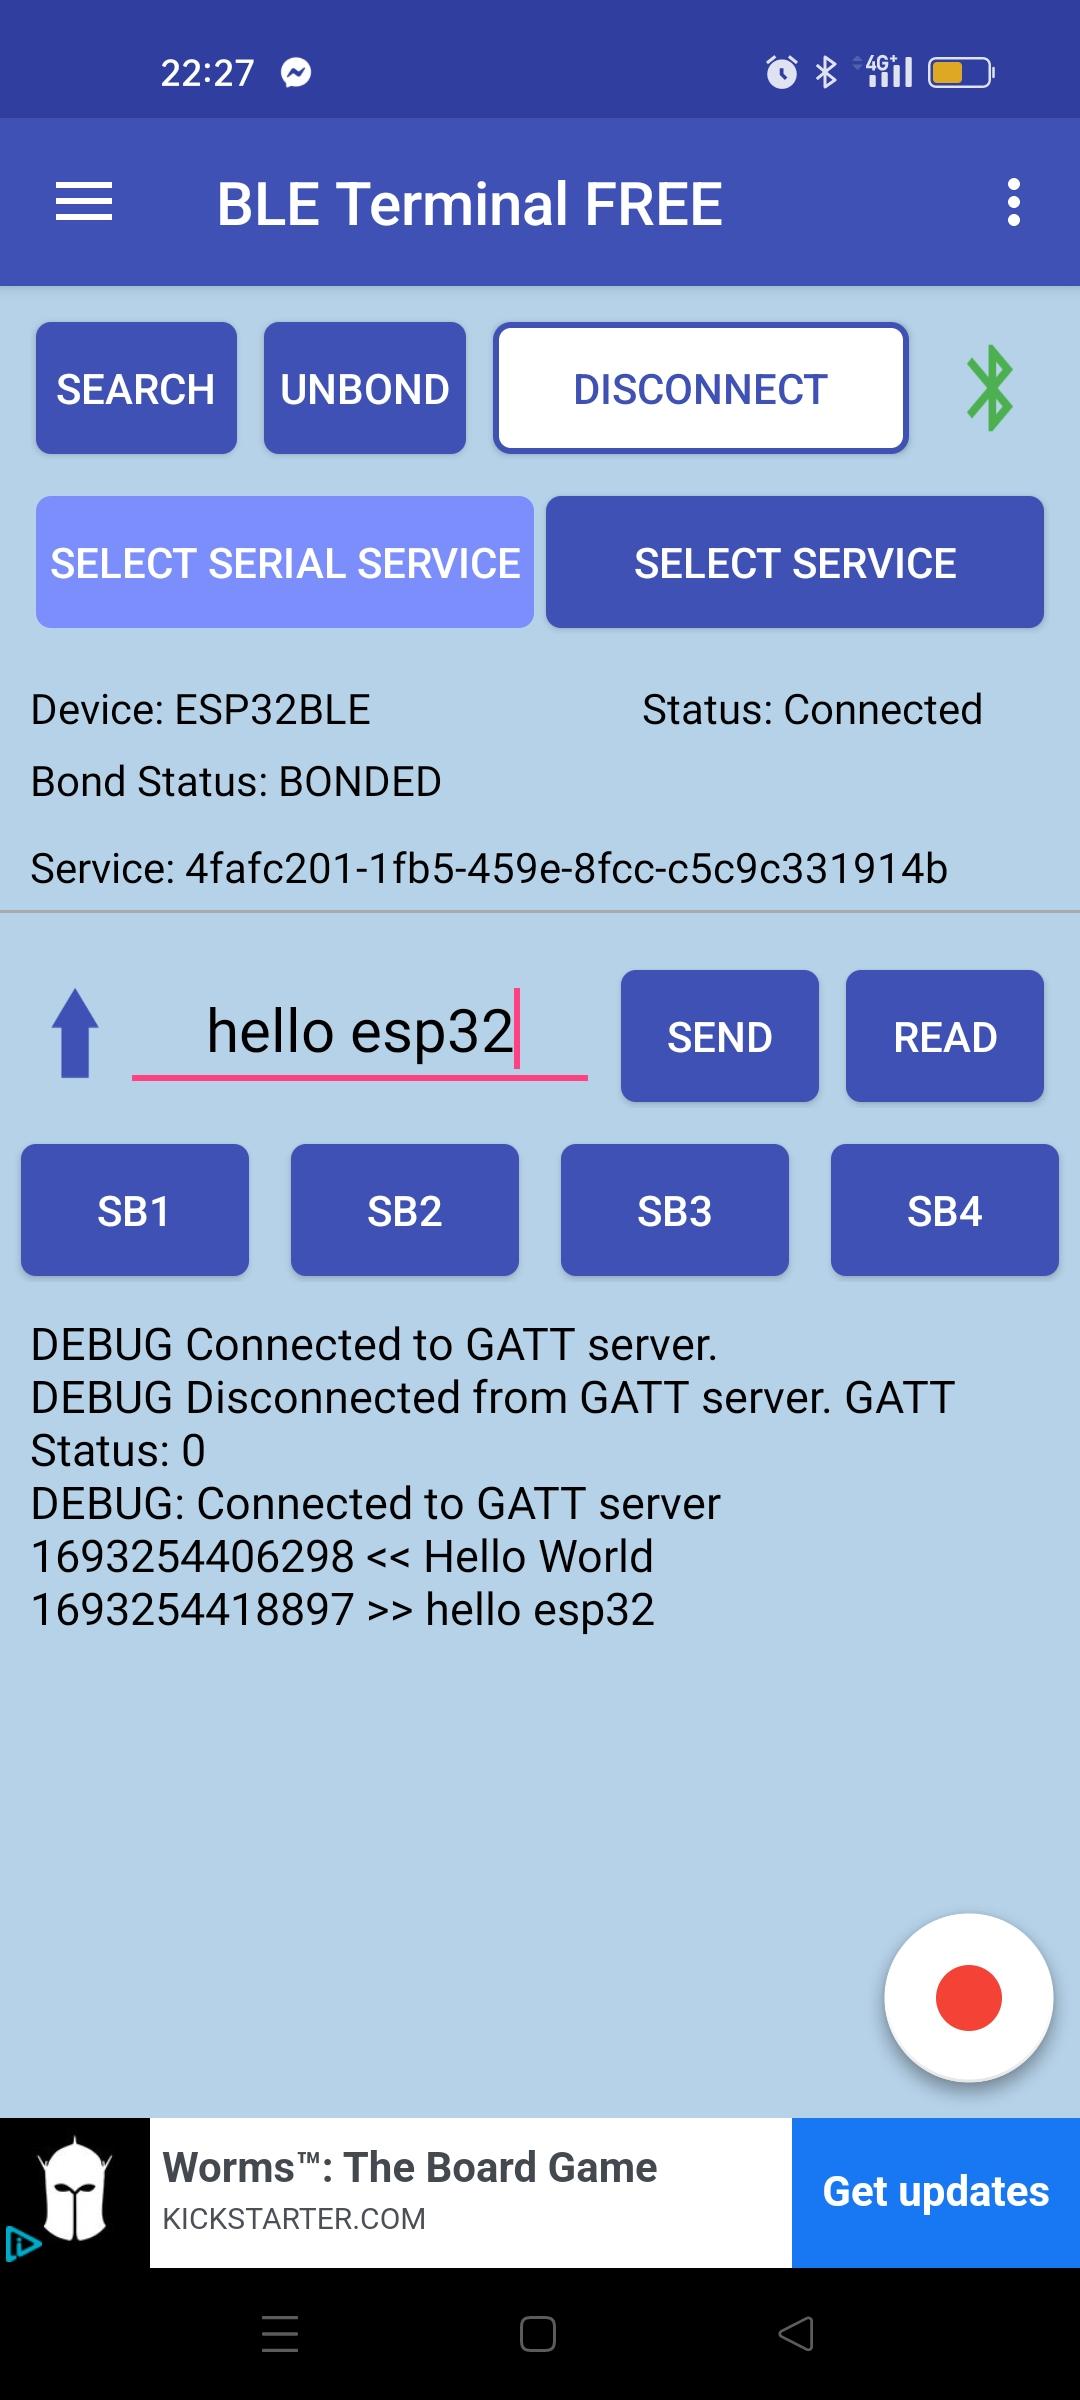

Le message est bien échangé entre le téléphone et l’ESP32 via Bluetooth LE
Communication bidirectionnel entre appareil et ESP32BLE
Voici le code permettant de modifier la valeur de la caractéristique à l’aide du moniteur série. Ainsi l’appareil connecté et le moniteur série viennent modifier la valeur de la caractéristique.
#include <BLEDevice.h>
#include <BLEUtils.h>
#include <BLEServer.h>

// See the following for generating UUIDs:
// https://www.uuidgenerator.net/

#define SERVICE_UUID        "4fafc201-1fb5-459e-8fcc-c5c9c331914b"
#define CHARACTERISTIC_UUID "beb5483e-36e1-4688-b7f5-ea07361b26a8"

BLECharacteristic *pCharacteristic = NULL;

std::string msg;

class MyCallbacks: public BLECharacteristicCallbacks {
    void onWrite(BLECharacteristic *pCharacteristic) {
      std::string value = pCharacteristic->getValue();

      if (value.length() > 0) {
        Serial.println("*********");
        Serial.print("New value: ");
        for (int i = 0; i < value.length(); i++)
          Serial.print(value[i]);

        Serial.println();
        Serial.println("*********");
      }
    }
};

void setup() {
  Serial.begin(115200);

  Serial.println("1- Download and install an BLE Terminal Free");
  Serial.println("2- Scan for BLE devices in the app");
  Serial.println("3- Connect to ESP32BLE");
  Serial.println("4- Go to CUSTOM CHARACTERISTIC in CUSTOM SERVICE and write something");

  BLEDevice::init("ESP32BLE");
  BLEServer *pServer = BLEDevice::createServer();

  BLEService *pService = pServer->createService(SERVICE_UUID);

  pCharacteristic = pService->createCharacteristic(
                                         CHARACTERISTIC_UUID,
                                         BLECharacteristic::PROPERTY_READ |
                                         BLECharacteristic::PROPERTY_WRITE
                                       );

  pCharacteristic->setCallbacks(new MyCallbacks());

  pCharacteristic->setValue("Hello World");
  pService->start();

  BLEAdvertising *pAdvertising = pServer->getAdvertising();
  pAdvertising->addServiceUUID(SERVICE_UUID);
  pAdvertising->setScanResponse(true);
  pAdvertising->setMinPreferred(0x06);  // functions that help with iPhone connections issue
  pAdvertising->setMinPreferred(0x12);
  pAdvertising->start();

  Serial.print("Server address:");
  Serial.println(BLEDevice::getAddress().toString().c_str());
}

void loop() {
  readSerialPort();

  //Send data to slave
  if(msg!=""){
    pCharacteristic->setValue(msg);
    msg="";
  }

  delay(2000);
}

void readSerialPort(){
 while (Serial.available()) {
   delay(10);
   if (Serial.available() >0) {
     char c = Serial.read();  //gets one byte from serial buffer
     msg += c; //add to String
   }
 }
 Serial.flush(); //clean buffer
}
En pratique, il sera certainement préférable d’utiliser un service pour l’écriture et un service pour la lecture.
Communiquer entre ESP32 et Python via BLE
Vous pouvez gérer la communication Bluetooth Low Energy depuis votre PC.
Pour cela installer le paquet Bleak
python -m pip install bleakDetect bluetooth devices
import asyncio
from bleak import BleakScanner

async def main():
	target_name = "ESP32BLE"
	target_address = None

	devices = await BleakScanner.discover()
	for d in devices:
		print(d)
		if target_name == d.name:
			target_address = d.address
			print("found target {} bluetooth device with address {} ".format(target_name,target_address))
			break
asyncio.run(main())
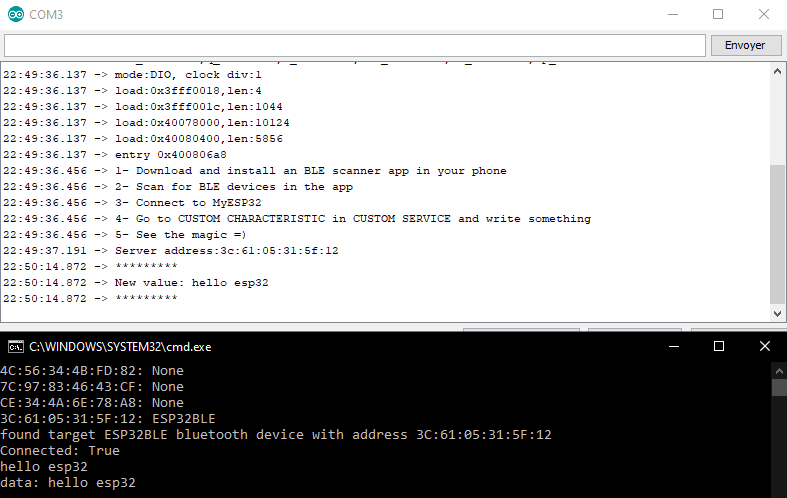
Output
C1:2E:C6:8E:47:E8: None
3C:61:05:31:5F:12: ESP32BLE
found target ESP32BLE bluetooth device with address 3C:61:05:31:5F:12
Se connecter et communiquer avec l’ESP32
Voici un script Python pour se connecter automatiquement à l’appareil BLE ESP32 depuis un PC. Pour communiquer avec l’appareil BLE, il est important de connaître les uiid des différents services. Nous définissons les UUID comme ceux définis dans le code de l’ESP32
import asyncio
from bleak import BleakScanner
from bleak import BleakClient

async def main():
	target_name = "ESP32BLE"
	target_address = None

	SERVICE_UUID=        "4fafc201-1fb5-459e-8fcc-c5c9c331914b"
	CHARACTERISTIC_UUID= "beb5483e-36e1-4688-b7f5-ea07361b26a8"

	devices = await BleakScanner.discover()
	for d in devices:
		print(d)
		if target_name == d.name:
			target_address = d.address
			print("found target {} bluetooth device with address {} ".format(target_name,target_address))
			break

	if target_address is not None:
		async with BleakClient(target_address) as client:
			print(f"Connected: {client.is_connected}")

			while 1:
				text = input()
				if text == "quit":
					break

				await client.write_gatt_char(CHARACTERISTIC_UUID, bytes(text, 'UTF-8'), response=True)

				try:
					data = await client.read_gatt_char(CHARACTERISTIC_UUID)
					data = data.decode('utf-8') #convert byte to str
					print("data: {}".format(data))
				except Exception:
					pass


	else:
		print("could not find target bluetooth device nearby")


asyncio.run(main())
Créer des caractéristiques, descripteurs et services
Le principe du BLE repose sur l’envoie de petits paquets de données contrairement au Bluetooth classique qui permet l’envoie de données en continu. En ce sens, vous pouvez créer des services et/ou des caractéristiques différentes en fonctions des données échangées. Si, par exemple, vous avez plusieurs capteurs branchés à l’ESP32, vous pouvez créer une caractéristique par capteur.
Chaque caractéristique est identifiée par UUID (16 bytes Universally Unique IDentifier) et gérée par un service.
Chaque service peut gérer par défaut 7 caractéristiques (15 handles au total, deux pour une caractéristique et un pour un descripteur)
Il est possible d’augmenter ce nombre à la création du service
BLEService* pService = pServer->createService(BLEUUID(SERVICE_UUID), 32); // 32 available handles
Nous créons donc les variables et fonctions nécessaires pour la gestions de 3 caractéristiques supplémentaires
- Points (pPoints, PtsCallbacks)
- IP (pIP, IpCallbacks)
- EEPROM (pEeprom, EeCallbacks)
Pour définir les UUD, nous utilisons le site uuid-generator
/*
    Based on Neil Kolban example for IDF: https://github.com/nkolban/esp32-snippets/blob/master/cpp_utils/tests/BLE%20Tests/SampleWrite.cpp
    Ported to Arduino ESP32 by Evandro Copercini
*/

#include <BLEDevice.h>
#include <BLEUtils.h>
#include <BLEServer.h>

// See the following for generating UUIDs:
// https://www.uuidgenerator.net/

#define SERVICE_UUID        "4fafc201-1fb5-459e-8fcc-c5c9c331914b"
#define CHARACTERISTIC_UUID "beb5483e-36e1-4688-b7f5-ea07361b26a8"

#define POINTS_UUID "ff0a1ece-8a3a-4dc8-bfb8-eae1371dc3fb"
#define IP_UUID "ff673592-0b83-4151-a871-7d222c9dab3c"
#define EEPROM_UUID "5056c1b6-f123-4ade-aa77-9b7f44c717eb"

BLECharacteristic *pCharacteristic = NULL;
BLECharacteristic* pPoints = NULL;
BLECharacteristic* pIP = NULL;
BLECharacteristic* pEeprom = NULL;

std::string msg;
bool deviceConnected = false;
bool oldDeviceConnected = false;

class MyCallbacks: public BLECharacteristicCallbacks {
    void onWrite(BLECharacteristic *pCharacteristic) {
      std::string value = pCharacteristic->getValue();

      if (value.length() > 0) {
        Serial.print("Charac value: ");
        for (int i = 0; i < value.length(); i++)
          Serial.print(value[i]);

        Serial.println();
      }
    }

};
class PtsCallbacks: public BLECharacteristicCallbacks {
    void onWrite(BLECharacteristic *pPoints) {
      std::string value = pPoints->getValue();

      if (value.length() > 0) {
        Serial.print("Points value: ");
        for (int i = 0; i < value.length(); i++)
          Serial.print(value[i]);

        Serial.println();
      }
    }

};
class IpCallbacks: public BLECharacteristicCallbacks {
    void onWrite(BLECharacteristic *pIP) {
      std::string value = pIP->getValue();

      if (value.length() > 0) {
        Serial.print("IP value: ");
        for (int i = 0; i < value.length(); i++)
          Serial.print(value[i]);

        Serial.println();
      }
    }

};
class EeCallbacks: public BLECharacteristicCallbacks {
    void onWrite(BLECharacteristic *pEeprom) {
      std::string value = pEeprom->getValue();

      if (value.length() > 0) {
        Serial.print("EEPROM value: ");
        for (int i = 0; i < value.length(); i++)
          Serial.print(value[i]);

        Serial.println();
      }
    }


};

class MyServerCallbacks: public BLEServerCallbacks {
  void onConnect(BLEServer* pServer) {
    Serial.println("Client connected");
  }
  void onDisconnect(BLEServer* pServer) {
    Serial.println("Client disconnected");
    BLEDevice::startAdvertising(); // needed for reconnection
  }
};

void setup() {
  Serial.begin(115200);

  Serial.println("ESP32BLE server ready");

  BLEDevice::init("ESP32BLE");
  BLEServer *pServer = BLEDevice::createServer();
  pServer->setCallbacks(new MyServerCallbacks());

  BLEService *pService = pServer->createService(SERVICE_UUID);

  //create BLE characteristics
  pCharacteristic = pService->createCharacteristic(
                                         CHARACTERISTIC_UUID,
                                         BLECharacteristic::PROPERTY_READ | BLECharacteristic::PROPERTY_WRITE
                                       );
  pCharacteristic->setCallbacks(new MyCallbacks());
  pCharacteristic->setValue("Hello World");


    // Create a BLE Characteristic
  pPoints = pService->createCharacteristic(
    POINTS_UUID,
    BLECharacteristic::PROPERTY_READ | BLECharacteristic::PROPERTY_WRITE);
  pPoints->setCallbacks(new PtsCallbacks());
  pPoints->setValue("0");
  pIP = pService->createCharacteristic(
    IP_UUID,
    BLECharacteristic::PROPERTY_READ | BLECharacteristic::PROPERTY_WRITE);
  pIP->setCallbacks(new IpCallbacks());
  pIP->setValue("0");
  pEeprom = pService->createCharacteristic(
    EEPROM_UUID,
    BLECharacteristic::PROPERTY_READ | BLECharacteristic::PROPERTY_WRITE);
  pEeprom->setCallbacks(new EeCallbacks());
  pEeprom->setValue("0");

  //start servers
  pService->start();

  BLEAdvertising *pAdvertising = pServer->getAdvertising();
  pAdvertising->addServiceUUID(SERVICE_UUID);
  pAdvertising->setScanResponse(true);
  pAdvertising->setMinPreferred(0x06);  // functions that help with iPhone connections issue
  pAdvertising->setMinPreferred(0x12);
  pAdvertising->start();

  Serial.print("Server address:");
  Serial.println(BLEDevice::getAddress().toString().c_str());
}

void loop() {
  readSerialPort();

  //Send data to slave
  if(msg!=""){
    pCharacteristic->setValue(msg);
    msg="";
  }
}

void readSerialPort(){
 while (Serial.available()) {
   delay(10);
   if (Serial.available() >0) {
     char c = Serial.read();  //gets one byte from serial buffer
     msg += c; //add to String
   }
 }
 Serial.flush(); //clean buffer
}
N.B.: lorsque vous modifier les services et caractéristiques de l’appareil, vous devez l’appairer de nouveau
13:02:48.359 -> ESP32BLE server ready
13:02:49.049 -> Server address:3c:61:05:31:5f:12
13:02:53.967 -> Client connected
13:02:59.679 -> Client disconnected
13:03:16.293 -> Client connected
13:08:15.321 -> Points value: myPoints
13:08:28.964 -> Client disconnected
13:08:34.952 -> Client connected
13:08:48.883 -> IP value: myipaddress
13:08:53.353 -> Client disconnected
13:08:58.916 -> Client connected
13:09:07.574 -> EEPROM value: myeepromval
Application
- Créer un capteur IoT connecté qui envoie des données via BLE
- Créer un Terminal BLE avec React Native