Nous allons voir dans ce tutoriel comment mettre en place un menu de navigation avec différents écrans dans React Native. Pour cela, nous allons utiliser la librairie React Navigation
N.B.: Une autre alternative react-native-navigation existe mais ne fonctionne pas avec mon environnement
Configuration du projet React Native
npm install @react-navigation/native
npm install @react-navigation/native-stack
Puis installez les paquets suivants
npm install --save react-native-screens react-native-safe-area-contextPour utiliser la navigation, vous devez mettre à jour le fichier MainActivity.java
android/app/src/main/java/<your package name>/MainActivity.javaAjouter import android.os.Bundle; au début du fichier
et la fonction onCreate dans la classe MainActivity
  @Override
  protected void onCreate(Bundle savedInstanceState) {
    super.onCreate(null);
  }
MainActivity.java
package com.menuapp;

import com.facebook.react.ReactActivity;
import com.facebook.react.ReactActivityDelegate;
import com.facebook.react.defaults.DefaultNewArchitectureEntryPoint;
import com.facebook.react.defaults.DefaultReactActivityDelegate;

import android.os.Bundle;

public class MainActivity extends ReactActivity {

  /**
   * Returns the name of the main component registered from JavaScript. This is used to schedule
   * rendering of the component.
   */
  @Override
  protected String getMainComponentName() {
    return "MenuApp";
  }

  /**
   * Returns the instance of the {@link ReactActivityDelegate}. Here we use a util class {@link
   * DefaultReactActivityDelegate} which allows you to easily enable Fabric and Concurrent React
   * (aka React 18) with two boolean flags.
   */
  @Override
  protected ReactActivityDelegate createReactActivityDelegate() {
    return new DefaultReactActivityDelegate(
        this,
        getMainComponentName(),
        // If you opted-in for the New Architecture, we enable the Fabric Renderer.
        DefaultNewArchitectureEntryPoint.getFabricEnabled());
  }

  @Override
  protected void onCreate(Bundle savedInstanceState) {
    super.onCreate(null);
  }
}
Code principal de l’application
Dans le code principal de l’application, index.js ou App.tsx, nous importons l’objet NavigationContainer. Pour l’utiliser, ils suffit d’entourer le code de rendu avec le tag correspondant. Dans cet exemple, nous définissons deux pages avec chacune un bouton permettant de se rendre à l’autre page.
import * as React from 'react';
import { View, Button, Text } from 'react-native';
import { NavigationContainer } from '@react-navigation/native';
import { createNativeStackNavigator } from '@react-navigation/native-stack';

function HomeScreen({ navigation }) {
  return (
    <View style={{ flex: 1, alignItems: 'center', justifyContent: 'center' }}>
      <Text>Home Screen</Text>
      <Button
        title="Go to Details"
        onPress={() => navigation.navigate('Details')}
      />
    </View>
  );
}

function DetailsScreen({ navigation }) {
  return (
    <View style={{ flex: 1, alignItems: 'center', justifyContent: 'center' }}>
      <Text>Details Screen</Text>
      <Button
        title="Go to Details... again"
        onPress={() => navigation.push('Details')}
      />
      <Button title="Go to Home" onPress={() => navigation.navigate('Home')} />
      <Button title="Go back" onPress={() => navigation.goBack()} />
    </View>
  );
}
const Stack = createNativeStackNavigator();

function App() {
  return (
    <NavigationContainer>
      <Stack.Navigator initialRouteName="Home">
        <Stack.Screen name="Home" component={HomeScreen} options={{ headerShown: false }}/>
        <Stack.Screen name="Details" component={DetailsScreen} />
      </Stack.Navigator>
    </NavigationContainer>
  );
}

export default App;
N.B.: vous pouvez afficher ou non la barre de navigation avec l’option headerShown: false
Exemple: Création d’un menu
Dans cet exemple, nous allons créer une application simple pour afficher différents écrans. Ces écrans parte d’une même composant qui est adapté en fonction des informations contenus dans une liste.
Tout d’abord nous créons un array contenant toutes les informations dont nous avons besoin
const screensArr = [
  {
    id: 1,
    color: "blue",
    text: "Screen 1",
    items: ["item1","item2"]
  },
  {
    id: 2,
    color: "red",
    text: "Screen 2",
    items: ["item2","item3"]
  },
  {
    id: 3,
    color: "green",
    text: "Screen 3",
    items: ["item1","item2","item3"]
  },
];
Composant principal
Dans le composant principal, nous créons une liste d’écran Stack.Screen à partir de l’Array screensArr
const Stack = createNativeStackNavigator();

function App() {

  const screensListArr = screensArr.map(buttonInfo => (
    <Stack.Screen
    key={buttonInfo.id}
    name={buttonInfo.text}
    component={DetailsScreen}
    options={{
      headerStyle: {
        backgroundColor: buttonInfo.color,
      },
      headerTintColor: '#fff',
      headerTitleStyle: {
        fontWeight: 'bold',
      },
    }}
    />
  ));

  return (
    <NavigationContainer>
      <Stack.Navigator initialRouteName="Home">
        <Stack.Screen name="Home" component={HomeScreen} options={{ headerShown: false }}/>
        {/*<Stack.Screen name="Details" component={DetailsScreen} />*/}
        {screensListArr}
      </Stack.Navigator>
    </NavigationContainer>
  );
}

export default App;
Écran Home
Nous créons ensuite l’écran principal qui contient les boutons permettant de naviguer vers les autres écrans
Sur cet écran, nous ajoutons un bouton pour chaque écran avec la fonction buttonListArr que nous personnalisons avec les données contenu dans screensArr.
function HomeScreen({ navigation }) {
  const menuItemClick = (buttonInfo: { id: any; color?: string; text: any; }) => {
    console.log(buttonInfo.id,' clicked :',buttonInfo.text);
    navigation.navigate(buttonInfo.text,buttonInfo); //'Details')
  };

  const buttonsListArr = screensArr.map(buttonInfo => (
    <Button
    key={buttonInfo.id}
    text={buttonInfo.text}
    onPress={() => menuItemClick(buttonInfo)}
    btnStyle={[styles.menuBtn,{backgroundColor:buttonInfo.color}]}
    btnTextStyle={styles.menuText}
    />
  ));


  return (
      <ScrollView>
        <View style={styles.mainBody}>
        {buttonsListArr}
        </View>
      </ScrollView>

  );
}
N.B.: notez qu’il y a une seule fonction pour gérer plusieurs boutons menuItemClick(buttonInfo)
Écran Details
Enfin, nous créons la fonction DetailsScreen qui va contenir les informations à afficher pour chaque page.
Nous passons les paramètres de la page lors du l’appel du changement de page
navigation.navigate(buttonInfo.text,buttonInfo);
const buttonInfo = route.params;
function DetailsScreen({ route, navigation }) {
const buttonInfo = route.params;
const itemsListArr = buttonInfo.items.map(item => (
<View key={item} style={{marginTop:10,marginBottom:10,flexDirection:'row', width: "100%", borderBottomWidth: 1,borderBottomColor:"white",}} >
<Text style={{marginBottom:5,fontSize: 20,}}>{item}</Text>
</View>
));
return (
<View style={{
flex: 1,
//justifyContent: 'center',
alignItems: 'center',
//minHeight: windowHeight,
color: "white",
backgroundColor: "black",
}}>
{itemsListArr}
{/*<Button text="Go back" btnStyle={styles.deviceButton} btnTextStyle={styles.buttonText} onPress={() => navigation.goBack()} />*/}
</View>
);
}
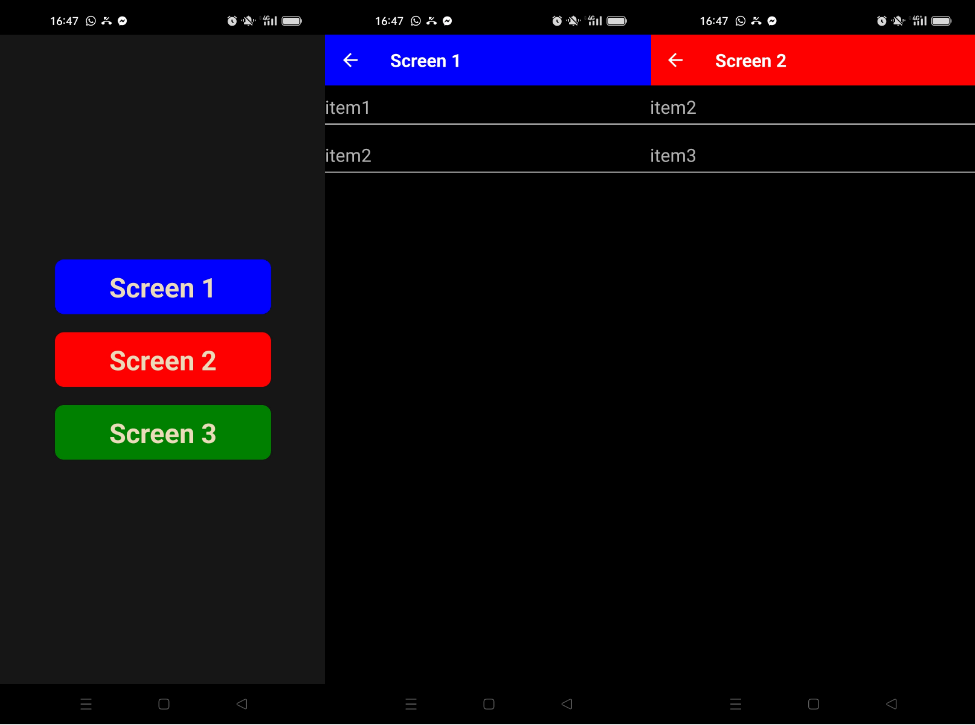
Résultat
Lorsque l’application est compilée et chargée sur l’appareil, nous pouvons naviguer d’un écran à l’autre.
Code complet de l’exemple
App.tsx
/**
* npm install --save react-native-navigation NOK
* npm install @react-navigation/native
* npm install @react-navigation/native-stack
* https://reactnavigation.org/docs/getting-started
*/
import React from 'react';
import {
View,
Text,
ScrollView,
} from 'react-native';
import { NavigationContainer } from '@react-navigation/native';
import { createNativeStackNavigator } from '@react-navigation/native-stack';
import Button from './src/ui_comp';
import {styles} from './src/styles/styles';
const screensArr = [
{
id: 1,
color: "blue",
text: "Screen 1",
items: ["item1","item2"]
},
{
id: 2,
color: "red",
text: "Screen 2",
items: ["item2","item3"]
},
{
id: 3,
color: "green",
text: "Screen 3",
items: ["item1","item2","item3"]
},
];
function HomeScreen({ navigation }) {
const menuItemClick = (buttonInfo: { id: any; color?: string; text: any; }) => {
console.log(buttonInfo.id,' clicked :',buttonInfo.text);
navigation.navigate(buttonInfo.text,buttonInfo); //'Details')
};
const buttonsListArr = screensArr.map(buttonInfo => (
<Button
key={buttonInfo.id}
text={buttonInfo.text}
onPress={() => menuItemClick(buttonInfo)}
btnStyle={[styles.menuBtn,{backgroundColor:buttonInfo.color}]}
btnTextStyle={styles.menuText}
/>
));
return (
<ScrollView>
<View style={styles.mainBody}>
{buttonsListArr}
</View>
</ScrollView>
);
}
function DetailsScreen({ route, navigation }) {
  const buttonInfo = route.params;

  const itemsListArr = buttonInfo.items.map(item => (
    <View key={item} style={{marginTop:10,marginBottom:10,flexDirection:'row', width: "100%", borderBottomWidth: 1,borderBottomColor:"white",}} >
      <Text style={{marginBottom:5,fontSize: 20,}}>{item}</Text>
    </View>
  ));

  return (
    <View style={{
      flex: 1,
      //justifyContent: 'center',
      alignItems: 'center',
      //minHeight: windowHeight,
      color: "white",
      backgroundColor: "black",
    }}>
      {itemsListArr}
      {/*<Button text="Go back" btnStyle={styles.deviceButton} btnTextStyle={styles.buttonText} onPress={() => navigation.goBack()} />*/}
    </View>
  );
}
const Stack = createNativeStackNavigator();
function App() {
const screensListArr = screensArr.map(buttonInfo => (
<Stack.Screen
key={buttonInfo.id}
name={buttonInfo.text}
component={DetailsScreen}
options={{
headerStyle: {
backgroundColor: buttonInfo.color,
},
headerTintColor: '#fff',
headerTitleStyle: {
fontWeight: 'bold',
},
}}
/>
));
return (
<NavigationContainer>
<Stack.Navigator initialRouteName="Home">
<Stack.Screen name="Home" component={HomeScreen} options={{ headerShown: false }}/>
{/*<Stack.Screen name="Details" component={DetailsScreen} />*/}
{screensListArr}
</Stack.Navigator>
</NavigationContainer>
);
}
export default App;
styles.jsx
/* ./src/styles/styles.jsx */
import {StyleSheet, Dimensions} from 'react-native';

//parameters
let BACKGROUND_COLOR = "#161616"; //191A19
let BUTTON_COLOR = "#346751"; //1E5128
let ERROR_COLOR = "#C84B31"; //4E9F3D
let TEXT_COLOR = "#ECDBBA"; //D8E9A8

const windowHeight = Dimensions.get('window').height;
const windowWidth = Dimensions.get('window').width;

export const styles = StyleSheet.create({
  mainBody: {
    flex: 1,
    justifyContent: 'center',
    alignItems: 'center',
    minHeight: windowHeight,
    color:TEXT_COLOR,
    backgroundColor: BACKGROUND_COLOR,
  },

  menuBtn: {
    backgroundColor: BUTTON_COLOR,
    paddingBottom: 10,
    paddingTop: 10,
    borderRadius: 10,
    margin: 10,
    //height: windowHeight/3,
    width: windowHeight/3,
    justifyContent: 'center',
  },

  menuText: {
    color: TEXT_COLOR,
    fontWeight: 'bold',
    fontSize: 30,
	  textAlign: 'center',
  },


  buttonText: {
    color: TEXT_COLOR,
    fontWeight: 'bold',
    fontSize: 12,
	  textAlign: 'center',
    textAlignVertical: 'center',
  },

  noDevicesText: {
    color: TEXT_COLOR,
    textAlign: 'center',
    marginTop: 10,
    fontStyle: 'italic',
  },
  deviceItem: {
    flexDirection: 'row',
    justifyContent: 'space-between',
    marginBottom: 2,
  },
  deviceName: {
    color: TEXT_COLOR,
    fontSize: 14,
    fontWeight: 'bold',
  },
  deviceInfo: {
    color: TEXT_COLOR,
    fontSize: 10,
  },
  deviceButton: {
    backgroundColor: BUTTON_COLOR,
    padding: 10,
    borderRadius: 10,
    margin: 2,
    paddingHorizontal: 20,
    fontWeight: 'bold',
    fontSize: 12,
  },

  inputBar:{
    flexDirection: 'row',
    justifyContent: 'space-between',
    margin: 5,
  },

  textInput:{
    backgroundColor: '#888888',
    margin: 2,
    borderRadius: 15,
    flex:3,
  },

  sendButton: {
  backgroundColor: BUTTON_COLOR,
  padding: 15,
  borderRadius: 15,
  margin: 2,
  paddingHorizontal: 20,
  },

  textOutput:{
    backgroundColor: '#333333',
    margin: 10,
    borderRadius: 2,
    borderWidth: 1,
    borderColor: '#EEEEEE',
    textAlignVertical: 'top',
  }

});
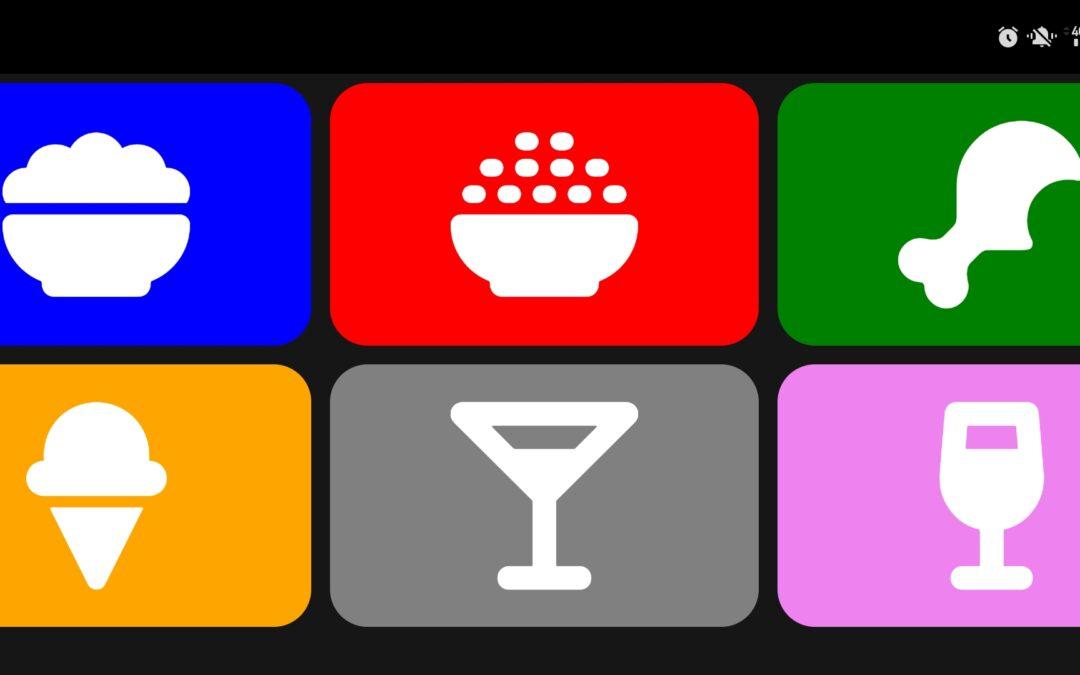
Bonus: Afficher une Icone sur le bouton
Il est possible d’ajouter ou de remplacer le texte par une icône.
npm install react-native-vector-icons --savePour cela vous devez importer chaque banque d’icone. Trouver les icônes que vous souhaitez ajouter et dans quelle banque
import Icon from 'react-native-vector-icons/FontAwesome6';
import IonIcon from 'react-native-vector-icons/Ionicons'
import MaterialIcon from 'react-native-vector-icons/MaterialIcons'
Vous pouvez ensuite placer l’objet Icon correspondant à la banque contenant l’icone
<Button>
    <Icon name="ice-cream" size={icon_size} color={'white'} />
</Button>
Sources
- Créer une application React Native
- React Navigation Documentation
- react-native-navigation Documentation(Not used)
- React Native Vector Icon
- React Native Vector Icon list