En este tutorial, veremos cómo realizar el reconocimiento de objetos con Yolo y OpenCV utilizando una red neuronal pre-entrenada utilizando deep learning.
En un tutorial anterior vimos cómo reconocer formas simples mediante visión por ordenador. Este método sólo funciona para ciertas formas simples predefinidas. Si quieres reconocer una mayor variedad de objetos, la forma más sencilla es utilizar la inteligencia artificial.
Hardware
- Un ordenador con una instalación de Python3
- Una cámara
Principio
La inteligencia artificial es un campo de la informática en el que el propio programa aprende a realizar determinadas tareas. En particular, el reconocimiento visual. En este tutorial, vamos a utilizar una red neuronal entrenada para reconocer determinadas formas.
Se necesitan muchos datos para poder entrenar correctamente una red neuronal. Se ha demostrado que el aprendizaje es más rápido en una red neuronal entrenada para otra cosa. Por ejemplo, una red neuronal entrenada para reconocer perros se entrenará más fácilmente para reconocer gatos.
Ultralytics ofrece los modelos YOLO, que son fáciles de usar y bastante eficaces para la detección, clasificación y seguimiento.
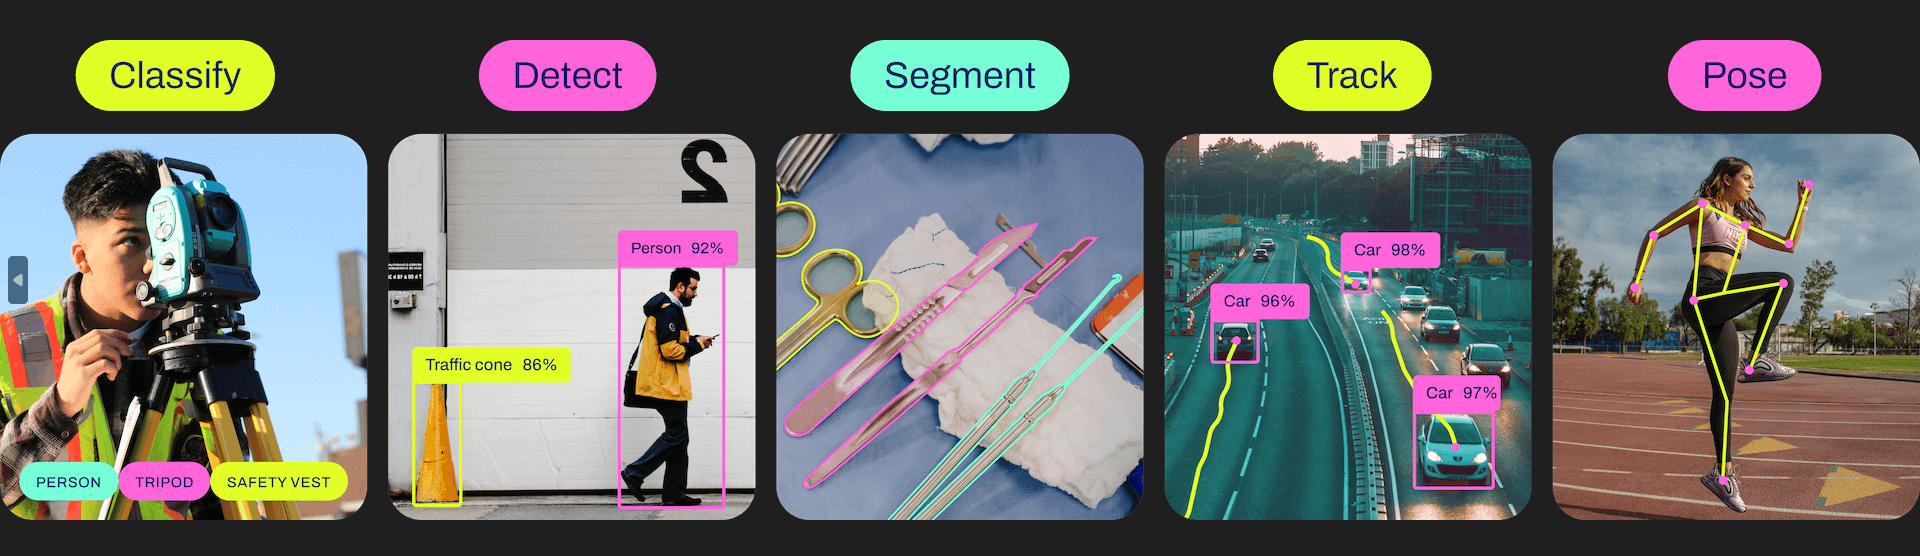
Para cada versión existen diferentes modelos, desde el más ligero y menos potente hasta el más potente pero más pesado.
| YOLOv5n | YOLOv5s | YOLOv5m | YOLOv5l | YOLOv5x |
| YOLOv8n | YOLOv8s | YOLOv8m | YOLOv8l | YOLOv8x |
Configuración de Python
Si no, puedes descargar e instalar Python 3
A continuación, puede instalar las bibliotecas necesarias: imutils, OpenCV, ultralytics, etc.
python3 -m pip install imutils opencv-python ultralytics
Recuperar un modelo preentrenado
Es posible recuperar un modelo preentrenado a partir del script pyhton
# load the pre-trained YOLOv8n model
model = YOLO("yolov8n.pt")
Script en Python para el reconocimiento de objetos
En primer lugar, creamos un flujo de vídeo (vs) utilizando la biblioteca imutils, que recuperará las imágenes de la cámara.
vs = VideoStream(src=0, resolution=(1600, 1200)).start()
Inicializamos una red neuronal con los parámetros del modelo utilizando la biblioteca YOLO (yolov5, v8, etc.).
model = YOLO("yolov8n.pt")
A continuación, crearemos un bucle que, en cada iteración, leerá la imagen de la cámara y la pasará a la entrada de la red neuronal para la detección y el reconocimiento de objetos.
while True:
	# start time to compute the fps
	start = datetime.datetime.now()

	#ret, frame = video_cap.read()
	#frame = vs.read(); ret=True


	# if there are no more frames to process, break out of the loop
	if not ret:
		break

	# run the YOLO model on the frame
	detections = model(frame)[0]
Por último, el código muestra el cuadro de detección en la imagen, la probabilidad de reconocimiento y la posición.
	# loop over the detections
	for box in detections.boxes:
		#extract the label name
		label=model.names.get(box.cls.item())

		# extract the confidence (i.e., probability) associated with the detection
		data=box.data.tolist()[0]
		confidence = data[4]

		# filter out weak detections
		if float(confidence) < CONFIDENCE_THRESHOLD:
			continue

		# if the confidence is greater than the minimum confidence
		xmin, ymin, xmax, ymax = int(data[0]), int(data[1]), int(data[2]), int(data[3])
		cv2.rectangle(frame, (xmin, ymin) , (xmax, ymax), GREEN, 2)

		#draw confidence and label
		y = ymin - 15 if ymin - 15 > 15 else ymin + 15
		cv2.putText(frame, "{} {:.1f}%".format(label,float(confidence*100)), (xmin, y), cv2.FONT_HERSHEY_SIMPLEX, 0.5, GREEN, 2)
Código completo de reconocimiento de objetos con OpenCV y YOLO
#!/usr/bin/env python
# -*- coding: utf-8 -*-
#

import datetime
from ultralytics import YOLO
import cv2
from imutils.video import VideoStream
#from helper import create_video_writer


# define some constants
CONFIDENCE_THRESHOLD = 0.8
GREEN = (0, 255, 0)


# load the pre-trained YOLOv8n model
model = YOLO("yolov8n.pt")
#model = YOLO("yolov5n.pt")
"""
#detect on image
frame= cv2.imread('./datasets/two-boats.jpg');ret= True #from image file
detections = model(frame)[0]
# loop over the detections
#for data in detections.boxes.data.tolist():
for box in detections.boxes:
	#extract the label name
	label=model.names.get(box.cls.item())

	# extract the confidence (i.e., probability) associated with the detection
	data=box.data.tolist()[0]
	confidence = data[4]

	# filter out weak detections by ensuring the
	# confidence is greater than the minimum confidence
	if float(confidence) < CONFIDENCE_THRESHOLD:
		continue

	# if the confidence is greater than the minimum confidence,
	# draw the bounding box on the frame
	xmin, ymin, xmax, ymax = int(data[0]), int(data[1]), int(data[2]), int(data[3])
	cv2.rectangle(frame, (xmin, ymin) , (xmax, ymax), GREEN, 2)

	#draw confidence and label
	y = ymin - 15 if ymin - 15 > 15 else ymin + 15
	cv2.putText(frame, "{} {:.1f}%".format(label,float(confidence*100)), (xmin, y), cv2.FONT_HERSHEY_SIMPLEX, 0.5, GREEN, 2)

# show the frame to our screen
cv2.imshow("Img", frame)
"""
#detect on video
# initialize the video capture object
#vs = VideoStream(src=0, resolution=(1600, 1200)).start()
video_cap = cv2.VideoCapture("datasets\\Splash - 23011.mp4")
# initialize the video writer object
#writer = create_video_writer(video_cap, "output.mp4")

while True:
	# start time to compute the fps
	start = datetime.datetime.now()

	#ret, frame = video_cap.read()
	#frame = vs.read(); ret=True


	# if there are no more frames to process, break out of the loop
	if not ret:
		break

	# run the YOLO model on the frame
	detections = model(frame)[0]

	# loop over the detections
	#for data in detections.boxes.data.tolist():
	for box in detections.boxes:
		#extract the label name
		label=model.names.get(box.cls.item())

		# extract the confidence (i.e., probability) associated with the detection
		data=box.data.tolist()[0]
		confidence = data[4]

		# filter out weak detections by ensuring the
		# confidence is greater than the minimum confidence
		if float(confidence) < CONFIDENCE_THRESHOLD:
			continue

		# if the confidence is greater than the minimum confidence,
		# draw the bounding box on the frame
		xmin, ymin, xmax, ymax = int(data[0]), int(data[1]), int(data[2]), int(data[3])
		cv2.rectangle(frame, (xmin, ymin) , (xmax, ymax), GREEN, 2)

		#draw confidence and label
		y = ymin - 15 if ymin - 15 > 15 else ymin + 15
		cv2.putText(frame, "{} {:.1f}%".format(label,float(confidence*100)), (xmin, y), cv2.FONT_HERSHEY_SIMPLEX, 0.5, GREEN, 2)
		#cv2.circle(frame, (int(X)-15, int(Y)), 1, GREEN, 2)
		#cv2.putText(frame, poslbl, (int(X), int(Y)),cv2.FONT_HERSHEY_SIMPLEX, 0.5, GREEN, 2)

	# end time to compute the fps
	end = datetime.datetime.now()
	# show the time it took to process 1 frame
	total = (end - start).total_seconds()
	print(f"Time to process 1 frame: {total * 1000:.0f} milliseconds")

	# calculate the frame per second and draw it on the frame
	fps = f"FPS: {1 / total:.2f}"
	cv2.putText(frame, fps, (50, 50),
				cv2.FONT_HERSHEY_SIMPLEX, 2, (0, 0, 255), 4)

	# show the frame to our screen
	cv2.imshow("Frame", frame)
	#writer.write(frame)
	if cv2.waitKey(1) == ord("q"):
		break

video_cap.release()
vs.stop()
#writer.release()
cv2.destroyAllWindows()
Fuentes de imágenes para la detección de objetos
Puede utilizar este script con diferentes fuentes de imágenes. Para ello, debe adaptar ligeramente el código anterior para modificar la variable «img» que contiene la imagen que se va a analizar.
- La cámara web de tu ordenador
vs = VideoStream(src=0, resolution=(1600, 1200)).start()
while True:
	frame = vs.read()
El flujo de vídeo debe detenerse al final del script con vs.stop()
- cámara IP
vc = cv2.VideoCapture('rtsp://user:password@ipaddress:rtspPort')
while True:
	ret, frame=vc.read() #from ip cam
Asegúrate de detener la captura de vídeo al final del script con vc.release()
- La Raspberry Pi Picam
vs = VideoStream(usePiCamera=True, resolution=(1600, 1200)).start()
while True:
	frame = vs.read()
Recuerda detener el flujo al final del script con vs.stop()
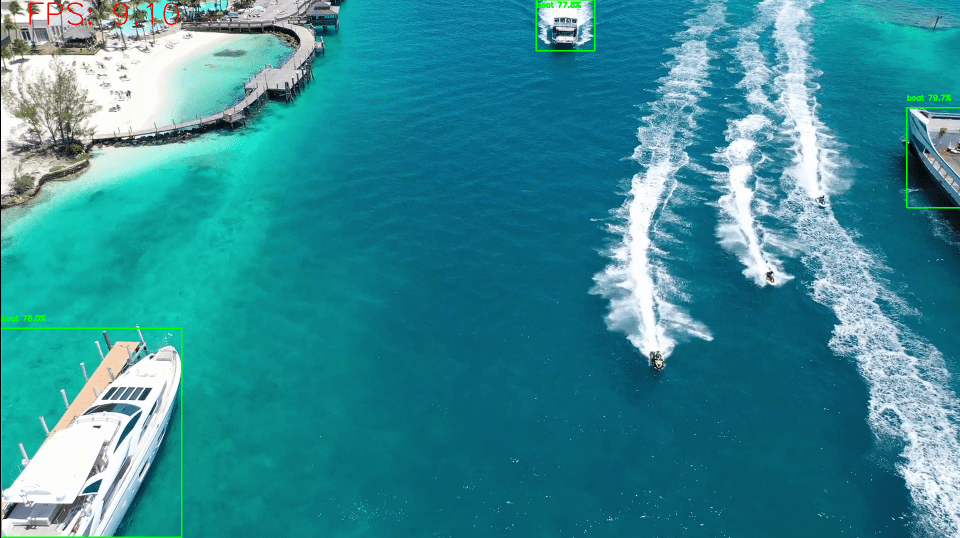
- Un archivo de vídeo
vc = cv2.VideoCapture('./datasets/Splash - 23011.mp4') #from video
while True:
	ret, frame=vc.read() #from video
- Un archivo de imagen
frame= cv2.imread('./datasets/two-boats.jpg')
Resultados
Para este ejemplo, enviamos una imagen de dos barcos como entrada a la red neuronal, que son reconocidos correctamente. Para obtener resultados ligeramente diferentes, puede modificar el parámetro de confianza para evitar falsos positivos.
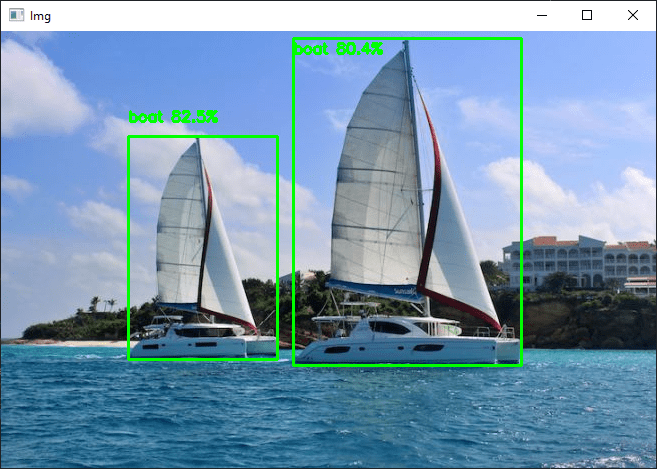
Puedes probar este código con tu webcam o con fotos, por ejemplo, para ver cómo funcionan el modelo y el reconocimiento de objetos.
Una vez que tu script funcione, puedes entrenar tu modelo para detectar otros objetos.


