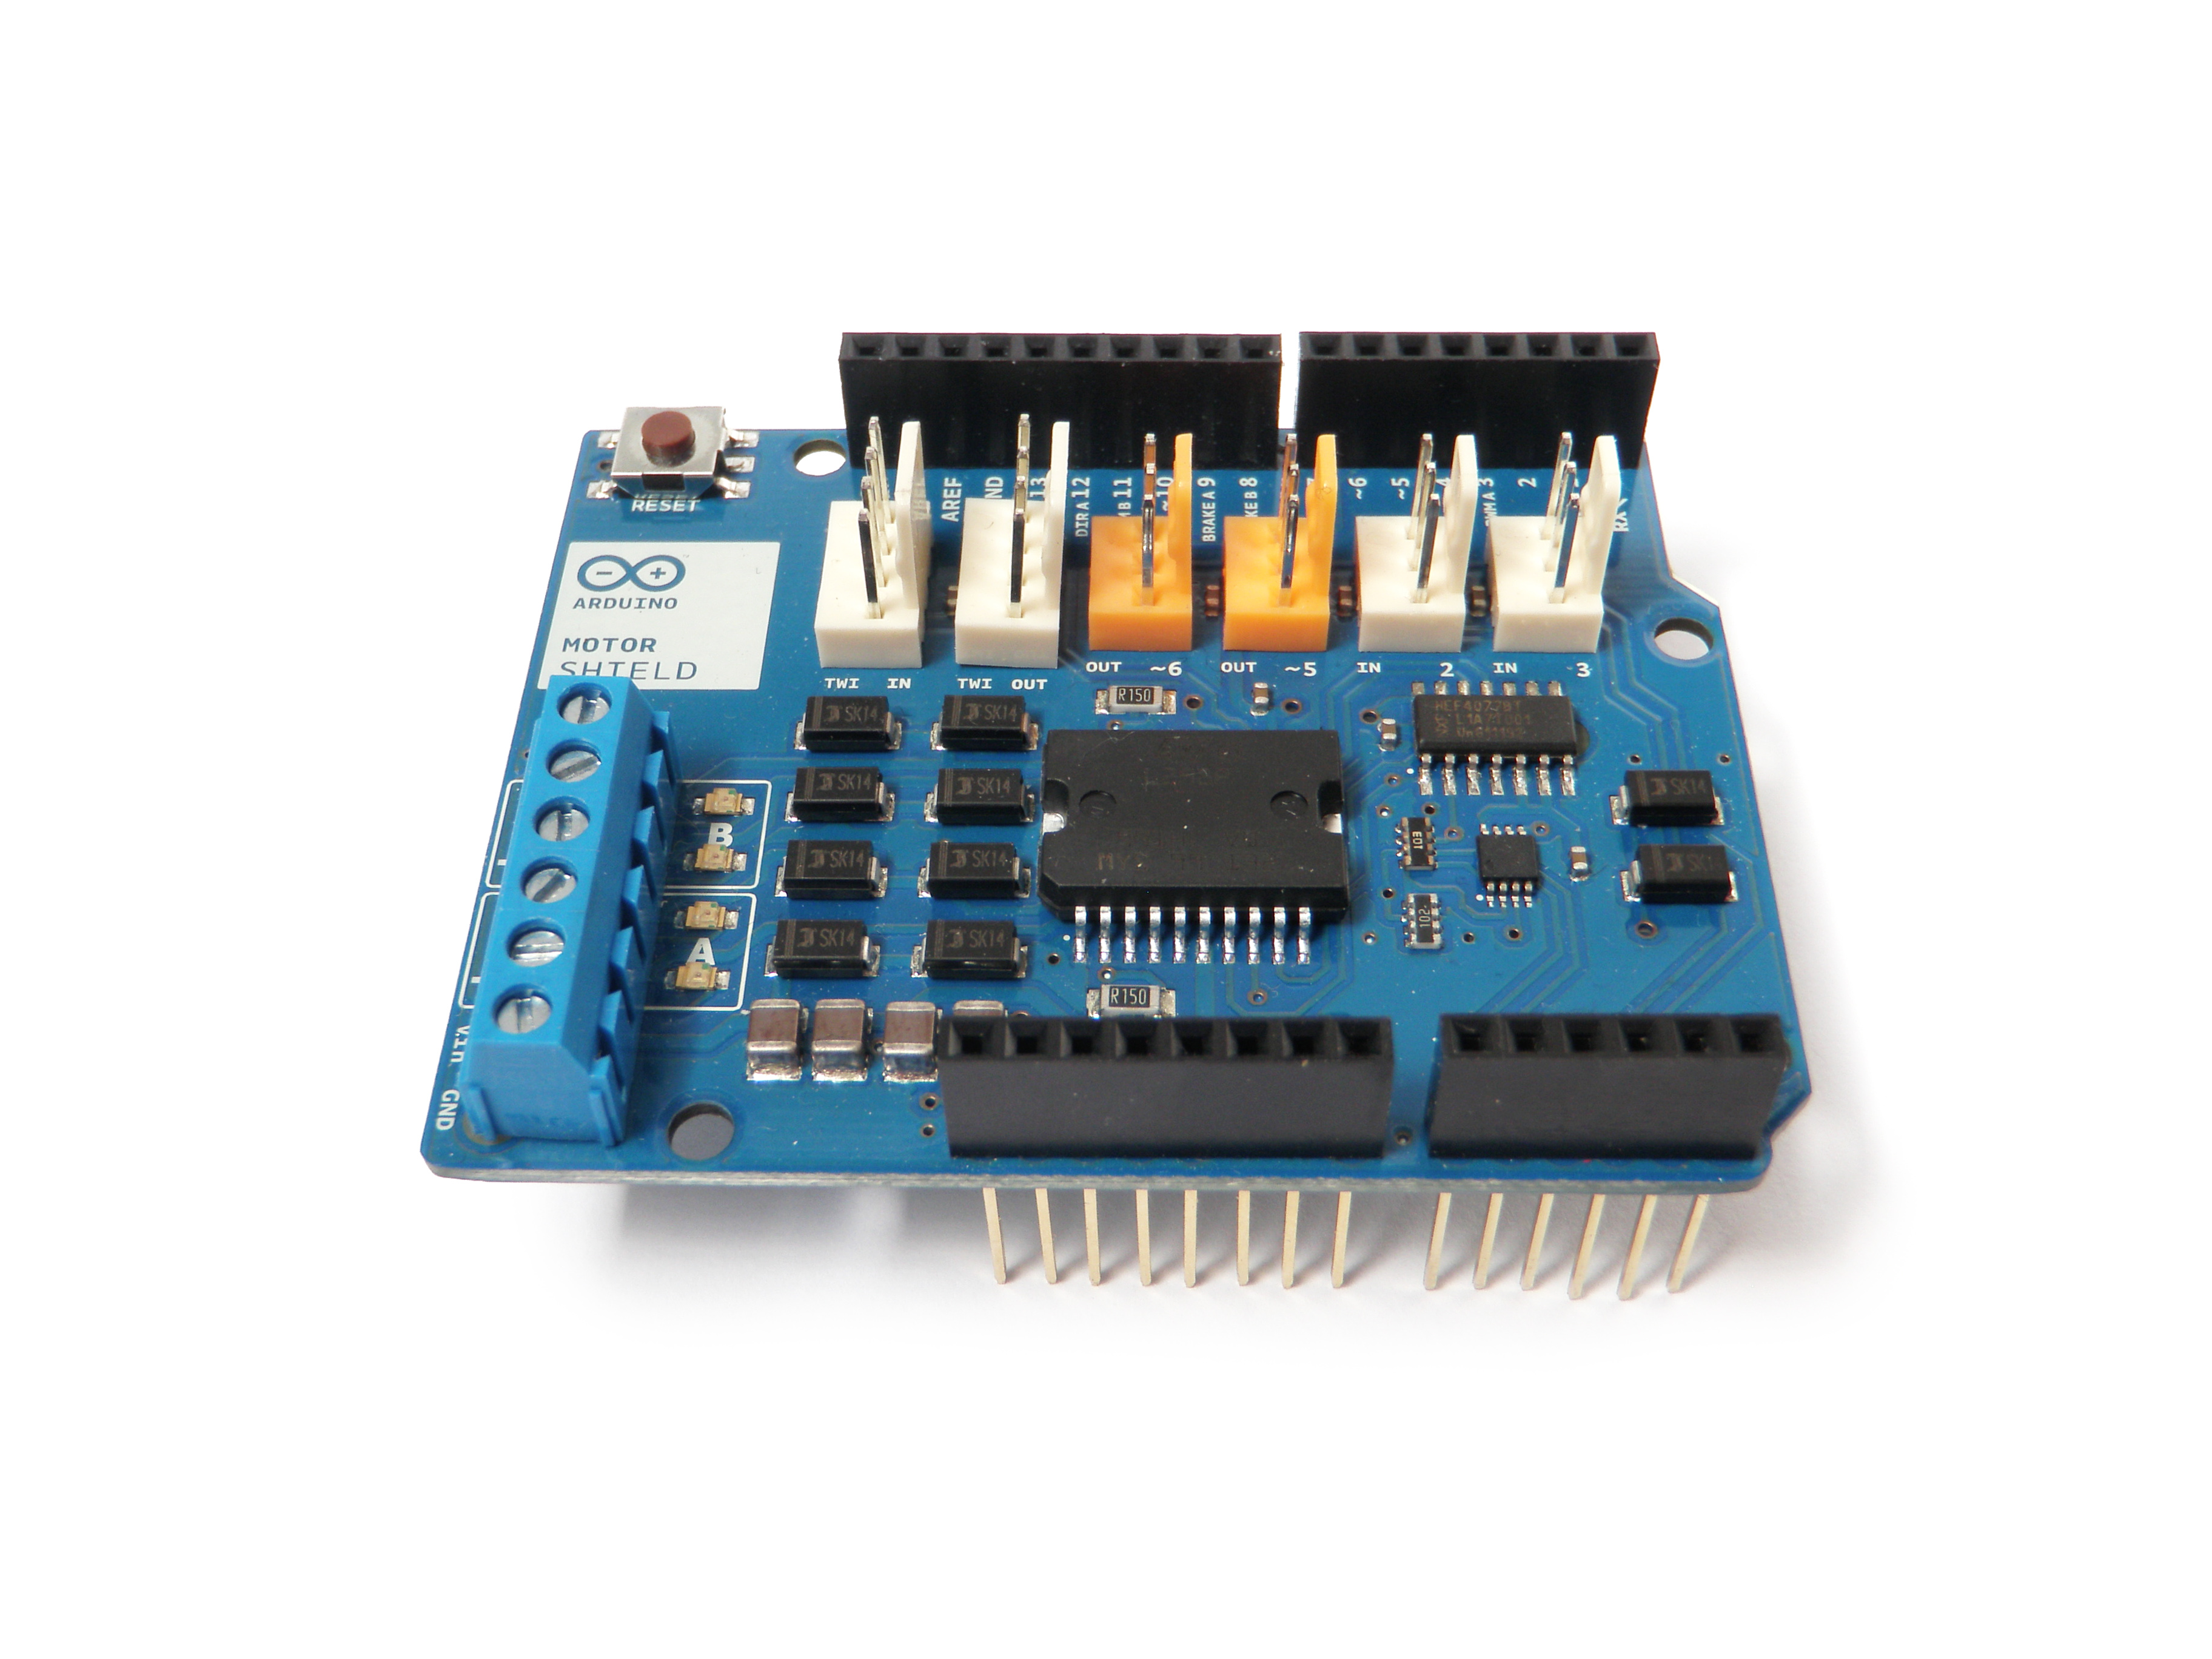
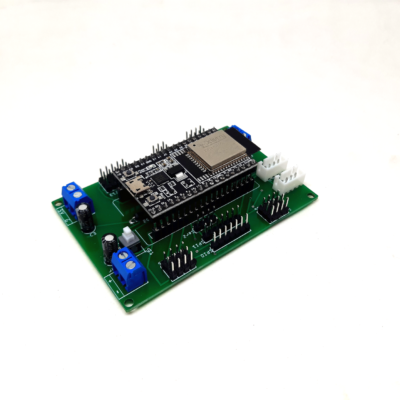
Le Motor Shield officiel d’Arduino est une carte d’extension pour les microcontrôleurs Arduino UNO et Mega pour le pilotage de moteur CC et de moteur pas-à-pas. Nous avons vu comment piloter un moteur CC en utilisant un pont en H ce qui peut nécessiter beaucoup de branchement lorsqu’on utilise le circuit intégré simplement. Pour une application embarquée, comme un robot Willy, vous serez amené à piloter plusieurs moteurs en parallèle. Ils existent pour cela des Shields qui simplifieront le montage.
Matériel
- Ordinateur
- Arduino UNO
- Câble USB A Mâle/B Mâle
- Arduino Motor Shield
- Moteur CC x1 ou Moteur pas-à-pas x1
Principe de fonctionnement
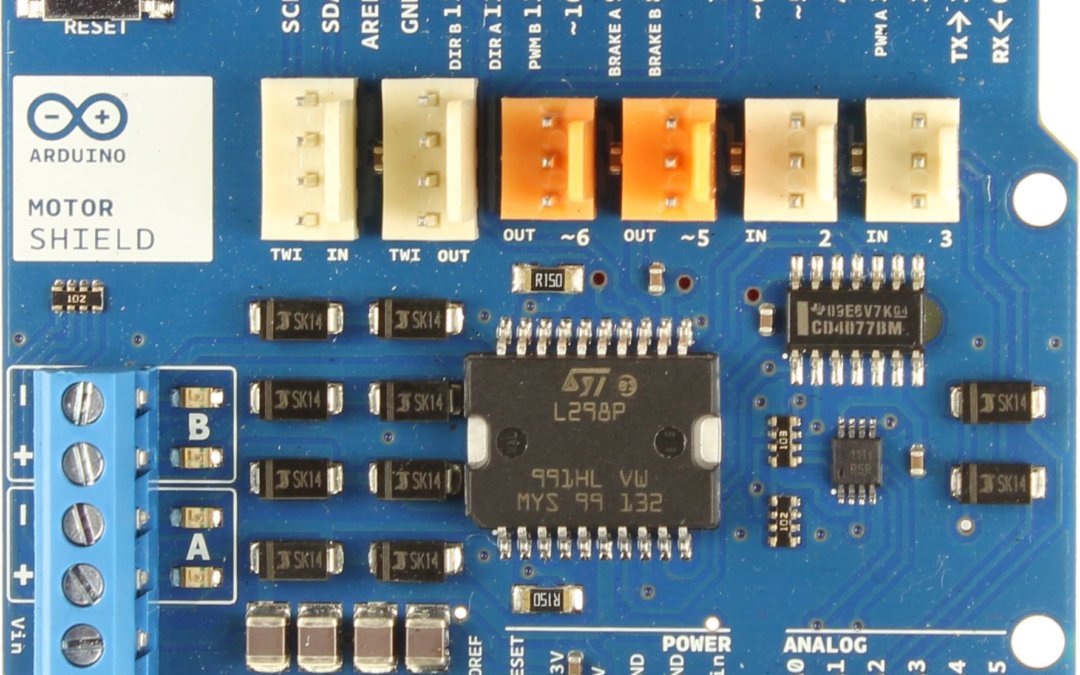
Le Motor Shield Arduino utilise le double pont en H L298. Il permet de piloter des moteurs en direction et en vitesse avec une tension nominale entre 5 et 12V et un courant de 2A, jusqu’à 4A avec une source de tension extérieure.
Ce shield permet de piloter:
- jusqu’à deux moteurs à courant continu ou un moteur pas à pas bipolaire
- deux capteurs analogiques
- deux sorties PWM comme des servomoteurs.
- un bus I2C est disponible ce qui permet de brancher des modules compatibles
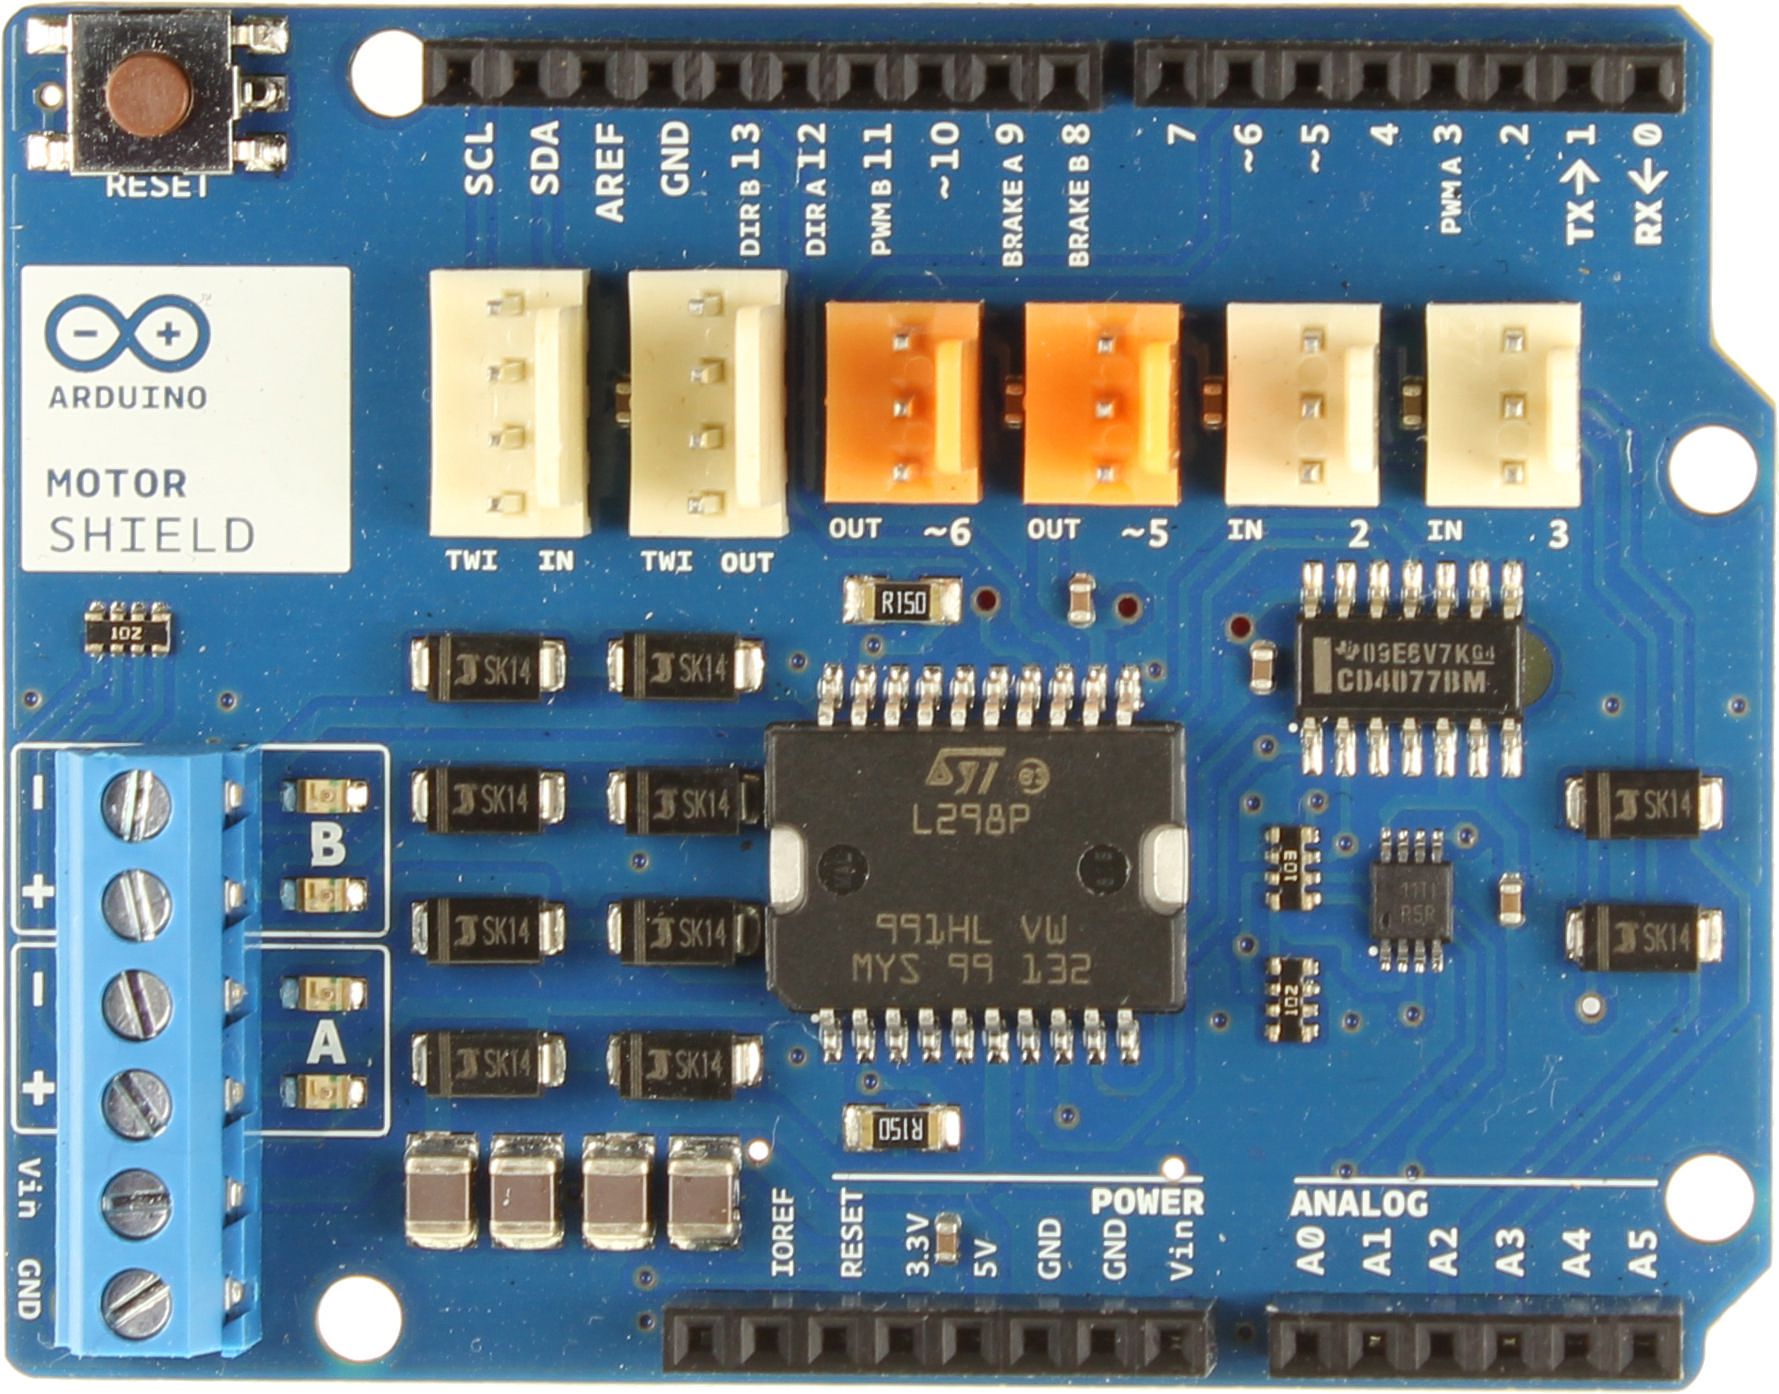
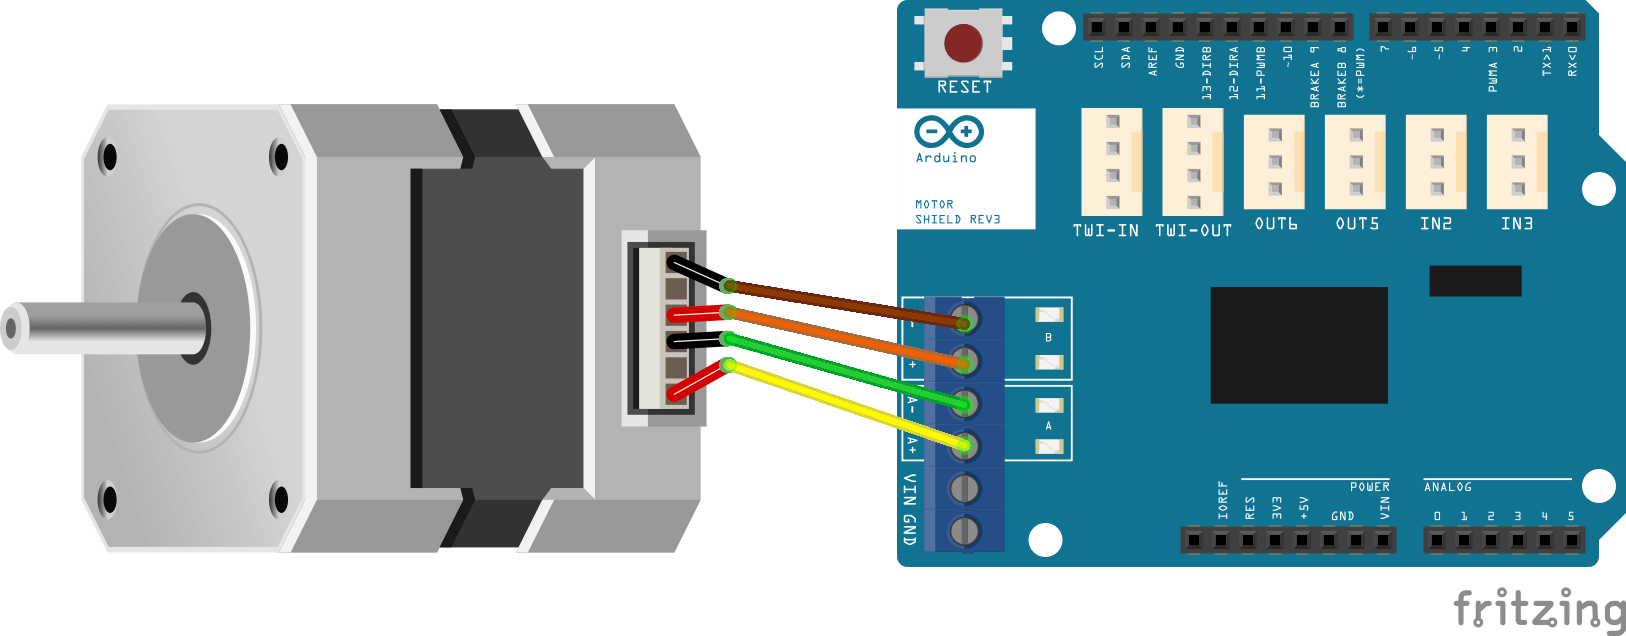
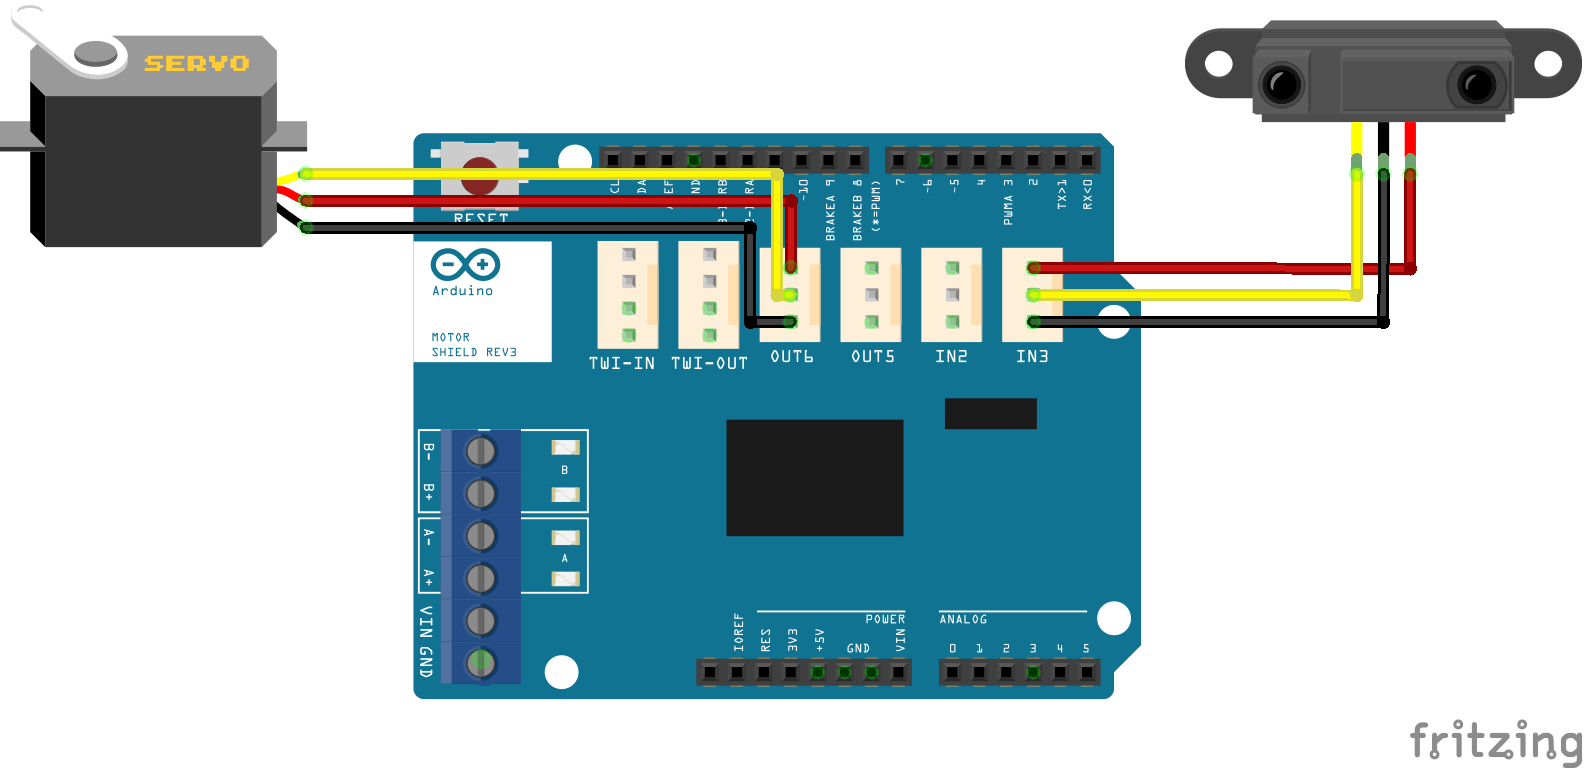
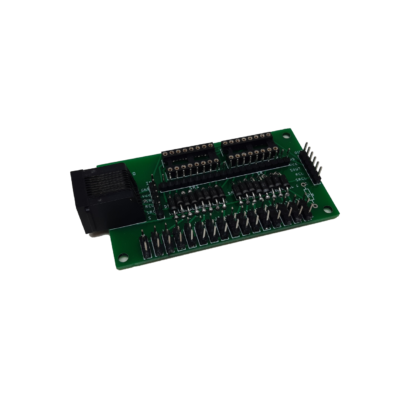
Schéma
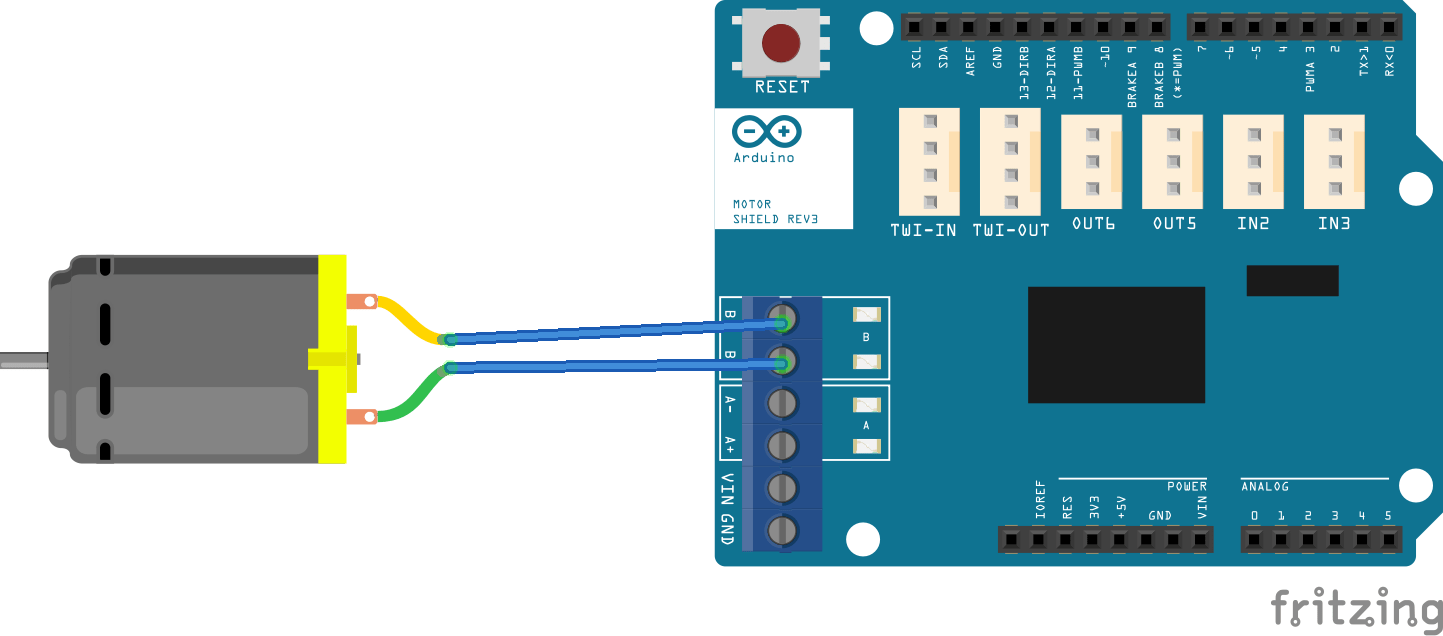
Compatible avec les carte UNO et Mega, le shield se place directement sur la carte Arduino. L’alimentation se branche au bornier Power. Les moteurs sont branchés sur les borniers A+,A-,B+,B-. Les broches de l’Arduino sont directement reliées aux broches du circuit intégré:
- Digital pin 12: direction DC Motor #A / Stepper #A
- Digital pin 13: direction DC Motor #B / Stepper #B
- Digital pin 3: vitesse DC Motor #A / Stepper #A
- Digital pin 11: vitesse DC Motor #B / Stepper #B
- Digital pin 9: activation brake DC Motor #A
- Digital pin 8: activation brake DC Motor #B
- Entrées disponibles In2 In3 reliées aux entrées analogiques A2 et A3
- Sorties disponibles Out5, Out6 reliées aux sorties PWM 5 et 6
Dans le cas d’un shield, les branchements sont prédéfinis. Vérifiez bien dans la documentation technique du composant comment l’utiliser.
Les branchements des moteurs sont détaillés dans les schémas suivants.
Code
Pour interagir avec le Motor Shield, nous n’utilisons pas de librairie particulière car il est relié au broches de l’Arduino directement. Il vous est toujours possible de créer votre librairie pour simplifier votre code.
//Parameters
const int input_voltage  = 9;//V
const int nominal_voltage  = 5;////V
const int MAX_SPEED  = int(nominal_voltage * 255 / input_voltage);
const int directionA  = 12;
const int directionB  = 13;
const int brakeA  = 9;
const int brakeB  = 8;
const int speedA  = 3;
const int speedB  = 11;
const int in2  = A2;
const int in3  = A3;

void setup() {
  //Init Serial USB
  Serial.begin(9600);
  Serial.println(F("Initialize System"));
  //Init Motor Shield
  pinMode(directionA, OUTPUT); //Initiates Motor Channel A pin
  pinMode(brakeA, OUTPUT); //Initiates Brake Channel A pin
  pinMode(directionB, OUTPUT); //Initiates Motor Channel B pin
  pinMode(brakeB, OUTPUT); //Initiates Brake Channel B pin
}

void loop() {
  readSensorMS();
  testMotorMS();
  //testStepperMS();
}

void testStepperMS() { /* function testStepperMS */
  //// Test stepper
  Serial.println("Move stepper 1 step clockwise");
  stpCW(1);
  Serial.println("Move stepper 1 step counter clockwise");
  stpCCW(1);
}

void testMotorMS() { /* function testMotorMS */
  //// Test DC motor
  Serial.println(F("-------------------------------------"));
  Serial.println(F("Avant "));
  dcForward();
  delay(500);
  Serial.println(F("Arrière "));
  dcBackward();
  delay(500);
  Serial.println(F("Arrêt "));
  dcStop();
  delay(1000);
}

void readSensorMS() { /* function readSensorMS */
  //// Read sensors
  Serial.print(F("In2 : ")); Serial.println(analogRead(in2));
  Serial.print(F("In3 : ")); Serial.println(analogRead(in3));
}

void dcForward() { /* function dcForward */
  //// set forward motion for A and B
  digitalWrite(directionA, HIGH); //Establishes forward direction of Channel A
  digitalWrite(brakeA, LOW);   //Disengage the Brake for Channel A
  analogWrite(speedA, MAX_SPEED);
  digitalWrite(directionB, HIGH); //Establishes forward direction of Channel B
  digitalWrite(brakeB, LOW);   //Disengage the Brake for Channel B
  analogWrite(speedB, MAX_SPEED);
}

void dcBackward() { /* function dcBackward */
  //// set backward motion for A and B
  digitalWrite(directionA, LOW); //Establishes forward direction of Channel A
  digitalWrite(brakeA, LOW);   //Disengage the Brake for Channel A
  analogWrite(speedA, MAX_SPEED);
  digitalWrite(directionB, LOW); //Establishes forward direction of Channel B
  digitalWrite(brakeB, LOW);   //Disengage the Brake for Channel B
  analogWrite(speedB, MAX_SPEED);
}

void dcStop() { /* function dcStop */
  //// stop motors A and B
  digitalWrite(brakeA, HIGH);   //Engage the Brake for Channel A
  analogWrite(speedA, 0);
  digitalWrite(brakeB, HIGH);   //Engage the Brake for Channel B
  analogWrite(speedB, 0);
}

void stpCW(int nbstep) { /* function stpCW */
  //// Move stepper clockwise
  for (int i = 0; i < nbstep; i++) {
    digitalWrite(brakeA, LOW);  //Disable brake A
    digitalWrite(brakeB, HIGH); //Enable brake B
    digitalWrite(directionA, HIGH);   //Set direction of CH A
    analogWrite(speedA, MAX_SPEED);   //Set speed for CH A
    delay(30);

    digitalWrite(brakeA, HIGH);  //Enable brake A
    digitalWrite(brakeB, LOW); //Disable brake B
    digitalWrite(directionB, LOW);   //Set direction of CH B
    analogWrite(speedB, MAX_SPEED);   //Set speed for CH B
    delay(30);

    digitalWrite(brakeA, LOW);  //Disable brake A
    digitalWrite(brakeB, HIGH); //Enable brake B
    digitalWrite(directionA, LOW);   //Set direction of CH A
    analogWrite(speedA, MAX_SPEED);   //Set speed for CH A
    delay(30);

    digitalWrite(brakeA, HIGH);  //Enable brake A
    digitalWrite(brakeB, LOW); //Disable brake B
    digitalWrite(directionB, HIGH);   //Set direction of CH B
    analogWrite(speedB, MAX_SPEED);   //Set speed for CH B
    delay(30);
  }
}

void stpCCW(int nbstep) { /* function stpCCW */
  //// Move stepper counter-clockwise
  for (int i = 0; i < nbstep; i++) {
    digitalWrite(brakeA, LOW);  //Disable brake A
    digitalWrite(brakeB, HIGH); //Enable brake B
    digitalWrite(directionA, HIGH);   //Set direction of CH A
    analogWrite(speedA, MAX_SPEED);   //Set speed for CH A
    delay(30);

    digitalWrite(brakeA, HIGH);  //Enable brake A
    digitalWrite(brakeB, LOW); //Disable brake B
    digitalWrite(directionB, HIGH);   //Set direction of CH B
    analogWrite(speedB, MAX_SPEED);   //Set speed for CH B
    delay(30);

    digitalWrite(brakeA, LOW);  //Disable brake A
    digitalWrite(brakeB, HIGH); //Enable brake B
    digitalWrite(directionA, LOW);   //Set direction of CH A
    analogWrite(speedA, MAX_SPEED);   //Set speed for CH A
    delay(30);

    digitalWrite(brakeA, HIGH);  //Enable brake A
    digitalWrite(brakeB, LOW); //Disable brake B
    digitalWrite(directionB, LOW);   //Set direction of CH B
    analogWrite(speedB, MAX_SPEED);   //Set speed for CH B
    delay(30);
  }
}

void dcStop() { /* function dcStop */
  //// stop motors A and B
  digitalWrite(brakeA, HIGH);   //Engage the Brake for Channel A
  analogWrite(speedA, 0);
  digitalWrite(brakeB, HIGH);   //Engage the Brake for Channel B
  analogWrite(speedB, 0);
}
Applications
- Piloter un robot à deux roues comme Willy
Sources
- Fiche technique du module L298
- Piloter un moteur CC avec Arduino
- Piloter un moteur pas-à-pas avec Arduino
Retrouvez nos tutoriels et d’autres exemples dans notre générateur automatique de code
La Programmerie

Super I know all about use this shield
Génial !!!!!!!!!!!!!!!!!
Merci!