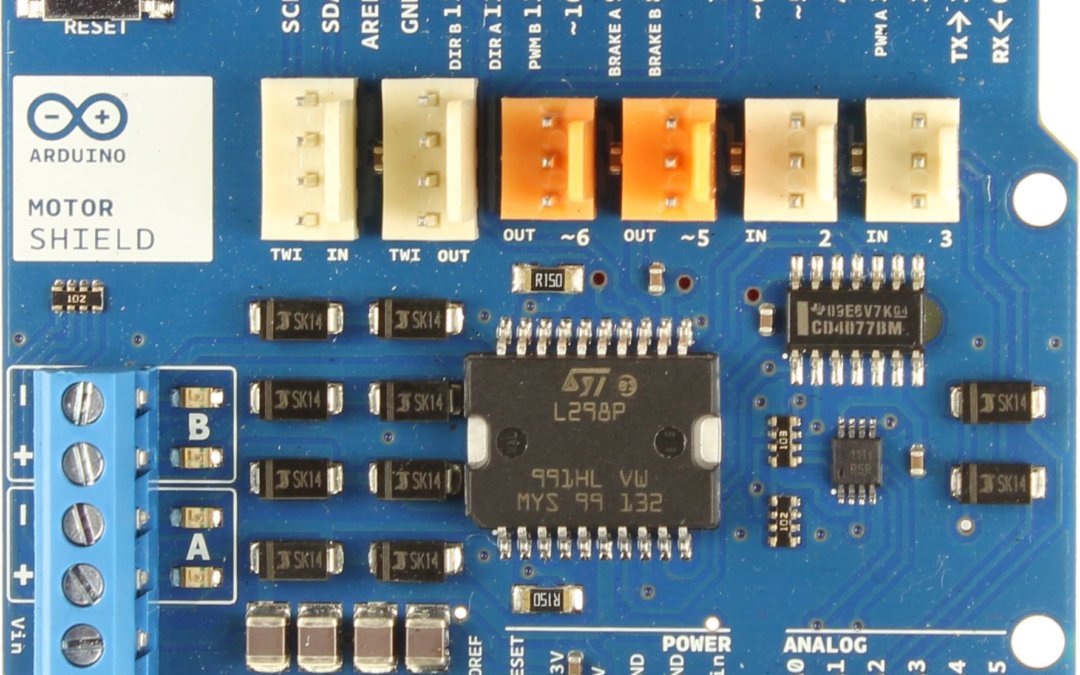
The official Arduino Motor Shield is an expansion board for the Arduino UNO and Mega microcontrollers for DC and stepper motor control. We have seen how to drive a DC motor using an H-bridge which can require a lot of wiring when using the IC simply. For an embedded application, such as a Willy robot, you will need to drive several motors in parallel. Shields are available for this purpose which will simplify the assembly.
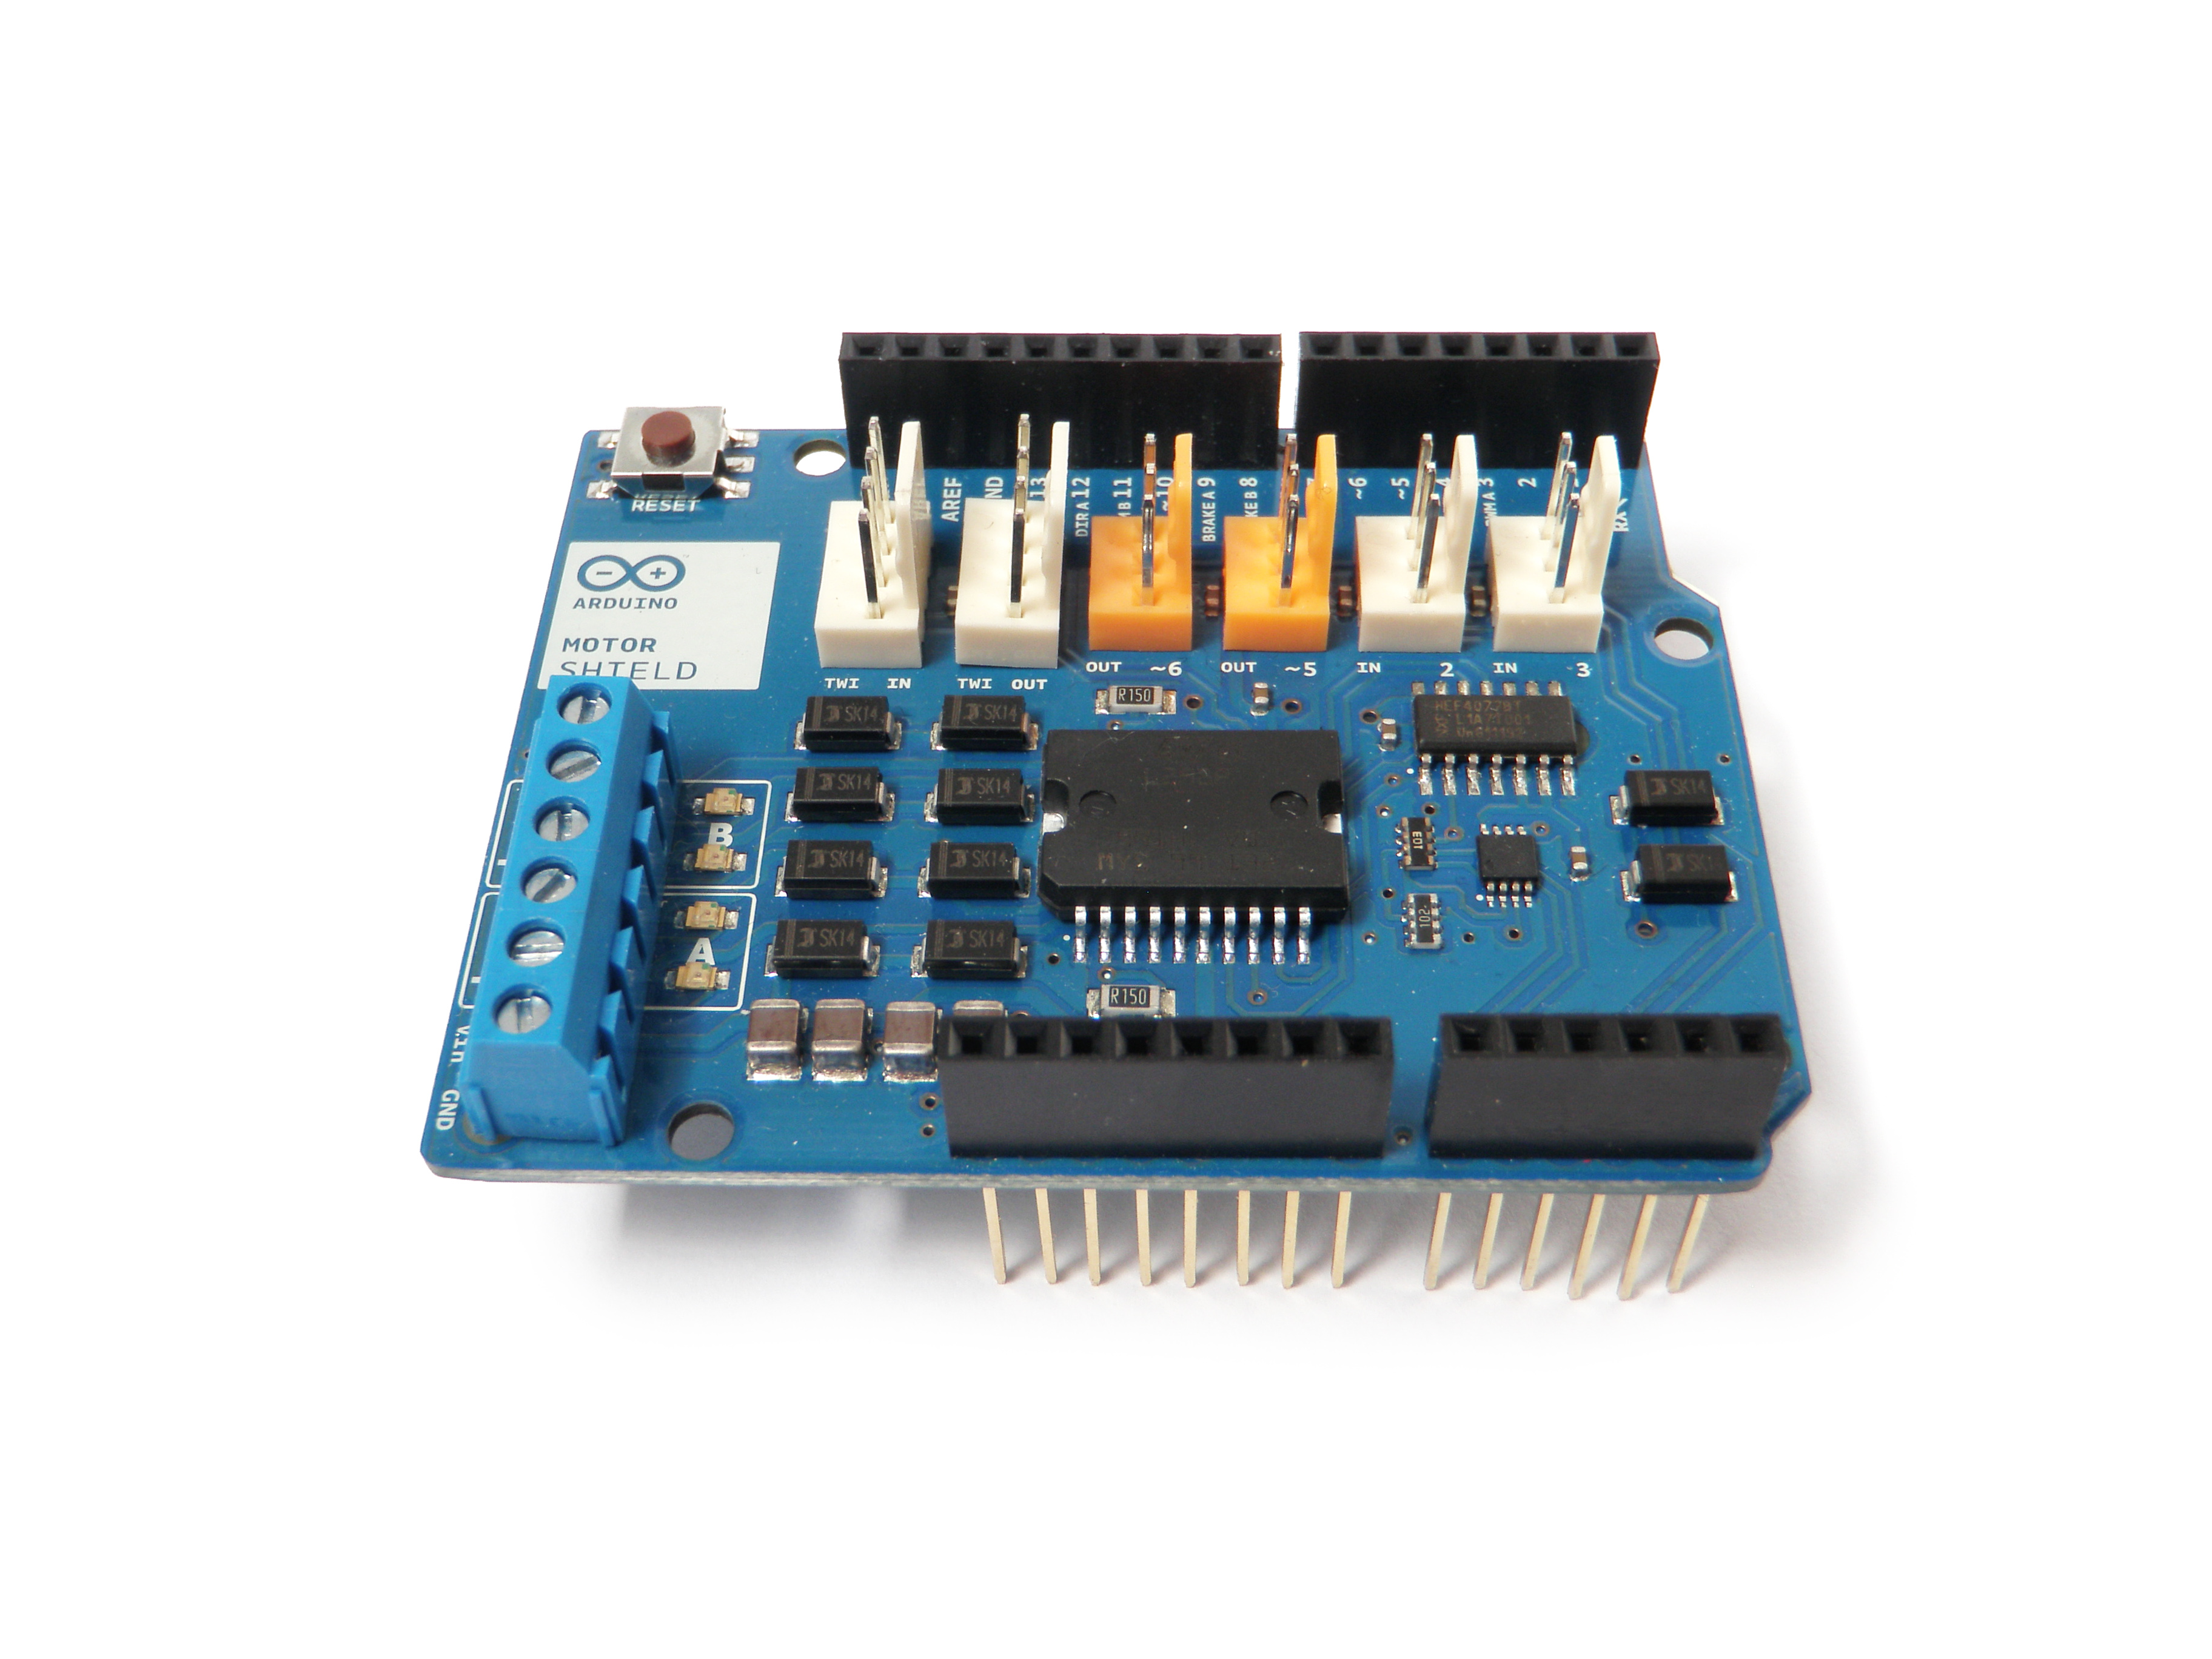
Material
- Computer
- Arduino UNO
- USB cable A Male to B Male
- Arduino Motor Shield
- DC motor x1 or Stepper motor x1
Principle of operation
The Motor Shield Arduino uses the L298 double H-bridge. It allows to drive motors in direction and speed with a nominal voltage between 5 and 12V and a current of 2A, up to 4A with an external voltage source.
This shield allows piloting:
- up to two DC motors or one bipolar stepper motor
- two analogue sensors
- two PWM outputs as servomotors.
- an I2C bus is available which allows the connection of compatible modules
Schematic
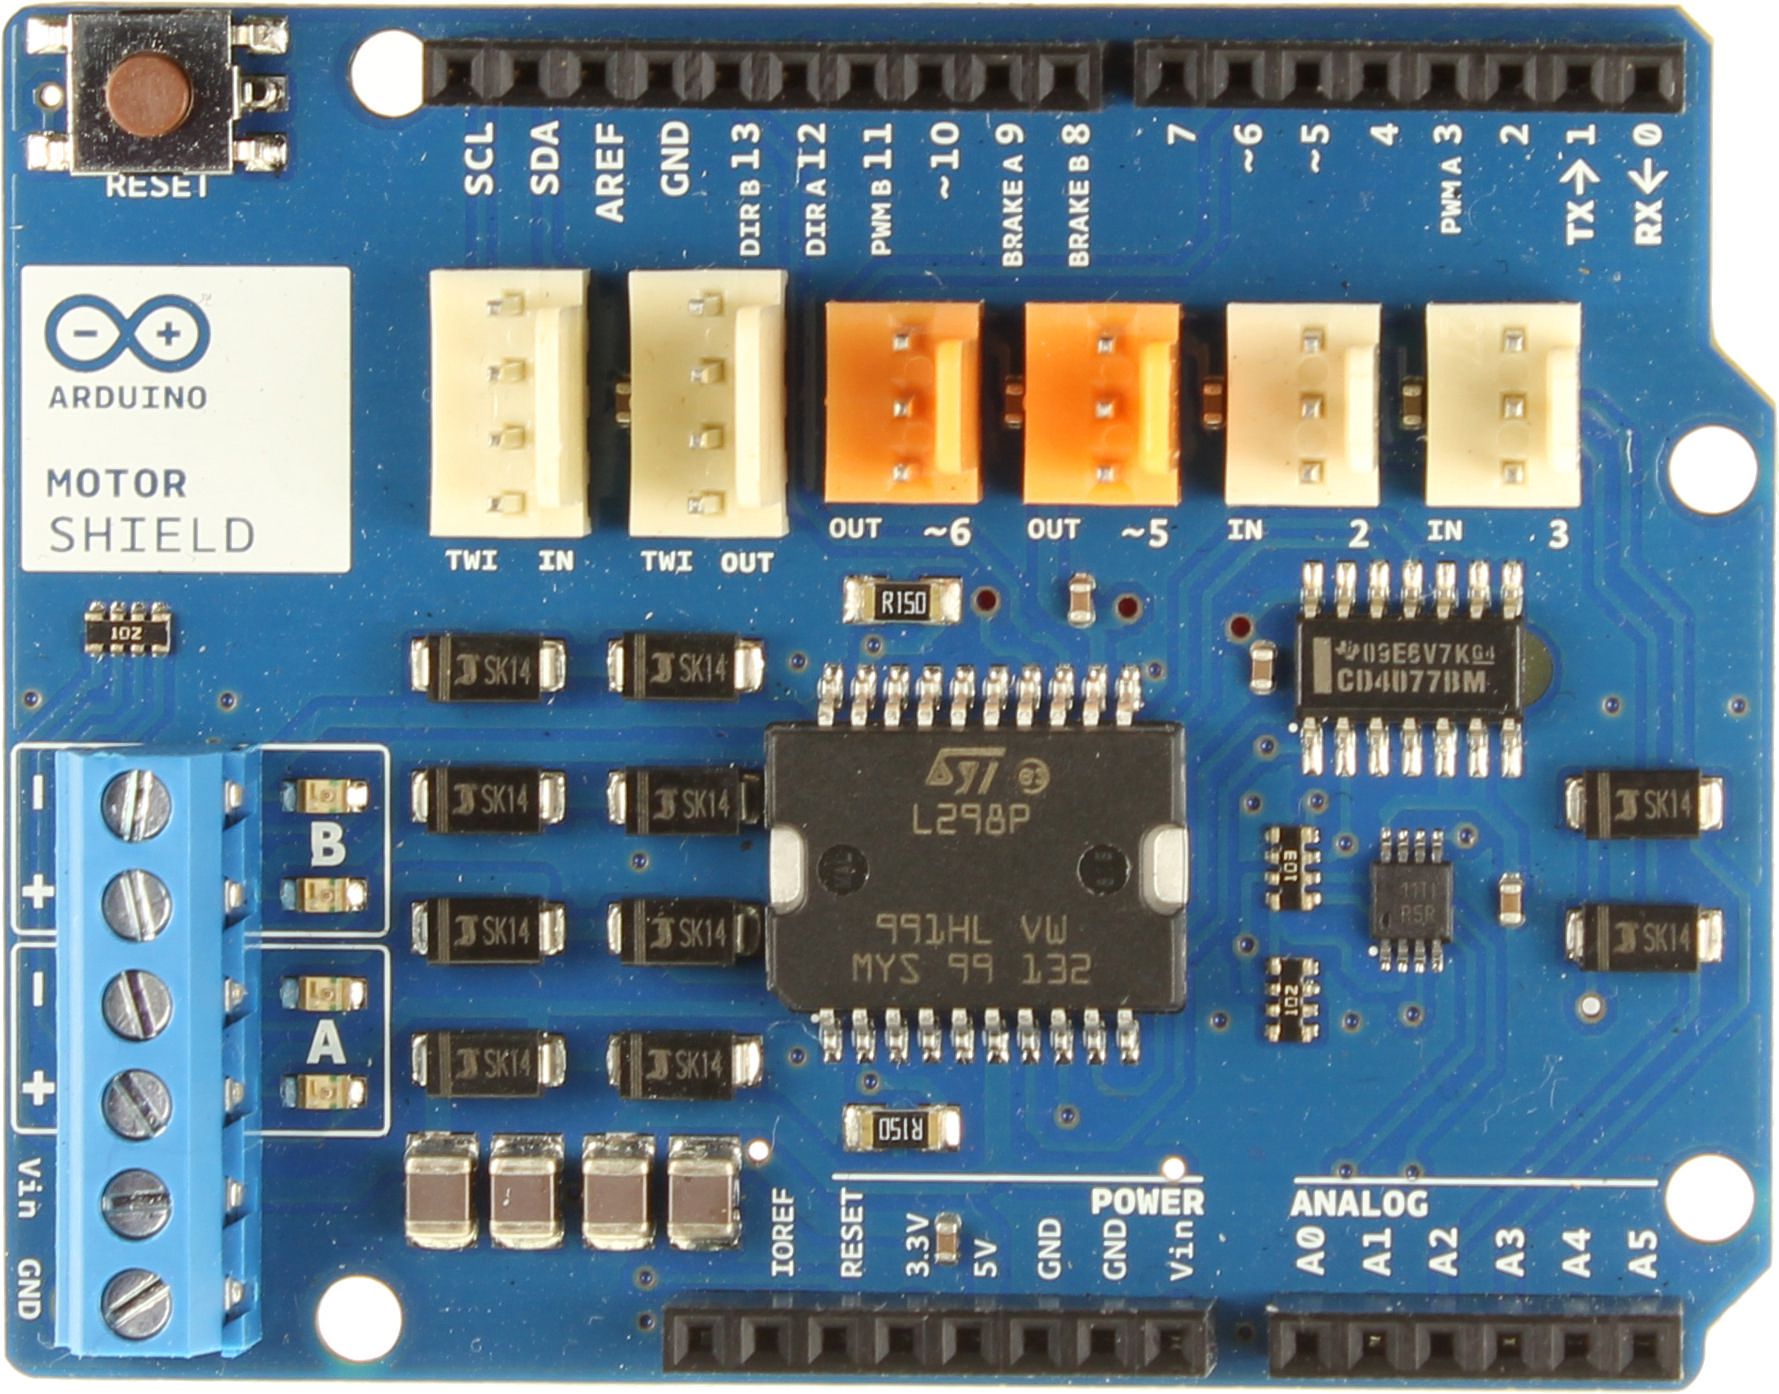
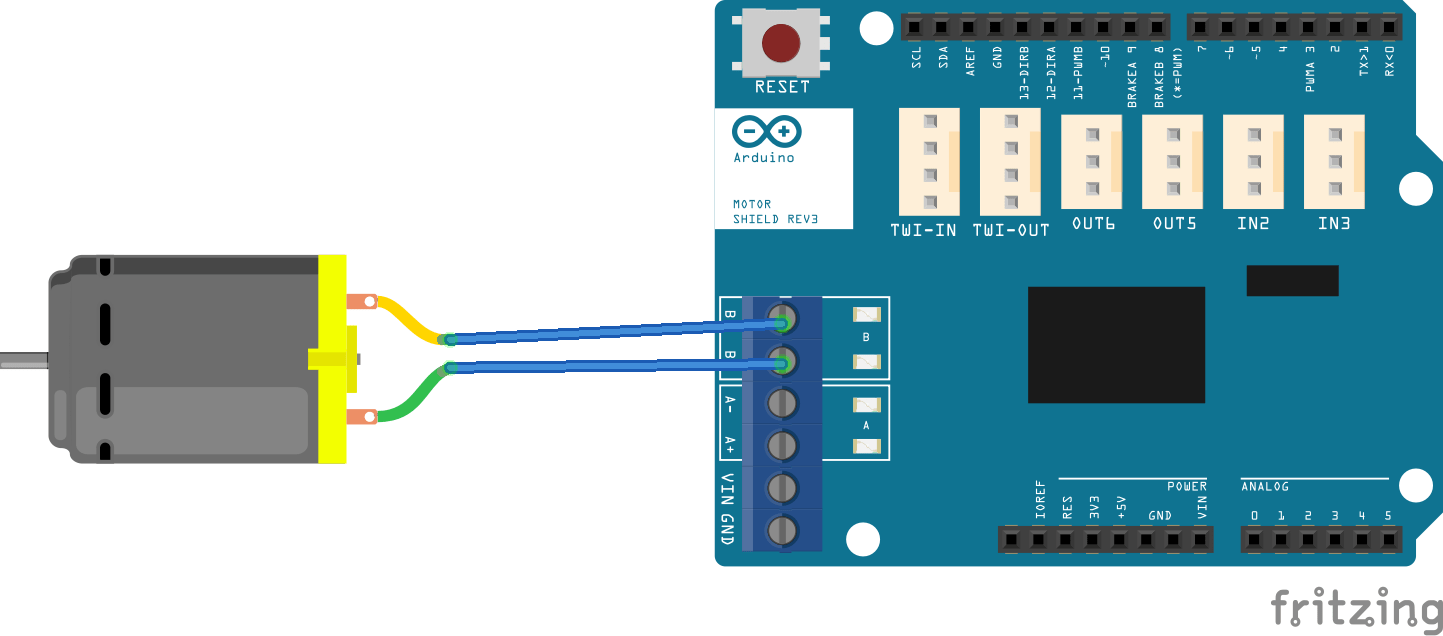
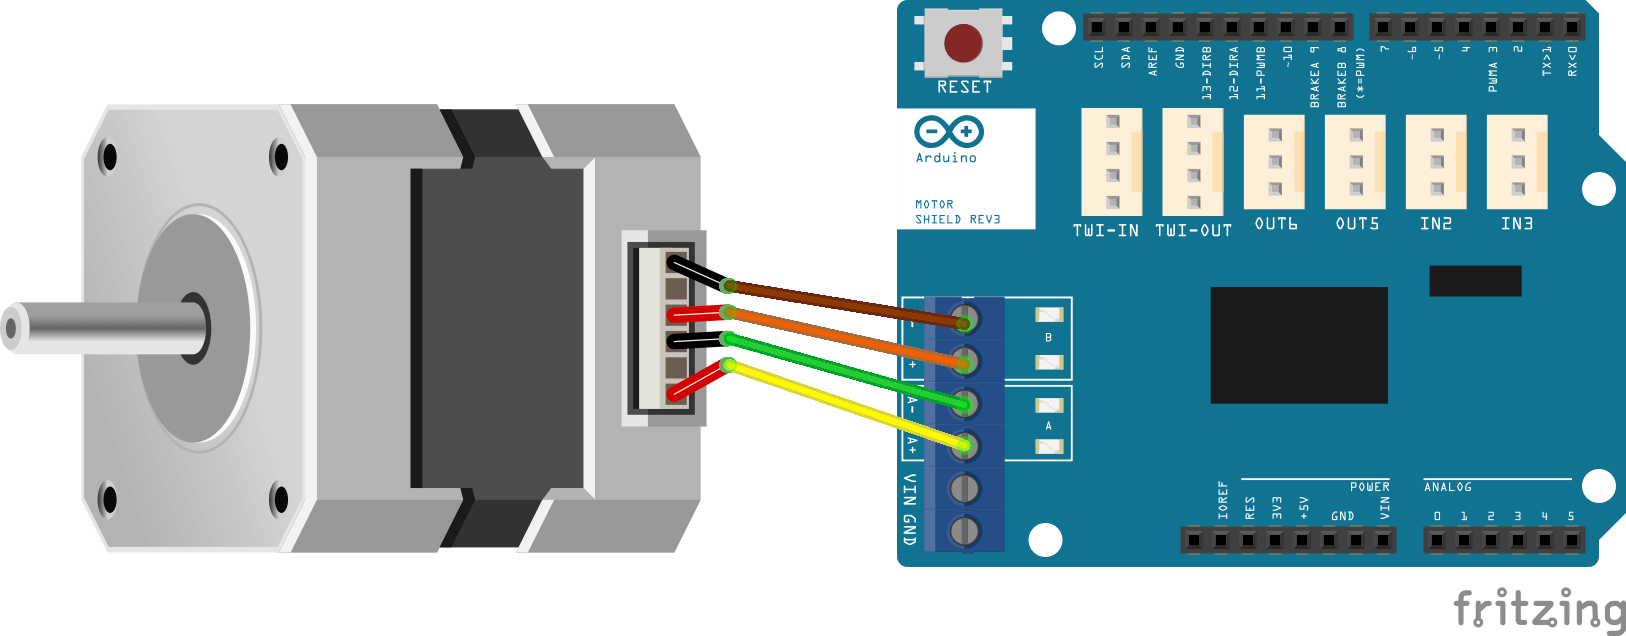
Compatible with UNO and Mega cards, the shield is placed directly on the Arduino card. The power supply is connected to the power terminal block. The motors are connected to the A+,A-,B+,B- terminals. The pins of the Arduino are directly connected to the pins of the integrated circuit:
- Digital pin 12: direction DC Motor #A / Stepper #A
- Digital pin 13: direction DC Motor #B / Stepper #B
- Digital pin 3: vitesse DC Motor #A / Stepper #A
- Digital pin 11: vitesse DC Motor #B / Stepper #B
- Digital pin 9: activation brake DC Motor #A
- Digital pin 8: activation brake DC Motor #B
- Available inputs In2 In3 connected to analogue inputs A2 and A3
- Available outputs Out5, Out6 connected to PWM outputs 5 and 6
In the case of a shield, the connections are predefined. Check carefully in the technical documentation of the component how to use it.
The motor connections are detailed in the following diagrams.
Code
To interact with the Motor Shield, we do not use a special library as it is connected to the Arduino pins directly. You can always create your own library to simplify your code.
//Parameters
const int input_voltage  = 9;//V
const int nominal_voltage  = 5;////V
const int MAX_SPEED  = int(nominal_voltage * 255 / input_voltage);
const int directionA  = 12;
const int directionB  = 13;
const int brakeA  = 9;
const int brakeB  = 8;
const int speedA  = 3;
const int speedB  = 11;
const int in2  = A2;
const int in3  = A3;

void setup() {
  //Init Serial USB
  Serial.begin(9600);
  Serial.println(F("Initialize System"));
  //Init Motor Shield
  pinMode(directionA, OUTPUT); //Initiates Motor Channel A pin
  pinMode(brakeA, OUTPUT); //Initiates Brake Channel A pin
  pinMode(directionB, OUTPUT); //Initiates Motor Channel B pin
  pinMode(brakeB, OUTPUT); //Initiates Brake Channel B pin
}

void loop() {
  readSensorMS();
  testMotorMS();
  //testStepperMS();
}

void testStepperMS() { /* function testStepperMS */
  //// Test stepper
  Serial.println("Move stepper 1 step clockwise");
  stpCW(1);
  Serial.println("Move stepper 1 step counter clockwise");
  stpCCW(1);
}

void testMotorMS() { /* function testMotorMS */
  //// Test DC motor
  Serial.println(F("-------------------------------------"));
  Serial.println(F("Avant "));
  dcForward();
  delay(500);
  Serial.println(F("Arrière "));
  dcBackward();
  delay(500);
  Serial.println(F("Arrêt "));
  dcStop();
  delay(1000);
}

void readSensorMS() { /* function readSensorMS */
  //// Read sensors
  Serial.print(F("In2 : ")); Serial.println(analogRead(in2));
  Serial.print(F("In3 : ")); Serial.println(analogRead(in3));
}

void dcForward() { /* function dcForward */
  //// set forward motion for A and B
  digitalWrite(directionA, HIGH); //Establishes forward direction of Channel A
  digitalWrite(brakeA, LOW);   //Disengage the Brake for Channel A
  analogWrite(speedA, MAX_SPEED);
  digitalWrite(directionB, HIGH); //Establishes forward direction of Channel B
  digitalWrite(brakeB, LOW);   //Disengage the Brake for Channel B
  analogWrite(speedB, MAX_SPEED);
}

void dcBackward() { /* function dcBackward */
  //// set backward motion for A and B
  digitalWrite(directionA, LOW); //Establishes forward direction of Channel A
  digitalWrite(brakeA, LOW);   //Disengage the Brake for Channel A
  analogWrite(speedA, MAX_SPEED);
  digitalWrite(directionB, LOW); //Establishes forward direction of Channel B
  digitalWrite(brakeB, LOW);   //Disengage the Brake for Channel B
  analogWrite(speedB, MAX_SPEED);
}

void dcStop() { /* function dcStop */
  //// stop motors A and B
  digitalWrite(brakeA, HIGH);   //Engage the Brake for Channel A
  analogWrite(speedA, 0);
  digitalWrite(brakeB, HIGH);   //Engage the Brake for Channel B
  analogWrite(speedB, 0);
}

void stpCW(int nbstep) { /* function stpCW */
  //// Move stepper clockwise
  for (int i = 0; i < nbstep; i++) {
    digitalWrite(brakeA, LOW);  //Disable brake A
    digitalWrite(brakeB, HIGH); //Enable brake B
    digitalWrite(directionA, HIGH);   //Set direction of CH A
    analogWrite(speedA, MAX_SPEED);   //Set speed for CH A
    delay(30);

    digitalWrite(brakeA, HIGH);  //Enable brake A
    digitalWrite(brakeB, LOW); //Disable brake B
    digitalWrite(directionB, LOW);   //Set direction of CH B
    analogWrite(speedB, MAX_SPEED);   //Set speed for CH B
    delay(30);

    digitalWrite(brakeA, LOW);  //Disable brake A
    digitalWrite(brakeB, HIGH); //Enable brake B
    digitalWrite(directionA, LOW);   //Set direction of CH A
    analogWrite(speedA, MAX_SPEED);   //Set speed for CH A
    delay(30);

    digitalWrite(brakeA, HIGH);  //Enable brake A
    digitalWrite(brakeB, LOW); //Disable brake B
    digitalWrite(directionB, HIGH);   //Set direction of CH B
    analogWrite(speedB, MAX_SPEED);   //Set speed for CH B
    delay(30);
  }
}

void stpCCW(int nbstep) { /* function stpCCW */
  //// Move stepper counter-clockwise
  for (int i = 0; i < nbstep; i++) {
    digitalWrite(brakeA, LOW);  //Disable brake A
    digitalWrite(brakeB, HIGH); //Enable brake B
    digitalWrite(directionA, HIGH);   //Set direction of CH A
    analogWrite(speedA, MAX_SPEED);   //Set speed for CH A
    delay(30);

    digitalWrite(brakeA, HIGH);  //Enable brake A
    digitalWrite(brakeB, LOW); //Disable brake B
    digitalWrite(directionB, HIGH);   //Set direction of CH B
    analogWrite(speedB, MAX_SPEED);   //Set speed for CH B
    delay(30);

    digitalWrite(brakeA, LOW);  //Disable brake A
    digitalWrite(brakeB, HIGH); //Enable brake B
    digitalWrite(directionA, LOW);   //Set direction of CH A
    analogWrite(speedA, MAX_SPEED);   //Set speed for CH A
    delay(30);

    digitalWrite(brakeA, HIGH);  //Enable brake A
    digitalWrite(brakeB, LOW); //Disable brake B
    digitalWrite(directionB, LOW);   //Set direction of CH B
    analogWrite(speedB, MAX_SPEED);   //Set speed for CH B
    delay(30);
  }
}

void dcStop() { /* function dcStop */
  //// stop motors A and B
  digitalWrite(brakeA, HIGH);   //Engage the Brake for Channel A
  analogWrite(speedA, 0);
  digitalWrite(brakeB, HIGH);   //Engage the Brake for Channel B
  analogWrite(speedB, 0);
}
Applications
- Piloting a two-wheeled robot like Willy
Sources
Find other examples and tutorials in our Automatic code generator
Code Architect
