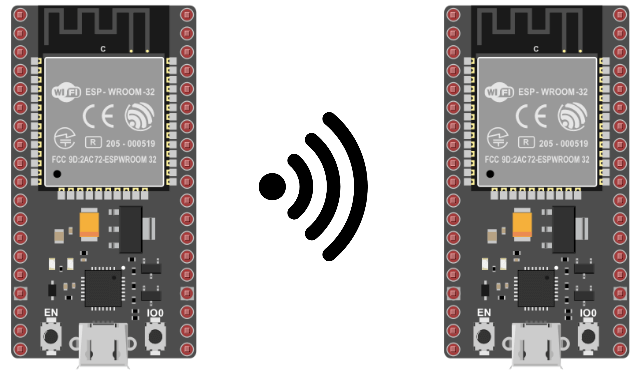
The NodeMCU ESP32 is a small microcontroller with a Wi-Fi chip. It is possible to establish a communication between two ESP32, when they are connected on the same network. In this tutorial, we will see a Master/Slave architecture, in which one ESP32 will play the role of a server and manage a web interface as well as the various “slave” requests.
Material
- Computer
- NodeMCU ESP32 x2 ou plus
- USB A Male/Micro B Male Cable
Configure the server with a fixed IP address
In some cases, such as creating a server, you will need to specify a particular IP address to your microcontroller. It is possible to set a fixed address on ESP32s by specifying the IP addresses of the gateway and subnet.
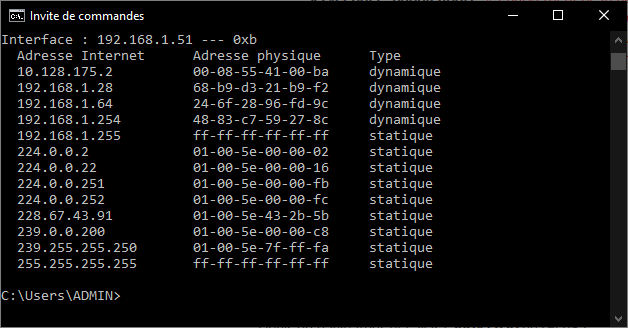
At the command prompt, type arp -a to display the IP addresses already in use on your network. Choose an address that is not in the list (e.g. 192.168.1.103)
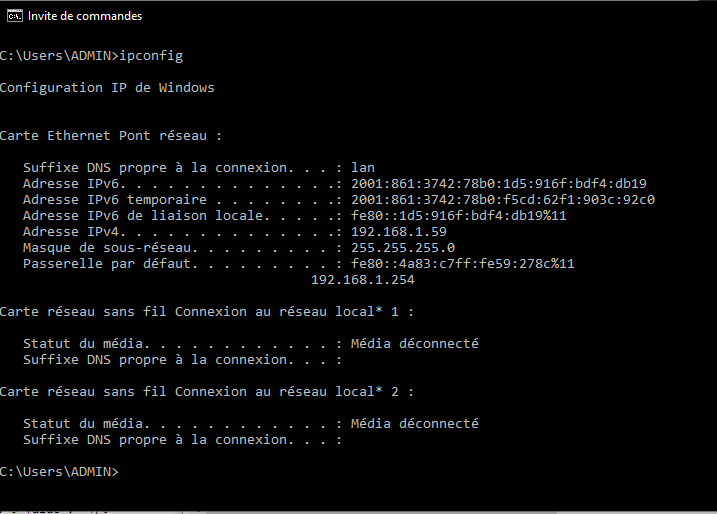
Then type ipconfig to retrieve the IP addresses for your router.
Initialise the different IP addresses in the Arduino code (don’t forget to replace these addresses with those displayed on your computer).
IPAddress ip(192, 168, 1,103 );
IPAddress gateway(192, 168, 1, 254);
IPAddress subnet(255, 255, 255, 0);
Then you can configure the Wi-Fi connection before initialising it
WiFi.config(ip, gateway, subnet); // Static IP setup
WiFi.begin(ssid, password);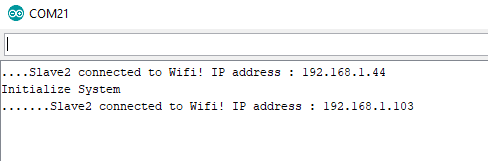
ESP32 Master Code
For the Master microcontroller, we will create a server to manage the browser requests, the web interface and the requests coming from the slave microcontrollers. We use the WiFi.h library which allows the management of the WiFi chip for the ESP32 cards.
N.B.: Don’t forget to change the values of ssid and password, by the name and the password of the wifi network you want to use
//Libraries
#include <WiFi.h>
//Constants
#define NUM_SLAVES 1
#define LED 2
//Parameters
String nom = "Master";
const char* ssid = "*******";
const char* password = "**********";
//Variables
bool sendCmd = false;
String slaveCmd = "0";
String slaveState = "0";
//Objects
WiFiServer server(80);
WiFiClient browser;
IPAddress ip(192, 168, 1, 44);
IPAddress gateway(192, 168, 1, 254);
IPAddress subnet(255, 255, 255, 0);
void setup() {
//Init Serial USB
Serial.begin(115200);
Serial.println(F("Initialize System"));
//Init ESP32 Wifi
WiFi.config(ip, gateway, subnet); // forces to use the fix IP
WiFi.begin(ssid, password);
while (WiFi.status() != WL_CONNECTED) {
delay(500);
Serial.print(F("."));
}
server.begin();
Serial.print(nom);
Serial.print(F(" connected to Wifi! IP address : http://")); Serial.println(WiFi.localIP()); // Print the IP address
pinMode(LED, OUTPUT);
}
void loop() {
clientRequest();
}
void clientRequest( ) { /* function clientRequest */
////Check if client connected
WiFiClient client = server.available();
client.setTimeout(50);
if (client) {
if (client.connected()) {
//Print client IP address
Serial.print(" ->");Serial.println(client.remoteIP());
String request = client.readStringUntil('\r'); //receives the message from the client
if (request.indexOf("Slave0") == 0) {
//Handle slave request
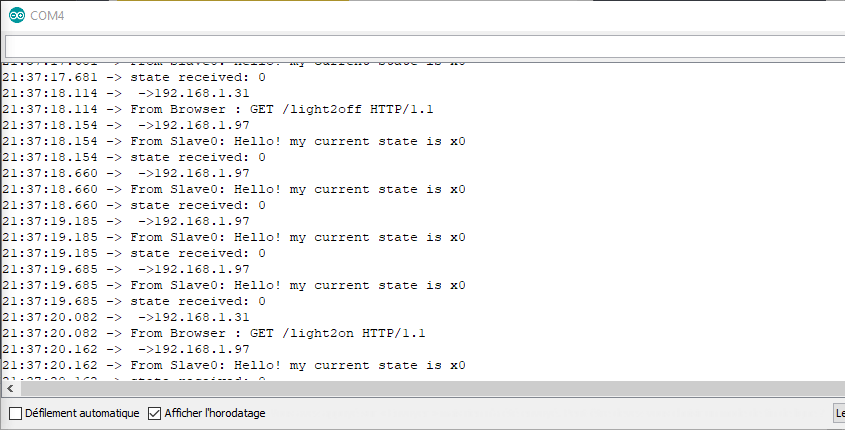
Serial.print("From "); Serial.println(request);
int index = request.indexOf(":");
String slaveid = request.substring(0, index);
slaveState = request.substring(request.indexOf("x") + 1, request.length());
Serial.print("state received: "); Serial.println(slaveState);
client.print(nom);
if (sendCmd) {
sendCmd = false;
client.println(": Ok " + slaveid + "! Set state to x" + String(slaveCmd) + "\r");
} else {
client.println(": Hi " + slaveid + "!\r"); // sends the answer to the client
}
client.stop(); // terminates the connection with the client
} else {
Serial.print("From Browser : "); Serial.println(request);
handleRequest(request);
webpage(client);
}
}
}
}
void handleRequest(String request) { /* function handleRequest */
////Check if client connected
if (request.indexOf("/light1on") > 0) {
digitalWrite(LED, LOW);
}
if (request.indexOf("/light1off") > 0) {
digitalWrite(LED, HIGH);
}
if (request.indexOf("/light2on") > 0) {
sendCmd = true;
slaveCmd = "1";
}
if (request.indexOf("/light2off") > 0) {
sendCmd = true;
slaveCmd = "0";
}
}
void webpage(WiFiClient browser) { /* function webpage */
////Send webpage to browser
browser.println("HTTP/1.1 200 OK");
browser.println("Content-Type: text/html");
browser.println(""); // do not forget this one
browser.println("<!DOCTYPE HTML>");
browser.println("<html>");
browser.println("<head>");
browser.println("<meta name='apple-mobile-web-app-capable' content='yes' />");
browser.println("<meta name='apple-mobile-web-app-status-bar-style' content='black-translucent' />");
browser.println("</head>");
browser.println("<body style = ' background-color:#000000; color:white;'>");
browser.println("<hr/><hr>");
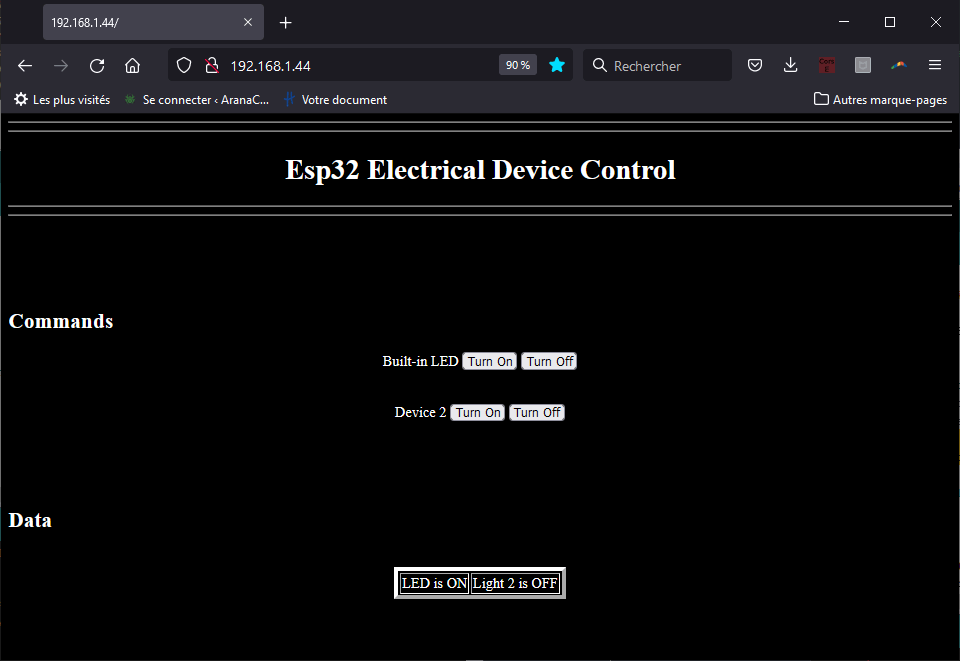
browser.println("<h1><center> Esp32 Electrical Device Control </center></h1>");
browser.println("<hr/><hr>");
browser.println("<br><br>");
browser.println("<br><br>");
browser.println("<h2> Commands </h2>");
browser.println("<center>");
browser.println("Built-in LED");
browser.println("<a href='/light1on'><button>Turn On </button></a>");
browser.println("<a href='/light1off'><button>Turn Off </button></a><br />");
browser.println("</center>");
browser.println("<br><br>");
browser.println("<center>");
browser.println("Device 2");
browser.println("<a href='/light2on'><button>Turn On </button></a>");
browser.println("<a href='/light2off'><button>Turn Off </button></a><br />");
browser.println("</center>");
browser.println("<br><br>");
browser.println("<br><br>");
browser.println("<h2> Data </h2>");
browser.println("<center>");
browser.println("<table border='5'>");
browser.println("<tr>");
if (digitalRead(LED))
{
browser.print("<td>LED is OFF</td>");
}
else
{
browser.print("<td>LED is ON</td>");
}
browser.println("<br />");
if (slaveState == "1") //(digitalRead(4))
{
browser.print("<td>Light 2 is OFF</td>");
}
else
{
browser.print("<td>Light 2 is ON</td>");
}
browser.println("</tr>");
browser.println("</table>");
browser.println("</center>");
browser.println("</body></html>");
delay(1);
}
Code ESP32 Esclave
In the slave code, we will connect to the server using the previously used IP address.
N.B.: Don’t forget to modify and use the same ssid and password values as in the Master module so that both ESP32 cards are connected to the same network.
//Libraries
#include <WiFi.h>
//Constants
#define LED 2
#define UPDATE_TIME 500
//Parameters
String nom = "Slave0";
const char* ssid = "*******";
const char* password = "*******";
//Variables
String command;
unsigned long previousRequest = 0;
//Objects
WiFiClient master;
IPAddress server(192, 168, 1, 44);
void setup() {
//Init Serial USB
Serial.begin(115200);
Serial.println(F("Initialize System"));
//Init ESP32 Wifi
WiFi.begin(ssid, password);
while (WiFi.status() != WL_CONNECTED) {
delay(500);
Serial.print(F("."));
}
Serial.print(nom);
Serial.print(F(" connected to Wifi! IP address : ")); Serial.println(WiFi.localIP()); // Print the IP address
pinMode(LED, OUTPUT);
}
void loop() {
requestMaster();
}
void requestMaster( ) { /* function requestMaster */
////Request to master
if ((millis() - previousRequest) > UPDATE_TIME) { // client connect to server every 500ms
previousRequest = millis();
if (master.connect(server, 80)) { // Connection to the server
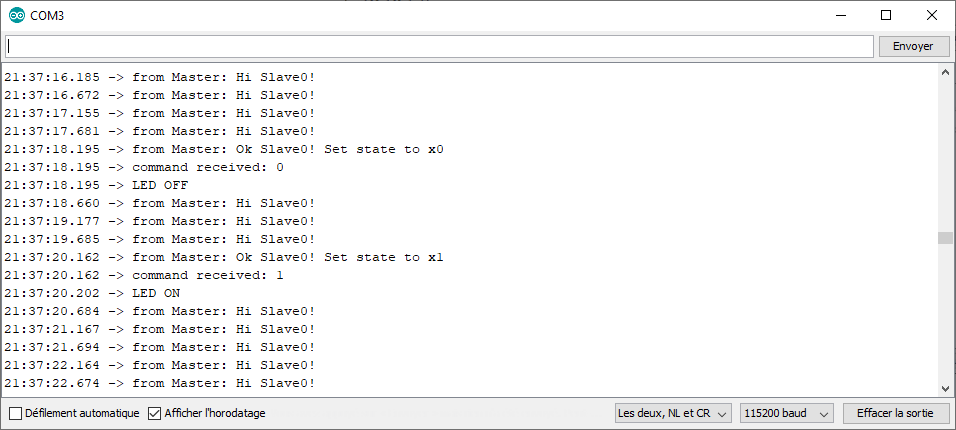
master.println(nom + ": Hello! my current state is x" + String(!digitalRead(LED)) + "\r");
//answer
String answer = master.readStringUntil('\r'); // receives the answer from the sever
master.flush();
Serial.println("from " + answer);
if (answer.indexOf("x") >= 0) {
command = answer.substring(answer.indexOf("x") + 1, answer.length());
Serial.print("command received: "); Serial.println(command);
if (command == "1") {
Serial.println("LED ON");
digitalWrite(LED, LOW);
} else {
Serial.println("LED OFF");
digitalWrite(LED, HIGH);
}
}
}
}
}
Result
When the microcontrollers are connected to the Wi-Fi and communication between the two ESP32s is established, we can see that information and commands are exchanged between the two boards. It is also possible to control the LEDs on both boards using the buttons on the interface.
In this tutorial, we have seen how to make two ESP32s communicate over the local Wi-Fi network. It is also possible to reproduce this tutorial using the ESP32 Master card in Access Point mode.
Applications
- Create a network of Esp32 NodeMCUs (or other microcontrollers) to manage different devices or sensors


