In this tutorial, we’ll look at how to create a desktop application using the Electron framework. This programming environment enables you to develop GUIs using the Web languages JavaScript, HTML and CSS, compatible with several OS.
Setting up the programming environment
For this tutorial, we’ll be using the VS Code code editor.
The Electron framework works with Node.js software. Download and install the latest version
or enter the following commands on Linux
sudo apt-get install nodejs npmCheck installed versions. This will help you check library compatibility.
node -v
npm -v
In the VSCode terminal, create your working directory
mkdir ElectronApp && cd ElectronApp
In the application directory, enter the initialization command to create the default files
npm init
Enter the requested information. Note that Electron takes main.js as its entry point.
Press ^C at any time to quit.
package name: (electronapp)
version: (1.0.0)
description: custom electron app for dev and tutorials
entry point: (index.js) main.js
test command:
git repository:
keywords:
author: aranacorp
license: (ISC) MIT
About to write to D:\Formation\Javascript\Electron\ElectronApp\package.json:

{
  "name": "electronapp",
  "version": "1.0.0",
  "description": "custom electron app for dev and tutorials",
  "main": "main.js",
  "scripts": {
    "test": "echo \"Error: no test specified\" && exit 1",
    "start": "electron ."
  },
  "author": "aranacorp",
  "license": "MIT"
}
You can then install the electron
npm install --save-dev electron
Once the package.json file has been created, add the following line to scripts
"start": "electron ."
This scirpt is used to launch the application with the command
npm start
Creation of the first Electron application
In this example, we’ll retrieve the versions of node and electron as in the basic tutorial. We’ll also add an input field to define a possible URL.
To create the application, we’ll create 5 files
- main.js manages the application lifecycle
- index.html contains the HTML page
- ./src/ac_style.css contains the style of the HTML page
- preload.js contains the preload script, including inter-process communication functions
- renderer.js contains the functions that manage the HTML page
- main.js
const { app, BrowserWindow, ipcMain } = require('electron')
const path = require('node:path')

const createWindow = () => {
    const win = new BrowserWindow({
      width: 800,
      height: 600,
      //icon:'./src/logo_araignee.png',
      webPreferences: {
        preload: path.join(__dirname, 'preload.js')
      }
    })

    ipcMain.on('set-url', (event, url) => {
        console.log("url set to: ",url)
      })

    //win.webContents.openDevTools() //Open devtools on launch
    win.setTitle(app.getName()+"@"+app.getVersion());
    win.loadFile('index.html')
  }

  app.whenReady().then(() => {
    createWindow()

    app.on('activate', () => { //for macOS
        if (BrowserWindow.getAllWindows().length === 0) createWindow()
      })
  })

  app.on('window-all-closed', () => {
    if (process.platform !== 'darwin') app.quit()
  })
- index.html
<!DOCTYPE html>
<html>
  <head>
    <meta charset="UTF-8">
    <!-- https://developer.mozilla.org/en-US/docs/Web/HTTP/CSP -->
    <meta http-equiv="Content-Security-Policy" content="default-src 'self'; script-src 'self'">
	<link rel="stylesheet" href="./src/ac_style.css">
  </head>
  <body>
    <h1>Hello World!</h1>
    <p>Nous utilisons les versions: </p>
    <ul>
      <li>Node.js : <span id="node-version"></span></li>
      <li>Chromium : <span id="chrome-version"></span></li>
      <li>Electron : <span id="electron-version"></span></li>
  </ul>
  <p>CurrentURL: <span id="current-url">None</span></p>
  <p>URL: <input id="url"/> <button id="btn" type="button">Set</button></p>
  <script src="./renderer.js"></script>
  </body>
</html>
- ./src/ac_style.css
:root {
  --bg-color: #161616;
  --btn-color: #346751;
  --title-color: #3aaa35; /*#c84b31; #ff9900*/
  --text-color: #ecdbba;
}

body {
  background-color: var(--bg-color);
  color: var(--text-color);
  font-family: Arial, sans-serif;
  margin: 0;
  padding: 0;
}

h1 {
  color: var(--title-color);
}

p {
  font-size: 18px;
  margin-bottom: 20px;
}
- preload.js
const { contextBridge, ipcRenderer } = require('electron')

contextBridge.exposeInMainWorld('electronAPI', {
  setURL: (url) => ipcRenderer.send('set-url', url)
})

window.addEventListener('DOMContentLoaded', () => {
    const replaceText = (selector, text) => {
      const element = document.getElementById(selector)
      if (element) element.innerText = text
    }
    for (const dependency of ['chrome', 'node', 'electron']) {
      replaceText(`${dependency}-version`, process.versions[dependency])
    }
  })
- renderer.js
const urlInput = document.getElementById('url')
const currURL = document.getElementById('current-url')

const setButton = document.getElementById('btn')
setButton.addEventListener('click', () => {
  const url = urlInput.value
  window.electronAPI.setURL(url)
  currURL.innerHTML = url
})
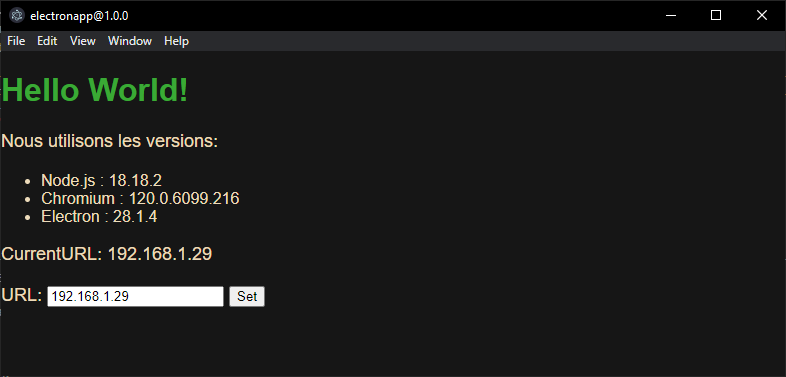
Results
Once the script has been launched with “npm start”, a window opens. You can update the URL using the input field and the “Set” button.
Create an executable for the application
To create the executable, we use the electron-packager package
npm install --save-dev electron-packager
You can then compile your project with the command
npx electron-packager <sourcedir> <appname> --platform=<platform> --arch=<arch> [optional flags...]Example for Windows
npx electron-packager . myElectronApp --overwrite --asar --platform=win32 --arch=x64 --icon=./src/logo_araignee.ico --prune=true --out=release-buildsExample for Linux
npx electron-packager . myElectronApp --overwrite --asar --platform=linux --arch=x64 --icon=./src/logo_araignee.ico --prune=true --out=release-builds| OS | platform | architecture |
| Windows | win32 | x86, x86_64, and arm64 |
| Linux | linux | x86, x86_64, armv7l, arm64, and mips64el |
| macOS | darwin | x86_64, arm64, and universal |
In package.json, add these two scripts as shortcuts;
    "build": "electron-packager . myElectronApp --overwrite",
    "clean": "rm -rf release-builds"
You can create an executable with the command
npm run build
or delete folders generated with
npm run clean
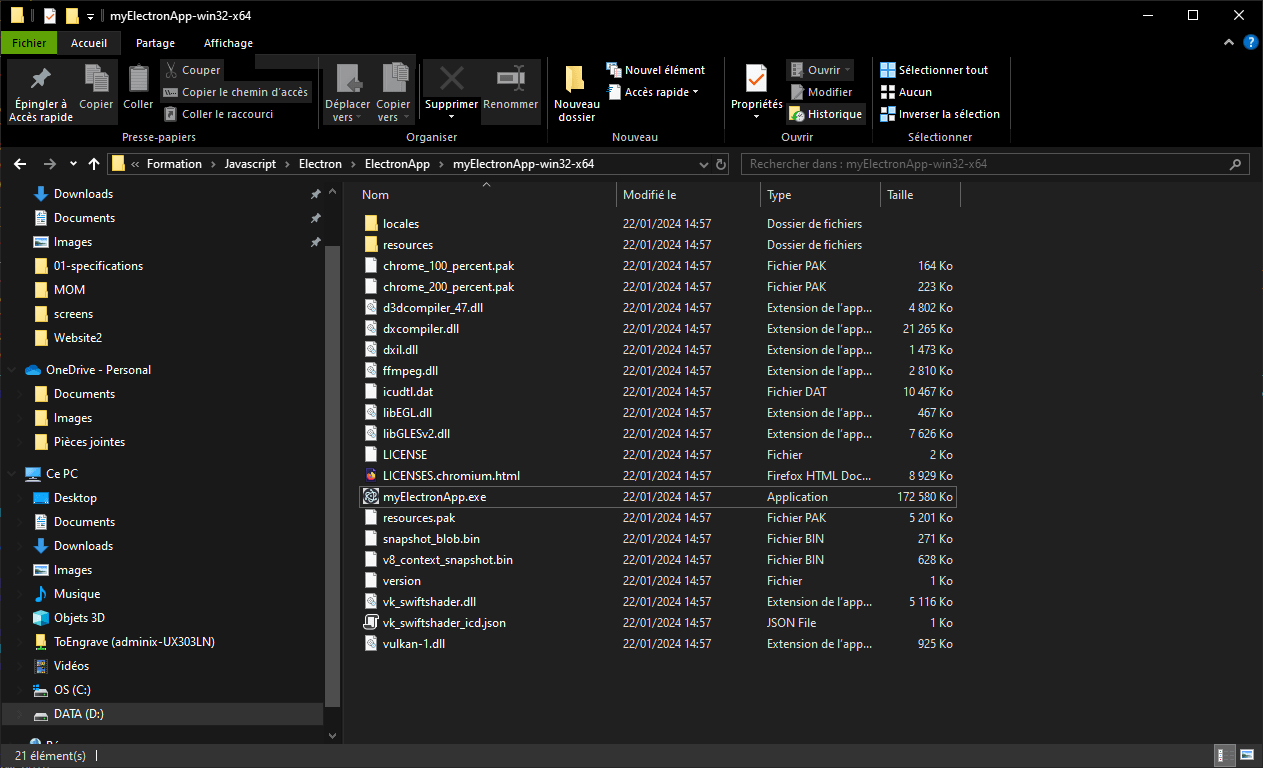
You can now launch the application from the executable file myElectronApp.exe
Bonus: Creating an application with Electron and React
We’re going to create the same application with Electron and React. To do this, we create a new project
npm init electron-app@latest react-electron-app -- --template=webpack
cd react-electron-app
npm install --save-dev @babel/core @babel/preset-react babel-loader
Then modify the webpack.rules.js file
  {
    test: /\.jsx?$/,
    use: {
      loader: 'babel-loader',
      options: {
        exclude: /node_modules/,
        presets: ['@babel/preset-react']
      }
    }
  }
npm install -save react react-dom
- index.html
<!DOCTYPE html>
<html>
  <head>
    <meta charset="UTF-8" />
    <title>Hello World!</title>

  </head>
  <body>
    <div id="root"></div>
  </body>
</html>
- renderer.js
import React from "react";
import ReactDOM from "react-dom/client";
import "./index.css";
import App from "./app.jsx";

const root = ReactDOM.createRoot(document.getElementById("root"));
root.render(
  <React.StrictMode>
    <App />
  </React.StrictMode>
);
- app.jsx
import React from "react";

class App extends React.Component {
  constructor(props) {
        super(props);
        this.state = {
            url: "None",
        };
    }

    setUrl = () => {
        //() => {this.setState({url: document.getElementById("url").value})}
        this.setState({url: document.getElementById("url").value})
    }

    render() {
    return (
        <div>

        <h1>Hello World!</h1>
        <p>Welcome to your Electron application.</p>
        <p>CurrentURL: <span id="current-url">{this.state.url}</span></p>
        <p>URL: <input id="url" /> <button id="btn" type="button" onClick={this.setUrl}>Set</button></p>

        </div>
    );
    }
}

export default App;
You can then launch the application with the command
npm start
To create the executable
npm run make


