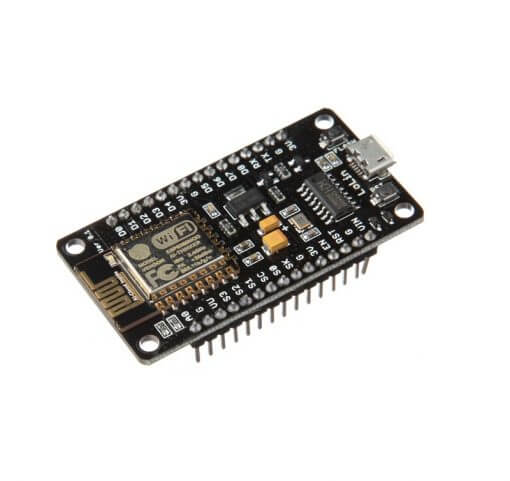
The NodeMCU ESP8266 is a microcontroller with an integrated Wifi module. Very easy to use, it is lightweight and has a memory and computing capacity greater than the Arduino. Ideal for your connected projects.
The basics of IoT is to connect objects to a network such as WiFi. The transmitter and WiFi antenna integrated in the microcontroller allow connection to the Internet. Thanks to this, it is possible to create a server that hosts a web page that allows the microcontroller to be controlled remotely. This page can be used to display values measured by the NodeMCU or to control inputs/outputs of the microcontroller.
Prerequisites: Programming a NodeMCU with the Arduino IDE
Hardware
- Computer
- NodeMCU ESP8266 (or Wemos)
- Câble USB A Mâle/Micro B Mâle
Principle of operation
The NodeMCU ESP8266 board contains an ESP-12E module containing a 32-bit microprocessor. It integrates a WiFi transceiver which allows it to connect to existing networks or to set up its own network.
The WiFi network is a radio network that works on the 2.45 GHz and 5 GHz frequencies.

Schematic
The microcontroller has an analogue input and 16 GPIO (11 Digital I/O) available on the pins of the development board. On the 25 pins:
- 1 anlogue input
- 4 PWM outputs
- Some are reserved for serial communication protocols (SPI, I2C, Serial).
It is necessary to have an Ethernet or Wifi component integrated or added to the microcontroller to have the ability to communicate on the network. The ESP-12E module has a Wifi interface. Therefore it does not require any additional component to connect to the internet.

Code
To use the NodeMCU card, we first need to install the card manager after adding the address https://arduino.esp8266.com/stable/package_esp8266com_index.json in the Arduino IDE preferences.
To communicate on the network, we need to use a special protocol. This protocol is integrated in all the libraries relating to Wifi communication.
- connect the WiFi module to the network
- define a server
- define a client
The library that will allow us to manage the Wifi transceiver is the ESP8266WiFi.h library. To load the Arduino code into the card, you must select the right card and the right port. In our case, the card is NodeMCU 1.0 (ESP-12E Module).
N.B.: Before compiling the code you should modify ssid and password to match the one from your Wifi network
//Libraries
#include <ESP8266WiFi.h>//https://github.com/esp8266/Arduino/blob/master/libraries/ESP8266WiFi/src/ESP8266WiFi.h

//Constants
#define LED D4

//Parameters
String request;
char* ssid = "********";
char* password = "********";
String nom = "ESP8266";

//Objects
WiFiServer server(80);

void setup(){
//Init Serial USB
Serial.begin(115200);
Serial.println(F("Initialize System"));
//Init ESPBrowser
  Serial.print(F("Connecting to "));Serial.println(ssid);
WiFi.begin(ssid, password);
  // Connect to Wifi network.
while (WiFi.status() != WL_CONNECTED)
{
  delay(500);Serial.print(F("."));
}
  server.begin();
  Serial.println();
  Serial.println(F("ESPBrowser initialized"));
  Serial.print(F("IP Address: "));
  Serial.println(WiFi.localIP());
//Init WiFi server
  server.begin();
  pinMode(LED, OUTPUT);
  pinMode(A0,INPUT);
}

void loop(){
WiFiClient client = server.available();
  if (!client) {
    return;
  }

  // Wait until the client sends some data
  Serial.println("new client");
  while(!client.available()){
    delay(1);
  }

  // Read the first line of the request
  String request = client.readStringUntil('\r');
  Serial.println(request);
  client.flush();
  handleRequest(request);
  webpage(client);//Return webpage
}

void handleRequest(String request){/* function handleRequest */
////Handle web client request
 if (request.indexOf("/light1on") > 0)  {
    digitalWrite(LED, LOW);
  }
  if (request.indexOf("/light1off") >0)  {
    digitalWrite(LED, HIGH);
  }
}

void webpage(WiFiClient client){/* function webpage */
////Send wbepage to client
  client.println("HTTP/1.1 200 OK");
  client.println("Content-Type: text/html");
  client.println(""); //  do not forget this one
  client.println("<!DOCTYPE HTML>");
  client.println("<html>");
  client.println("<head>");
  client.println("<meta name='apple-mobile-web-app-capable' content='yes' />");
  client.println("<meta name='apple-mobile-web-app-status-bar-style' content='black-translucent' />");
  client.println("</head>");
  client.println("<body bgcolor = '#70706F'>");
  client.println("<hr/><hr>");
  client.println("<h1 style='color : #3AAA35;'><center> "+nom+" Device Control </center></h1>");
  client.println("<hr/><hr>");
  client.println("<br><br>");
  client.println("<br><br>");
  client.println("<center>");
  client.println("  Pin A0");
  client.println("  <input value="+String(analogRead(A0))+" readonly></input>");
  client.println("  </center>");
  client.println("<center>");
  client.println("Built-in LED");
  client.println("<a href='/light1on'><button>Turn On </button></a>");
  client.println("<a href='/light1off'><button>Turn Off </button></a><br />");
  client.println("</center>");
  client.println("<br><br>");
  client.println("<br><br>");
  client.println("<center>");
  client.println("<table border='5'>");
  client.println("<tr>");
  client.print("<td>LED is </td>");
  if (digitalRead(LED))
  {
    client.print("<td> OFF</td>");
  }else{
    client.print("<td> ON</td>");
  }
   client.println("</tr>");
   client.println("</table>");
   client.println("</center>");
   client.println("</body></html>");
   client.println();
   delay(1);
}
Applications
- Use a web interface to drive motors or manage sensors connected to your ESP8266 microcontroller.


