GitHub is an open source version management and collaboration platform for software developers. It is based on Git, an open source versioning tool. It provides a chronology of lossless developments, which can easily be multi-user by specifying the author, date and description (message) of each change made by one of the users. There is a branching system for different versions of code with a common core.
What we call a Git repository is a kind of file system (database), recording file versions of a project at specific points in time in the form of snapshots. It’s important to keep track of your developments on your well-structured projects.
It’s important to know that Github isn’t the only repository site that works with Git. The command lines in this tutorial are also compatible with GitLab, Gerrit, Bitbucket and Codebase, to name but a few. In this tutorial, we’ll concentrate on Github.
Installation
You can also install Git on Linux with the following command in the console :
sudo apt-get install git
Install TortoiseGit : TortoiseGit is a Windows extension for using Git commands graphically via File Explorer. Git functions will be additional options accessible by right-clicking on any folder.
Cloning a repository
Once Git has been installed, you need to start by cloning a repository created on Github. Once your Github repository is ready, open the command terminal and start by creating the directory on your computer that will receive the repository clone.
mkdir nom-de-repertoire
cd nom-de-repertoire
Then you configure Git with your identifiers (adapt the content):
git init git config --global user.name "VotrePrénom VOTRENOM"git config --global user.email "votremail@mail.com"
And we end up cloning the repository into a folder
git clone https://github.com/VotreRepository [NomRepertoire]
Downloading a repository from the command line on Linux
To download files from a repository, you need a token linked to your github account.
Create an SSH key under github :
$ ssh-keygen -t ed25519 -C "your_email@example.com"
launch ssh-agent then add the key to ssh-agent
$ eval "$(ssh-agent -s)"
$ ssh-add ~/.ssh/id_ed25519
Finally, add the SSH key to your account
Enter the following command to display the cl “
$ cat ~/.ssh/id_ed25519.pub
Copy the result of the command and copy it into your github account settings in the SSH and GPG Keys menu.
Once the key has been generated and linked to your account, you can enter the following command to download the repositry
git clone git@github.com:<account_name>/<repo_name>.git
Updating changes (add, commit, push & pull)
Once you’ve cloned your repository into your directory, if you’ve made a modification to the directory, whether it’s a new file or the modification of a file already present, you now need to update the online repository, which will keep a history of your modifications:
git add NomDuFichier.extension
git commit -m "commentaire"
add adds a new file or its modifications to the current repository. You can do several in a row.commit allows you to make changes to the repository, including the files you have just added and the changes made to the files with the git add. You can add (and this is highly recommended) a comment to the commit to specify what you have changed, added or deleted. This will make the history of commits to the repository easier to read.
git push origin main
push is used to push the current branch to the branch you want to target on the remote repository. Here, origin main specifies pushing the main (local) branch to the main (origin) branch. From now on, you will see the changes to your repository appear on the online repository, along with the commit and its comment made just before. git add, git commit and git push are complementary commands.
git pull origin main
pull downloads and merges new data from the remote repository into your directory. This will update your directory relative to the online repository with the latest commits that have been pushed to it. You can also add the -rebase option before the repository and origin, so that instead of merging the new data, you rebase your directory (but never do this on a public repository).
Basic command lists
git status
status displays the status of files in the current directory. There are 3 different statuses:- Untracked files: unversioned files (which have not been added and are new) – Changes to be committed: modifications (additions, deletions, changes) loaded in the staging area (add but not commit) or indexed – Changes not staged for commit: modifications that have not been loaded in the staging area (files that already exist but have not been added or committed).
git reset Nomdufichier.extension
reset cancels indexed changes to a file.
git checkout -- Nomdufichier.extension
checkout is used to cancel changes to a file that have not yet been indexed.
git log
log shows the history of commits.
git rm Nomdufichier.extension
rm is used to index the deletion of a file. You can add the -cached option before the filename to undelete the file instead.
git diff
diff is used to display details of non-indexed modifications. You can add the – staged option for indexed modifications.
git remote
remote is used to display the list of all the remote repositories for the project (some projects may work with different remote repositories for a single project).
git remote add Nom https://github.com/VotreRepository
remote add is an alternative to git clone, but where git clone copies the online repository, here you add a new repository alongside one that already exists on your computer in your directory.
git fetch origin
fetch retrieves changes from a remote repository (the name of the repository is usually origin but you can adapt it to suit your needs).
Using Tortoise
For those who don’t feel like writing command lines in a terminal on Windows, you can use TortoiseGit to use Git graphically.
Create an empty folder and then right-click on it. The TortoiseGit options will appear, giving you access to the various Git commands:

We start by configuring TortoiseGit by clicking on Settings :
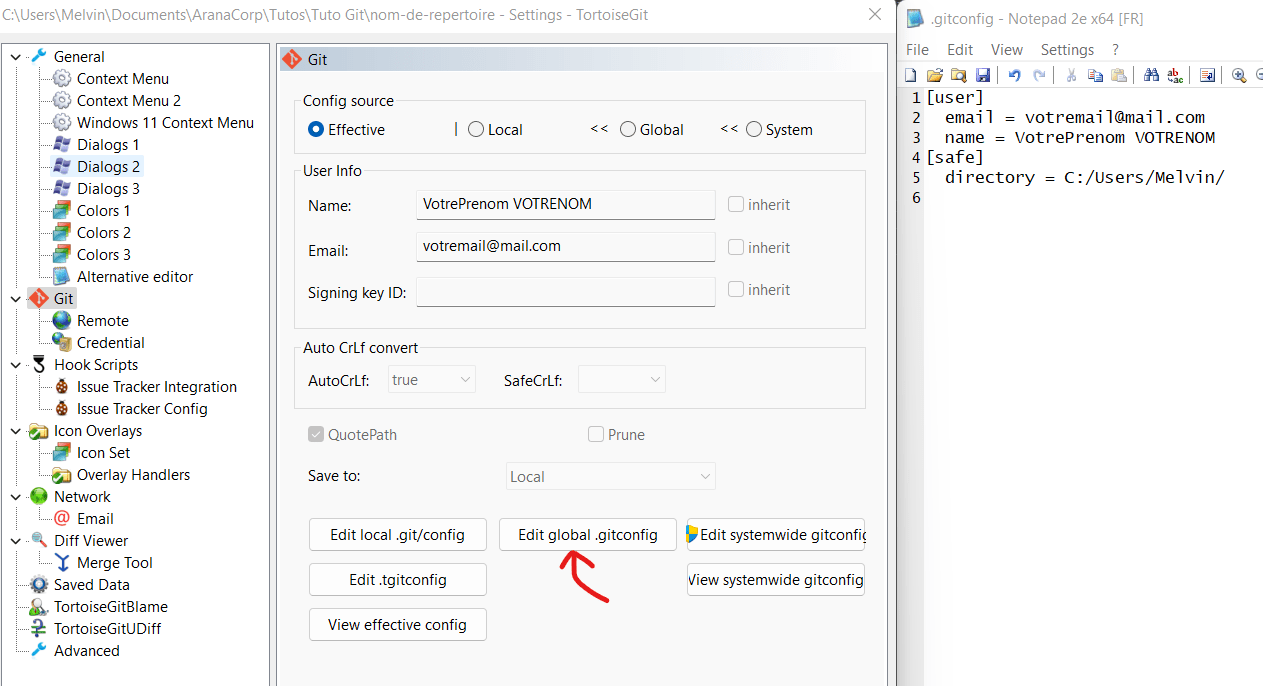
To change the name and email, click on Edit global .gitconfig and enter your name and email.
You can then clone a repository by clicking on Clone :
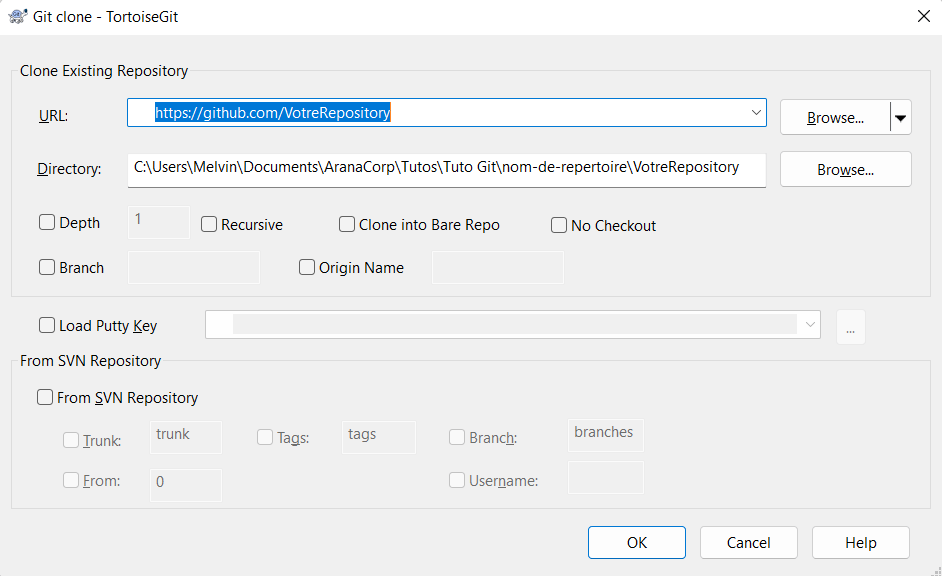
The first time you clone a repository, additional windows may open asking you to connect to your Github account. Please do so.
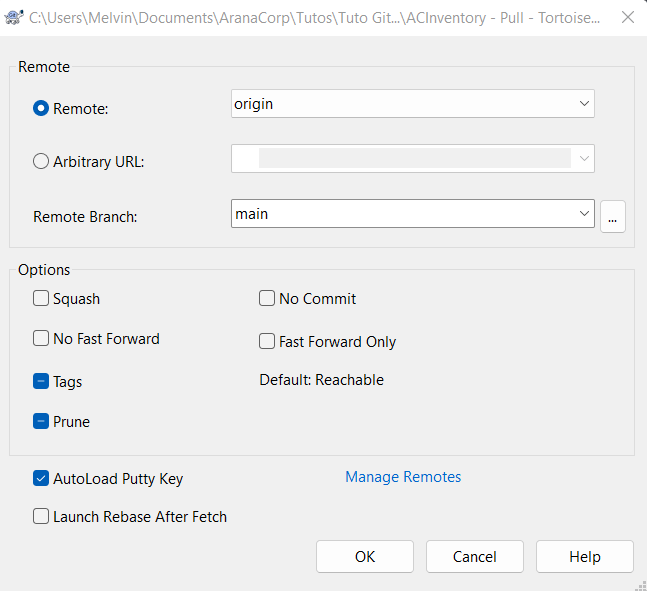
To retrieve the data, simply click on Pull. Here you can choose which branch and which repository to retrieve the data from:
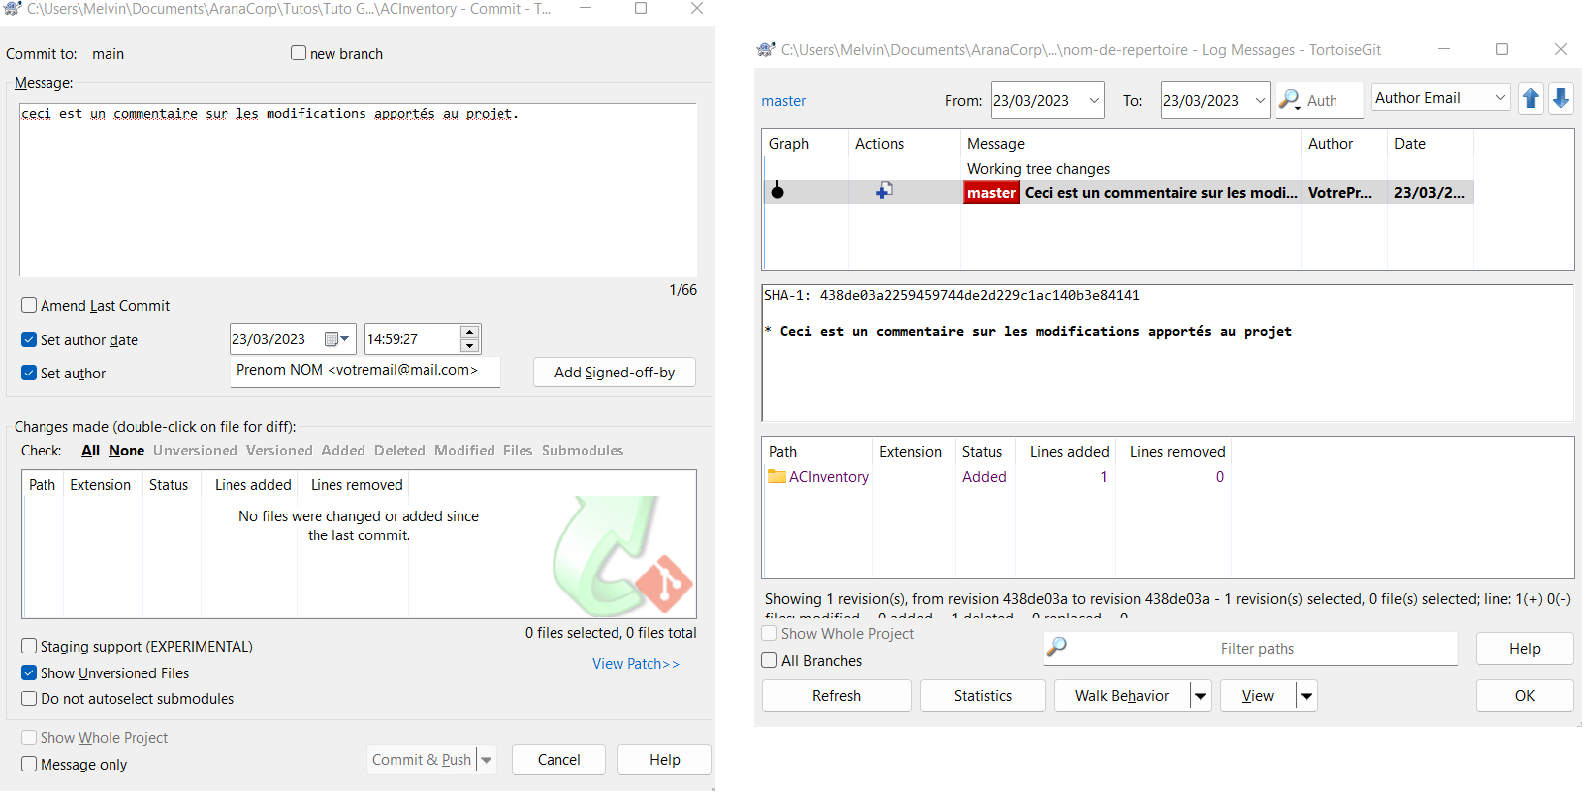
To send the changes made locally, simply click on Commit. It is advisable to write a comment, the name of the author of the commit and the date and time. You can also Push at the same time using the Commit&Push option. Click on Log to view the commit history: