,
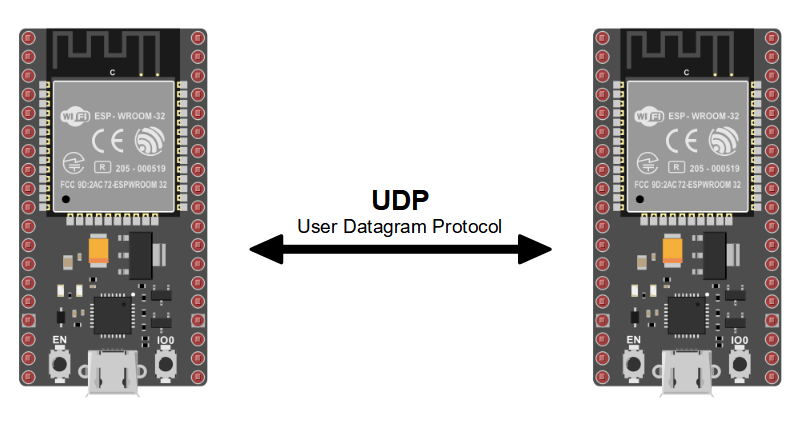
The NodeMCU ESP32 is a small microcontroller with a WiFi chip. It is possible to establish communication between two ESP32s, when they use the same network. In this tutorial, we’ll look at an architecture with two NodeMCUs exchanging data via the UDP protocol.
If you don’t have access to a second ESP32, you can test communication with Packet Sender.
Hardware
- Computer
- NodeMCU ESP32 x2 or more
- USB A Male cable
Code ESP32 UDP Server
For the Server microcontroller, we’ll create a server to handle requests from client microcontrollers. We’ll use the WiFi.h library to manage the WiFi chip for ESP32 cards, and the WiFiUdp.h library to manage UDP requests.
N.B.: Don’t forget to change the ssid and password values to the name and password of the wifi network you wish to use.
#include <WiFi.h>
#include <WiFiUdp.h>
WiFiUDP udp;
char packetBuffer[255];
unsigned int localPort = 9999;
const char *ssid = "**********";
const char *password = "**********";

void setup() {
  Serial.begin(115200);
  // Connect to Wifi network.
  WiFi.begin(ssid, password);
  while (WiFi.status() != WL_CONNECTED){
    delay(500); Serial.print(F("."));
  }
  udp.begin(localPort);
  Serial.printf("UDP server : %s:%i \n", WiFi.localIP().toString().c_str(), localPort);
}

void loop() {
  int packetSize = udp.parsePacket();
  Serial.print(" Received packet from : "); Serial.println(udp.remoteIP());
  Serial.print(" Size : "); Serial.println(packetSize);
  if (packetSize) {
    int len = udp.read(packetBuffer, 255);
    if (len > 0) packetBuffer[len - 1] = 0;
    Serial.printf("Data : %s\n", packetBuffer);
    udp.beginPacket(udp.remoteIP(), udp.remotePort());
    udp.printf("UDP packet was received OK\r\n");
    udp.endPacket();
  }
  Serial.println("\n");
  delay(500);
  Serial.print("[Server Connected] ");
  Serial.println (WiFi.localIP());
}
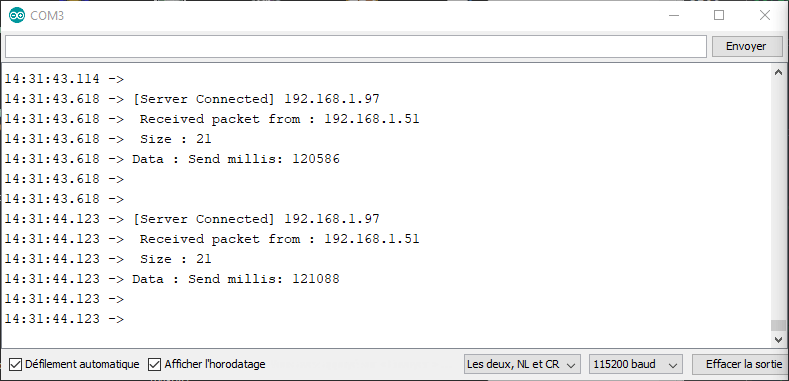
Once the code has been loaded, you can retrieve the IP address and port of the server card from the serial monitor and copy it into the client code (here, 192.168.1.97:9999).
Code ESP32 UDP Client
In the client code, we’ll connect to the server using the IP address we previously used (here 192.168.1.97).
N.B.: Don’t forget to modify and use the same ssid and password values as in the Server module, so that both ESP32 cards connect to the same network.
#include <WiFi.h>
#include <WiFiUdp.h>
WiFiUDP udp;
char packetBuffer[255];
unsigned int localPort = 9999;
const char *ssid = "******";
const char *password = "********";

void setup() {
  Serial.begin(115200);
  // Connect to Wifi network.
  WiFi.begin(ssid, password);
  while (WiFi.status() != WL_CONNECTED){
    delay(500); Serial.print(F("."));
  }
  udp.begin(localPort);
  Serial.printf("UDP Client : %s:%i \n", WiFi.localIP().toString().c_str(), localPort);
}

void loop() {
  int packetSize = udp.parsePacket();
  Serial.print(" Received packet from : "); Serial.println(udp.remoteIP());
  Serial.print(" Size : "); Serial.println(packetSize);
  if (packetSize) {
    int len = udp.read(packetBuffer, 255);
    if (len > 0) packetBuffer[len - 1] = 0;
    Serial.printf("Data : %s\n", packetBuffer);
  }
  Serial.println("\n");
  delay(500);
  Serial.print("[Client Connected] ");
  Serial.println(WiFi.localIP());
  udp.beginPacket("192.168.1.97", localPort);
  udp.printf("Send millis: ");
  char buf[20];
  unsigned long testID = millis();
  sprintf(buf, "%lu", testID);
  udp.printf(buf);
  udp.printf("\r\n");
  udp.endPacket();
}
N.B.: In this example, the port used on the client is the same as the port used on the server. These values may be different.
Results
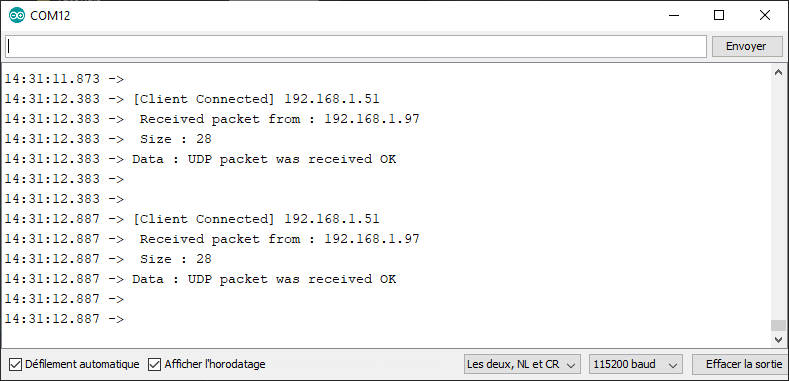
When the microcontrollers connect to Wifi and communication between the two ESP32s is established, we can see that information is exchanged between the two boards. It is then possible to control a device connected to the client from the server, or vice versa.
Applications
- Create a network of Esp32 NodeMCUs to manage different devices or sensors


