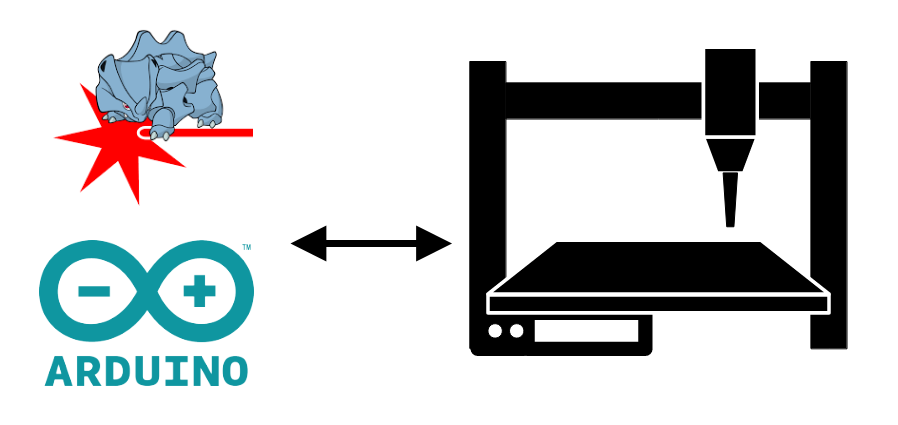
In this tutorial, we’ll look at how to drive a CNC using laserGRBL software, an Arduino and a CNC shield. If you have a workshop or want to make things yourself, you’ll probably want to build or hack a CNC milling machine.
In a previous tutorial, we saw a description of the Shield CNC, and now we’re going to see how to use it to drive a digital milling machine. In this tutorial, I won’t focus on mechanical design, but rather on electronics and software.
Hardware
- CNC machine (digital milling or laser engraving)
- CNC Shield
- Arduino UNO or compatible
- Stepper driver DRV8825
Connection diagram
The Shield CNC and the laser are powered by 12V. We use a transistor to regulate the laser power.
Locate the X, Y and Z axes on the machine and connect the motors accordingly on the board. Pay attention to the order

Setting stepper motor drivers
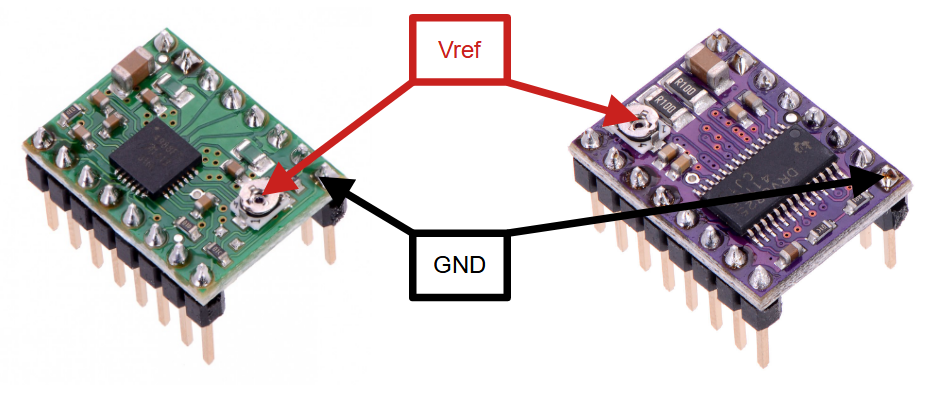
- Current limit
Stepper motors are designed for a certain current level. Depending on the supply voltage, the current limit delivered by the driver can be set using a multimeter and the potentiometer on the board. To do this, measure the voltage between the potentiometer and ground.
Then set the potentiometer according to the following formula Vref= max_current
Example: For 1.2A, the value measured at the potentiometer should be 0.6V.
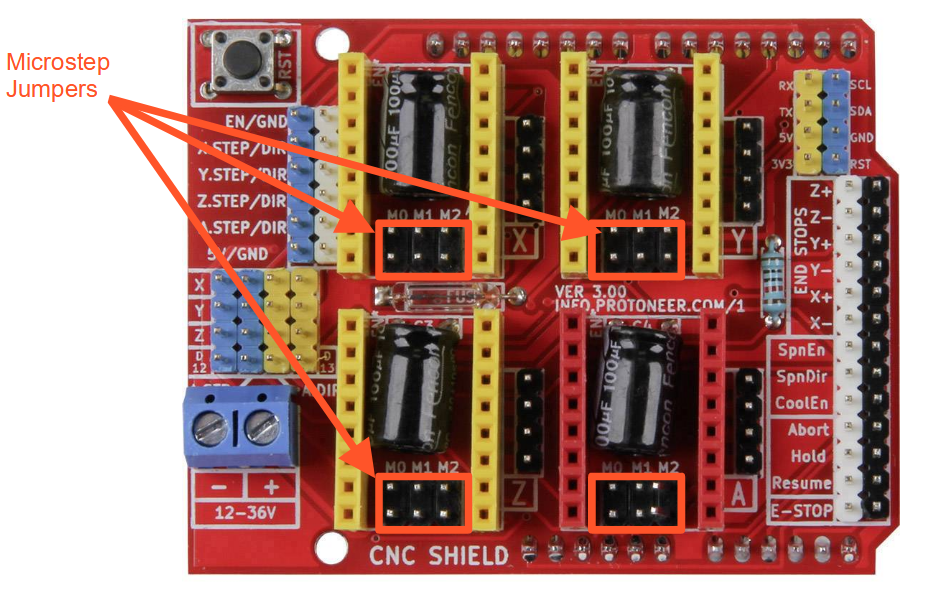
- Resolution
It may also be important to set the driver resolution using jumpers to improve accuracy and reduce vibration noise. You can choose between different resolutions: up to 16 for the A4988 and 32 for the DRV8825.
| M0 | M1 | M2 | DRV8825 | A4988 |
|---|---|---|---|---|
| Low | Low | Low | Full step | Full step |
| High | Low | Low | 1/2 step | 1/2 step |
| Low | High | Low | 1/4 step | 1/4 step |
| High | High | Low | 1/8 step | 1/8 step |
| Low | Low | High | 1/16 step | NC |
| High | Low | High | 1/32 step | NC |
| Low | High | High | 1/32 step | NC |
| High | High | High | 1/32 step | 1/16 step |
Installing GRBL firmware on Arduino
Download the GRBL library for Arduino… Unzip the file, grbl-master.zip
Dans l’IDE Arduino, importez la libraire GRBL. Dans croquis>Inclure une bibliothèque> Ajouter la bibliothèque .ZIP, puis sélectionnez le dossier grbl-master/grbl
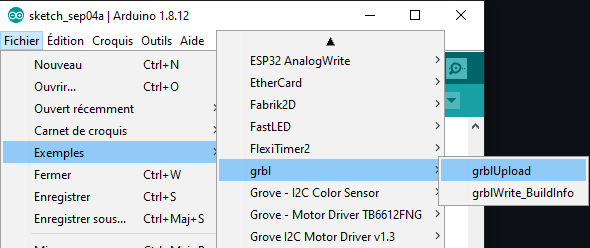
To flash the firmware to the Arduino board, select File>Examples> grbl>grpblUpload and upload the code to the microcontroller.
Install LaserGRBL
Download and install LaserGRBL
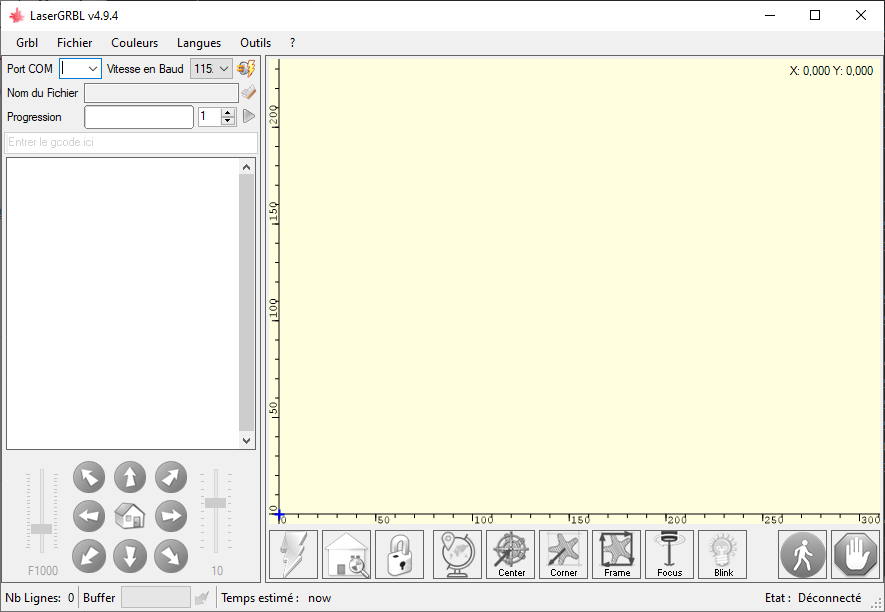
Then connect to the Arduino to use the interface to test and configure your CNC.
If you prefer, you can install LaserGRBL under Linux to have a machine dedicated to the engraver.
Configuring GRBL for your CNC
Once the CNC shield has been connected and the LaserGRBL software installed, you can configure the machine parameters.
To do this, a menu is available in the interface.
N.B.: You can also find these parameters in the config.h file (C:\Users\ADMIN\Documents\Arduino\libraries\grbl\config.h).
Value of mm per step ($100,$101 and $102) is given by the following formula on each axis
step/mm= (step/rev)/(mm/rev)*microstep
the conversion from motor steps to mm will depend on the CNC architecture
Two widespread examples are:
- GT2 pulley belt (mm
- T8 worm (mm
There are certain parameters to take into account if you have limit switches and use a laser.
To configure a laser, you need to modify the following parameters:
- $30=255 max spindle speed (Laser PWM maximum value)
- $32=0 min spindle speed (Laser PWM minimum value)
- $32=1 Laser mode activated
For speed and acceleration, you’ll need to experiment a little to find the right settings for your machine.
Mechanical adjustments
A few adjustments need to be made before the machine can be used properly. Be sure to check the following points
- Tighten bolts and belts
- set zero point
- adjust laser focus
- Check connections
Results
For reference, here are the laserGRBL parameters for a 240x340mm laser engraver driven by Shield CNC and an Arduino UNO
$0=10
$1=25
$2=0
$3=2
$4=0
$5=0
$6=0
$10=1
$11=0.010
$12=0.002
$13=0
$20=0
$21=1
$22=1
$23=3
$24=50.000
$25=1000.000
$26=250
$27=2.000
$30=255
$31=0
$32=1
$100=160.000
$101=160.000
$102=160.000
$110=8000.000
$111=8000.000
$112=8000.000
$120=500.000
$121=500.000
$122=500.000
$130=240.000
$131=340.000
$132=200.000
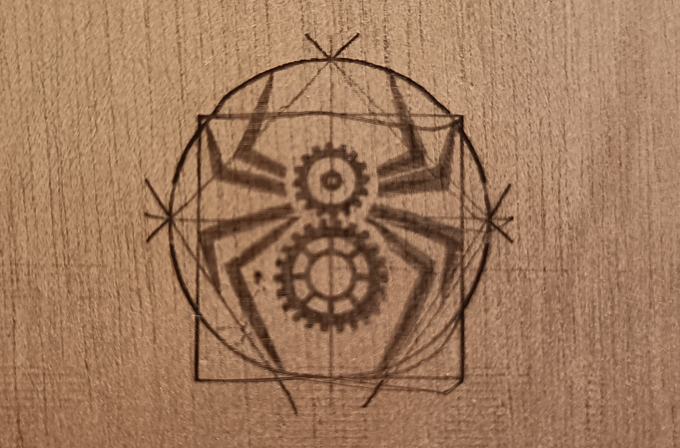
And the result of laser engraving