In order to generate synthetic sounds on your computer using an interface and create music, it is possible to transform an Arduino into a MIDI device.
Material
- Computer
- Arduino with USB port
Introduction to the MIDI protocol
MIDI (Musical Instrument Digital Interface) is a communication protocol between electronic instruments, controllers and music software. It consists in sending a series of bytes (command then data) at a speed of 31250 (baudrate) to specify the type of message (play note, stop note, change program, etc.) and the associated information (played note, selected program, etc.). Here is a summary of the MIDI messages.

Code to send MIDI messages with Arduino
We will see how to send MIDI messages via the serial port. In this example, we will send note commands successively. Just like pressing different keys on a piano. To do this we send the following information in a precise order:
- noteOn or Off command play the note or stop it
- the note played or pitch
- speed at which the key is pressed
A large number of messages exist in the MIDI protocol to perform different actions such as changing instruments, modulating notes, etc.
 int velocity = 100;//velocity of MIDI notes, must be between 0 and 127
 //higher velocity usually makes MIDI instruments louder

 int noteON = 144;//144 = 10010000 in binary, note on command
 int noteOFF = 128;//128 = 10000000 in binary, note off command

void setup() {
  Serial.begin(115200);
}

void loop() {
  for (int note=50;note<70;note++) {//from note 50 (D3) to note 69 (A4)
    MIDImessage(noteON, note, velocity);//turn note on
    delay(300);//hold note for 300ms
    MIDImessage(noteOFF, note, velocity);//turn note off
    delay(200);//wait 200ms until triggering next note
  }
}

void MIDImessage(int command, int MIDInote, int MIDIvelocity) {
  Serial.write(command);//send note on or note off command
  Serial.write(MIDInote);//send pitch data
  Serial.write(MIDIvelocity);//send velocity data
}
Transfer this code to the Arduino microcontroller before moving on.
N.B.: the MIDI communication speed is 31250. In this example we will use a MIDI/Serial converter. So we can use any baudrate.
MIDI sound generation configuration with Windows
Setting up a virtual MIDI instrument
To generate sound, we need a sound synthesis software or a DAW (Digital Audio Workstation). DAWs can be quite complicated to use. For this tutorial, we will use a very simple virtual sound synthesizer: CoolSoft Virtual MIDI Synth.
- Download and install CoolSoft software

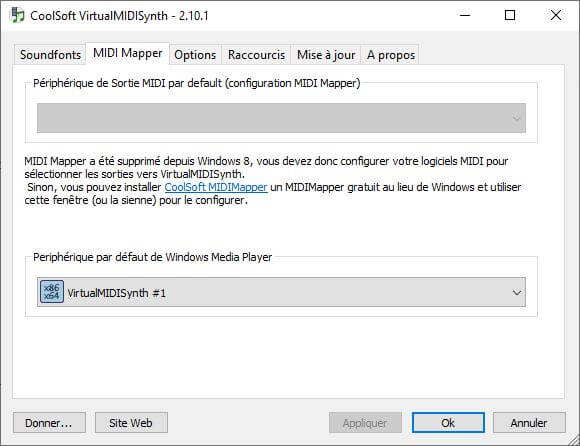
- In the MIDI Mapper tab, select VirtualMIDISynth in the default Windows Media Player device
- In the Option tab, select the audio output device
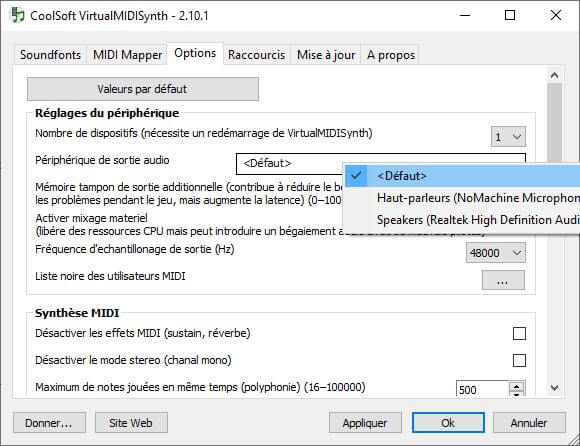
- Press “Apply”.
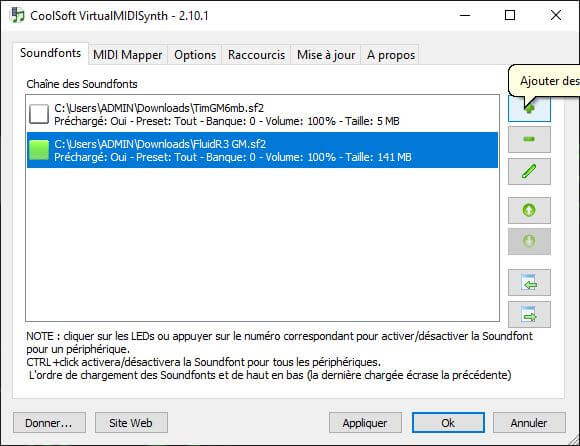
For the synthesis software to work, you need to use a SoundFont to convert MIDI messages into sounds coming from a piano, for example. You can find a list of SoundFonts on the CoolSoft page. Then you just have to download the .sf2 file you want and add it in the CoolSoft interface.
Setting up the Serial to MIDI converter
The MIDI communication is a particular protocol different from the USB communication. To take into account the MIDI messages sent by the Arduino via the USB port, we will need a Serial to MIDI converter
For this we use the Hairless Midi to Serial Bridge software, which will allow us to convert serial messages into MIDI messages.
- Download and open the Hairless software
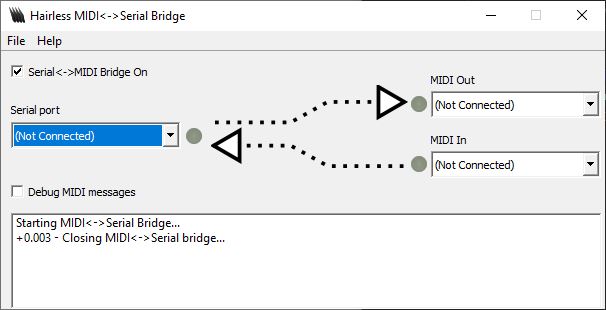
- Select the Arduino you have connected to your PC in the “Serial Port” drop-down list
- Then select VirtualMIDISynth in the “MIDI Out” drop-down list
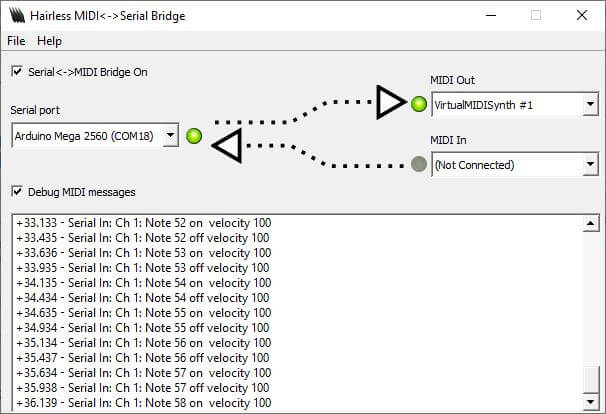
If you enable the MIDI Debug messages, you should see the notes played and their velocities scrolling.
If the audio output of your computer is activated, you will hear musical notes.
N.B.: You will not be able to upload code to the Arduino if the Serial <->MIDI Bridge On box is checked.
You have now created your first MIDI interface with Arduino and can take your first steps in sound synthesis.
Applications
- Create a MIDI controller with Arduino, buttons and potentiometers.


