In this tutorial we configure the Raspberry Pi in headless mode. This mode can be interesting when using the microcomputer without a screen. The main advantage is a lighter installation without the desktop and unnecessary software.
Configuring your Raspberry headless
download and write the Raspberry Pi OS Lite image file to the SD card
Authorize ssh access
to authorise ssh access, create an empty file called ssh in the /boot/ folder on the partition (WITHOUT EXTENSION)
Configuring the WiFi connection
At the root of the partition, create a file wpa_supplicant.conf
ctrl_interface=DIR=/var/run/wpa_supplicant GROUP=netdev
update_config=1
country=FR

network={
    ssid="wifi_ssid"
    psk="wifi_password"
    key_mgt="WPA-PSK"
}
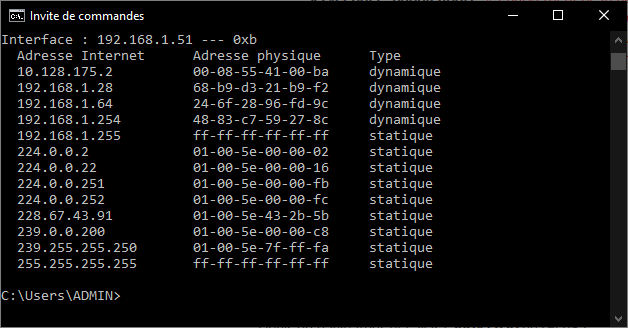
Recover your Raspberry Pi’s IP address
There are several ways to recover the IP address of your Raspberry Pi.
- use your box’s management page to display connections
- scan IP addresses using arp -a (Windows
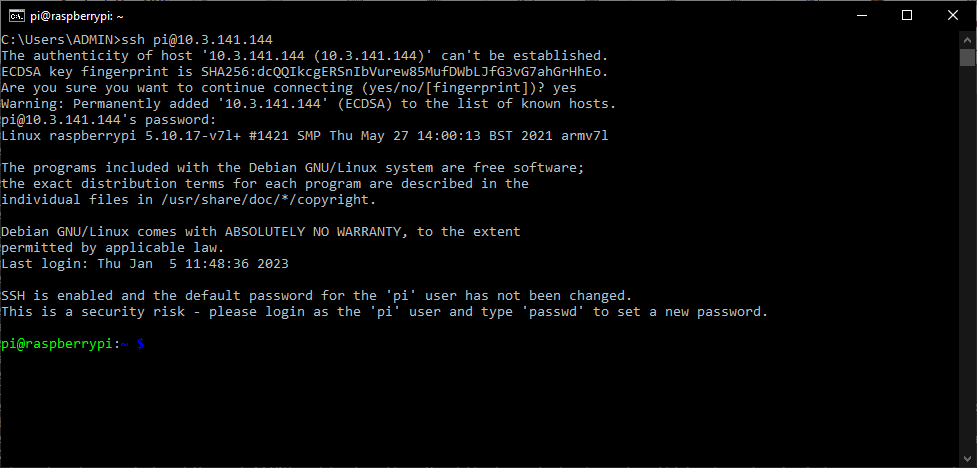
Connecting with ssh
If the Raspberry Pi is connected to the network, it can be accessed via ssh with the ip address, login and password. By default, the logins are:
- login: pi
- password: raspberry
ssh pi@192.168.1.0 #replace with raspberry pi ip adressYou can now access your Raspberry Pi in Headless mode. To make it easier to use in this mode, here are a few tips.
Browsing on multiple terminals
You can navigate through different terminal tabs using the Alt+F1-F12 keys, allowing you to run up to 12 terminals in parallel. This can be very handy when you want to:
- run tasks in parallel
- perform tasks with different users
- run continuous tasks such as htop in the background
Copy the contents of a USB stick
the usb stick should appear under media
To check that the USB key has been recognized, enter the following command and note the volume name (in this case sda1)
lsblk --fsTo mount the USB key in a folder, we use the mount command.
mkdir /home/pi/mntusb
sudo mount /dev/sda1 /home/pi/mntusb
Once the USB key has been mounted correctly, you can copy the files to your Raspberry with the cp command
cp home/pi/mntusb/myfile.txt home/pi/myfile.txtN.B.: If exfat is not recognized, enter
sudo apt-get install exfat-fuse exfat-utilsThen reboot the Raspberry Pi
Before removing your storage volume, use the umount command
sudo umount /dev/sda1


