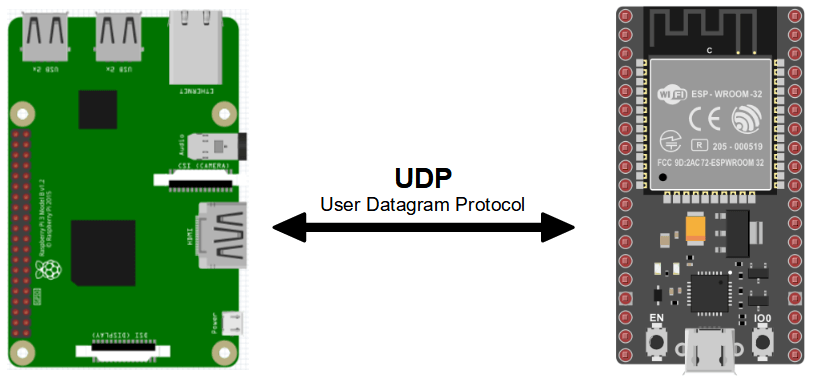
In this tutorial, we’ll look at how to communicate between a Raspberry Pi and an ESP32 using the UDP protocol. When devices are connected to the same Wifi network, they can communicate very simply by exchanging data packets using the UDP protocol. As both the Raspberry Pi and the ESP32 have on-board Wifi connectivity, it’s easy enough to set up a UDP protocol between the two.
In this example, the Raspberry Pi will act as server and the ESP32 as client.
N.B.: This tutorial can easily be transposed to an ESP8266 (bonus customer code at the end of the article).
Hardware
- Computer
- Raspberry Pi
- NodeMCU ESP32 x1 or higher (or ESP8266)
- USB A Male cable
Code Raspberry Pi Server
To communicate using the UDP protocol, we “ll simply create the udp server, which will be able to read and write on the localPort port. The socket library can be used to open a connection between two devices.
The socket constructor expects two parameters: the address family (in this case, Internet addresses) and the socket type (in this case, UDP).
sock = socket.socket(socket.AF_INET,socket.SOCK_DGRAM) ## Internet,UDPThe socket must be bound to a machine port sock.bind((hostname, localPort)). Putting a blank character in place of hostname (equivalent to 0.0.0.0) binds the socket to all local interfaces.
#!/usr/bin/env python
# -*- coding: utf-8 -*-

#Libraries
import socket	#https://wiki.python.org/moin/UdpCommunication

#Parameters
localPort=8888
bufferSize=1024

#Objects
sock = socket.socket(socket.AF_INET,socket.SOCK_DGRAM)  ## Internet,UDP

# function init
def init():
	sock.setsockopt(socket.SOL_SOCKET, socket.SO_REUSEPORT, 1)
	sock.setsockopt(socket.SOL_SOCKET, socket.SO_BROADCAST, 1) #enable broadcasting mode
	sock.bind(('', localPort))
	print("UDP server : {}:{}".format(get_ip_address(),localPort))

# function main
def main():
	while True:
		data, addr = sock.recvfrom(1024) # get data
		print("received message: {} from {}\n".format(data,addr))

		sock.sendto("RPi received OK",addr)  # write data


# function get_ip_address
def get_ip_address():
	"""get host ip address"""
	ip_address = '';
	s = socket.socket(socket.AF_INET, socket.SOCK_DGRAM)
	s.connect(("8.8.8.8",80))
	ip_address = s.getsockname()[0]
	s.close()
	return ip_address


if __name__ == '__main__':
	init()
	main()
N.B.: The get_ip_address() function implements a method for obtaining the Raspberry Pi’s IP address by opening a socket temporarily. It is also possible to use the os library with the ifconfig command.
Make a note of the Raspberry Pi’s IP address and port, and copy them into the client code:
- IP address: 192.168.1.46
- Port number: 8888
Code ESP32 UDP Client
In the client code, we’ll connect to the server using the IP address and port previously noted (here 192.168.1.46:8888).
N.B.: Don’t forget to change the ssid and password values so that the ESP32 connects to the same network as the Raspberry Pi.
#include <WiFi.h>
#include <WiFiUdp.h>
WiFiUDP udp;

char packetBuffer[255];
unsigned int localPort = 9999;
char *serverip = "192.168.1.46";
unsigned int serverport = 8888;

const char *ssid = "******";
const char *password = "********";

void setup() {
  Serial.begin(115200);
  // Connect to Wifi network.
  WiFi.begin(ssid, password);
  while (WiFi.status() != WL_CONNECTED) {
    delay(500); Serial.print(F("."));
  }
  udp.begin(localPort);
  Serial.printf("UDP Client : %s:%i \n", WiFi.localIP().toString().c_str(), localPort);
}

void loop() {
  int packetSize = udp.parsePacket();
  if (packetSize) {
    Serial.print(" Received packet from : "); Serial.println(udp.remoteIP());
    int len = udp.read(packetBuffer, 255);
    Serial.printf("Data : %s\n", packetBuffer);
    Serial.println();
  }
  delay(500);
  Serial.print("[Client Connected] "); Serial.println(WiFi.localIP());
  udp.beginPacket(serverip, serverport);
  char buf[30];
  unsigned long testID = millis();
  sprintf(buf, "ESP32 send millis: %lu", testID);
  udp.printf(buf);
  udp.endPacket();
}
Results
When the two cards connect to the Wifi, we can see that information is exchanged between the two cards. It is then possible to control a device connected to the client from the server, or vice versa.


N.B.: IP addresses are generally assigned automatically. As the addresses are defined ‘hard’ in the code, it is preferable to configure your devices so that they have a static rather than a dynamic IP address. This will save you having to modify the code each time you power up.
Bonus: UDP communication between Raspberry Pi and two ESP32 clients
Once communication has been established, it is possible to add several clients. In this example, we add an ESP8266 client
UDP customer code ESP8266
It’s easy to transform the ESP32 code to suit the ESP8266 by modifying the name of the Wifi library. We also modify the value of port 9696
#include <ESP8266WiFi.h>
#include <WiFiUdp.h>
WiFiUDP udp;

char packetBuffer[255];
unsigned int localPort = 9696;
char *serverip = "192.168.1.46";
unsigned int serverport = 8888;

const char *ssid = "******";
const char *password = "******";


void setup() {
  Serial.begin(115200);
  WiFi.begin(ssid, password);
  while (WiFi.status() != WL_CONNECTED) {
    delay(500); Serial.print(F("."));
  }
  udp.begin(localPort);
  Serial.printf("UDP Client : %s:%i \n", WiFi.localIP().toString().c_str(), localPort);
}


void loop() {
  int packetSize = udp.parsePacket();
  if (packetSize) {
    Serial.print(" Received packet from : "); Serial.println(udp.remoteIP());
    int len = udp.read(packetBuffer, 255);
    Serial.printf("Data : %s\n", packetBuffer);
    Serial.println();
  }
  delay(500);
  Serial.print("[Client Connected] "); Serial.println(WiFi.localIP());
  udp.beginPacket(serverip, serverport);
  char buf[30];
  unsigned long testID = millis();
  sprintf(buf, "ESP8266 send millis: %lu", testID);
  udp.printf(buf);
  udp.endPacket();
}
Results
We can see that the addresses and values exchanged by ESP32 and ESP8266 are different.


Applications
- Create a network of computers and/or microcontrollers to manage different devices or sensors


