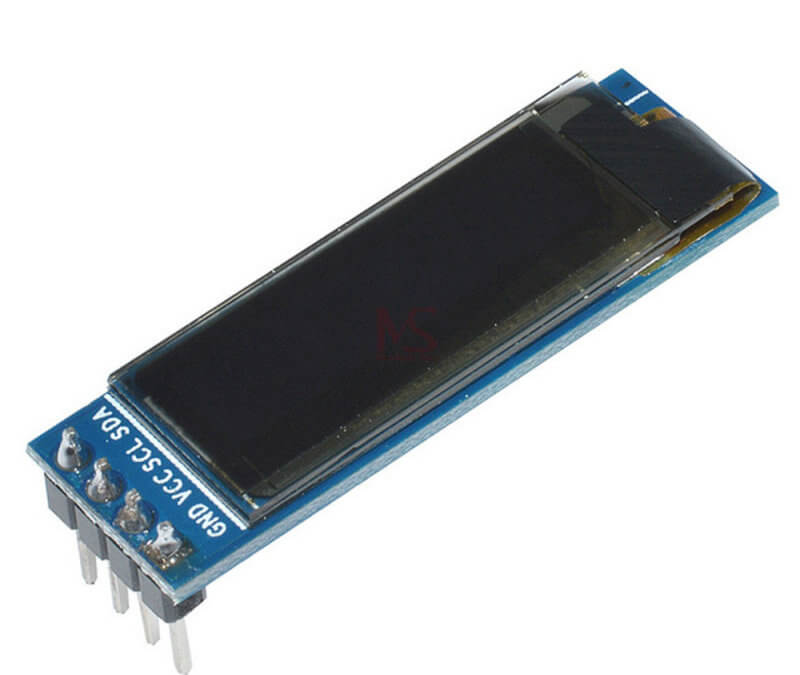
The 0.91in OLED display is a compact graphic display with a resolution of 128×32 pixels that allows you to draw and display text to create a graphical interface. Among all the displays available for the Arduino, the OLED display is taking more and more space on the market. Since they are thinner and do not require backlighting, they are easy to insert in miniaturized projects.
Material
- Computer
- Arduino UNO
- USB cable A Male/B Male
- OLED 0.91in
Principle of operation
The 0.91in OLED display is a monochrome display driven by the SSD1306 IC and interfaces using I2C communication.
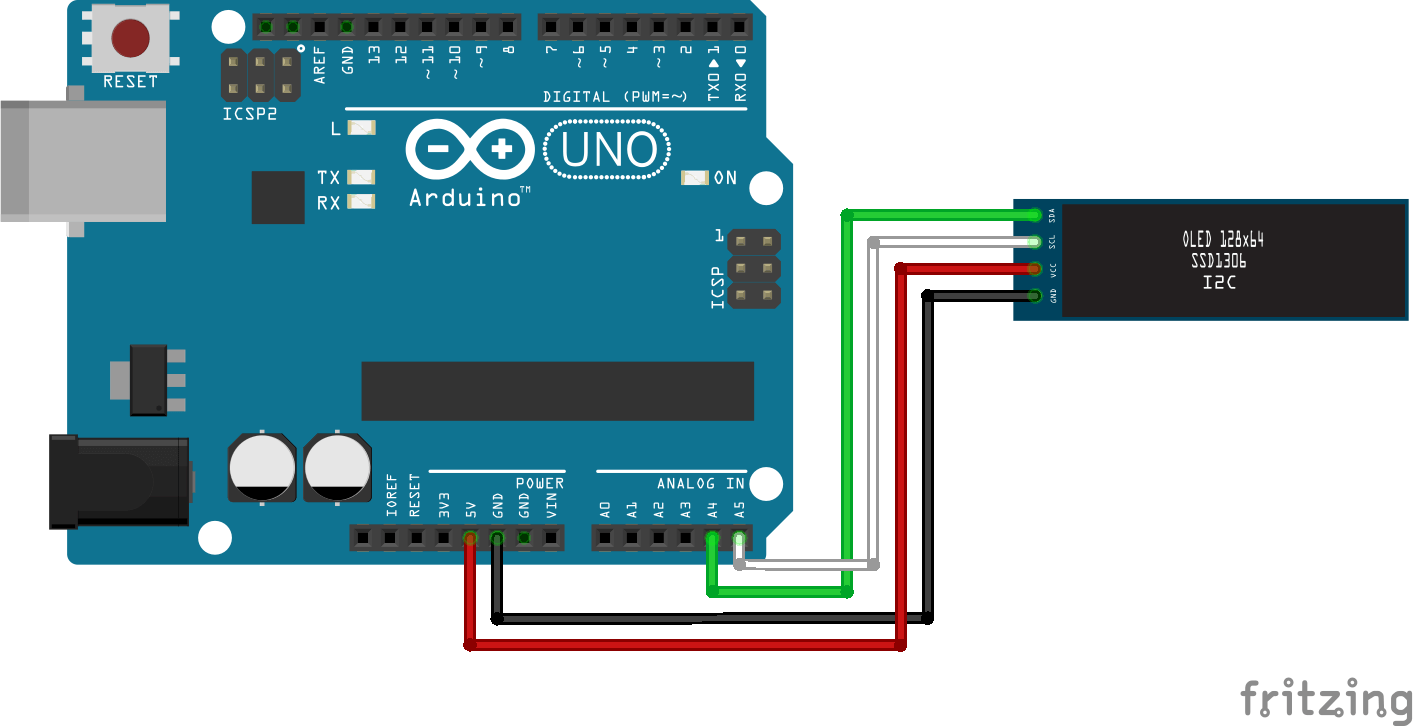
Scheme
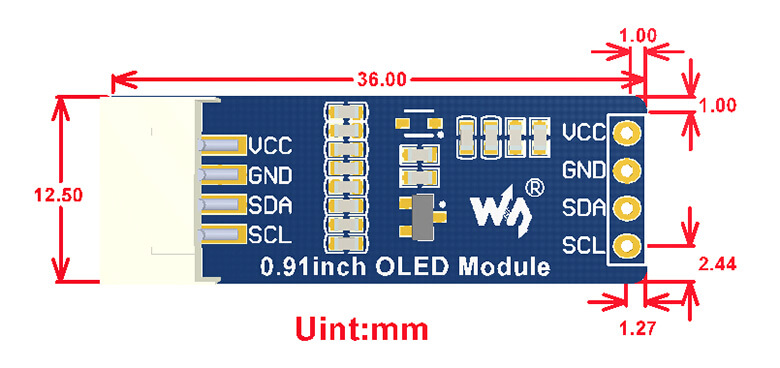
The OLED screen has 4 pins to allow the management of the display. It is powered by the microcontroller and connects to the I2C bus.
- GND Connect to the ground of the microcontroller
- VCC Power supply pin. Typically connected to the 3V or 5V pin of the microcontroller.
- SCL Clock of the I2C communication
- SDA Data of the I2C connection.
Code
Once your OLED display is correctly connected, you can modify the following code to obtain the desired functionality. In the following example, we will simply realize the display of a counter.to manage the OLED screen, the libraries used are Adafruit_GFX.h and Adafruit_SSD1306.h whose functions to know are the following:
- Adafruit_SSD1306 display = Adafruit_SSD1306(128, 32, &Wire); to define the display according to the type
- display.begin(SSD1306_SWITCHCAPVCC, 0x3C); to initialize the screen
- display.setTextSize() to set the text size
- display.clearDisplay(); to clear what is displayed on the screen
- display.display(); to refresh the screen
- display.setCursor() to set the cursor
- display.print() and display.println() to display text
Other more specific functions exist to draw rectangles, lines or to display images. Once you have mastered these functions, it will be easy to display what you want.
#include <SPI.h>
#include <Wire.h>
#include <Adafruit_GFX.h>
#include <Adafruit_SSD1306.h>

Adafruit_SSD1306 display = Adafruit_SSD1306(128, 32, &Wire);

byte compteur;

void setup() {
  Serial.begin(9600);

  Serial.println("OLED intialized");
  display.begin(SSD1306_SWITCHCAPVCC, 0x3C); // Address 0x3C for 128x32

  display.display();
  delay(1000);

  // Clear the buffer.
  display.clearDisplay();
  display.display();

  // text display tests
  display.setTextSize(1);
  display.setTextColor(WHITE);
}

void loop() {


  for (compteur = 0 ; compteur < 25 ; compteur++) {
    display.clearDisplay();
    display.setCursor(0, 0);
    display.println("test compteur");
    display.print("compteur: ");
    display.println(compteur);
    display.display();
    delay(1000);
  }
}
Result
Observe carefully where the displayed strings are placed and play with the input parameters of the functions to compare their effects. This will allow you to have a better understanding of the library and the functionalities of the Oled module.
Applications
- Make a clock with a RTC module
- Create an interactive menu with a rotary encoder
Sources
Retrouvez nos tutoriels et d’autres exemples dans notre générateur automatique de code
La Programmerie


Simple but tons of information. Thanks