Steppers are used when high precision is required with open-loop control. We’ll see how to program your Raspberry Pi to control a stepper motor.
Prerequisite: Programming with Raspberry Pi
Material
- Screen
- HDMI cable
- Keyboard
- Raspberry PI 3 (with OS on micro SD)
- Mouse
- Power supply micro USB B
- Stepper x1
- ULN2003APG x1 or H-Bridge SN754410NE x1
Steppers
Steppers have several phases which if energized with the correct sequence of impulsions can rotate in discrete steps. As the sequence to move one step at a time is known, the position of the rotor can be kept in memory and thus control precisely the motor without sensor.

There are two main types of steppers unipolar (5 or 6 wires) and bipolar (4 wires) which have different characteristics such as the number of steps per revolution. Those characteristics should be known and implemented in the code to be able to control the stepper correctly.
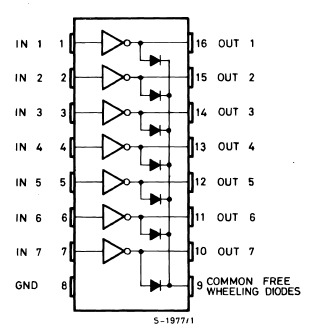
Transistor
To control steppers, both transistor network or H-bridge can be used to apply the correct sequence of impulsions to the coils or phases of the stepper.
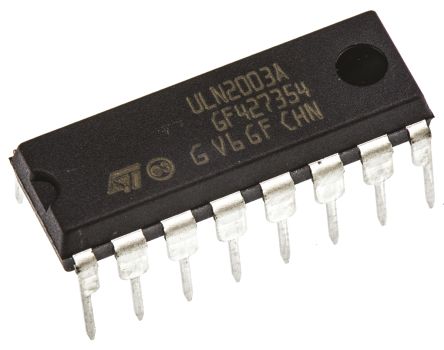
For the unipolar example, we used transistor network ULN2003A
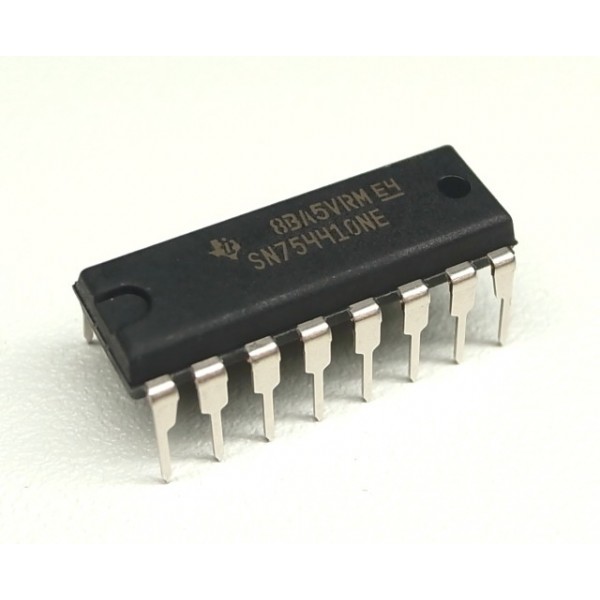
For the bipolar example, we used an H-bridge, SN754410NE.
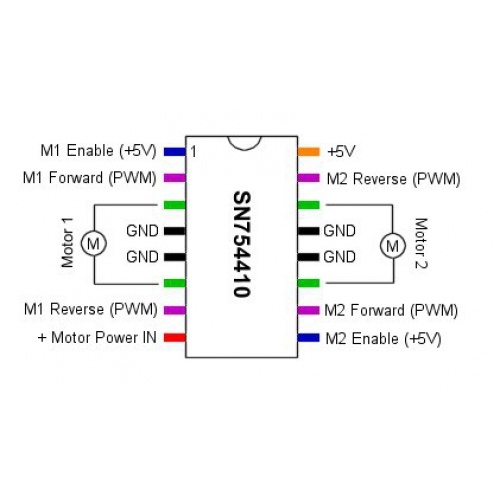
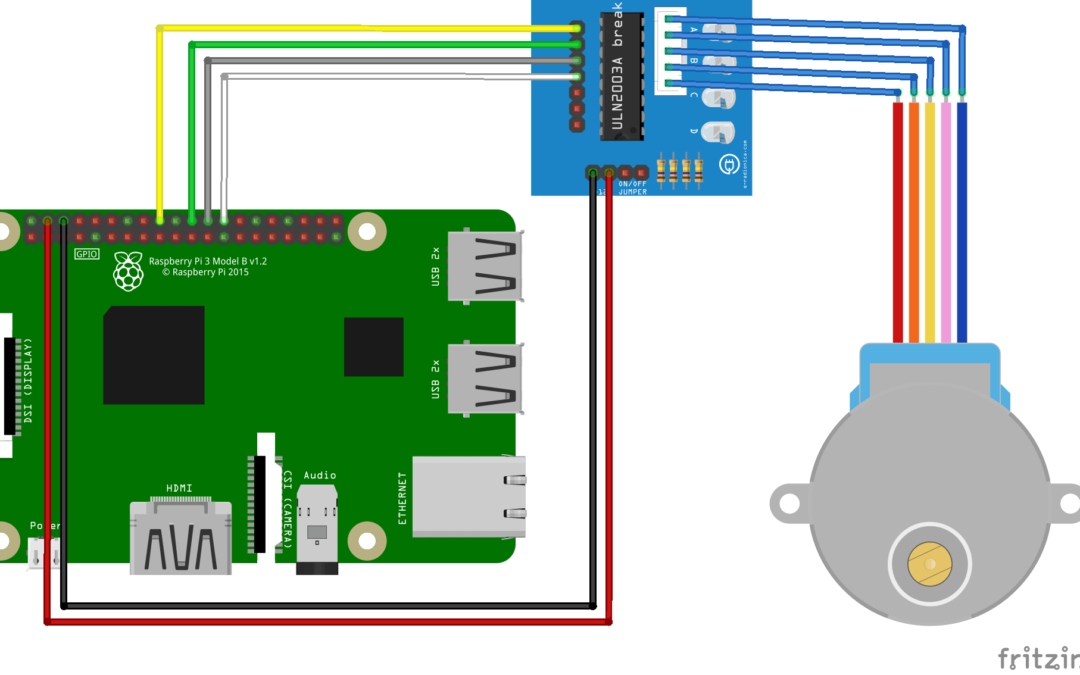
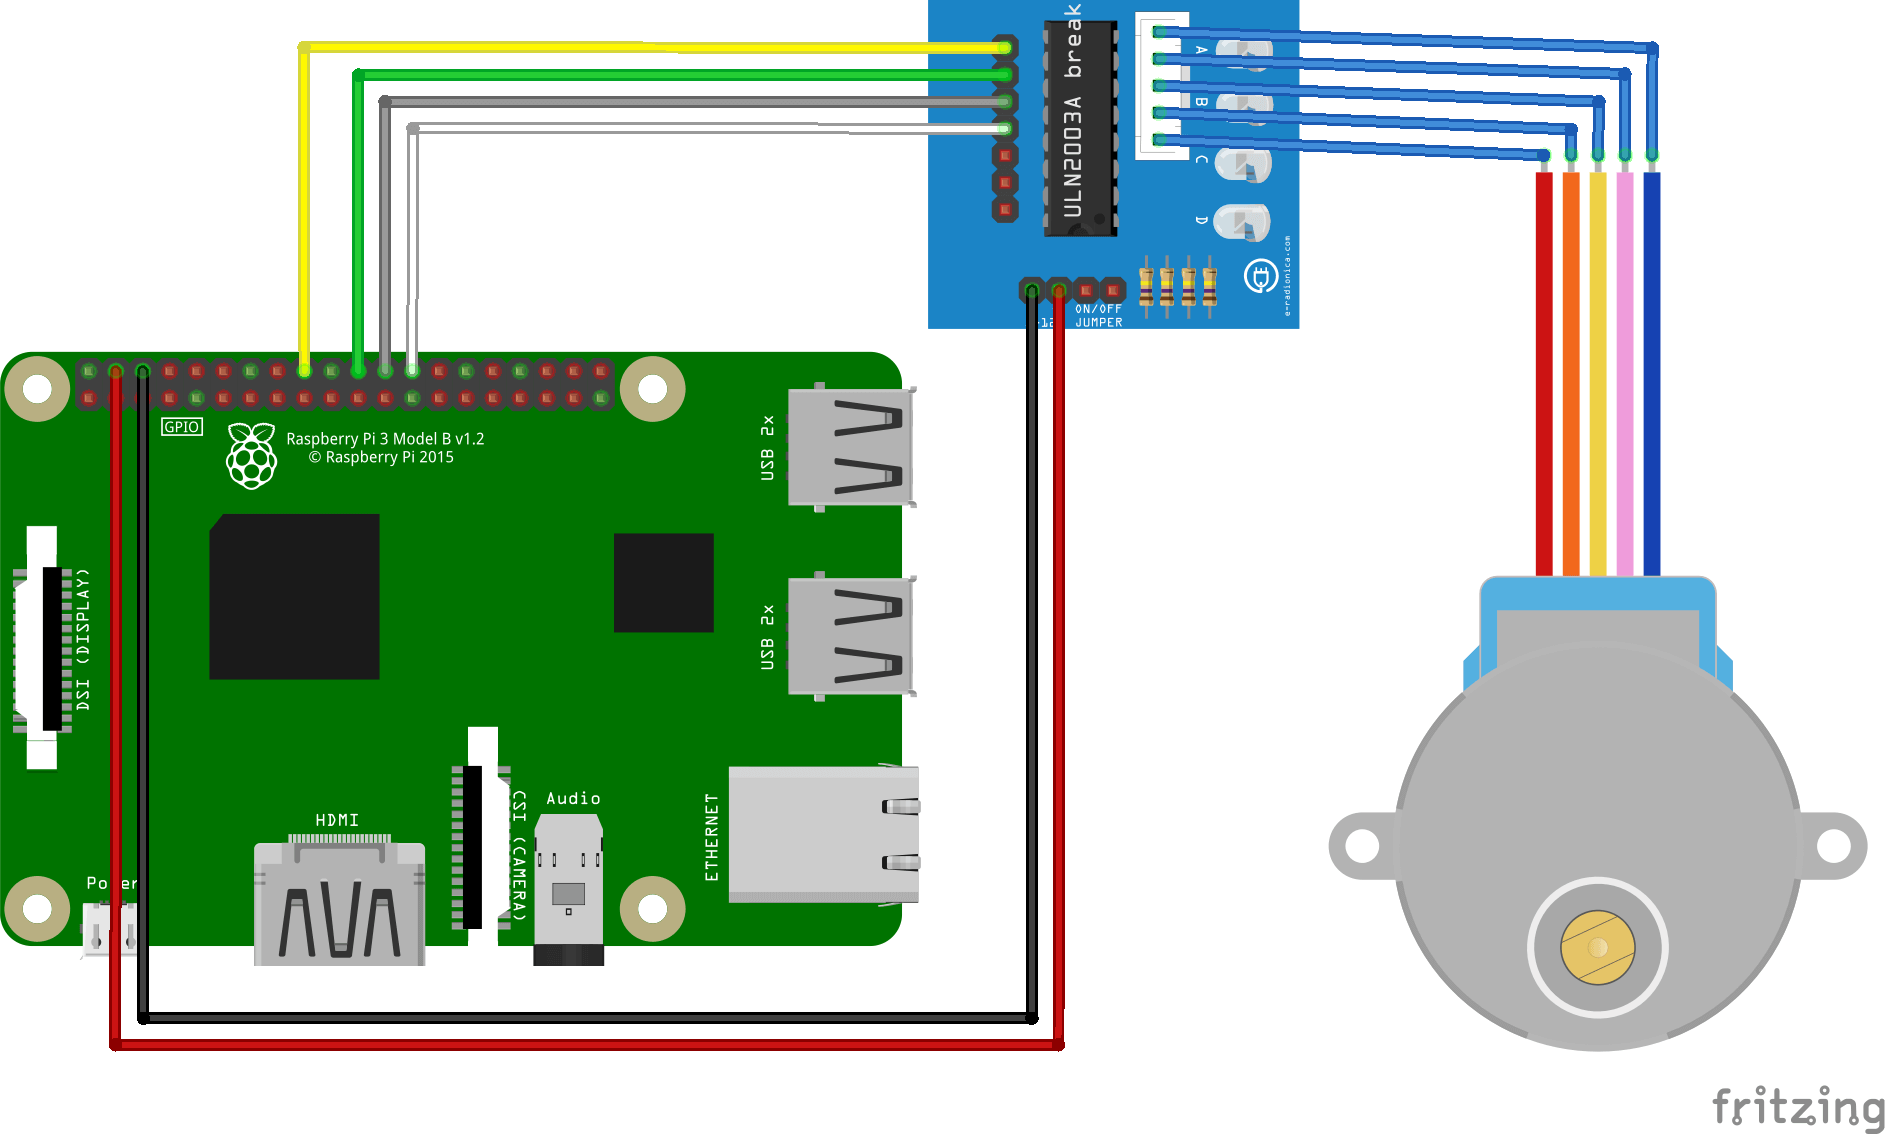
Wiring of 28BYJ-48 stepper with Raspberry Pi
Stepper is powered through the ULN2003A module. The module inputs from 1 to 4 are connected to the output 18,22,24,26 (GPIO24,GPIO25,GPIO8,GPIO7) of the RaspberryPi. Pins + and – of the module are connected to pin 5V and GND of the RaspberryPi.
Depending on the power required for the motor, the voltage output of the Raspberry Pi may be used but it is strongly advised to use an external power supply in order to protect the microcontroller.
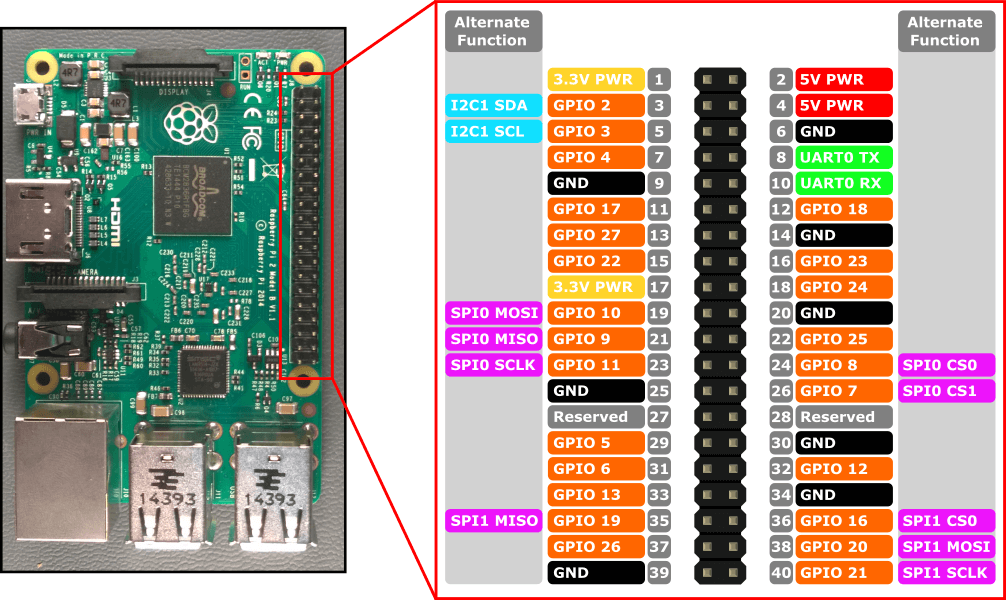
As a reminder, here is the pinout of the Raspberry Pi 3.
Basic code to control a stepper with Raspberry Pi
To control a stepper with Raspberry Pi, a sequence of impulsions sent to each phase of the motor must be defined. This will rotate the rotor. The number of steps per revolution gives you the angle for each step (in this case 2048).
This is the example was written for this particular stepper (28BYJ-48 130061869) to work. Steppers can be quite different, check the datasheets and play a bit with the parameters to make the code work for your application.
#!/usr/bin/env python
# -*- coding: utf-8 -*-

# libraries
import time
import RPi.GPIO as GPIO

# Use BCM GPIO references
# Instead of physical pin numbers
GPIO.setmode(GPIO.BCM)

# Define GPIO signals to use Pins 18,22,24,26 GPIO24,GPIO25,GPIO8,GPIO7
StepPins = [24,25,8,7]
# Set all pins as output
for pin in StepPins:
        print("Setup pins")
        GPIO.setup(pin,GPIO.OUT)
        GPIO.output(pin, False)
# Define some settings
WaitTime = 0.005

# Define simple sequence
StepCount1 = 4
Seq1 = []
Seq1 = [i for i in range(0, StepCount1)]
Seq1[0] = [1,0,0,0]
Seq1[1] = [0,1,0,0]
Seq1[2] = [0,0,1,0]
Seq1[3] = [0,0,0,1]
# Define advanced half-step sequence
StepCount2 = 8
Seq2 = []
Seq2 = [i for i in range(0, StepCount2)]
Seq2[0] = [1,0,0,0]
Seq2[1] = [1,1,0,0]
Seq2[2] = [0,1,0,0]
Seq2[3] = [0,1,1,0]
Seq2[4] = [0,0,1,0]
Seq2[5] = [0,0,1,1]
Seq2[6] = [0,0,0,1]
Seq2[7] = [1,0,0,1]
# Choose a sequence to use
Seq = Seq2
StepCount = StepCount2

def steps(nb):
        StepCounter = 0
        if nb<0: sign=-1
        else: sign=1
        nb=sign*nb*2 #times 2 because half-step
        print("nbsteps {} and sign {}".format(nb,sign))
        for i in range(nb):
                for pin in range(4):
                        xpin = StepPins[pin]
                        if Seq[StepCounter][pin]!=0:
                                GPIO.output(xpin, True)
                        else:
                                GPIO.output(xpin, False)
                StepCounter += sign
        # If we reach the end of the sequence
        # start again
                if (StepCounter==StepCount):
                        StepCounter = 0
                if (StepCounter<0):
                        StepCounter = StepCount-1
                # Wait before moving on
                time.sleep(WaitTime)

# Start main loop
nbStepsPerRev=2048
if __name__ == '__main__' :
	hasRun=False
	while not hasRun:
			steps(nbStepsPerRev)# parcourt un tour dans le sens horaire
			time.sleep(1)
			steps(-nbStepsPerRev)# parcourt un tour dans le sens anti-horaire
			time.sleep(1)

			hasRun=True

	print("Stop motor")
	for pin in StepPins:
			GPIO.output(pin, False)
N.B.: Be careful when copying Python code from the internet, you may encounter indentation issues which lead to compilation error.
Sources
Find other examples and tutorials in our Automatic code generator
Code Architect


This is about my sixth attempt to get control of a 28BYJ-48 to work with my Raspberry Pi 4 Model B.
I received the following error running the code with Thonny v 3.3.3
Seq1[0] = [1,0,0,0]
TypeError: ‘range’ object does not support item assignment
Raspberry Pi was loaded with latest software package.
Any help?
Hi, it appears you are using Python 3.
The code was working on version Pyhton 2.
Thanks to your comment, it has been corrected so that it works on both version.
How to run this script repeatedly for example 100 or 200 times?
You can add a for loop
for i in range(400):
use while(1) function
hi is there a way to get it to do 180* instead of 360*?
Hello, nbStepsPerRev=4096