Capacitive sensors are commonly used in particular for object detection. They can, for example, detect the passage of an object on a conveyor belt or the level of a liquid in a tank. Closer to home, capacitive sensors are used in touch screens or as switches. In this tutorial we will see how to create a capacitive sensor using a simple conductor and a microcontroller.
Hardware
- Computer
- Arduino UNO
- USB Cable A Male to B Male
- Jumper cable
- 1Mohm resistor
Principle of operation
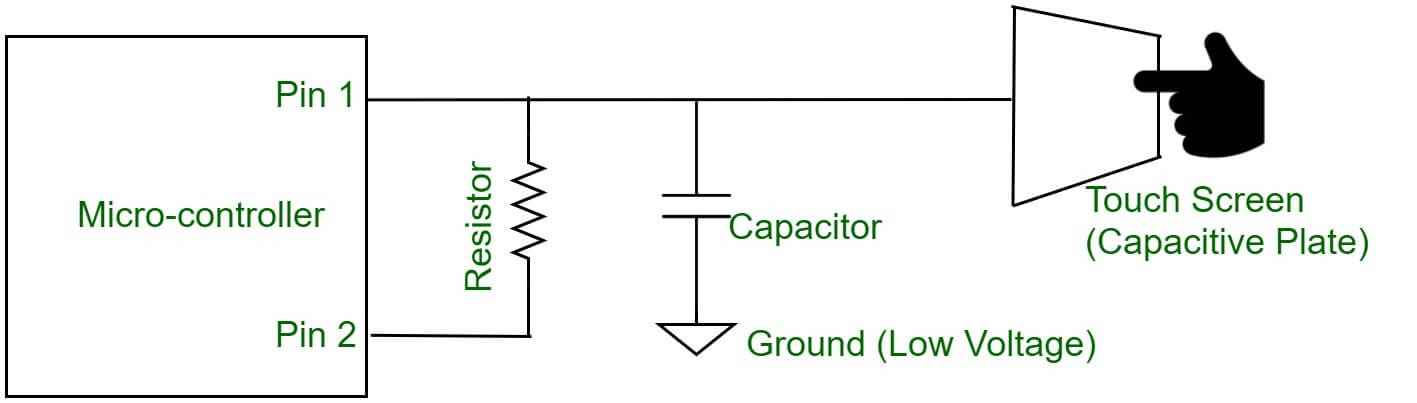
A capacitive sensor works like an antenna that generates an electric field. When a material gets close to the antenna, it will change the capacity of this field. The microcontroller senses this difference and can determine the proximity of the object. With this technology, it is possible to transform any conductive object into a sensor.
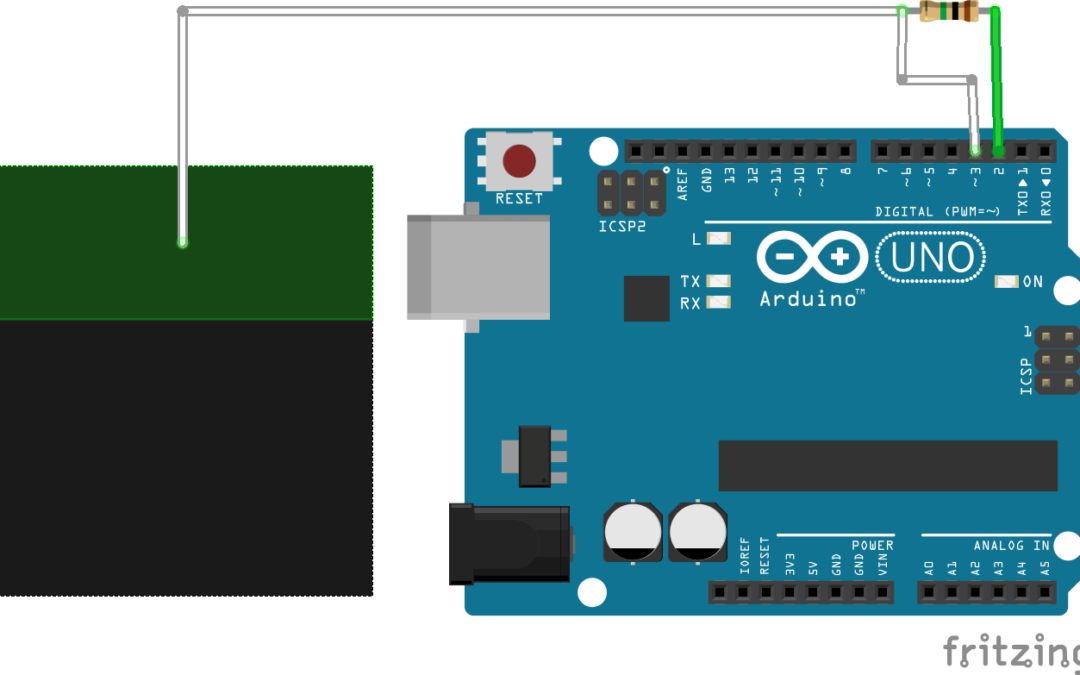
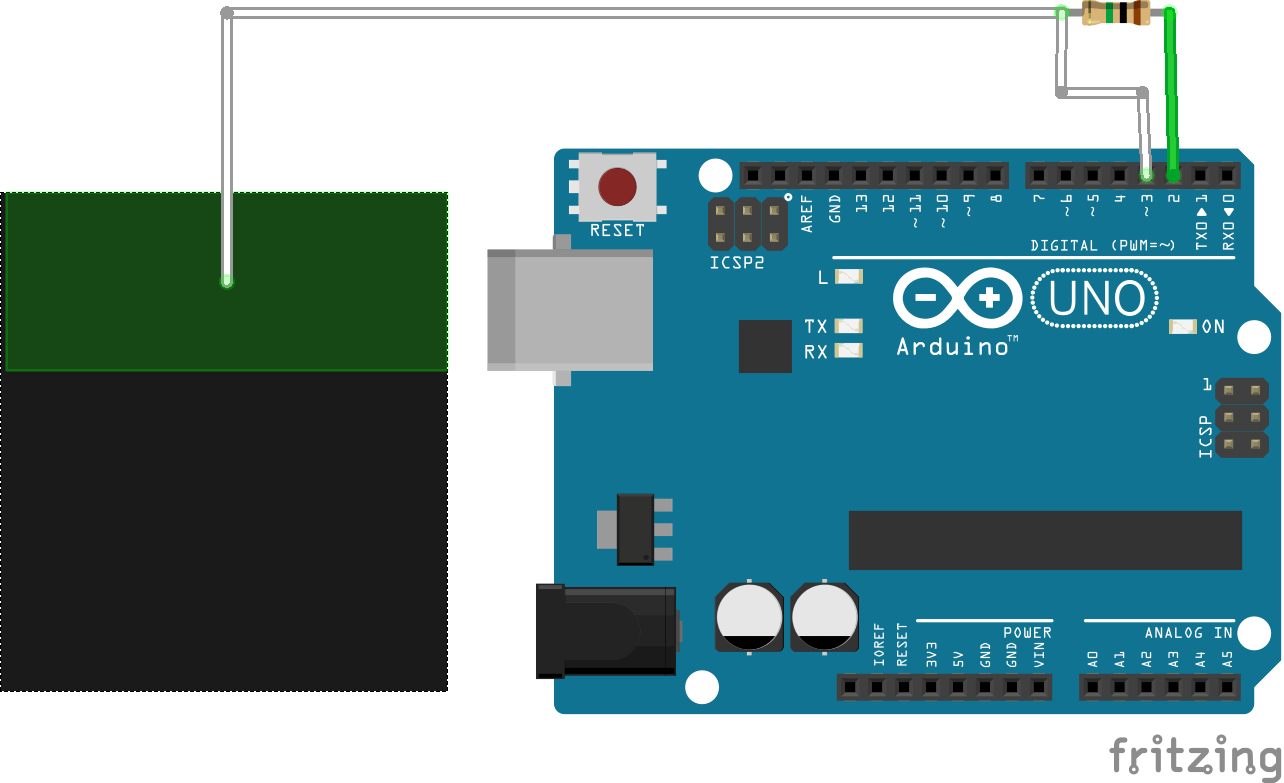
Schematic
To create a touch sensor on an Arduino board. You will need a resistor and a cable and/or conductive paint. The resistor connects the measuring pin with the reference pin and the cable runs from the measuring pin to a sheet of aluminum foil, conductive paint or other material. The value of the resistance will define the sensitivity of the sensor. The higher the resistance value, the more the sensor will be able to detect an object from a distance. We use a resistance of 1MOhm but you can choose the most suitable for your application between 500k and 40Mohm.
There are microcontrollers such as the NodeMCU (ESP8266 or ESP32) with integrated touch sensors. In this case, a single conductor connected to the pin is sufficient to create a capacitive sensor.
Code
There are microcontrollers such as NodeMCU (To use the Capacitive object we use the CapacitiveSensor.h library. To initialize the sensor, we must specify the pins used (here, 2 and 3). It is possible to adjust the sensitivity of the sensor during the call function cs.capacitiveSensor(sensitivity). To have more control over the sensor’s accuracy we use a sliding average managed by the smooth() function to filter the sensor measurements.
//Libraries
#include <CapacitiveSensor.h>//https://github.com/PaulStoffregen/CapacitiveSensor

//Parameters
bool autocal  = 0;
const int numReadings  = 10;
long readings [numReadings];
int readIndex  = 0;
long total  = 0;
const int sensitivity  = 1000;
const int thresh  = 200;
const int csStep  = 10000;
CapacitiveSensor cs  = CapacitiveSensor(2, 3);

void setup() {
  //Init Serial USB
  Serial.begin(9600);
  Serial.println(F("Initialize System"));
  //Init cs
  if (autocal == 0) {
    {
      cs.set_CS_AutocaL_Millis(0xFFFFFFFF);
    }
  }
}

void loop() {
  Serial.println(smooth());
}

long smooth() { /* function smooth */
  ////Perform average on sensor readings
  long average;
  // subtract the last reading:
  total = total - readings[readIndex];
  // read the sensor:
  readings[readIndex] = cs.capacitiveSensor(sensitivity);
  // add value to total:
  total = total + readings[readIndex];
  // handle index
  readIndex = readIndex + 1;
  if (readIndex >= numReadings) {
    readIndex = 0;
  }
  // calculate the average:
  average = total / numReadings;

  return average;
}
Applications
- Create a touch switch
- Create a touch or proximity sensor
Sources
- https://github.com/PaulStoffregen/CapacitiveSensor
- https://www.aranacorp.com/en/implementation-of-the-moving-average-in-arduino/
Find other examples and tutorials in our Automatic code generator
Code Architect


Hi I used this method for many projects, and it worked fine. But this time, I am going to set up a very long distance from the sensor to Arduino, like 15 meters, it doesn’t work through such a long cable, the coming exhibition also is lasting for about 90 days, how can I fix the problem?
Hi, 15 meters will definitely act as an antenna.
I’ve never tried with such a length.
You might try with a shielded cable
The signal might need filtering as well
When you say it doesn’t work, what does it mean? What is the output of the signal over time?