
The Orange Pi Zero LTS board from Orange Pi can run Debian, Armbian, Ubuntu or Android 4.4. In this tutorial, we’ll show you how to configure your computer with Armbian.
Hardware
- Orange Pi Zero LTS
- Micro SD card
- Micro USB cable
- Computer
Install OS
First of all, we need to install an application that will allow us to flash the OS on the SD card inserted in your computer. You can install Balena Etcher (don’t forget to choose your computer’s operating system):
We’re going to download an OS in the form of an image to flash onto your SD card. You can download the image of Armbian Bullseye. Then unzip the .xz file with 7-zip or another archive manager to obtain the img file.
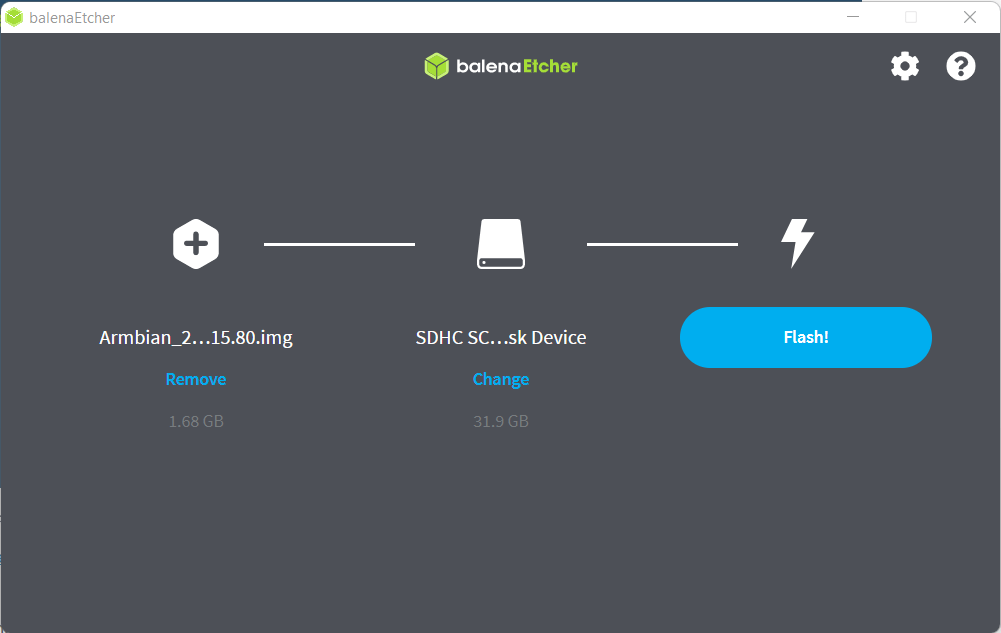
After installing balenaEtcher, launch the application and flash your OS to your SD card. This may take some time:
Once the OS has been installed, insert the SD card into the Orange Pi Zero and connect it to your computer with the Micro-USB cable.
Serial link start-up
To start up your OS on the Orange Pi Zero board, we’ll use the serial link to send command lists.
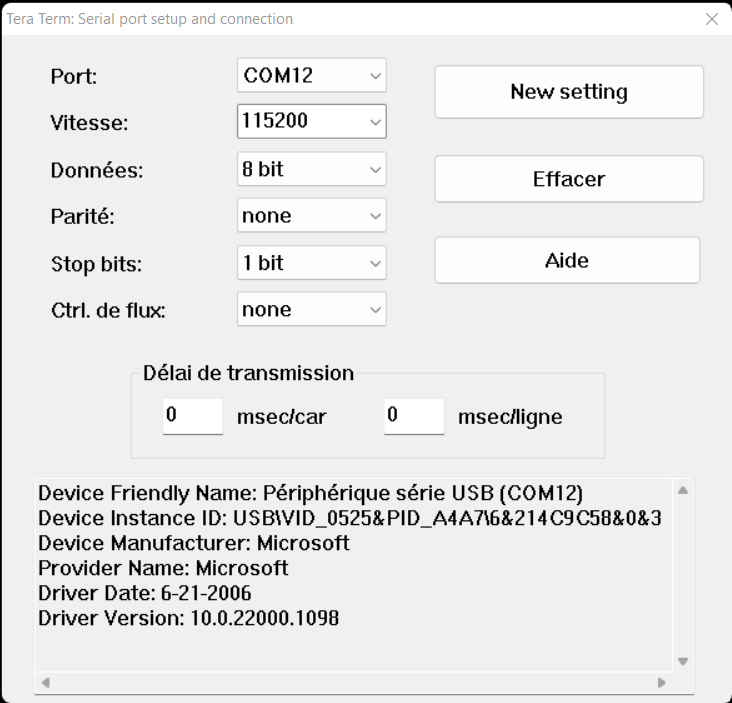
To do this, we’re going to use a software program that allows us to communicate via a serial link, such as Tera Term.
Once Tera Term has been launched, set up your serial link as follows:
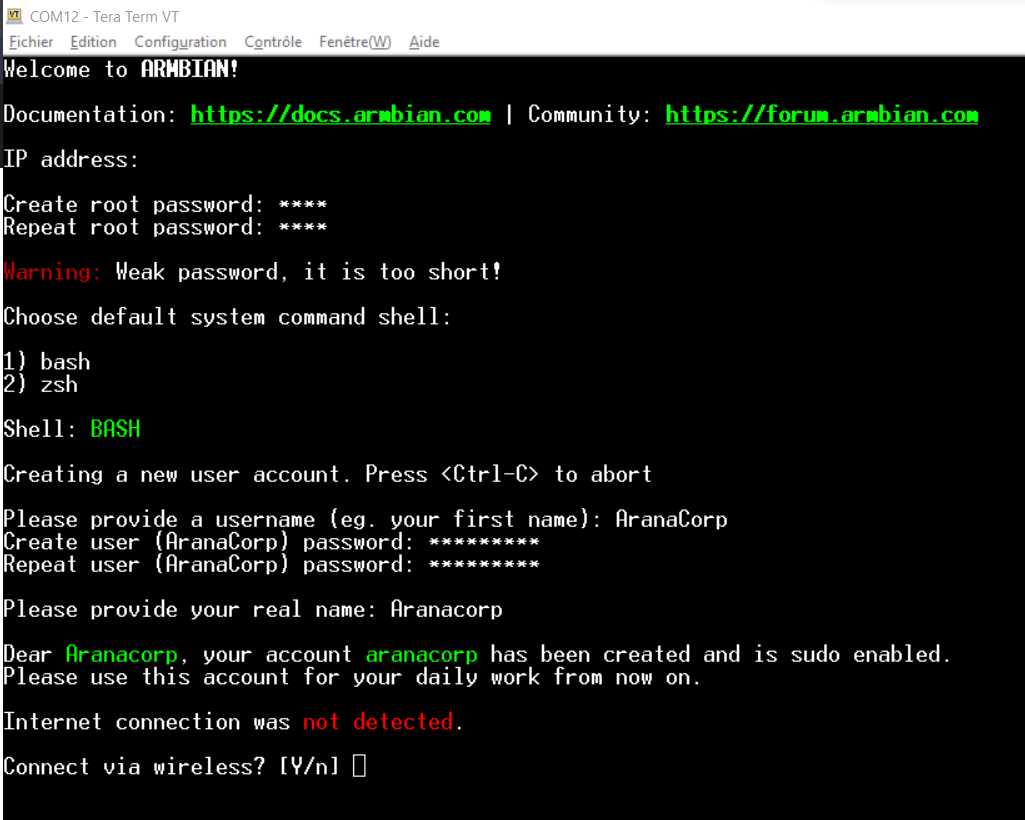
Once the serial link has been established, you’ll need to create the superuser password. In our example, we’ll simply define it as :
- orangepizero login: root
- Password: root
Choose the bash shell command system when given the choice. You may be asked to create a user with your own password, but to connect to the board later, we will always use the root superuser.
Connect to Wifi
To do this, answer “y” to the previous question after logging on as superuser root. This will take you to the Wifi settings page, where you can navigate with the arrow keys and select your Wifi router with the “enter” key. Next, you’ll be asked to select your language. Enter the number corresponding to your choice.
Updating your OS
Once connected to Wifi, you can enter the following command lines to update your OS:
apt-get upgrade
apt-get update
Once the updates are complete, you can restart your card with the following command line:
sudo rebootYou can then log back in as superuser root and enter the following command:
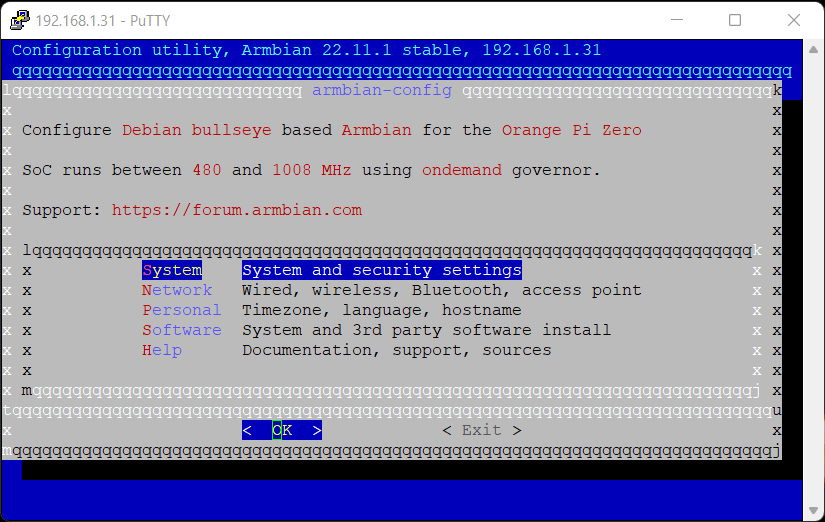
armbian-configYou will soon realise that the display is not very clean. To fix this, simply navigate the menu and go to Personal -> Locales and select en_AG UTF-8 for the English version or fr_FR.UTF-8 UTF-8 for the French version by pressing space (note that special characters such as letters with accents may be displayed strangely, so I recommend the English version for legibility).
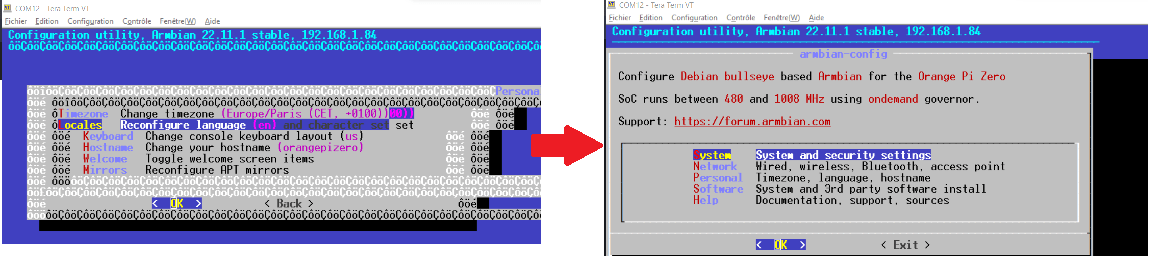
Avant d’avoir reconfigurer la langue locale VS après avoir reconfigurer la langue locale en en_AG UTF-8
SSH connection
One of the advantages of the Orange Pi Zero card is that, once connected to Wifi, you can connect to your card via SSH from any other computer connected to the same Wifi as your card, by installing SSH-capable software such as PuTTY.
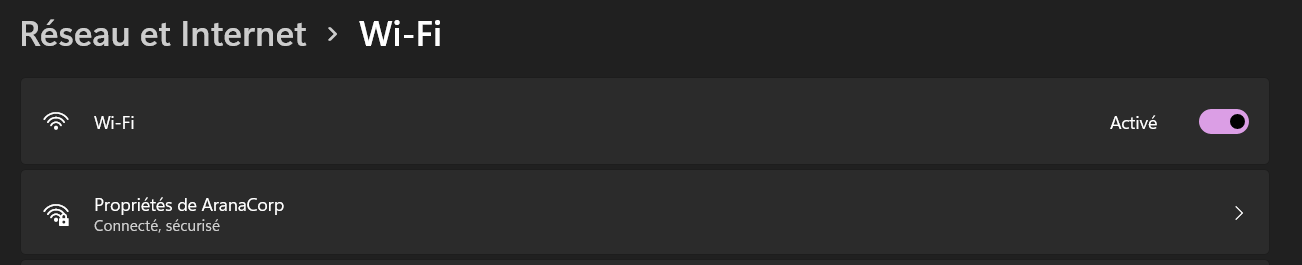
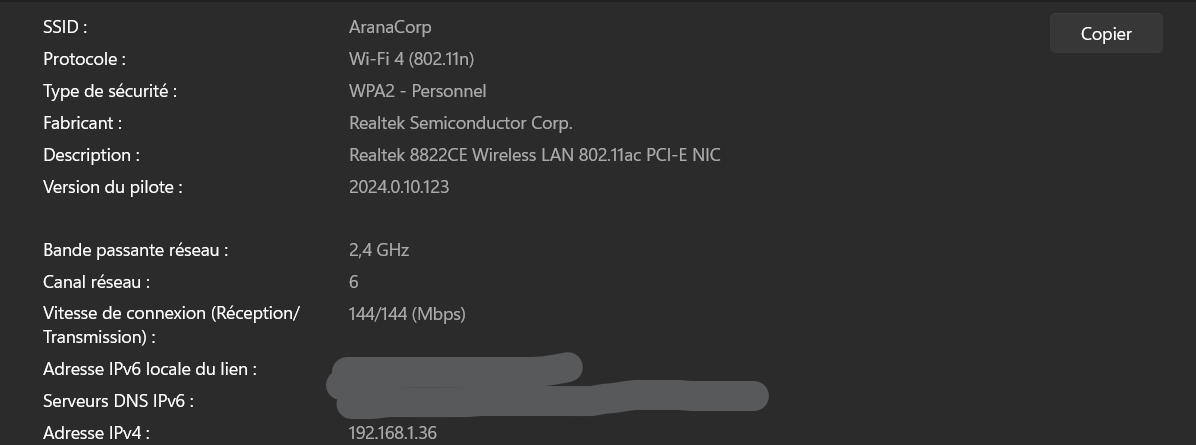
Once PuTTY has been installed, before launching the SSH connection, you need to test the connection between your computer and the Orange Pi Zero board. To do this, you’ll need to know the IP address of both your computer and your Orage Pi Zero board (beware, the latter’s IP address may change on reboot!). To find out your computer’s address, go to your computer’s Wifi settings and check your IPv4 address in the properties:
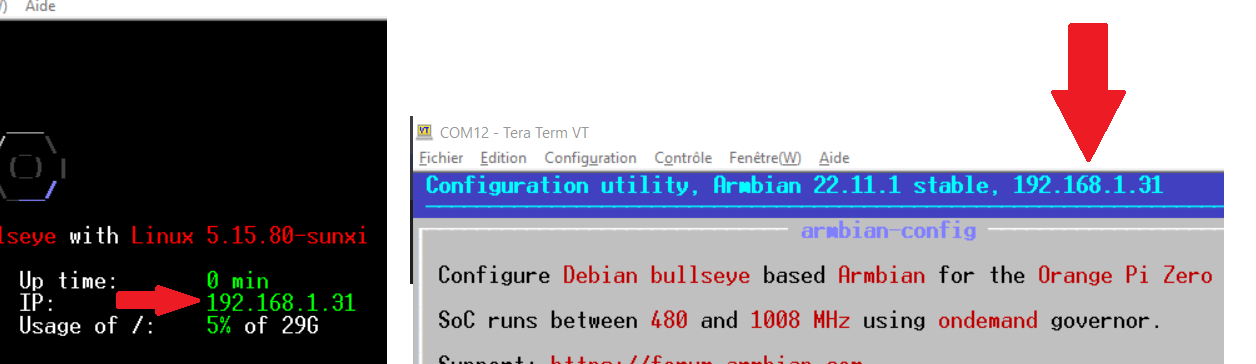
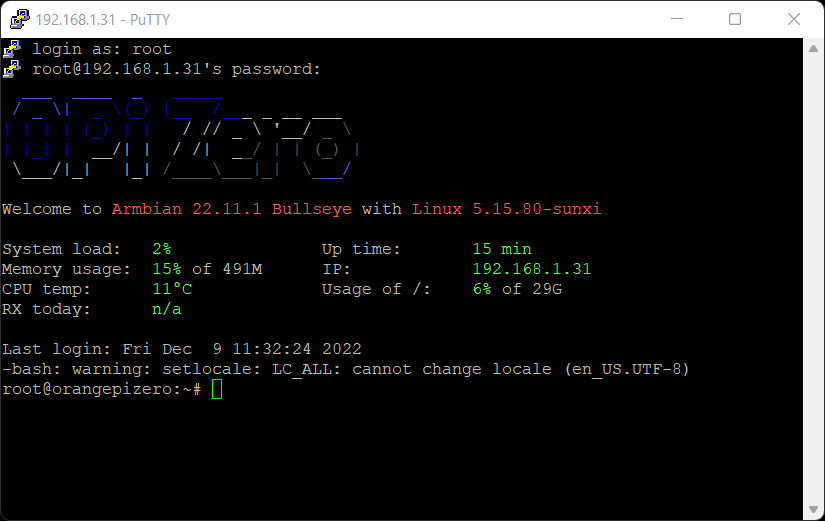
The IP address of your card can be found in the configuration menu and in the welcome display of your card:
To test the connection, go to your computer’s terminal and ping your card (of course, enter your IP addresses):
ping 192.168.1.31Then do the same from your card ( with the serial link ) but to your computer ( of course put your IP addresses ) :
ping 192.168.1.36Once you are sure that the pings are working properly, you can use PuTTY and set up the SSH connection as follows:
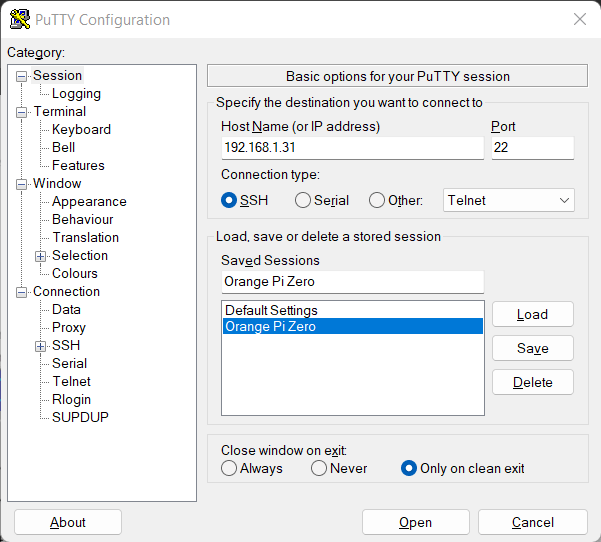
Click on Open and then on accept. Once you have connected to your card using SSH, you can connect to the root superuser as described above, and you will have the same options as with the serial link, but remotely and with any computer connected to the same Wifi network!
Modify IP address
Check connections present
nmcli dev statusroot@orangepizero:~# nmcli dev status
DEVICE TYPE STATE CONNECTION
eth0 ethernet connected armbian
wlan0 wifi connected AranaCorp
p2p-dev-wlan0 wifi-p2p disconnected --
lo loopback unmanaged --To change the IP address of the device on the wlan0 network
nmcli con mod AranaCorp ipv4.addresses 192.168.1.32/24
nmcli con up AranaCorp


