
Radxa’s Rock Pi 4 board can run Debian, Ubuntu or Android. In this tutorial, we’ll show how to configure the computer for Debian.
Hardware
- Rock Pi 4 SE
- Micro SD card
- USB cable
- screen+keyboard+mouse
- Computer
Install OS
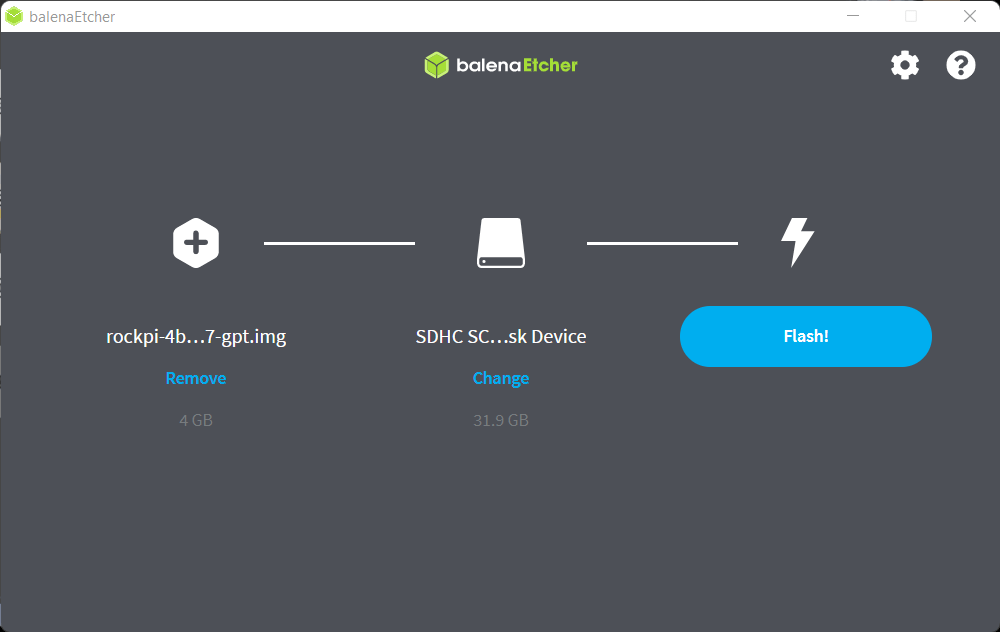
First of all, we need to install an application that will allow us to flash the OS on the SD card inserted in your computer. You can install Balena Etcher (don’t forget to choose your computer’s operating system).
We’re going to download an OS image to flash onto your SD card. You can download any OS image you like (Debian , Android, Ubuntu , etc.).
After installing balenaEtcher, launch the application and flash your OS to your SD card. This may take some time:
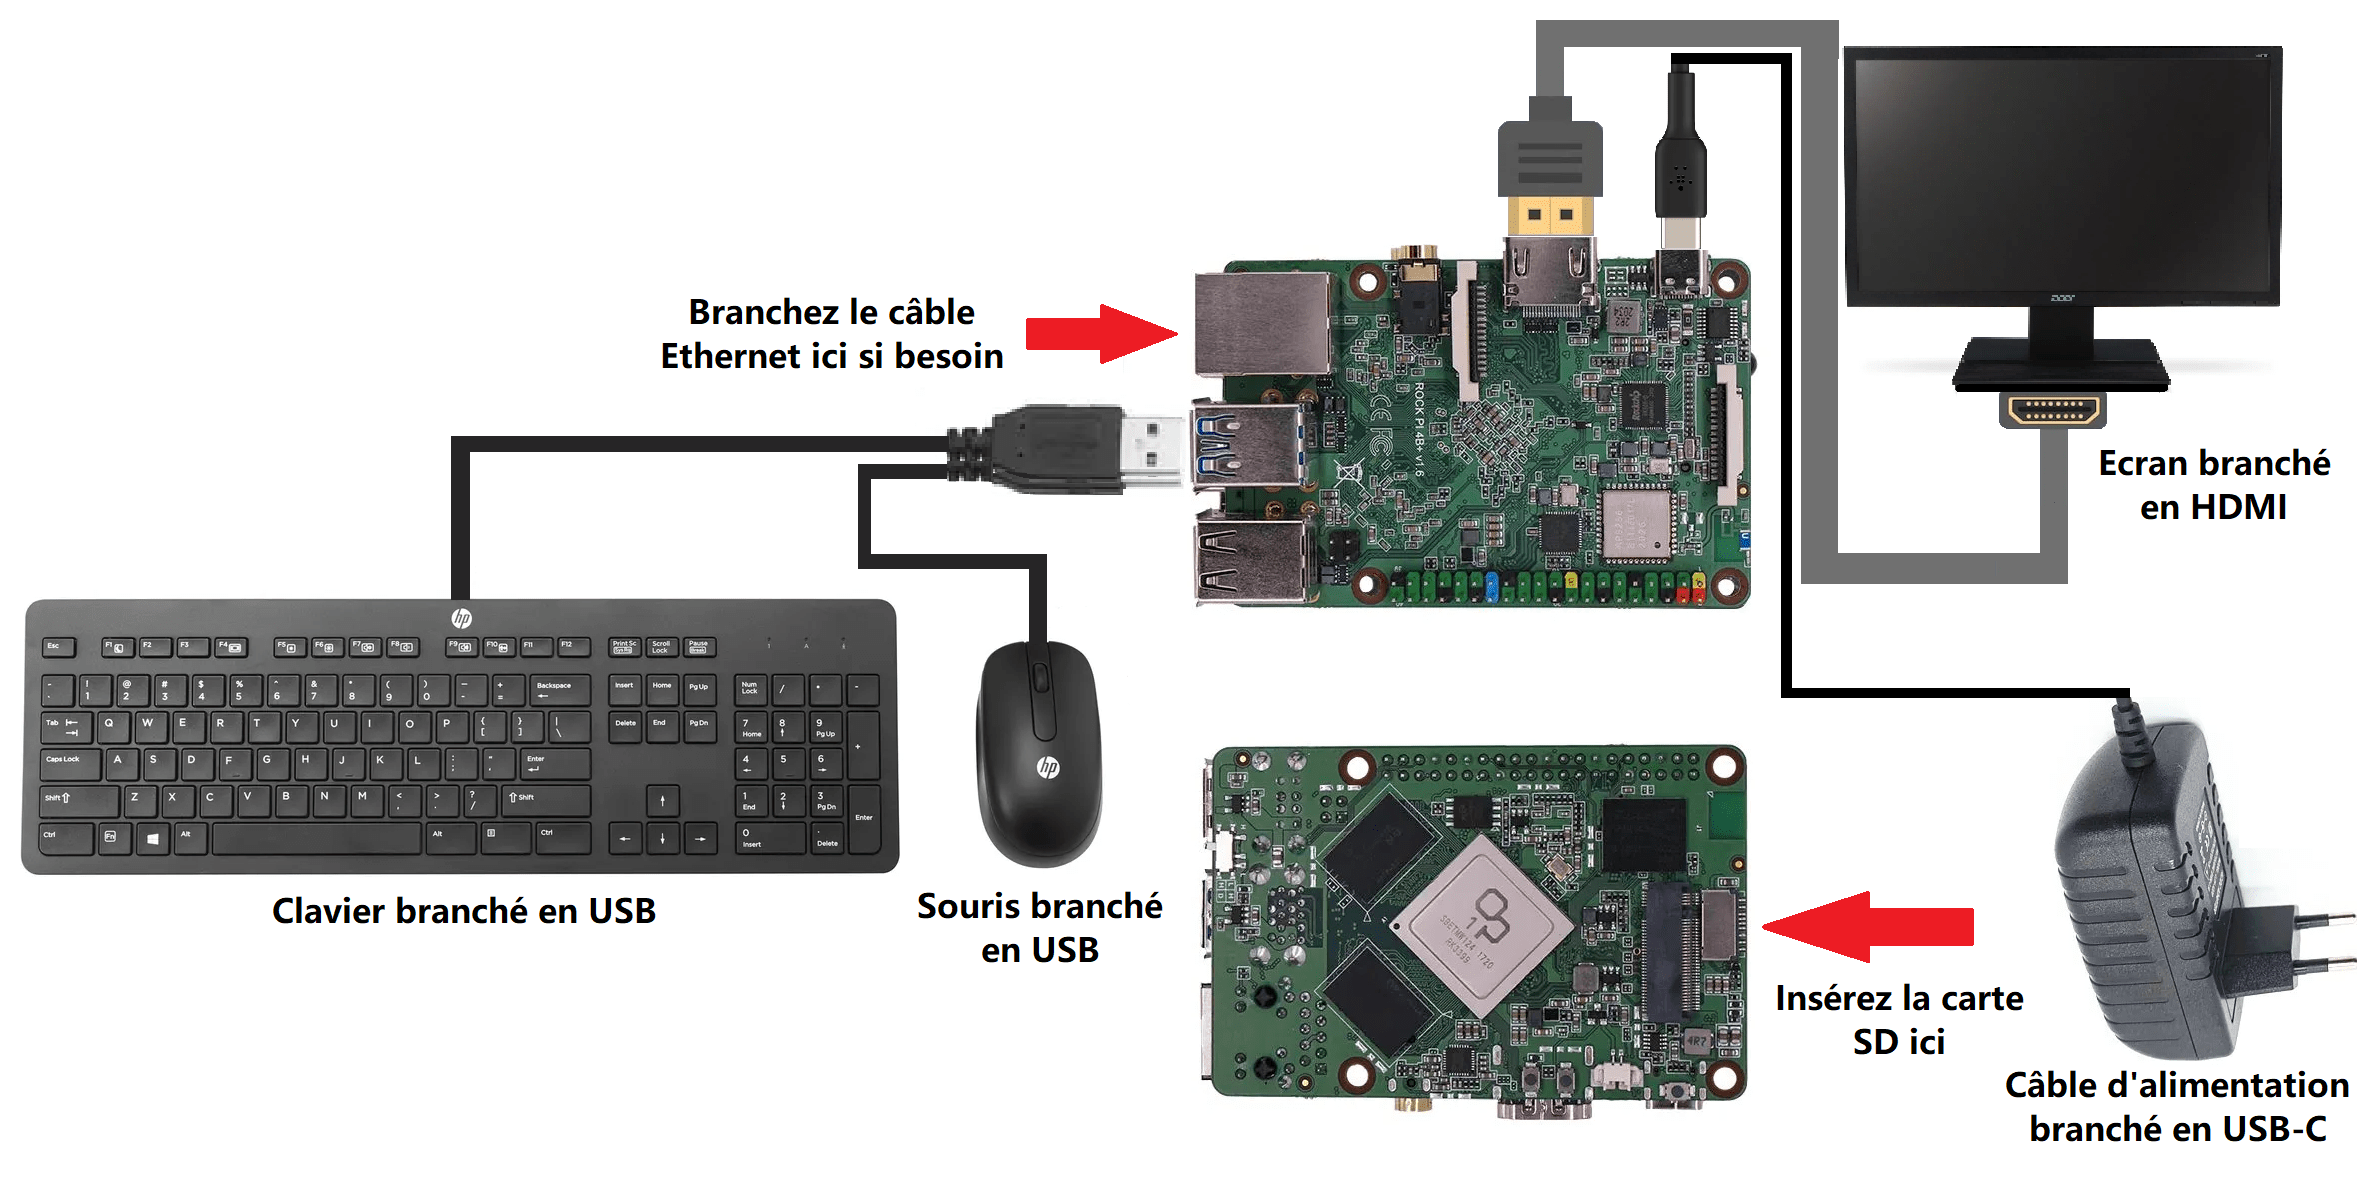
Once the OS has been installed, insert the SD card into the Rock Pi 4 SE and connect a display with an HDMI cable, as well as a mouse and keyboard to the USB ports.
The default identifiers are :
- login : rock
- password: rock
To change your password, enter the command in a terminal:
passwdScreen configuration
If you have a problem with the display on the HDMI screen, you can use the xrandr command.
To detect screens
xrandrTo change the resolution
xrandr --output HDMI-1 --autoor
xrandr --output HDMI-1 --mode 1280x720Or to overcome the overscan problem
xrandr --output HDMI-1 --transform 0.8,0,-35,0,0.8,-19,0,0,1Configure keyboard
In Applications>Settings>Keyboard, add and modify the layout. Move the desired layout up the list of priorities. The change will take effect after the board is restarted.
N.B.: If the layout is not modified after restart, don’t hesitate to delete unused layouts.
To test layouts on the command line :
setxkbmap frTo check and modify the layout of the default keyboard, you can open and modify the /etc/default/keyboard file.
sudo nano /etc/default/keyboardConnect to Wifi
To activate WiFi on your Rock Pi 4, you can open a terminal and enter the following command lines:
- To access the superuser :
sudo su- To activate or switch off WIFI :
nmcli radio wifi on
nmcli radio wifi off- To scan available WIFI networks :
nmcli dev wifi- To connect to your WIFI network (replace wifi_name with the name of your network and wifi_password with its password) :
nmcli dev wifi connect "wifi_name" password "wifi_password"- To view the connection status, use the ip command (similar to ifconfig) :
ip addrThese parameters will be saved in the following file:
Read the system log :
When you encounter a problem, it’s a good idea to check the system messages:
journalctlYou can pass a character string as an argument to filter what is displayed:
journalctl -u errorN.B.: If the Wifi connection does not work, check the ssid and password parameters in the .nmconnection file. The connection may be too weak. In this case, you can always connect your Rock Pi 4 card to the network with an Ethernet cable connected to your Box.
Setting a fixed IP address
To configure a fixed IP address, you can modify the connection file corresponding to the .nmconnection network (replace AranaCorp with the required ssid)
sudo nano /etc/NetworkManager/system-connections /AranaCorp.nmconnection[ipv4] address1=192.168.1.100/24 dns-search= method=manual
Ctrl+X then Y to save changes and restart your RockPi
N.B.: You can configure two IP addresses by leaving the method=auto parameter.
Debian Update
Once the Internet connection has been established, don’t hesitate to update your Debian installation.
sudo apt-get update && sudo apt-get upgradeRemote connection with NoMachine
You can connect remotely to the RockPi desktop using NoMachine. To install it, download the Debian package (.deb) from the NoMachine ARM download page.
https://download.nomachine.com/download/8.2/Arm/nomachine_8.2.3_3_arm64.deb
sudo dpkg -i nomachine_*_arm64.deb
You can then connect from another computer using the IP address given by
ip addrInstalling a Python IDE
One of the basic languages used on Linux is Python. You can install the Thonny IDE very simply using the command
sudo apt install thonny


