The INA219 Sensor is a current and voltage sensor for easy measurement of power. In some applications, it is interesting to measure the electrical power exchanged between devices. For example, measuring the power recovered by a solar panel. We will see in this tutorial how to measure the power values with the INA219 sensor.
Prerequisite: Give senses to your robot
Equipment
- Computer
- Arduino board
- USB cable
- 1x INA219 sensor
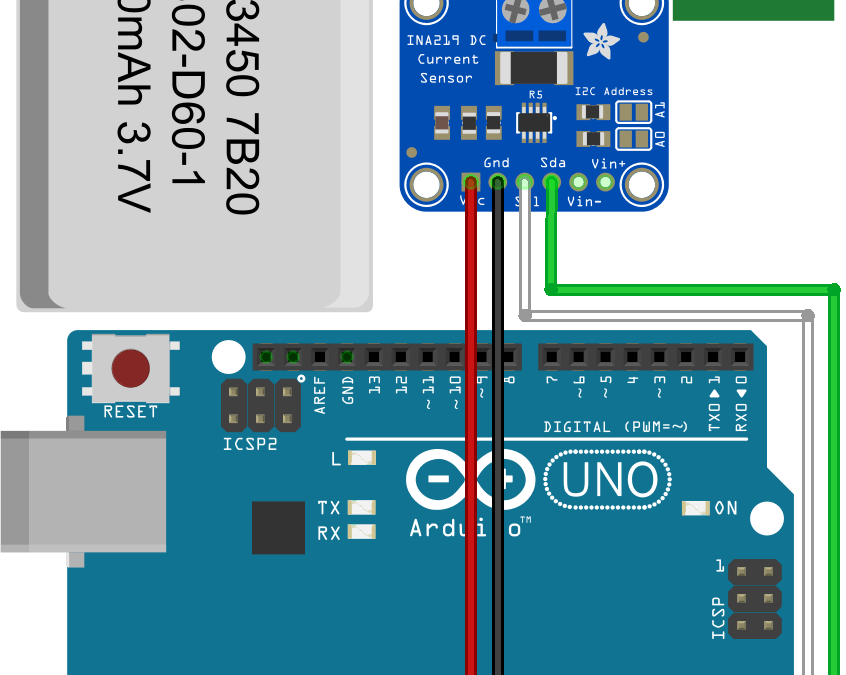
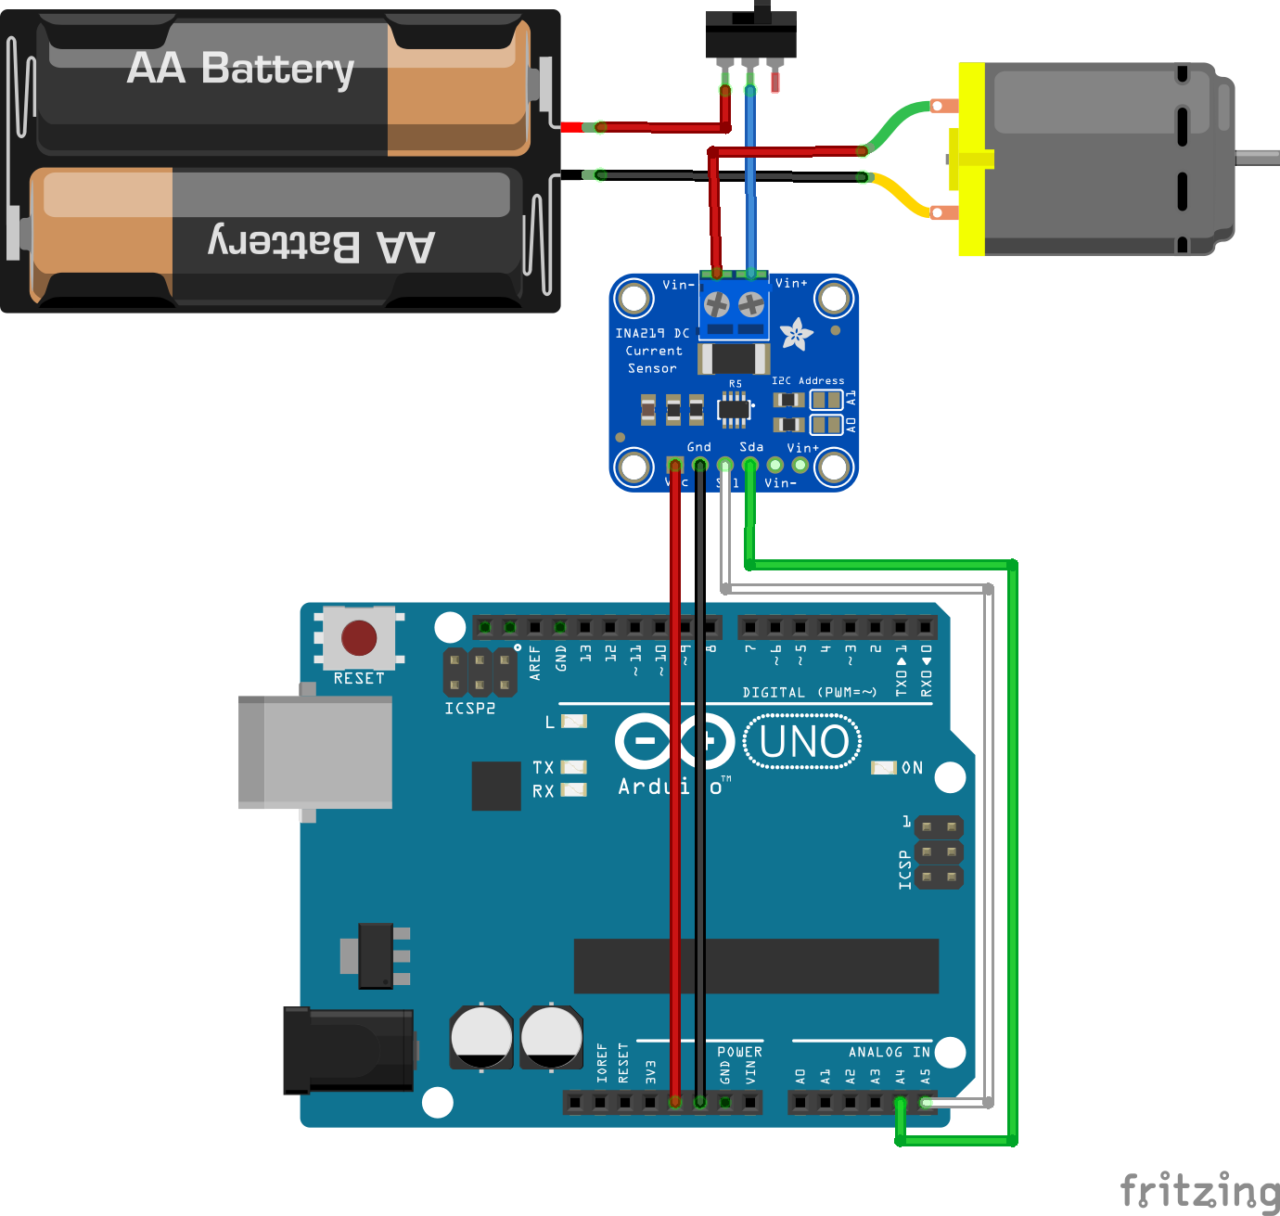
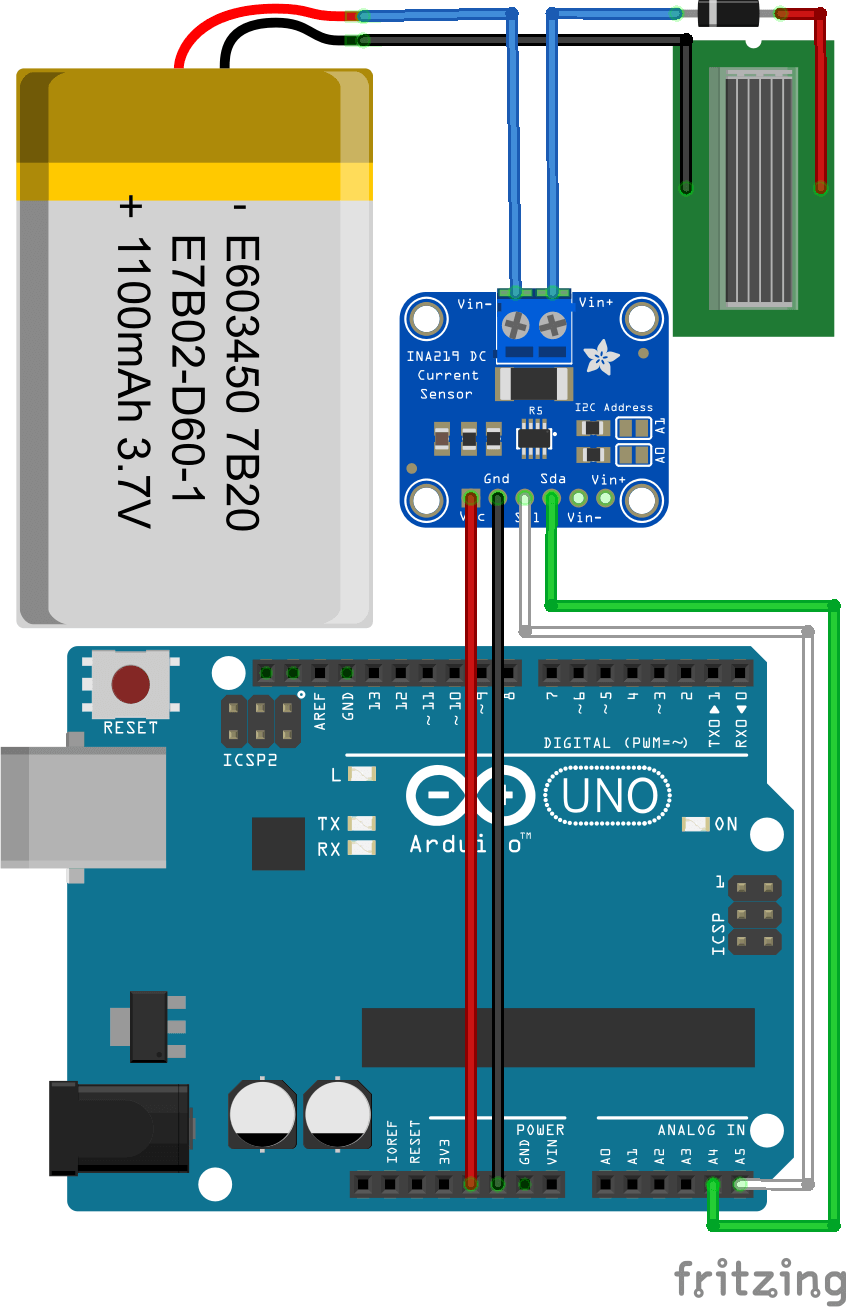
Diagram
The INA219 sensor is a current and voltage sensor communicating via I2C. It is enough to supply it with the 5V output of the Arduino and to connect the SDA and SLC terminals of the I2C communication.
Code
To display the INA219 measurements, we will use the Adafruit library Adafruit_INA219.h which you can download or install directly from the Arduino IDE.
The electrical power exchanged by two devices is calculated by multiplying the voltage and the current on the bus connecting them:
P = UxI with P the power (W), U the voltage (V) and I the current (A).
Energy is the power consumed by the device over time
E = Pxt with E energy (Wh), P power (W) and t time (h)
Functions to know:
- begin () to initialize communication with the sensor
- getBusVoltage_V () to retrieve the voltage value on the Vin- / Vin + bus
- shuntVoltage_mV () to recover the voltage across the shunt resistor
- getCurrent_mA () to retrieve the current value from the shunt resistor
#include <Wire.h>
#include <Adafruit_INA219.h>

Adafruit_INA219 ina219;

  float voltage_V = 0,shuntVoltage_mV,busVoltage_V;
  float current_mA = 0;
  float power_mW = 0;
  float energy_Wh=0;
  long time_s=0;

void setup(void)
{
  Serial.begin(9600);
  uint32_t currentFrequency;
  ina219.begin();
  Serial.println("Measuring voltage and current with INA219");
}

void loop(void)
{
  getData();
  delay(2000);
}

void getData(){

 time_s=millis()/(1000); // convert time to sec
 busVoltage_V = ina219.getBusVoltage_V();
 shuntVoltage_mV = ina219.getShuntVoltage_mV();
 voltage_V = busVoltage_V + (shuntVoltage_mV / 1000);
 current_mA = ina219.getCurrent_mA();
 //power_mW = ina219.getPower_mW();
 power_mW=current_mA*voltage_V;
 energy_Wh=(power_mW*time_s)/3600;   //energy in watt hour


  Serial.print("Bus Voltage:   "); Serial.print(busVoltage_V); Serial.println(" V");
  Serial.print("Shunt Voltage: "); Serial.print(shuntVoltage_mV); Serial.println(" mV");
  Serial.print("Load Voltage:  "); Serial.print(voltage_V); Serial.println(" V");
  Serial.print("Current:       "); Serial.print(current_mA); Serial.println(" mA");
  Serial.print("Power:         "); Serial.print(power_mW); Serial.println(" mW");
  Serial.print("Energy:        "); Serial.print(energy_Wh); Serial.println(" mWh");
  Serial.println("----------------------------------------------------------------------------");
}
Application
One possible application with an INA219 sensor is to create an energy meter to measure the electrical power absorbed by a solar panel, for example. This allows you to check the correct functioning of the photovoltaic cells, on the one hand, and to measure its performance over time.
Sources
Find other examples and tutorials in our Automatic code generator
Code Architect


wiring is all wrong. The sensor is high side connected, not low side in order to read the bus voltage
You’re absolutely right. Thanks for letting me know