, ,
We have seen that the ESP8266 NodeMCU is easily programmable using the Arduino IDE. We will see how to program it with MicroPython. The advantage of using Python to program an ESP8266 is to use it to its full potential.
Before following this tutorial, you must first install Python 3.
We will see in this tutorial how to configure the ESP8266 and how to use a terminal to test Python commands. Finally, we will see two methods to load and run Python scripts on the microcontroller.
Presentation of MicroPython
MicroPython is an implementation of Python 3 created to work in the microcontroller environment and its constraints. It has a subset of the Python libraries as well as libraries to interface with low level hardware and network interfaces. (ex: Wifi)
Cards supporting MicroPython:
- ESP32 Boards (ex: NodeMCU ESP32)
- PyBoard
- Micro:Bit
- Teensy 3.X
- WiPy – Pycom
Install the firmware on the ESP8266
To use MicroPython, we will erase the flash memory of the ESP8266 and install the firmware. To do this, we will use the esptool tool (.py or .exe depending on what you want to use)
- Install esptool.py
python3 -m pip install esptoolor esptool.exe (available when installing the esp package on Arduino IDE)
- Erase flash memory (Warning: the port name may be different from yours)
python3 -m esptool --port COM9 erase_flash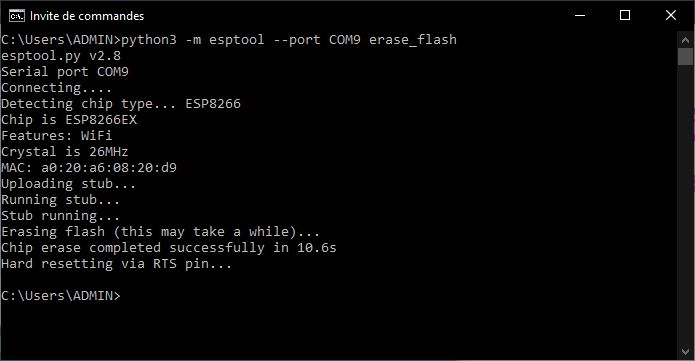
- Download the firmware, then enter the following line of code (Warning: the port name and file address may be different from yours)
python3 -m esptool --port COM9 --baud 460800 write_flash --flash_size=detect 0 C:\Users\ADMIN\Downloads\esp8266-20210202-v1.14.bin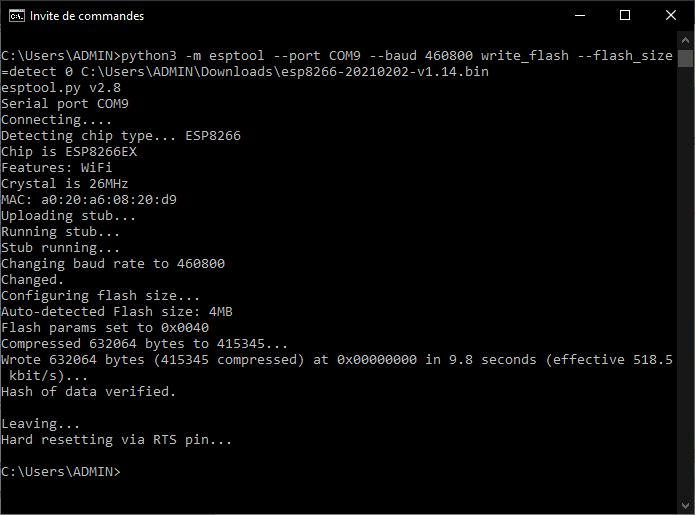
To be able to communicate and program the ESP with MicroPython, we need to install a terminal. We will see here the use of PuTTy and TeraTerm.
Install the TeraTerm Terminal on Windows
Download and install TeraTerm
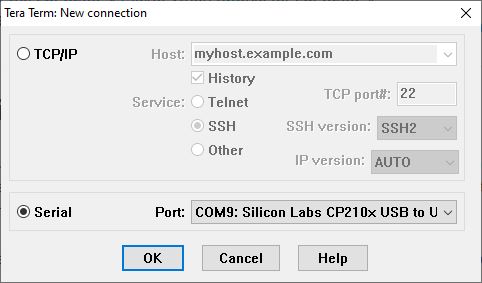
Open TeraTerm then select the serial port corresponding to the microcontroller.
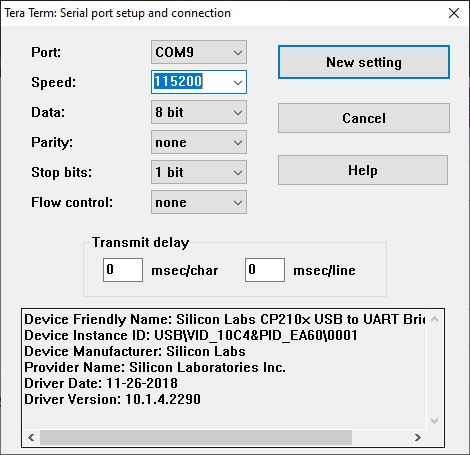
Then configure the serial communication in Setup> Serial Port …
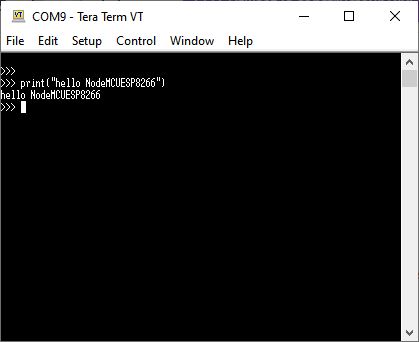
You can now use the terminal to enter Python commands and execute them on the ESP8266
Installation of the PuTTy terminal
Download and install PuTTy
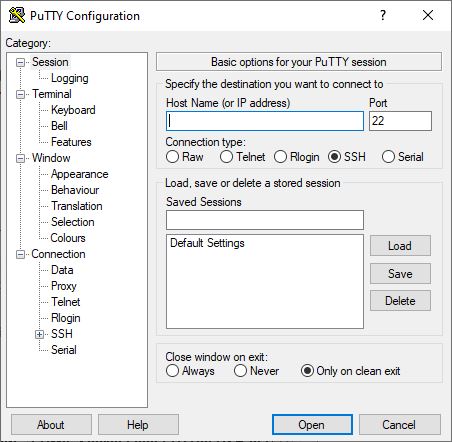
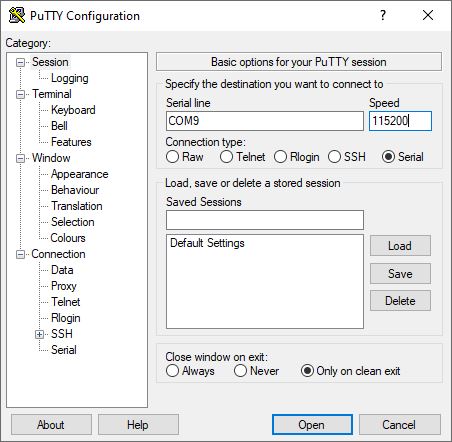
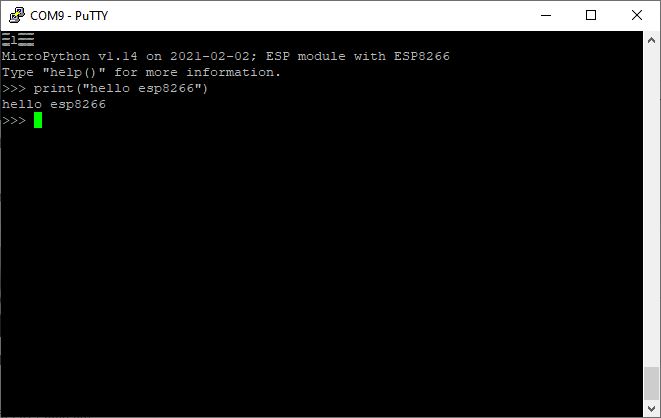
Open Putty and select the serial port corresponding to the microcontroller.
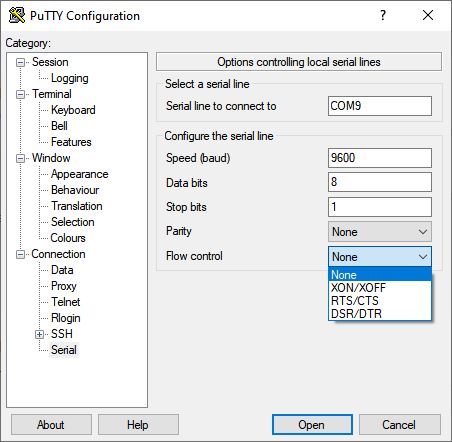
Next, configure the serial communication. To be able to communicate with the ESP8266, you must select None in Flow control under Serial
You can now use the terminal to enter Python commands and execute them on the ESP8266
The PuTTy and TeraTerm terminals are two good options for testing a few Python commands but not for making a complete program.
Create a Python script and upload it using ampy
We are going to write a simple code in order to test the upload of a code on ESP8266. There are two files that are treated differently by the ESP8266: boot.py and main.py. By default, only boot.py is present. The boot.py is executed first and then the main.py is executed in turn. If you want to create a script that runs at startup you must call it main or run it in main. If you don’t want it to run at startup call it something else.
import sys
import time

def main():
    print("Program is running ")
    time.sleep(0.5)

if __name__=="__main__":
  print("{} initialized".format(sys.platform))
  while(1):
    try:
      main()
    except KeyboardInterrupt:
      print("Program stopped")
      sys.exit(0)
We will then install ampy which will allow us to load a file on the microcontroller.
python3 -m pip install adafruit-ampyOnce ampy is installed, you can use it in a command prompt with the “put” function to load a file by specifying its path and name.
ampy -d 0.5 --port COM9 put \main.py 
N.B.: If you encounter the error “ampy.pyboard.PyboardError: could not enter raw repl”, you can increase the delay to 1 or 2 (i.e. “-d 1” or “-d 2”)
If you connect to the ESP8266 with a terminal, you will see the program running (you can stop the script with Ctrl+C)
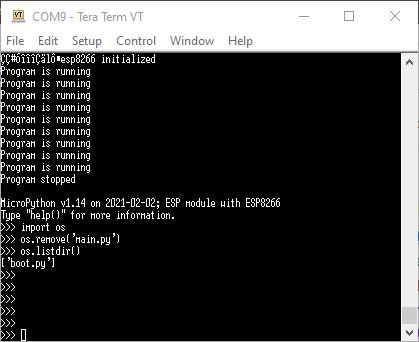
The main.py script will run on each reboot. To remove it, enter the following command in the terminal
import os
os.remove('main.py')
Using the uPyCraft IDE
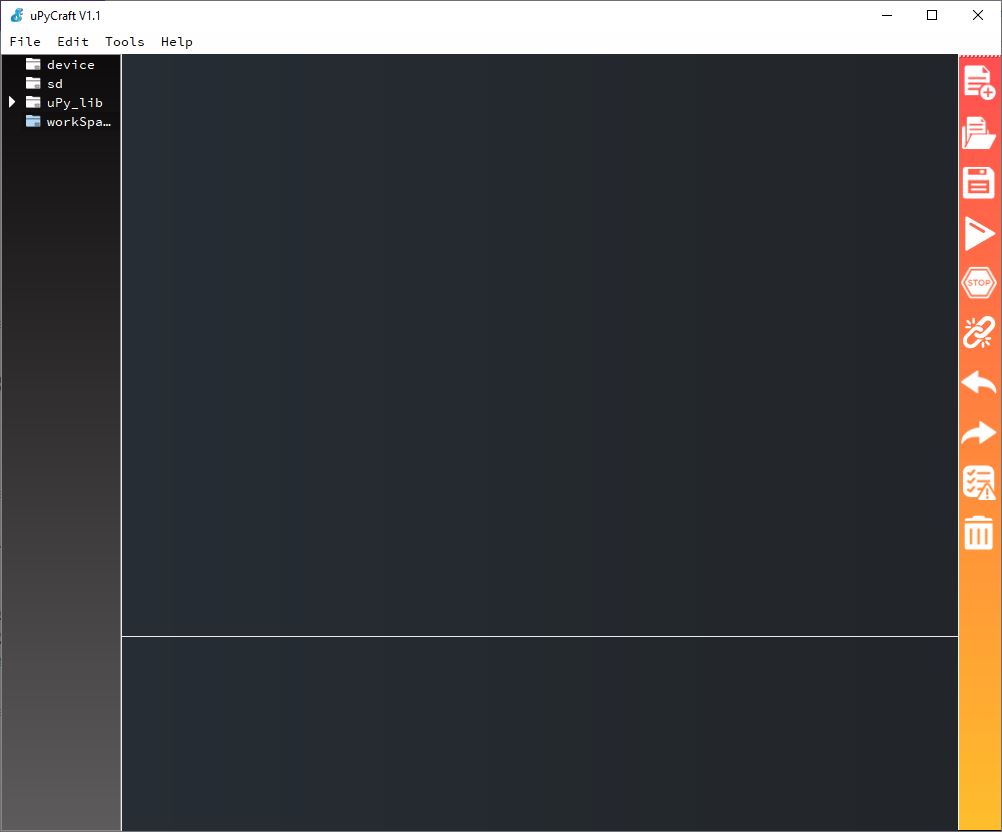
When developing code and it is necessary to test it, it is complicated to go through the command prompt to load it each time. There is an IDE for Python, similar to the Arduino IDE: uPyCraft that you can use as an editor and as a terminal to interface with the microcontroller.
- Download and open uPyCraft
- In Tools> Preferences, check the serial port configuration
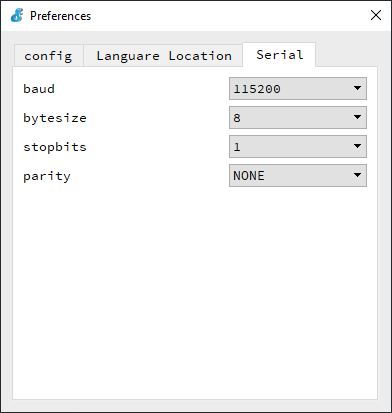
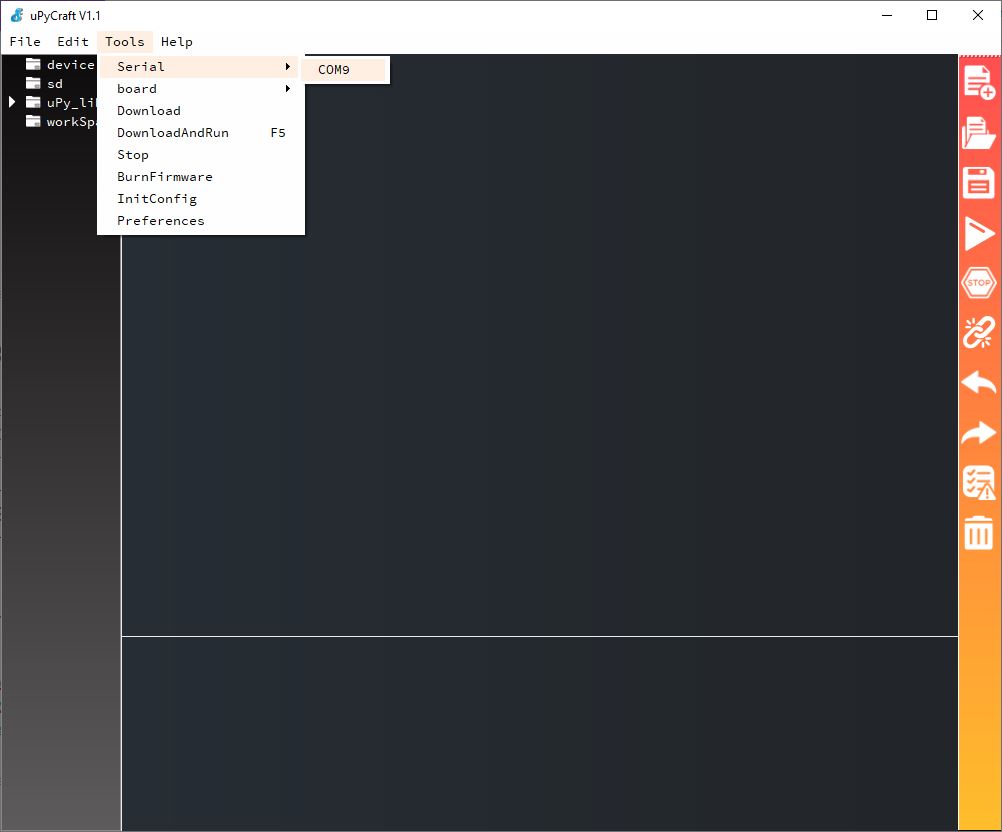
- In Tools>Serial, select the serial port used by the microcontroller
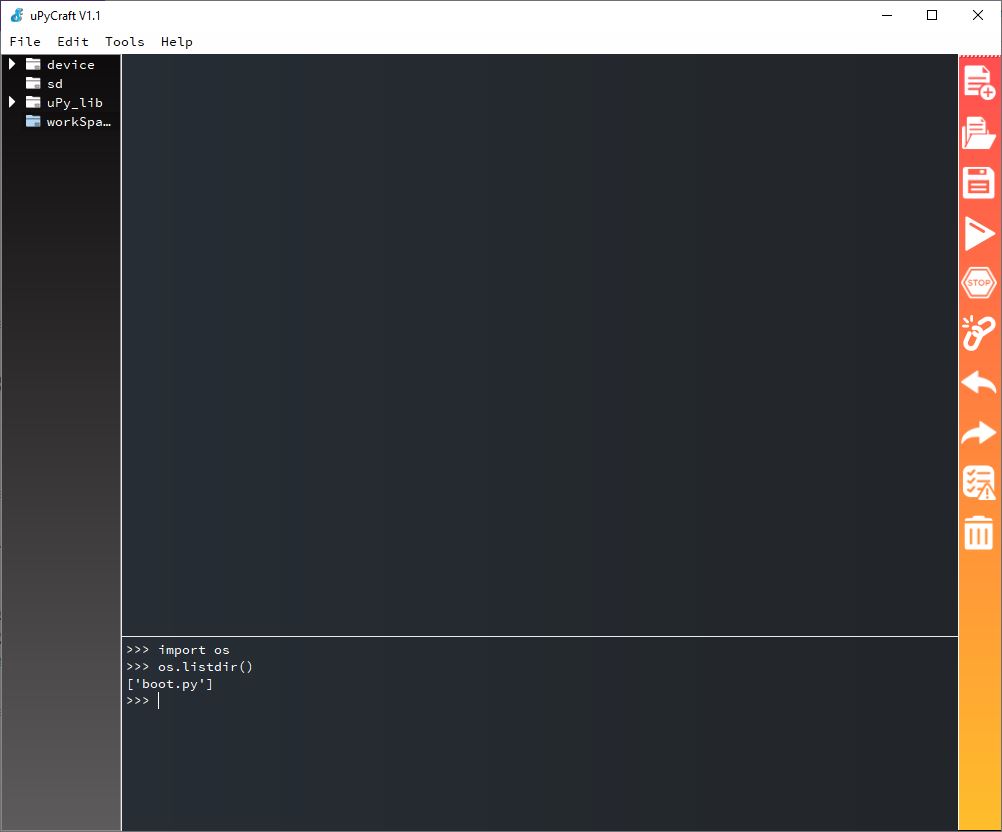
Once the microcontroller is connected to the interface, you can use the console as a terminal
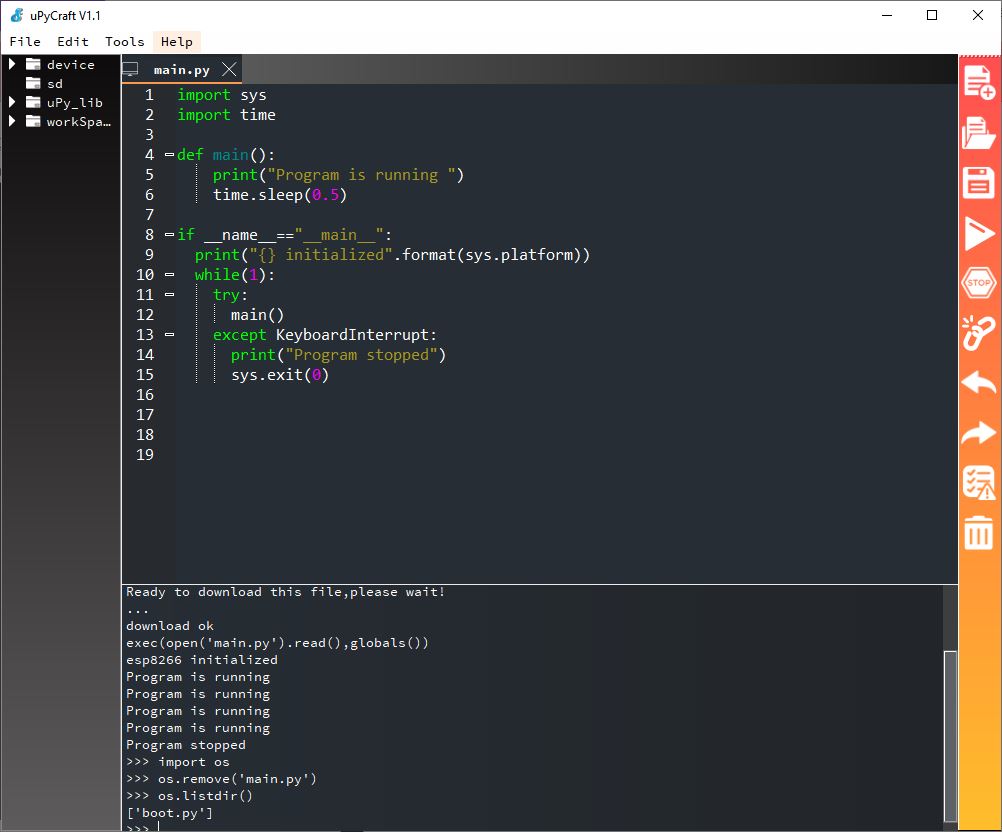
You can also create and edit a file containing the Python script. Once the code is written, you can load it and execute it by pressing F5. To validate the code upload, it may be necessary to press the reset button on the board. You can stop the code by pressing Ctrl+C in the console.
N.B.: You can restart the code without doing a reset, by entering the command
exec(open('main.py').read(), globals())Delete the file
If you don’t want the script to be triggered on restart, you have to delete the main.py code by using the command in a terminal or in the IDE
os.remove('main.py')Reset to default configuration
To be able to program the microcontroller with Arduino IDE, you must delete the main.py file if it exists and upload an Arduino code. This will reload the bootloader in the flash.
To use MicroPython again, you will have to erase the flash and load the firmware.


I spent quite some time to get my ESP to do at least something, than I found your Explanation and it just workt. great for people whith zero nolage.