
We’re going to take a look at how to program an ESP32 or ESP8266 board in MicroPython using Visual Studio Code, an IDE increasingly used for programming in a variety of languages. The ESP32 board can be programmed as follows
Introducing Visual Studio Code
Visual Studio Code is a lightweight, extensible code editor developed by Microsoft. VsCode offers many of the same features as the Arduino IDE:
- Automatic completion
- Highlighting syntax
- Debugging functionality
- Programming in several languages (C++, C
- Project management
- Git repository management
- Etc.
It is open-source and available on Windows, Linux and MacOS platforms.
Installing MicroPython firmware on the ESP board
To install MicroPyhton firmware on the ESP32 or ESP8266 board, you can use one of the following two tutorials:
Installing Visual Studio Code
Go to the Visual Studio Code download page and download the version corresponding to your OS.
Launch the installer and follow the procedure
Installing Pymakr
To program in Python, you need to install the corresponding extension.
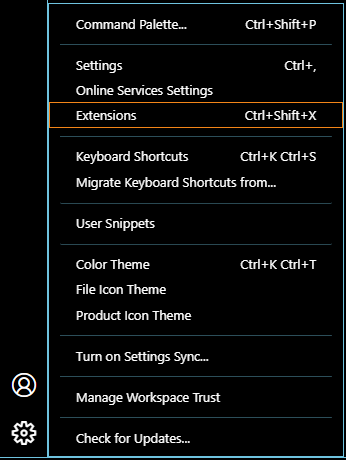
Click on the “Manage” icon (cogwheel) at bottom left and select Extensions (or Ctrl+Shift+X)
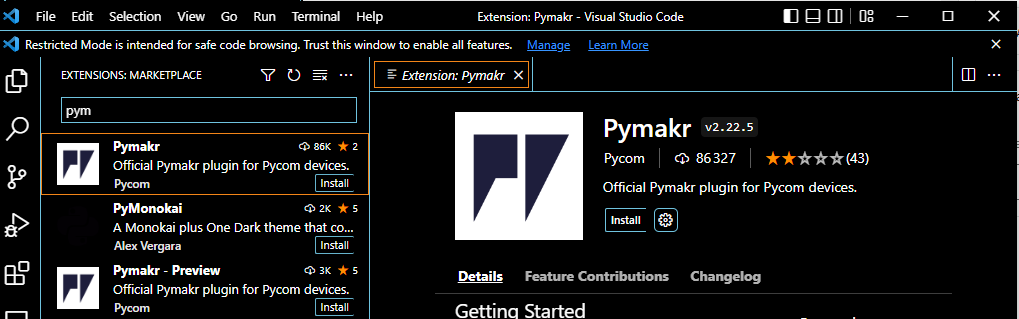
Then search for and select “Pymakr”. Then install the extension.
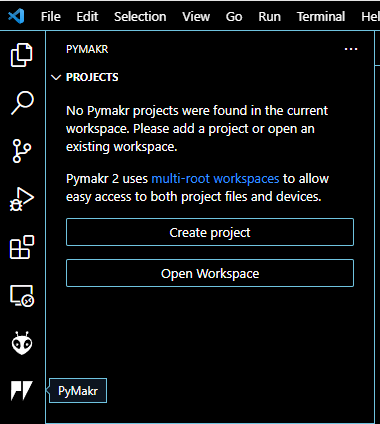
Click on the Pymakr icon and select “create project”.
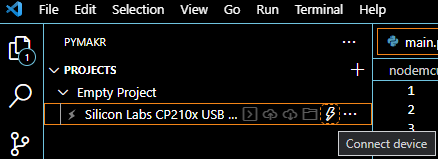
Then click ADD DEVICE and select the ESP connected to the computer.

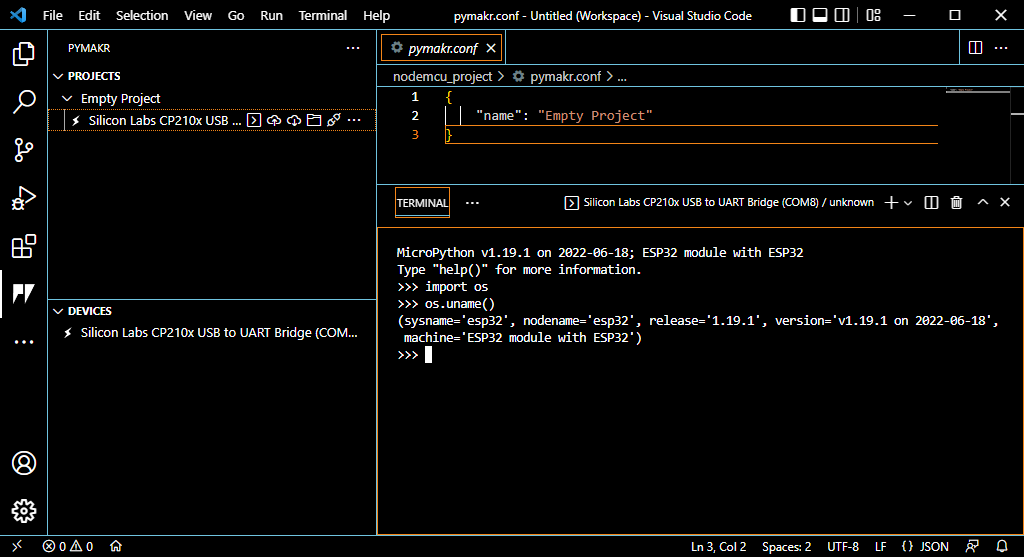
Once you’ve selected a device, you can connect it by pressing the
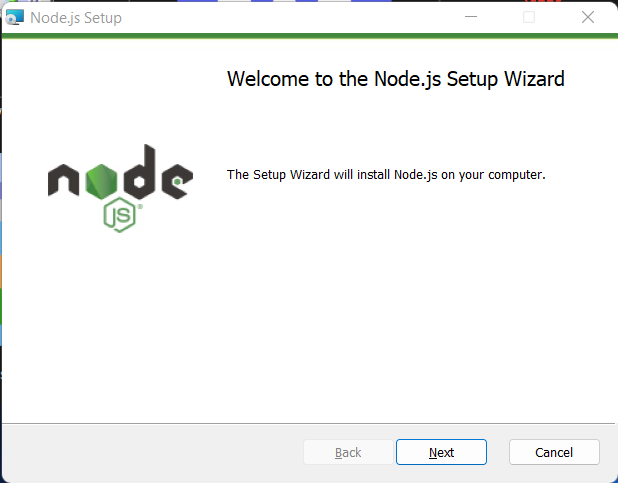
Installing Node.js
It may be that in the previous step, the “create project” step doesn’t work properly. In this case, to solve the problem, simply install another third-party software called Node.js, which will enable the Pymakr extension to work properly. Go to https:
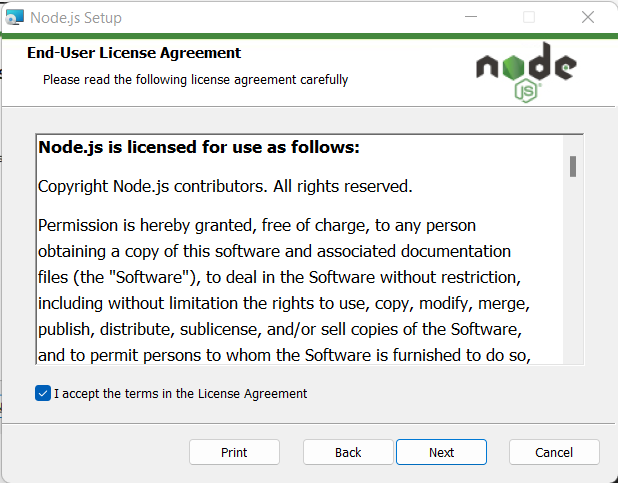
Click “next” twice to accept the conditions.
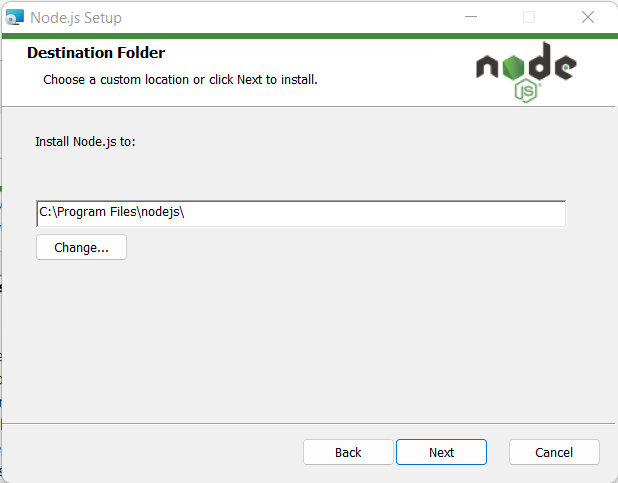
Choose the location for the application (you can leave the default location in your computer’s “Program Files” folder), then click “Next”.
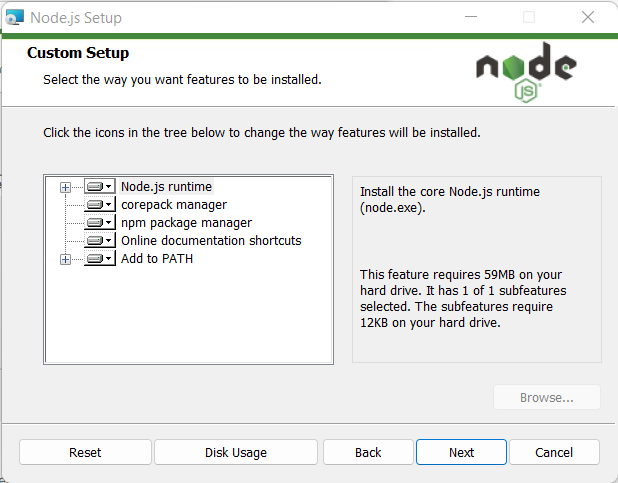
There’s no need to change anything here, so we click on “Next”.
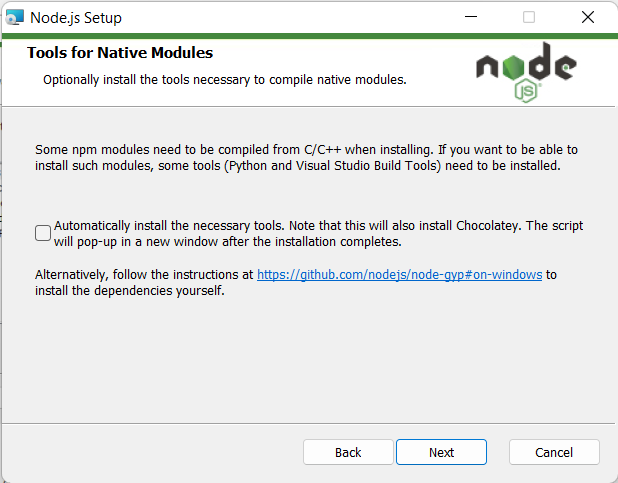
Here, there’s no need to install additional tools such as Chocolatey as suggested, so we click on “Next”.
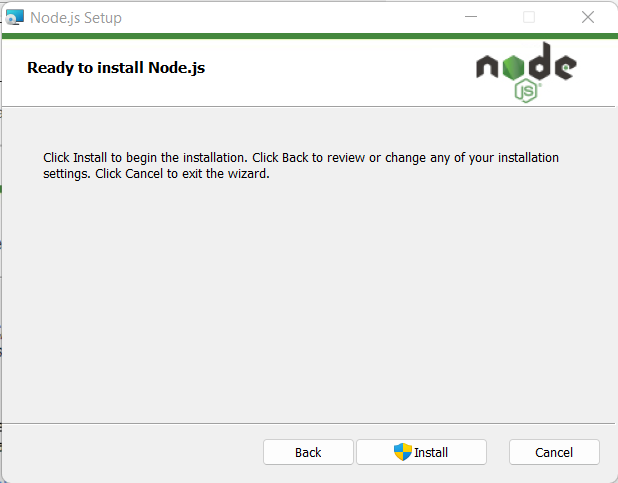
Finally, click on “Install”, authorizing installation with administrator rights if the computer asks you to do so.
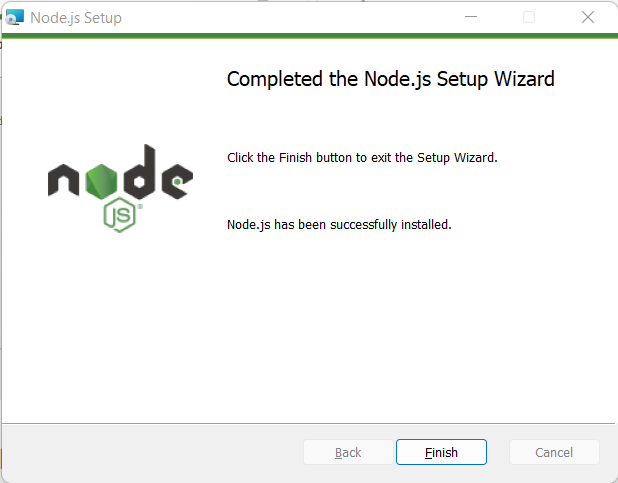
Node.js installation is now complete, and you can click on “Finish”.
You can now move on to the MicroPython programming part of Visual Studio Code. However, make sure you have closed and restarted Visual Studio Code so that it takes Node.js into account.
Programming the ESP32 card
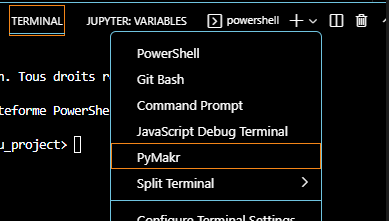
Once the project has been configured, you can launch a Pymakr terminal in the TERMINAL tab. Click on the arrow to the right of the “+” to select the Pymakr console.
Press “Enter” to establish the “select” connection
You can now program in MicroPython directly on the ESP
Run a Python script on your ESP32
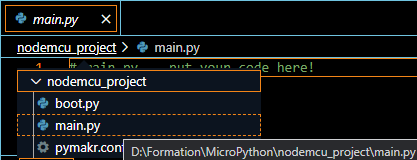
There are two Python files in the project:
- boot.py, which runs when the microcontroller starts up
- main.py, which contains the main code and runs immediately after boot.py
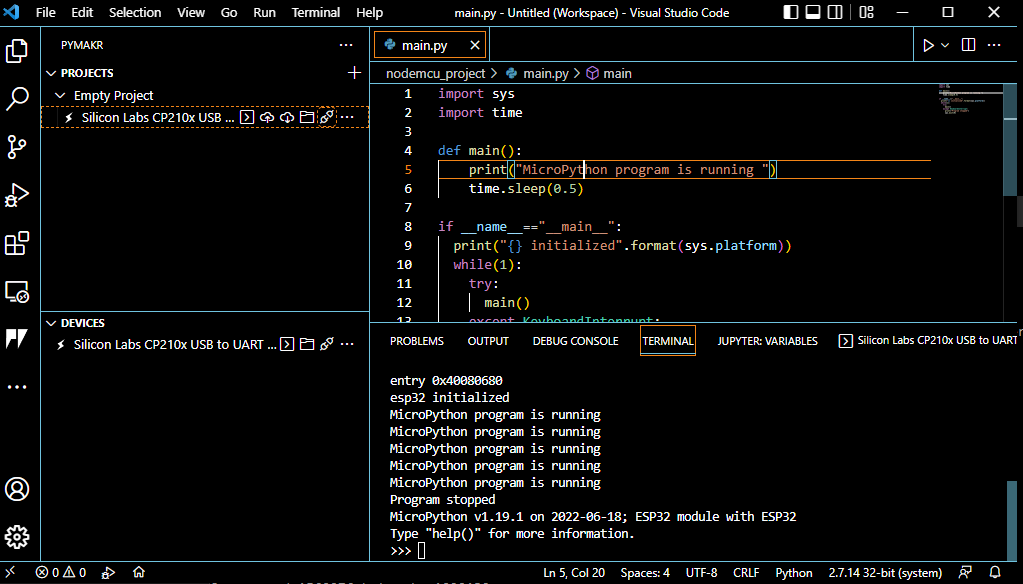
Open the project’s main.py file and copy the following code
import sys
import time

def main():
    print("MicroPython program is running ")
    time.sleep(0.5)

if __name__=="__main__":
  print("{} initialized".format(sys.platform))
  while(1):
    try:
      main()
    except KeyboardInterrupt:
      print("Program stopped")
      sys.exit(0)
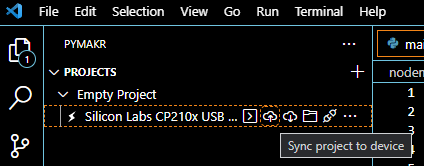
You can then upload the code to the card using the “Sync project to device” button.
After resetting the board with the EN button, you can see that the code runs correctly.


Can we not program the esp32 without using pymakr? It refuses to work on my computers and the pymakr website is useless.
Yes with Thonny
What is the problem with pymkr?