The Raspberry Pi Pico is a development board based on the RP2040 programmable with the Arduino IDE. It has a large number of inputs
Installing drivers on the computer
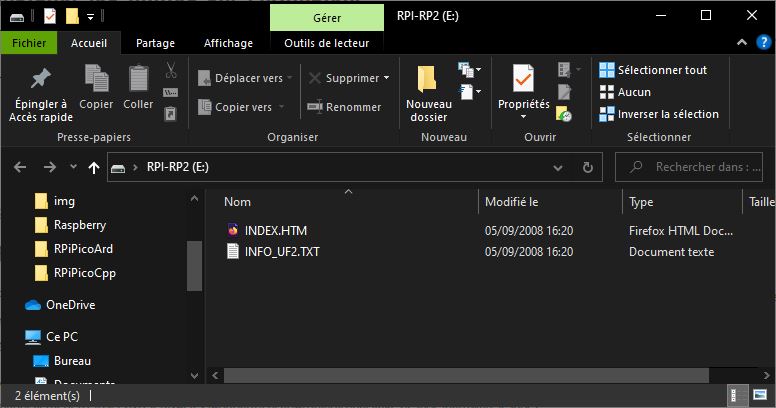
The Raspberry Pi Pico is recognized as a Fat32 USB storage device. No special driver needs to be installed to connect it to a computer. To convert the RPi Pico into a USB flash drive:
- Disconnect the Pico from its power supply
- Press the BOOTSEL button
- Connect the Pico to the computer using the USB cable
- Release the BOOTSEL button
Add JSON handlers
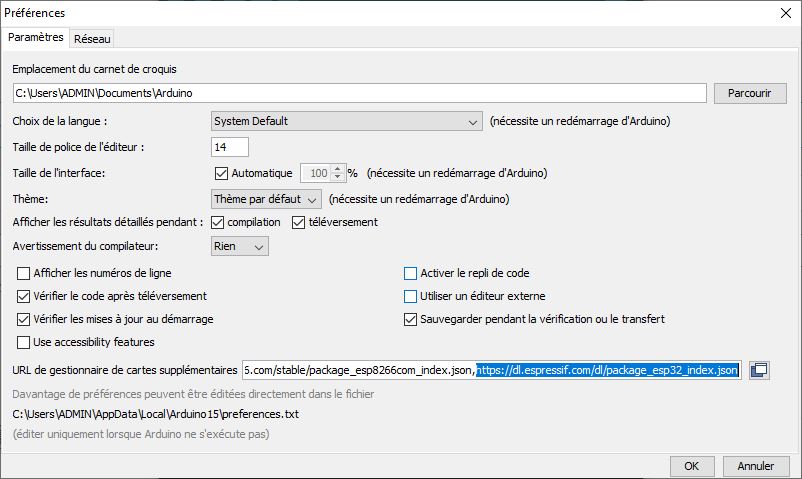
To program other microcontrollers with the Arduino IDE, you need to install board managers on your Arduino, containing all the tools you need to program them. To retrieve the managers, you need to find the corresponding URL. In the case of the Raspberry Pi Pico, https://github.com/earlephilhower/arduino-pico/releases/download/global/package_rp2040_index.json
N.B.: If you encounter compilation problems, check whether a previous version of Pico is installed. If so, delete it manually (C:\Users\\AppData\Local\Arduino15\packages\rp2040).
Then open the File>Preferences window of the Arduino software. At the bottom of the page you will find a text box in which to enter the URL: “Additional board manager URL”. (don’t forget to separate URLs with a comma “,”)
Install managers
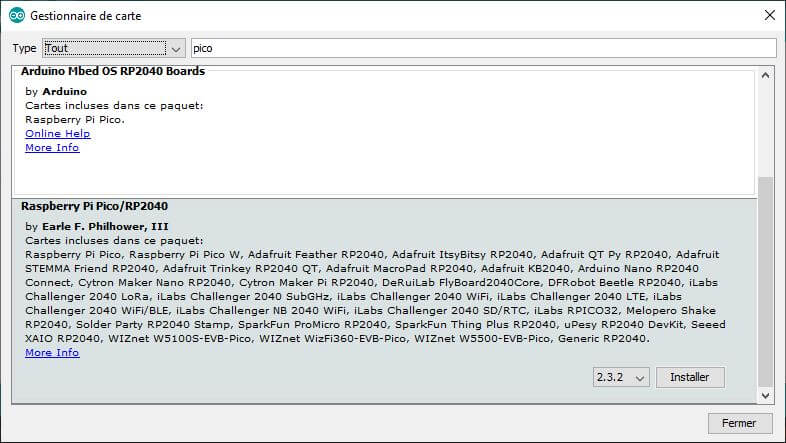
In the “Tools” tab, follow the path “Map type > Map manager”. The IDE will load the map catalogue from the URL.

If you search for the microcontroller in the search bar, the package to be installed should be displayed.
Select configuration
Once the management package has been installed, the microcontroller should appear in the available board types.
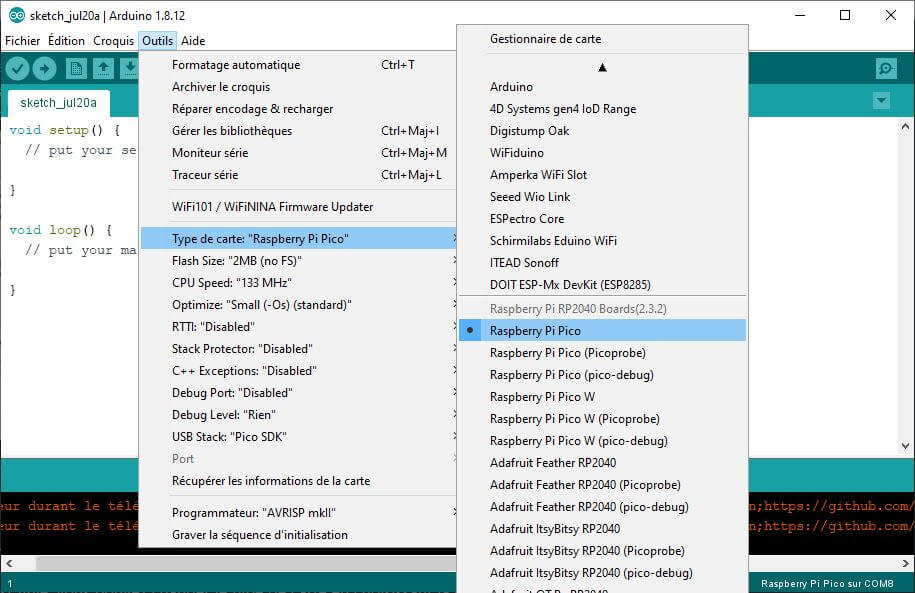
You’ll then need to know the characteristics of your card to select the right settings. However, except in exceptional cases, the default settings will work without a hitch.
Example code
You can copy and paste this example code to test compilation and uploading. A list of Arduino libraries compatible with the RP2040 microcontroller is available here.
//Constants
#define BRIGHTNESS 200
//Parameters
const int ledPin = 25;
//Variables
bool ledStatus = 0;
void setup() {
//Init Serial USB
Serial.begin(9600);
Serial.println(F("Initialize System"));
//Init led
pinMode(ledPin, OUTPUT);
}
void loop() {
testLed();
}
void testLed( ) {
digitalWrite(ledPin, HIGH);
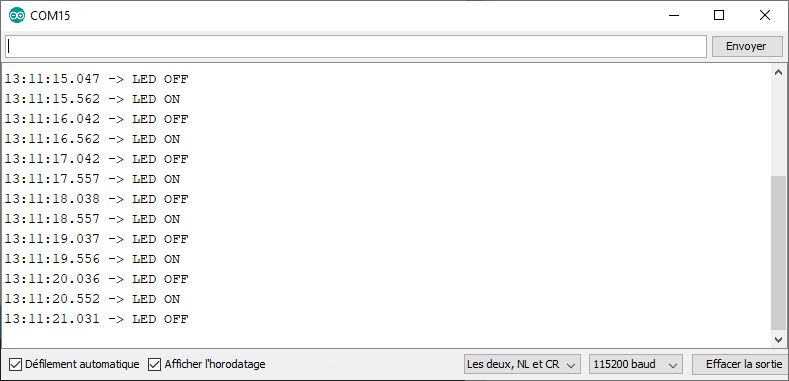
Serial.println(F("LED ON"));
delay(500);
digitalWrite(ledPin, LOW);
Serial.println(F("LED OFF"));
delay(500);
}
If the upload is successful, this message should be displayed
Resetting COM15
Converting to uf2, output size: 105472, start address: 0x2000
Flashing E: (RPI-RP2)
Wrote 105472 bytes to E:/NEW.UF2
Results
Sources
- Overview of the Raspberry Pi Pico board
- List of available libraries for RPi Pico under Arduino
- Features of the Raspberry Pi Pico board


