We’re going to look at how to program an Arduino board using Visual Studio Code, a nice alternative to the Arduino IDE. Programming on the Arduino is generally started using the official IDE. It can be interesting to change code editors to gain access to a wider range of functions. In this article, we present the use of Visual Studio Code. Other editors exist, such as Eclipse, Netbeans, Atom.io, etc.
Introducing Visual Studio Code
Visual Studio Code is a lightweight, extensible code editor developed by Microsoft. VsCode offers many of the same features as the Arduino IDE:
- Automatic completion
- Highlighting syntax
- Debugging functionality
- Programming in several languages (C++, C
- Project management
- Git repository management, Etc.
It is open-source and available on Windows, Linux and MacOS platforms.
Installing Visual Studio Code
Go to the Visual Studio Code download page and download the version corresponding to your OS.
Launch the installer and follow the procedure
To communicate with Arduino, you need to install the corresponding extension.
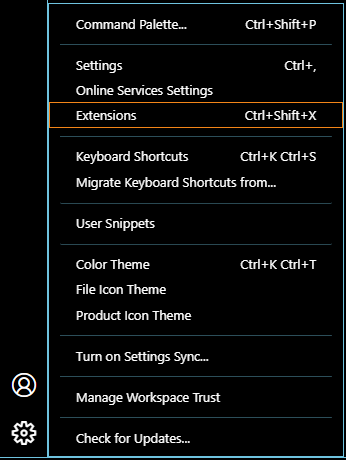
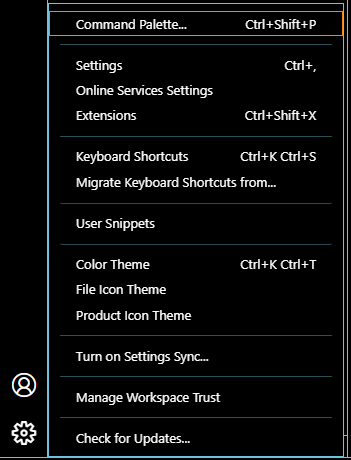
Click on the “Manage” icon (cogwheel) at bottom left and select Extensions (or Ctrl+Shift+X)
Then search for Arduino and select “Arduino for Visual Studio Code”.
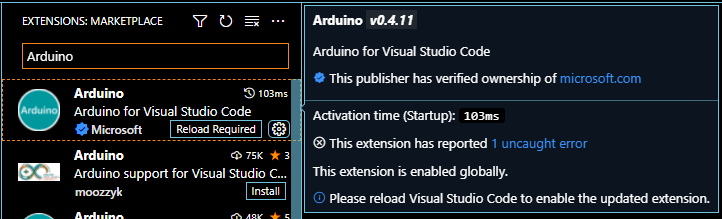
Restart VsCode
Configuring VsCode for Arduino
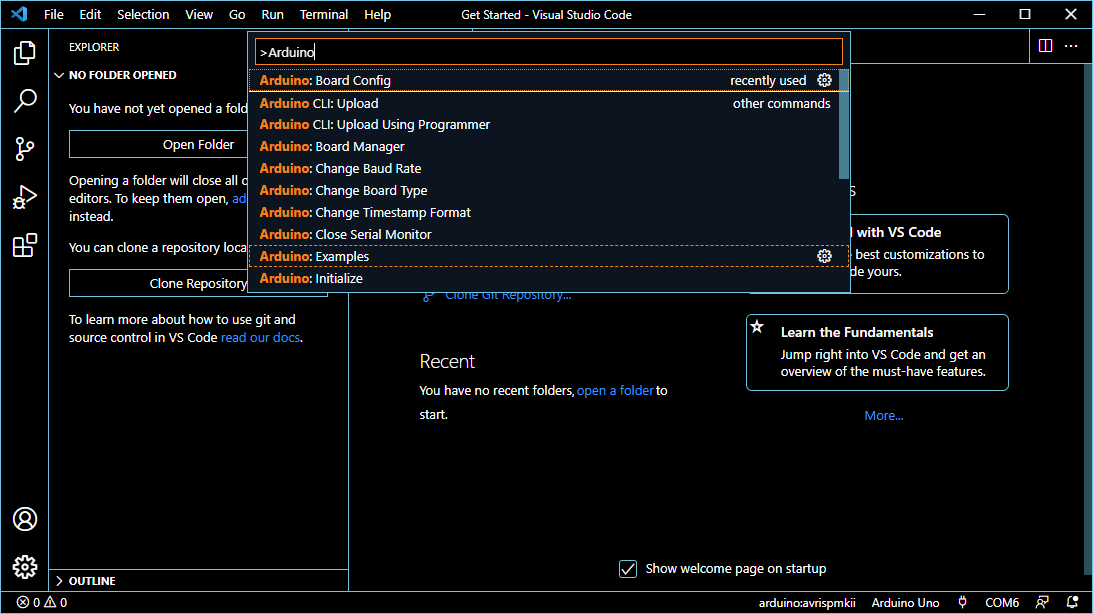
Click on the Manage icon and select “Palette command” (or Ctrl+Shift+P)
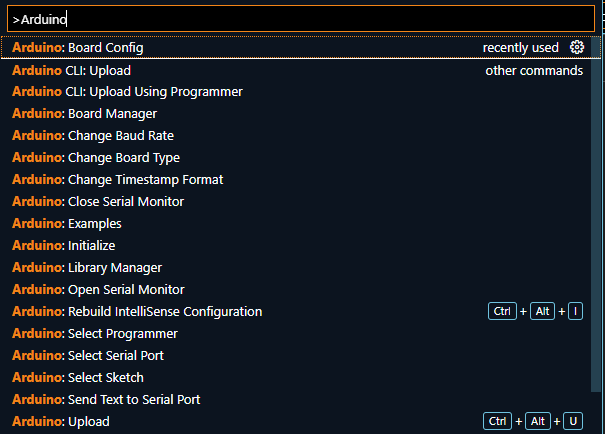
Search for Arduino, and you’ll have access to several Arduino-related commands.
Select Arduino Board Config then select the board type
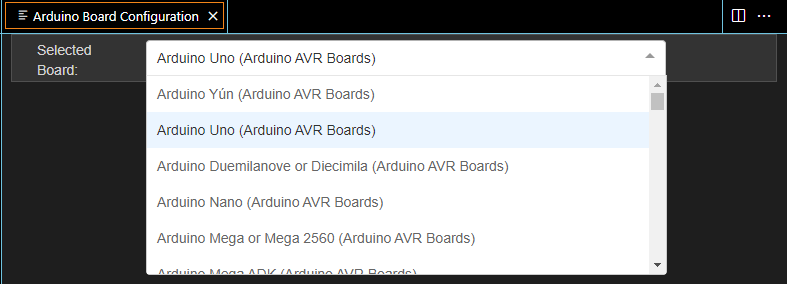
N.B.: you can install more boards with Arduino: Board Manager
At bottom right, click on Select Serial Port, then select the serial port corresponding to the Arduino (here, COM5).
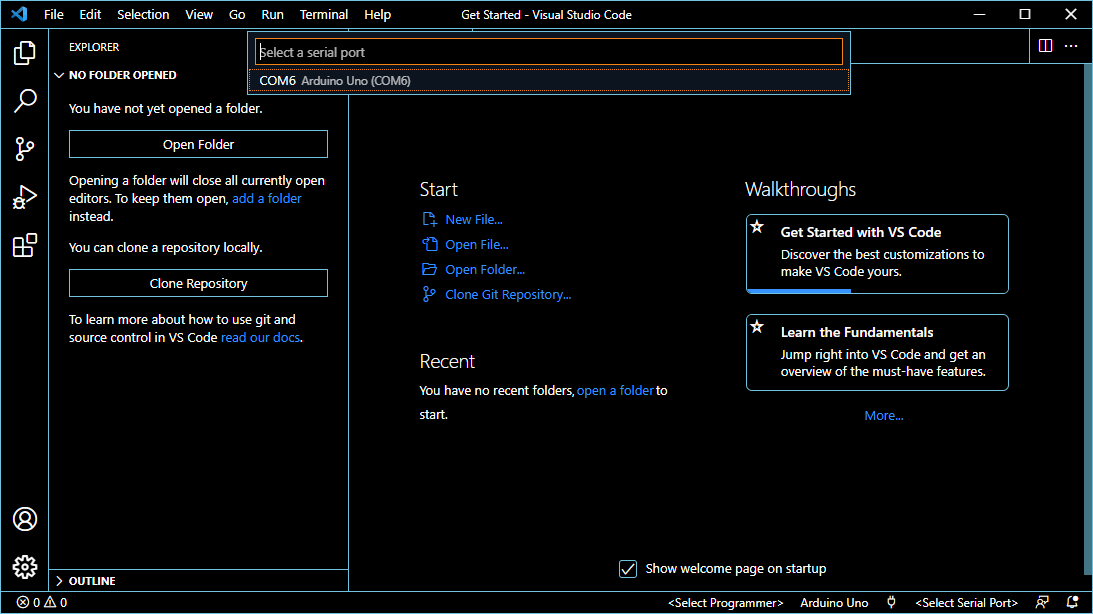
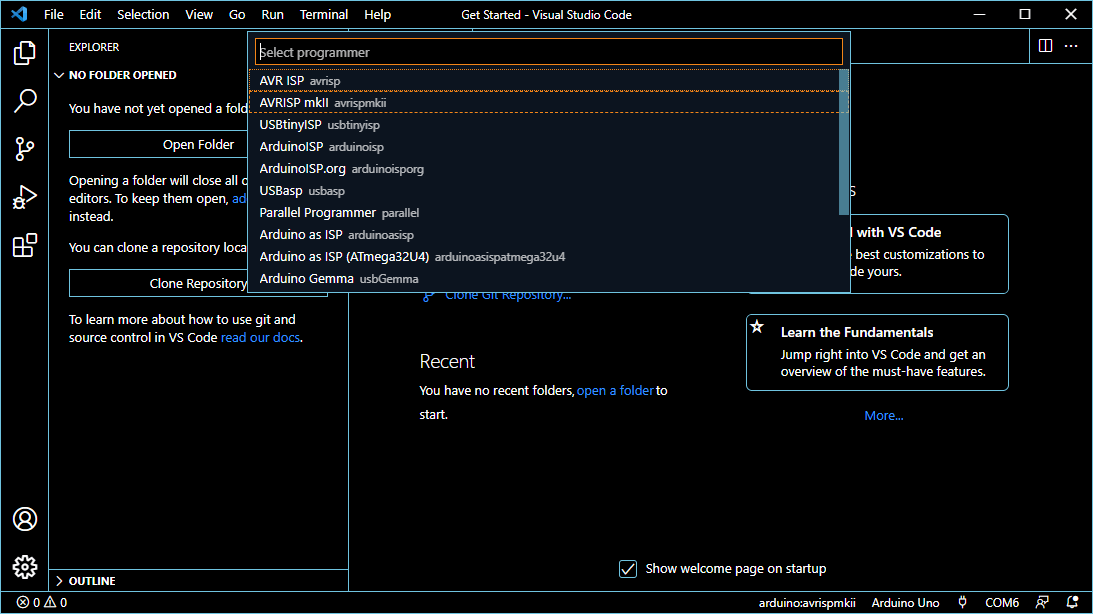
In the bottom right-hand corner, click on Select Programmer, then select “AVRPISP mkII”.
Code compilation and upload
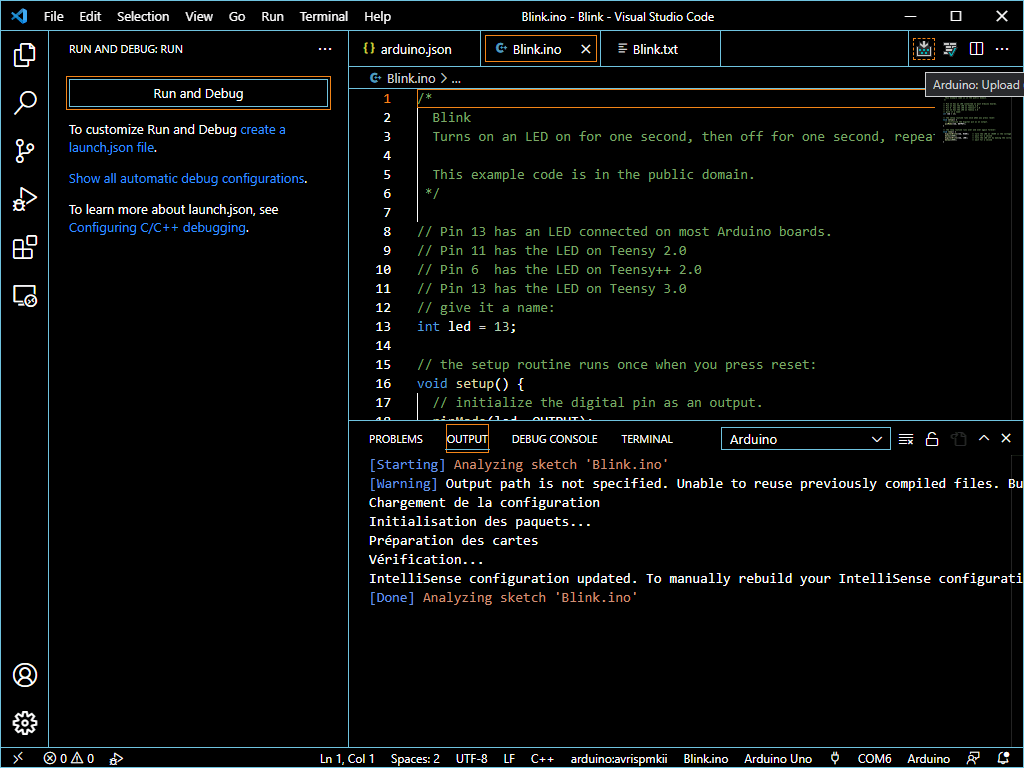
In the command palette (Ctrl+Shift+P), search for Arduino: Examples, then choose Blink or another example.
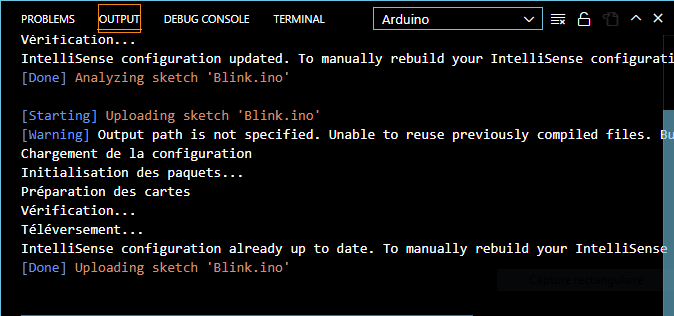
You can then upload the code by clicking on “Upload” in the top right-hand corner.
By modifying the code a little, we can send text to the serial monitor.
int led = 13;

// the setup routine runs once when you press reset:
void setup() {
  Serial.begin(115200);
  // initialize the digital pin as an output.
  pinMode(led, OUTPUT);
}

// the loop routine runs over and over again forever:
void loop() {
  digitalWrite(led, HIGH);   // turn the LED on (HIGH is the voltage level)
  Serial.println("Led is High");
  delay(1000);               // wait for a second
  digitalWrite(led, LOW);    // turn the LED off by making the voltage LOW
  Serial.println("Led is Low");

  delay(1000);               // wait for a second

}
Download the modified code to the Arduino board.
To open the serial monitor, click on the Serial Monitor icon just to the right of the card type in the bottom right-hand corner.

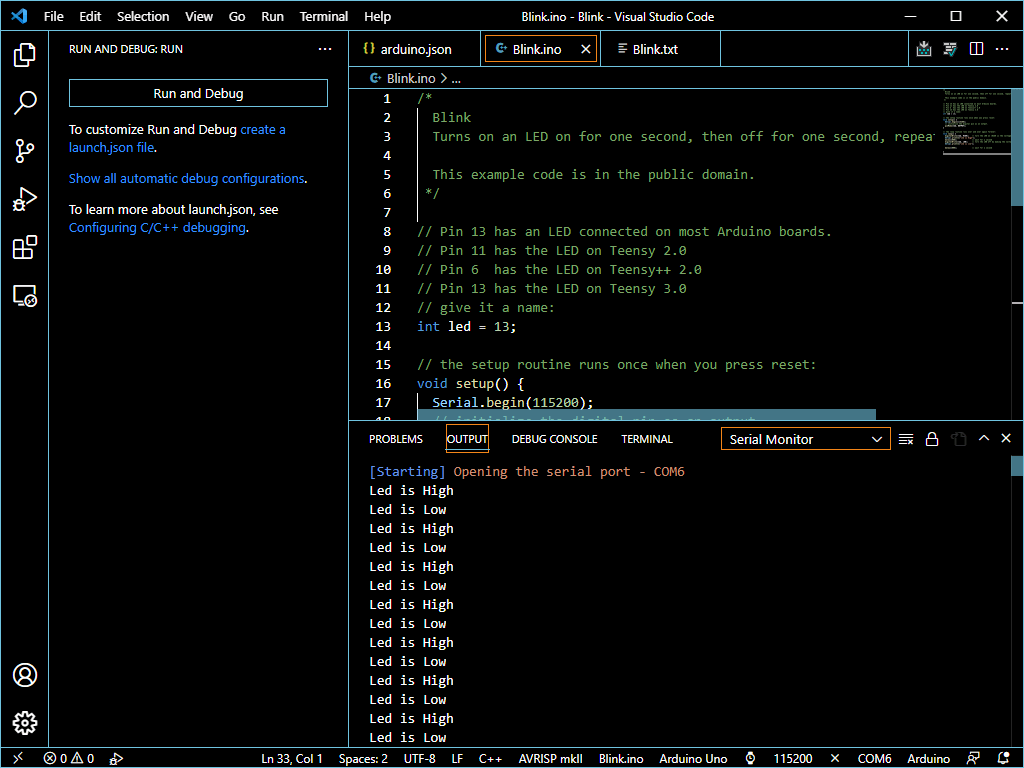
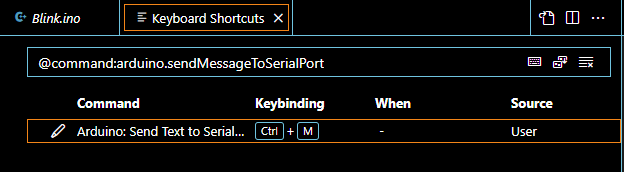
Send commands to the serial monitor
As with the Arduino IDE, commands can be sent via the serial port.
In the Arduino command palette, search for “Sedn text to Serial Port”. An input bar appears.

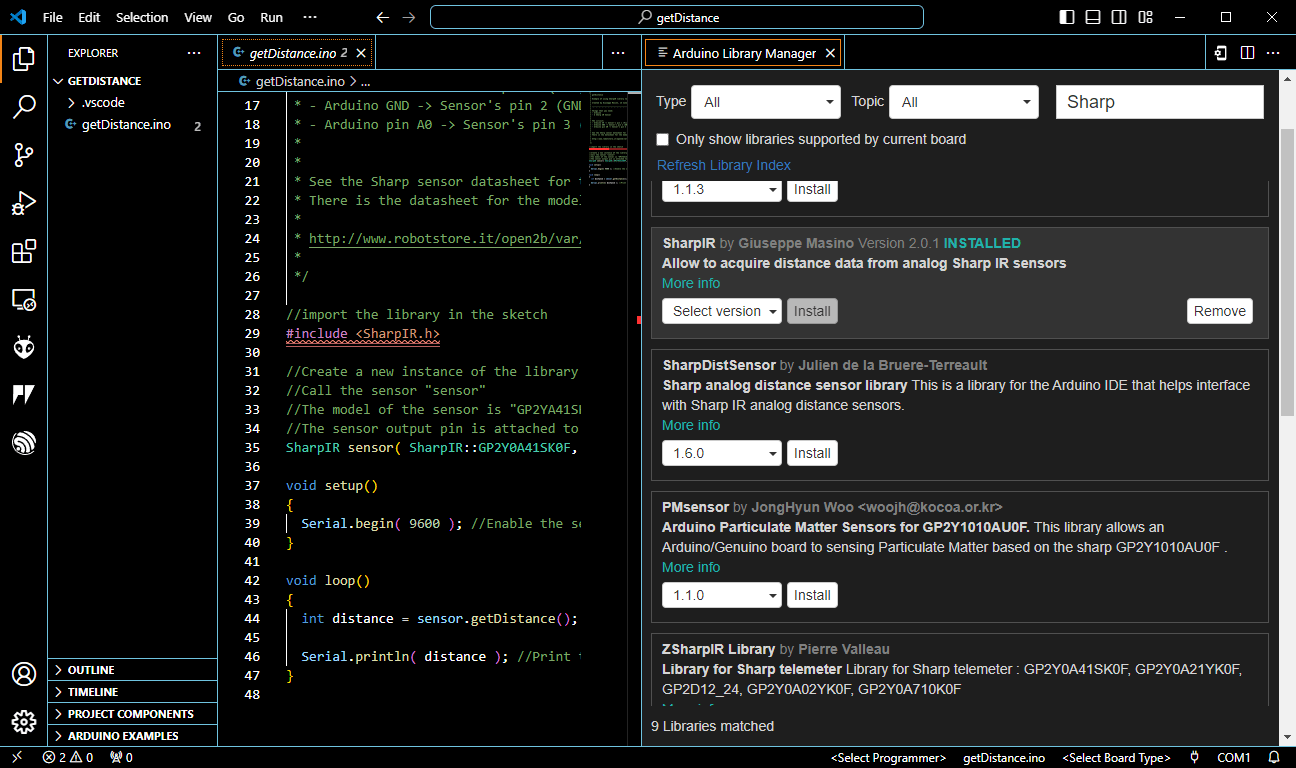
Add a library
You can install Arduino libraries using the Arduino: Library Manager command.