The Raspberry Pi is a very powerful tool offering many functionalities. One of them is the remote connection which makes it a favorite tool for connected objects or IoT. To configure the Raspberry on its first use, it is practical to have a screen with an HDMI port, a keyboard and a mouse as for a computer. It quickly becomes heavy for a connected object. We will see here how to get rid of these accessories when using the Pi.
Prérequis: Installation de Raspbian
Equipment
- Screen
- HDMI cable
- Keyboard
- Raspberry PI 3
- Micro SD card
- Mouse
- Micro USB charger B
Commands to know
- Install sudo apt-get install software
- OS update sudo apt-get udpate then sudo apt-get upgrade
- Restart the Raspberry Pi sudo reboot
- Turn off the Raspberry Pi sudo shutdown
- Open the configuration menu Raspberry Pi sudo raspi-config
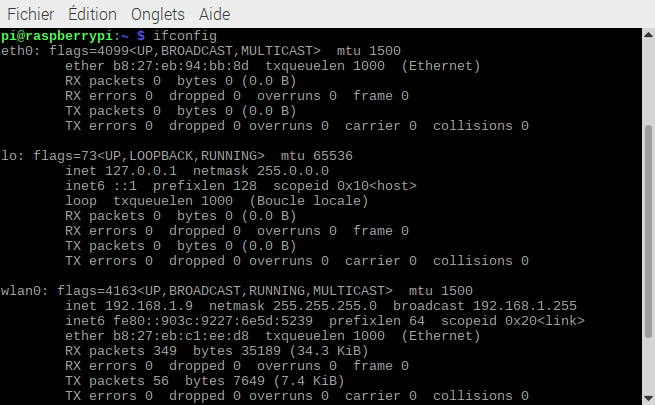
- Find the IP address of the Raspberry Pi ifconfig
Remote connection by SSH
Configuration of the Raspberry Pi
Once the OS is installed, go to the Raspberry Pi desktop. Open the terminal ![]() at the top left of the screen (or Ctrl + Alt + t).
at the top left of the screen (or Ctrl + Alt + t).
Then enter the command:
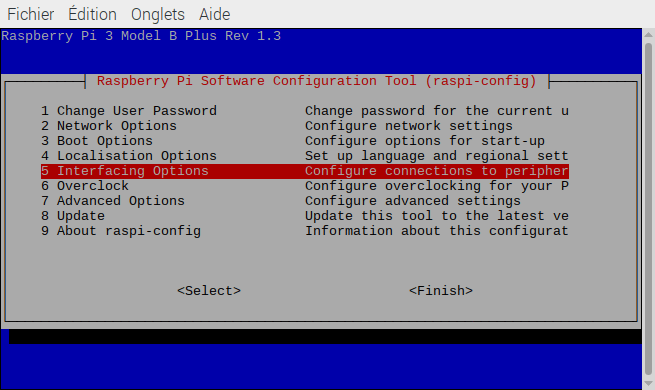
sudo raspi-config
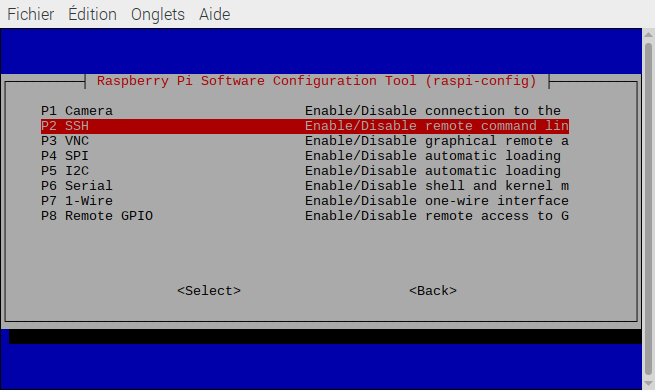
In the menu, select “5 – Interfacing Options”
Then “SSH”, select “Yes” to allow SSH connection.
To find out the IP address of your Raspberry Pi, enter the command, ifconfig (here IP : 192.168.1.9)
Installation of PuTTY software
On your PC, install the PuTTY software which is an SSH client and will allow you to connect remotely to your Raspberry.

Once the software is installed, open it. Just enter the IP address of the card and click on “Open”.
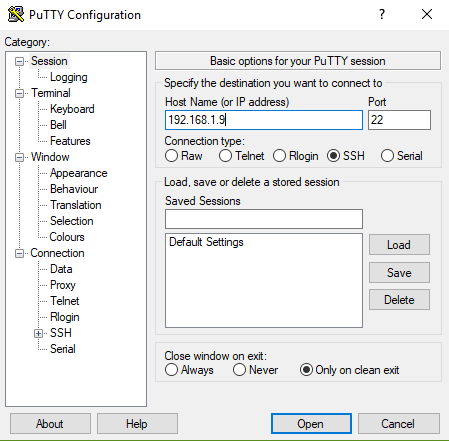
Specify the login and password when requested (By default, login: pi, password: raspberry).
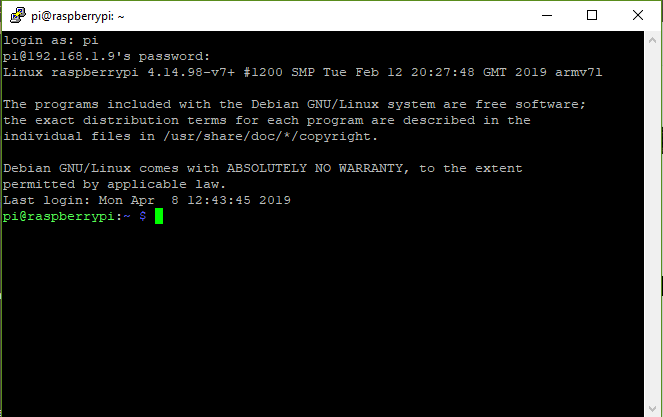
You now have access to the terminal of your Raspberry Pi and you can enter the command lines there as if you were on the Raspberry Pi.
Remote connection via VNC (Virtual Network Computing)
Raspberry Pi configuration
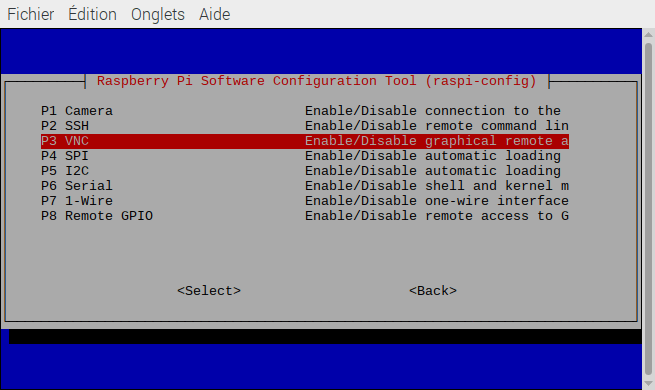
In the terminal, enter the command sudo raspi-config
In the menu, select “5 – Interfacing Options”
Then “VNC”, select “Yes” to allow connection via the VNC server.
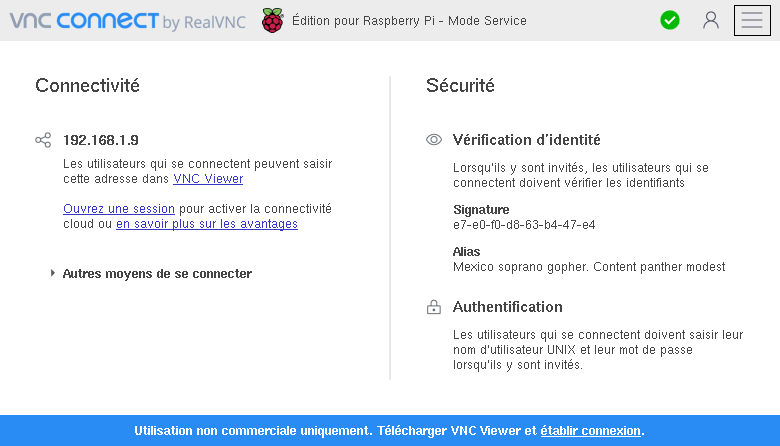
The VNC icon then appears in the task bar at the top right. Click it to open the VNC server and find the IP address, connection status, and security information.
Installing the VNC Viewer software
On your PC, download and install the VNC Viewer software.
Once the software is installed, open it. You just need to enter the IP address of the Raspberry Pi and validate. Enter the login and password to connect to the Raspberry Pi.

To be able to restart the Raspberry without monitor, enter the command
sudo nano /boot/config.txt
Uncomment the line
hdmi_force_hotplug=1
You can also adjust the size of the virtual monitor by adding the following lines. Choose a size suitable for your screen.
framebuffer_width=1920
framebuffer_height=1080
Restart the Raspberry by typing sudo reboot and disconnecting the HDMI port.
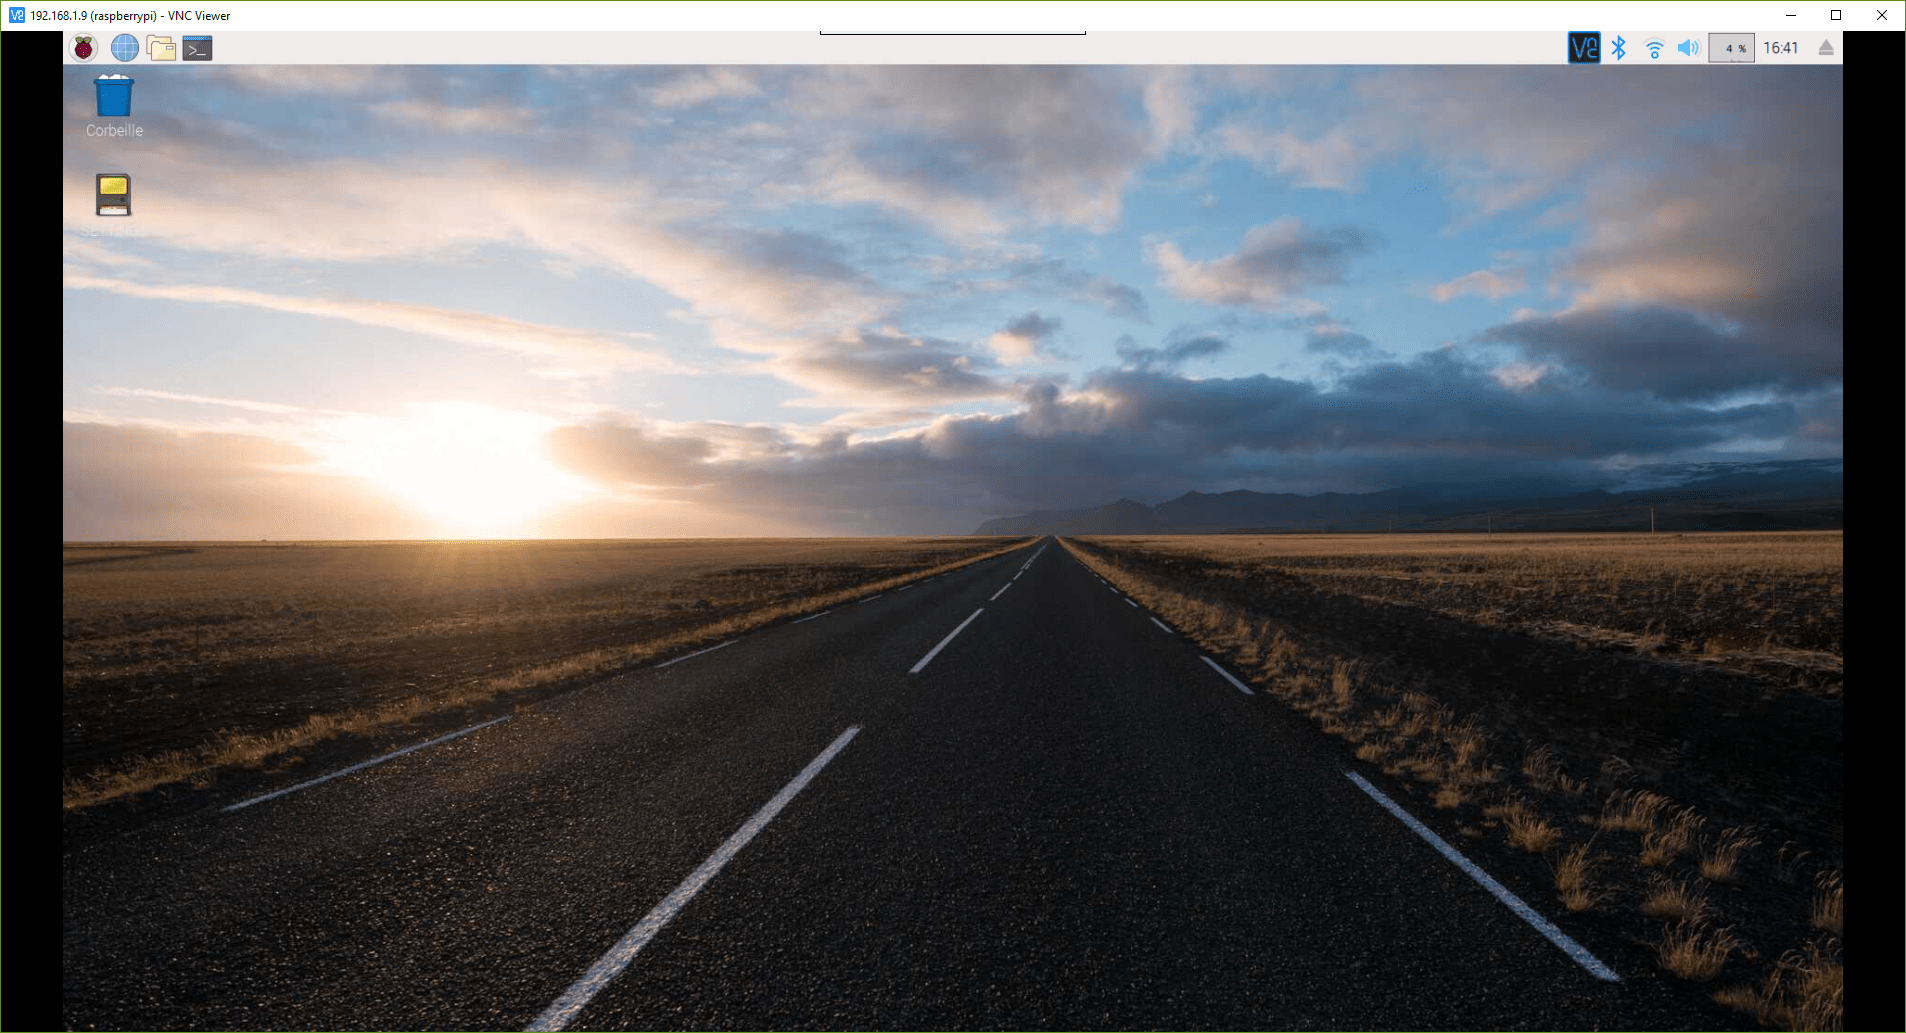
You now have access to the Raspberry’s desktop and can use it while forgetting about the screen and the keyboard.
File transfer
An interesting tool in VNC is file transfer which allows you to recover or load files on the Raspberry Pi without having to go back and forth between the PC and the Raspberry with the SD card or a USB key.
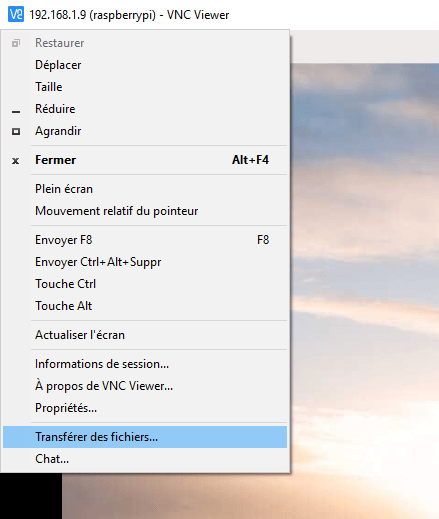
- To transfer a file from the PC to the Raspberry, click on the VNC icon in the PC window at the top left. Select “Transfer files …”
Then select the desired file(s).
- To transfer files from Raspberry to PC, open the VNC server window by clicking on the VNC icon on the Raspberry task bar at the top right. Then click on the menu icon at the top right and select “File transfer …”

If you have a problem configuring your Raspberry Pi or if you think that information is missing in this tutorial, leave me a comment or send me a message.


