
, ,
In this tutorial, we’ll look at how to send a video stream from one machine to another using FFMPEG. Sending data between two devices, whatever it may be, is one of the major issues in connected objects (IoT). If yor’d like to create a connected camera that sends video to a remote machine, this article should interest you.
Installing ffmpeg
On a Linux machine
sudo apt-get install ffmpegOn a Windows machine, please follow this procedure.
N.B.: if needed on a linux machine sudo apt-get install v4l-utils
Get the information yor need to stream Video
To create a video stream from one machine to another, the machines must be connected to the same network (Wifi or Ethernet).
First, yor need to obtain the IP address of the client machine (which receives the stream)
Enter a command terminal
ifconfig #pour une machine linux
ip addr # si ifconfig n'est pas disponible 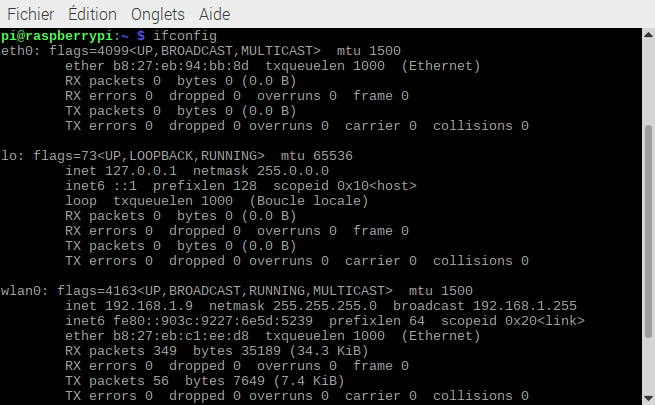
or
ipconfig #pour une machine windows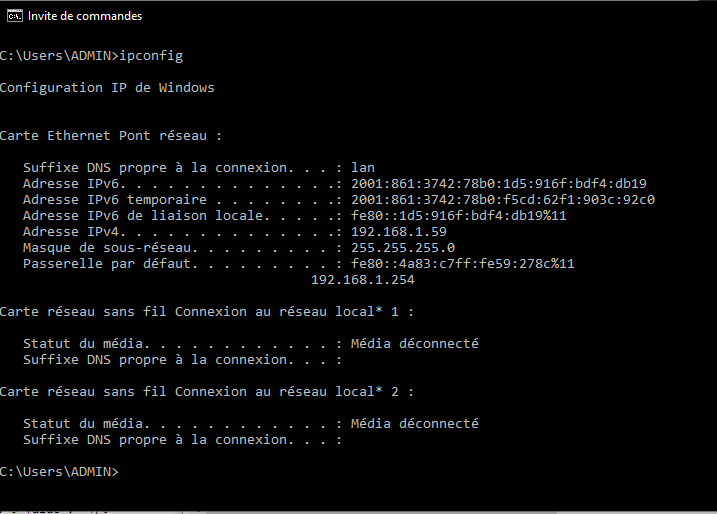
You should obtain an address of the form 192.168.X.X (in our case 192.168.1.67)
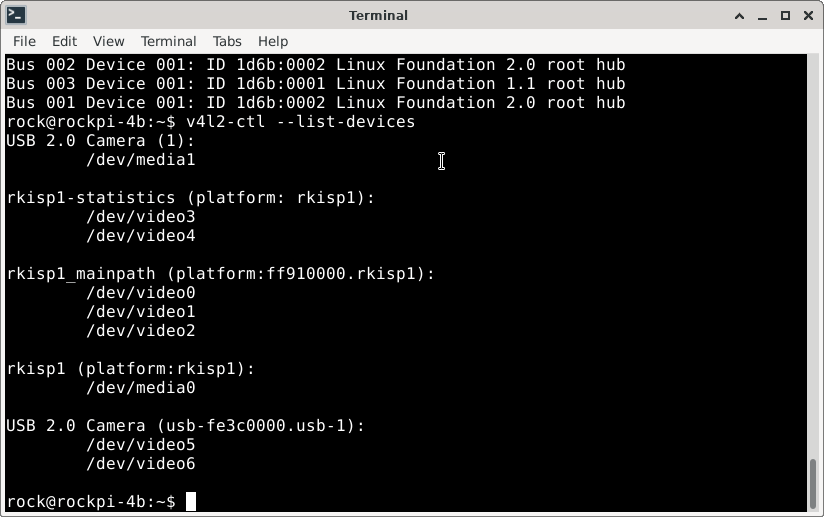
Then retrieve the video output. To list all the video inputs on a Linux machine
ls -l /dev/video*lsusb #list usb devicesv4l2-ctl --list-devices #list video devicesThese commands should help you identify the video output. In our case, /dev/video5
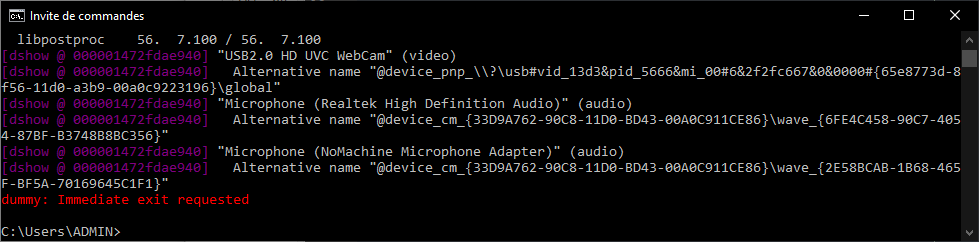
To list video outputs on a Windows machine, you can use ffmpeg
ffmpeg -list_devices true -f dshow -i dummyIn our case, video=”USB2.0 HD UVC WebCam “
Retrieve options and check formats and resolutions accepted by the camera
on Linux
v4l2-ctl -d /dev/video0 --list-formatson Windows
ffmpeg -f dshow -list_options true -i video="USB2.0 HD UVC WebCam"Once this data has been recorded, we can configure the streaming.
Creating a video stream with ffmpeg
To create a video stream, you need a sender (server) and a receiver (client) that will be connected to two terminals running on two different computers.
- linux server side
ffmpeg -re -f v4l2 -i /dev/video5 -r 10 -f mpegts udp://192.168.1.67:8554?pkt_size=1316- Windows server side
ffmpeg -f dshow -i video="USB2.0 HD UVC WebCam" -r 10 -f mpegts udp://192.168.1.67:8554?pkt_size=1316- customer side
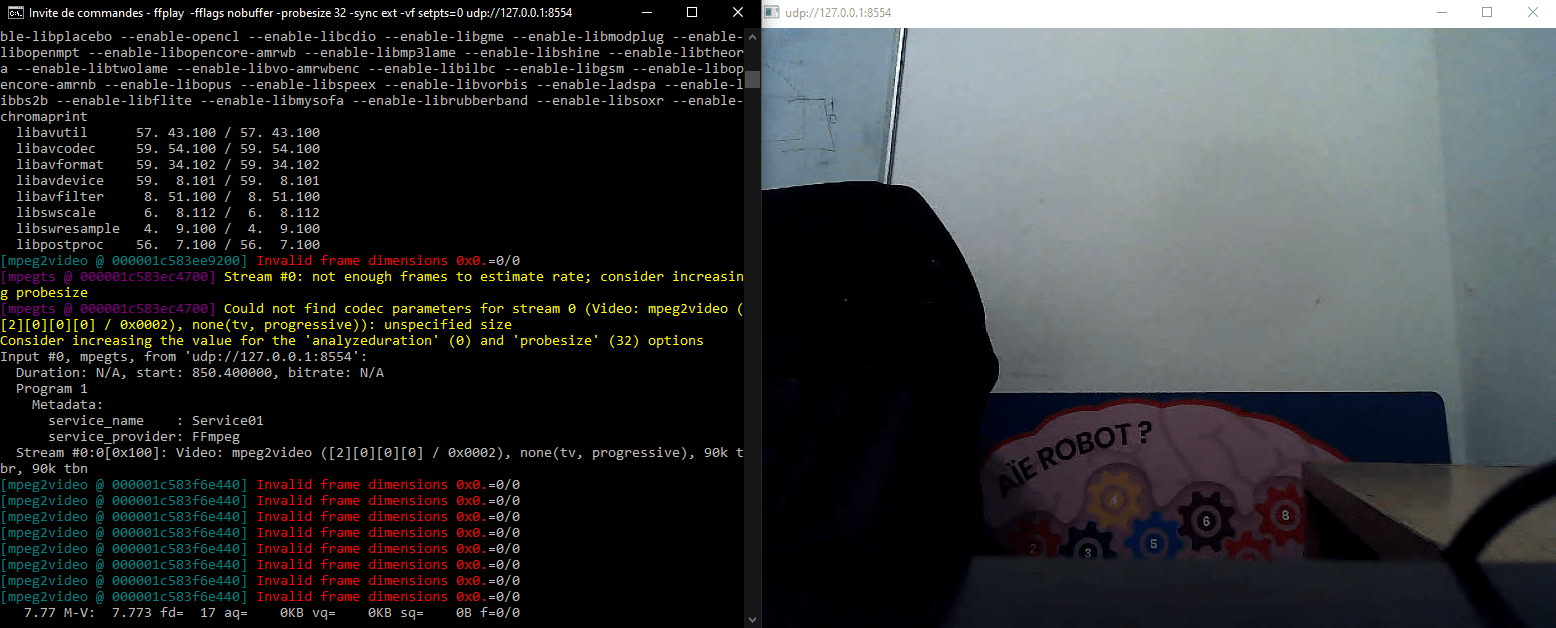
ffplay udp://127.0.0.1:8554N.B.: You can test streaming on a single machine using the IP address of the machine on which you are working and using two terminals, one for the server and one for the client.
To retrieve video statistics you can use the ffprobe command
ffprobe udp://127.0.0.1:8554or, for more details,
ffprobe -show_format -show_streams udp://127.0.0.1:8554Reduce video stream reception time between two machines
There is a delay of around 15 seconds between video transmission and reception. It may be useful to reduce this delay depending on the application.
On the server side, the parameters that affect transmission speed are:
- image size (e.g. -s 800×600)
- codec format conversion (e.g. -c:v libx264)
- number of frames per second or framerate (eg: -r 10)
Try to play with these parameters to reduce the delay while maintaining sufficient quality.
ffmpeg -re -thread_queue_size 64 -s800x600 -iOn the client side, there are various options that you can test from the documentation included in this discussion.
ffplay -fflags nobuffer -probesize 32 -sync ext -vf setpts=0 udp:By modifying the options of the ffmpeg and ffplay commands, you can reduce the video stream delay from 15 to around 2 seconds.
Creating an HTTP stream with ffmpeg
It is possible to create an HTTP video server using VLC. The advantage of this method is that the video stream can be transmitted to any device.
- linux server side
ffmpeg -input_format h264 -video_size 1280x720 -framerate 30 -i /dev/video0 -vcodec copy -f mpegts -|vlc -I dummy - --sout='#std{access=http,mux=ts,dst=:8554}'- customer side, you need to specify the IP address of the server
ffplay http://192.168.1.9:8554Creating an RTSP stream with ffmpeg
It is possible to create an HTTP video server using VLC. The advantage of this method is that the video stream can be transmitted to any device.
- linux server side
ffmpeg -input_format h264 -video_size 1280x720 -framerate 30 -i /dev/video0 -vcodec copy -f mpegts -|vlc -I dummy - --sout='#rtp{sdp=rtsp://:8554/} --sout-all --sout-keep'- customer side, you need to specify the IP address of the server
ffplay rtsp://192.168.1.9:8554/
Python script to start streaming
Here is a Python script that will allow you to test the different streaming methods as well as the ffmpeg parameters.
import subprocess

#UDP
#input client ip address here 192.168.1.9
stream_video="ffmpeg -input_format h264 -video_size 1280x720 -framerate 30 -i /dev/video0 -vcodec copy -f mpegts udp://192.168.1.9:8554?pkt_size=1316"
#on client side ffplay udp://127.0.0.1:8554

#HTTP
stream_video="ffmpeg -input_format h264 -video_size 1280x720 -framerate 30 -i /dev/video0 -vcodec copy -f mpegts -|vlc -I dummy - --sout='#std{access=http,mux=ts,dst=:8554}'"
#on client side ffplay http://192.168.1.73:8554

#RSTP
stream_video="ffmpeg -input_format h264 -video_size 1280x720 -framerate 30 -i /dev/video0 -vcodec copy -f mpegts -|vlc -I dummy - --sout='#rtp{sdp=rtsp://:8554/} --sout-all --sout-keep'"
#on client side ffplay rtsp://192.168.1.73:8554/ # don't forget / at the end

try:
	subprocess.call(stream_video,shell=True)
except:
	pass
print("Done")
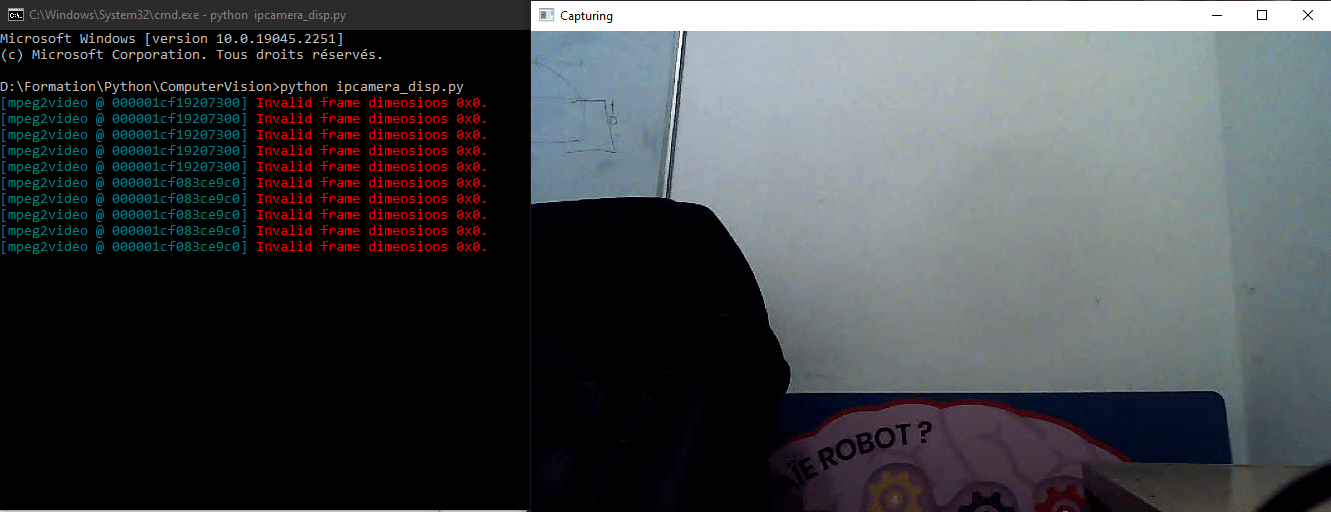
Bonus: View FFMPEG’s video stream with OpenCV
Once the video stream has been established between the two machines, OpenCV can be used to read and display images from the UDP stream.
import cv2

def main(args):

	#cap = cv2.VideoCapture(0) #default camera
	cap = cv2.VideoCapture('udp://127.0.0.1:8554')
	#cap = cv2.VideoCapture('http://192.168.1.9:8554')
	#cap = cv2.VideoCapture('rtsp://192.168.1.9:8554/')

	while(True):
		ret, frame = cap.read()
		if ret: #necessary if packet is lost
			frame=cv2.resize(frame, (800, 600))
			cv2.imshow('Capturing',frame)

		if cv2.waitKey(1) & 0xFF == ord('q'): #click q to stop capturing
			break

	cap.release()
	cv2.destroyAllWindows()
	return 0

if __name__ == '__main__':
    import sys
    sys.exit(main(sys.argv))
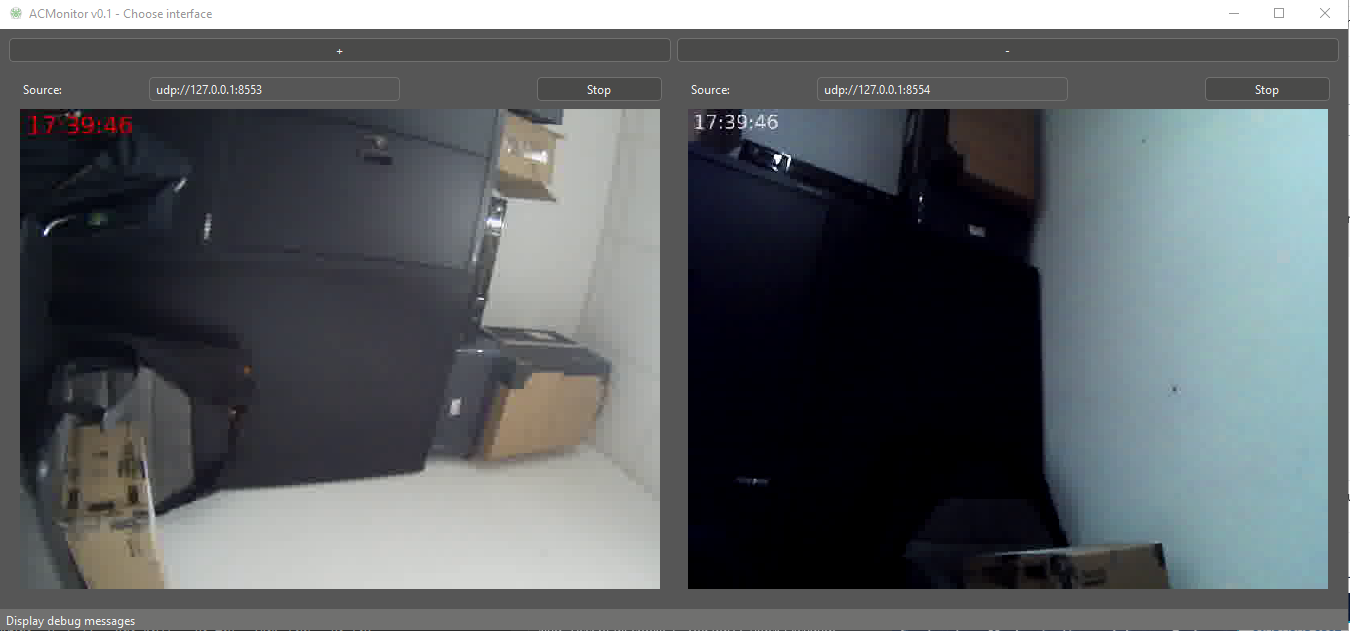
Bonus2: Show time on video
To display the time on the video, we’re going to use ffmpeg’s drawtext filter, which uses certain text parameters
- fontfile: font used
- fontsize: text size
- fontcolor: corleur du texte
"drawtext=fontfile=/usr/share/fonts/truetype/ttf-dejavu/DejaVuSans-Bold.ttf: text='%{localtime\:%T}': fontsize=24: fontcolor=white@0.8: x=7: y=460"The filter is applied with the -vf tag. Here is the complete command
ffmpeg -input_format h264 -video_size 1280x720 -framerate 30 -i /dev/video0 -vf "drawtext=fontfile=/usr/share/fonts/truetype/ttf-dejavu/DejaVuSans-Bold.ttf: text='%{localtime\:%T}': fontsize=24: fontcolor=white@0.8: x=7: y=460" -vcodec copy -f mpegts udp://192.168.1.9:8554?pkt_size=1316In Python
stream_cmd="""ffmpeg -input_format h264 -video_size 1280x720 -framerate 30 -i /dev/video0 -vf "drawtext=fontfile=/usr/share/fonts/truetype/ttf-dejavu/DejaVuSans-Bold.ttf: text='%{localtime\:%T}': fontsize=24: fontcolor=white@0.8: x=7: y=460" -vcodec copy -f mpegts udp://192.168.1.9:8554?pkt_size=1316"""
Handy for imitating a CCTV camera or for comparing times from different cameras


very good tutorial! Is it possible that the server sends the UDP packets to his IP address and the client accessing the port there?
server: ffmpeg -re -f v4l2 -i /dev/video5 -r 10 -f mpegts udp://serverip:8554?pkt_size=1316
client: ffplay udp://serverip:8554
I tried it but it didn’t work for me. The other way around like descriped in your tutorial works.
As far as I know, UDP uses recieverip to send data. You may look into multicast addresses but i didn’t try.
server side is used on RSTP and HTTP protocol
keep me posted if you find anything!
Hi, looks a nice tutorial but there’s something that I am missing on the command line arguments for VLC: on different machines and OSes, the argument “–sort=…..” is not recognized. Using VLC 3.0.21 on Fedora Linux.
Thanks for pointing this out! It is a typo. Please try with –sout=