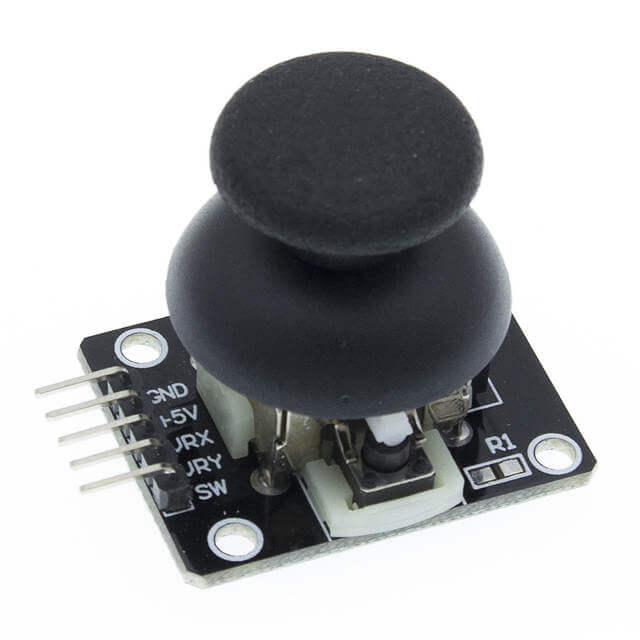
The joystick is a position sensor which returns two analogue values representing its X,Y position. It can be used as an interface to navigate a menu or to control an object in direction or speed. It is commonly found on joysticks for video games, model making remote controls or even on industrial machine dashboards.
Hardware
- Computer
- Arduino UNO
- USB cable A Male to B Male
- Joystick
Principle of operation
The joystick consists of two mechanically coupled potentiometers positioned to detect the horizontal and vertical components of the joystick. Thus the resistance values of the potentiometers vary independently depending on the position of the joystick. There is usually a push button that is activated when the joystick is pressed.
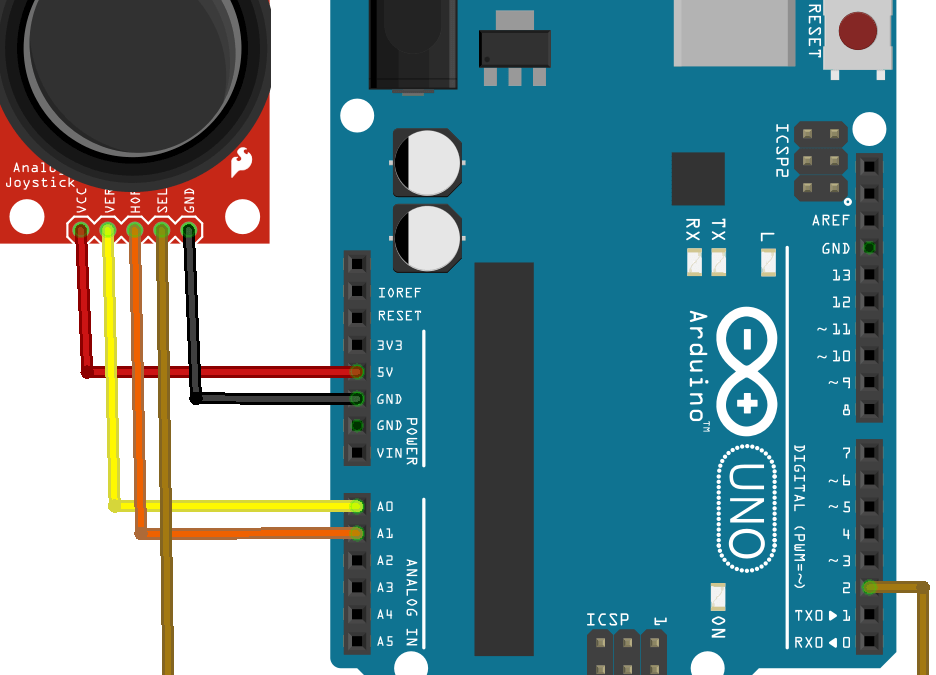
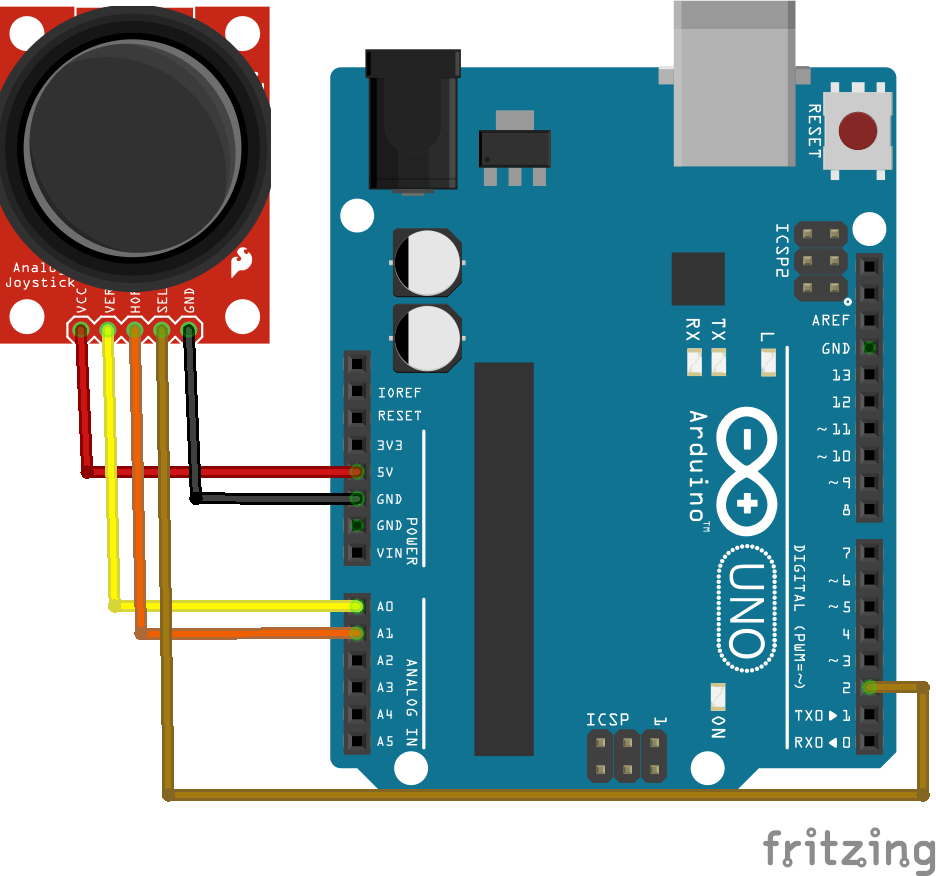
Schematics
The joystick returns two analogue values which we will naturally connect to the analogue inputs of the microcontroller. It also returns a digital value which we connect to pin 2 of the microcontroller.
Code
The joystick is used as a combination of two potentiometers and a push button. We will therefore define two analog inputs to retrieve the position values and a digital input for the button integrated in the joystick. In practice, the raw analog values will not be used directly. They will be used to drive variables with their own definition ranges (extreme values, accuracy, type, etc.). This being said, it may be interesting to define a function that will convert the raw value into a usable value. In our example, we choose a value range from -100 to 100, which can be interpreted as the speed of a motor with a negative value representing the opposite direction of rotation and 100 representing the maximum speed.
//Constants
#define NUM_JOY 2
#define MIN_VAL 0
#define MAX_VAL 1023

//Parameters
const int joyPin [2] = {A0, A1};
const int joyBtn   = 2;
const int joyOffset   = 0;

//Variables
int joyVal [NUM_JOY] = {0, 0};


void setup() {
  //Init Serial USB
  Serial.begin(9600);
  Serial.println(F("Initialize System"));
  //Init Joystick
  for (int i = 0; i < NUM_JOY; i++) pinMode(joyPin[i], INPUT);
  pinMode(joyBtn,INPUT_PULLUP);
}

void loop() {
  readJoystick();
  delay(500);
}

void readJoystick( ) { /* function readJoystick */
  ////Test routine for Joystick
  for (int i = 0; i < NUM_JOY; i++) {
    joyVal[i] = analogRead(joyPin[i]);
    Serial.print(F("joy")); Serial.print(i); Serial.print(F(" : ")); Serial.println(joyVal[i]);
  }
  for (int i = 0; i < NUM_JOY; i++) {
    Serial.print(F("Conv")), Serial.print(i); Serial.print(F(" : ")); Serial.println(joyRawToPhys(joyVal[i]));
  }
  if (!digitalRead(joyBtn)) {
    Serial.println(F("Joy Button pressed"));
  }
}

float joyRawToPhys(int raw) { /* function joyRawToPhys */
  ////Joystick conversion rule
  float phys = map(raw, MIN_VAL, MAX_VAL, -100 + joyOffset, 100 + joyOffset) - joyOffset;
  return phys;
}
Result
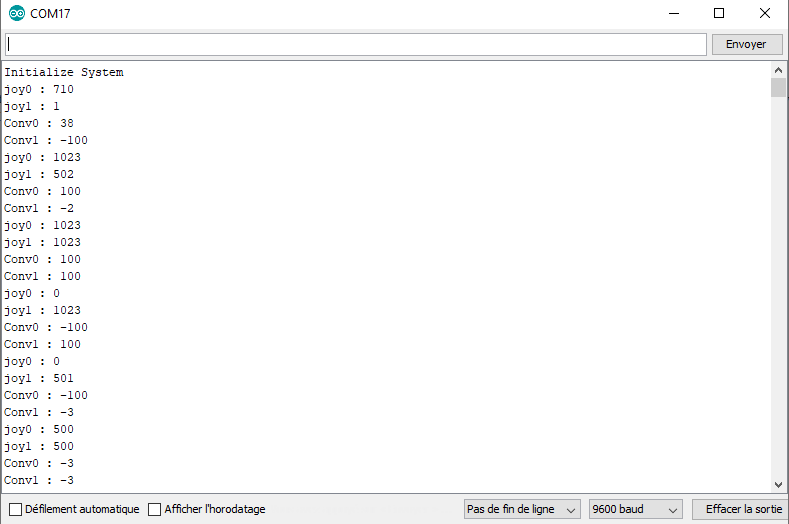
Once the code has been loaded into the microcontroller you should see the values of X and Y change according to the position of the joystick. It can also be seen that in the rest position, the conversion of the raw values is not equal to zero. It is possible to correct this deviation by adding an offset to the conversion parameter.
Applications
- Creating a remote control to control your microcontroller
Sources
- https://www.arduino.cc/reference/en/language/functions/analog-io/analogread/
- Manage Sensors with Arduino
Find other examples and tutorials in our Automatic code generator
Code Architect


