The MPU6050 module is an inertial unit that measures the evolution of an object in space. It can measure linear and angular accelerations in the three axes of space. This component can be found in several applications such as video game controllers or smartphones. It can be used to perform attitude control on a drone or to balance a robot on two wheels.
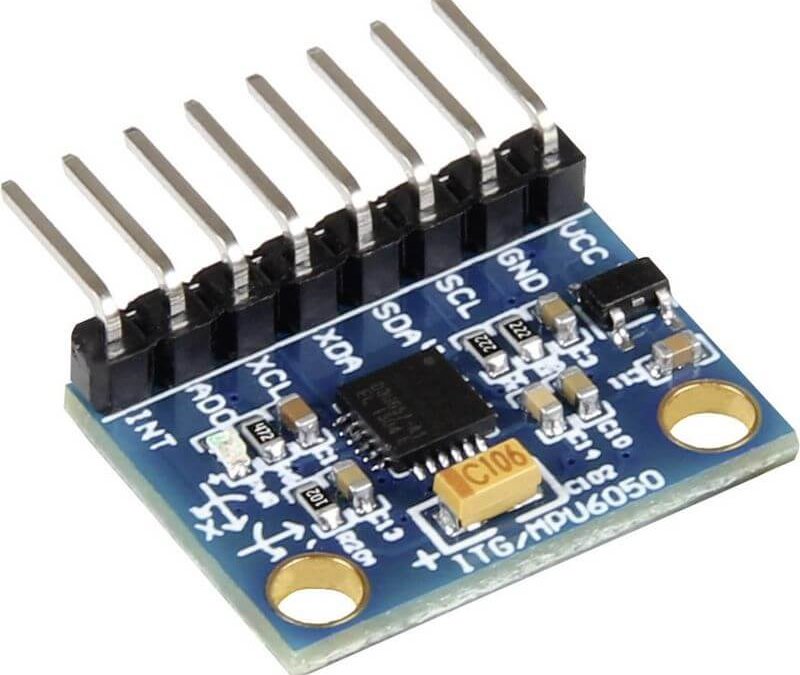
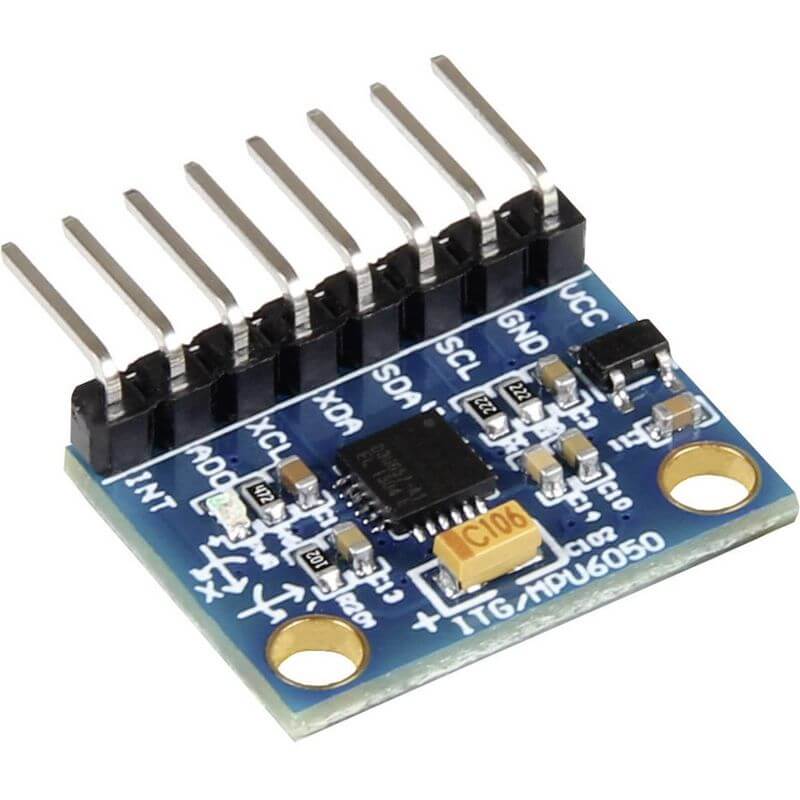
For this tutorial we will use the GY-521 module on which the MPU6050 is embedded.
Prerequisit : communication I2C
Hardware
- Ordinateur
- Arduino UNO
- USB cable A Male to B Male
- MPU6050 (Module GY-521)
Principle of operation
The GY-521 module is a development board for the MPU6050 microelectromechanical system (MEM- Microelectromechanical systems). The MPU6050 module consists of a temperature sensor and two micromechanical sensors: a gyroscope to measure rotations and an accelerometer to measure accelerations in space. These sensors usually consist of a mechanical and a piezoelectric part. When the object is in motion, the mechanical part moves against the piezoelectric part which sends an electrical signal.
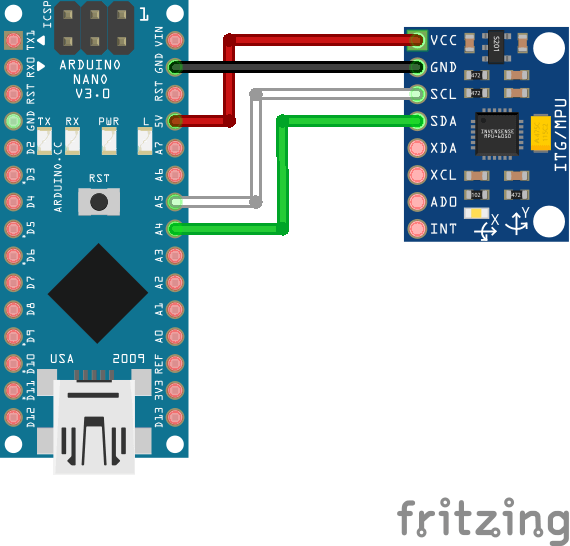
Schematic
The module GY-521 can be powered directly via the 5V pin on the Arduino board. The GY-521 Module uses I2C communication to interface with the microcontroller.
- SDA on pin A4
- SCL on pin A5
- VCC on pin 5V
- GND on pin GND
Code
To interface with the GY-521 module, and therefore the MPU6050, we will use the library of the same name Adafruit_MPU6050.h. It is important to note that, depending on the module used, you may need to modify the I2C address to be able to retrieve the measurements. The code proposed here is the basic program to display and evaluate the sensor measurements. The library offers many more settings and parameters. For more features, please refer to the documentation and examples in the library.
//Libraries
#include <Wire.h>//https://www.arduino.cc/en/reference/wire
#include <Adafruit_MPU6050.h>//https://github.com/adafruit/Adafruit_MPU6050
#include <Adafruit_Sensor.h>//https://github.com/adafruit/Adafruit_Sensor

//Objects
Adafruit_MPU6050 mpu;

void setup() {
  //Init Serial USB
  Serial.begin(9600);
  Serial.println(F("Initialize System"));
  //Init i2c (Default pins A4, A5)
  Wire.begin();
  if (!mpu.begin(0x69)) {
    Serial.println("Failed to find MPU6050 chip");
    while (1) {
      delay(10);
    }
  }

  mpu.setAccelerometerRange(MPU6050_RANGE_16_G);
  mpu.setGyroRange(MPU6050_RANGE_250_DEG);
  mpu.setFilterBandwidth(MPU6050_BAND_21_HZ);
}

void loop() {
  readMPU();
  delay(100);
}

void readMPU( ) { /* function readMPU */
  ////Read acceleromter data
  sensors_event_t a, g, temp;
  mpu.getEvent(&a, &g, &temp);

  /* Print out the values */
  Serial.print("Acceleration X: ");
  Serial.print(a.acceleration.x);
  Serial.print(", Y: ");
  Serial.print(a.acceleration.y);
  Serial.print(", Z: ");
  Serial.print(a.acceleration.z);
  Serial.println(" m/s^2");

  Serial.print("Rotation X: ");
  Serial.print(g.gyro.x);
  Serial.print(", Y: ");
  Serial.print(g.gyro.y);
  Serial.print(", Z: ");
  Serial.print(g.gyro.z);
  Serial.println(" rad/s");

  Serial.print("Temperature: ");
  Serial.print(temp.temperature);
  Serial.println("°C");
}
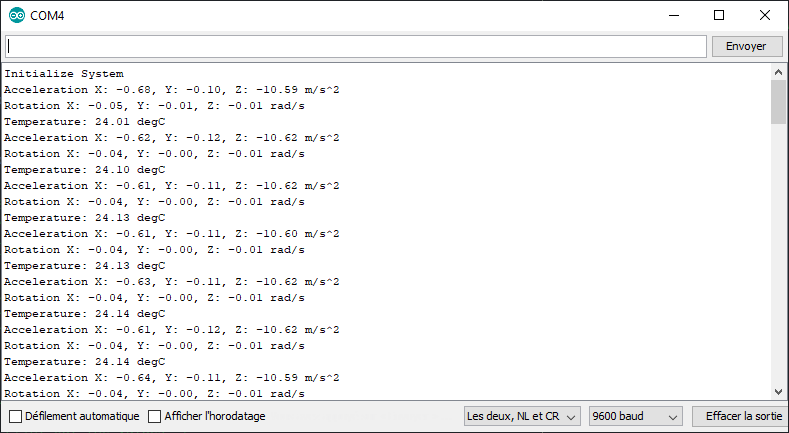
Results
Once the code has been uploaded into the Arduino, if you move the sensor, you can see the acceleration values change in different directions in space. You can also check the operation of the temperature sensor by sticking your finger on the module.
Applications
- Stabilising a UAV
- Controlling a robot by hand movements
- Giving balance to a two-wheeled robot
Sources
- https://github.com/ElectronicCats/mpu6050/blob/master/src/MPU6050.h
- https://www.arduino.cc/en/reference/wire
- https://github.com/adafruit/Adafruit_MPU6050
- https://github.com/adafruit/Adafruit_Sensor
Find other examples and tutorials in our Automatic code generator
Code Architect


