The RC522 RFID module is a smart card reader which, among other things, allows to activate a mechanism when the right card is presented to the reader. In this tutorial, we will see the management of an RC522 RFID module with an ESP32 NodeMCU card.
Prerequisite: Program your NodeMCU with Arduino
Material
- Computer
- Board NodeMCU ESP32
- USB cable A male to Micro B male
- 1x module RFID RC522
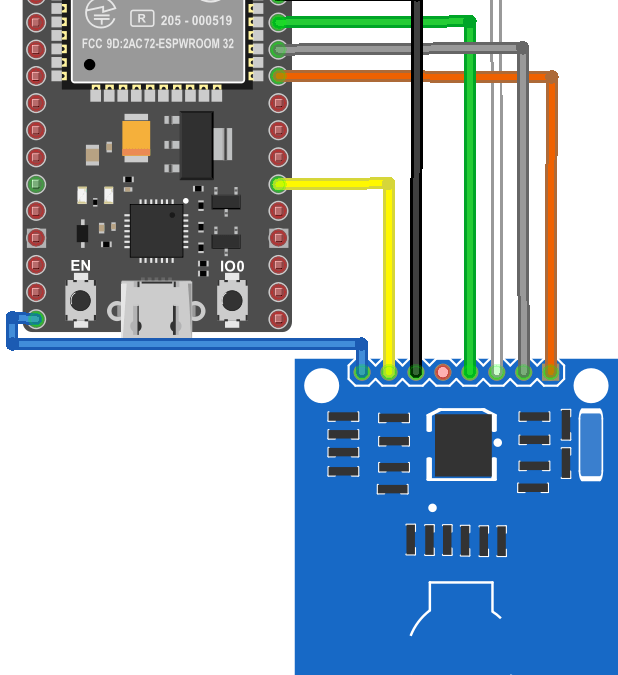
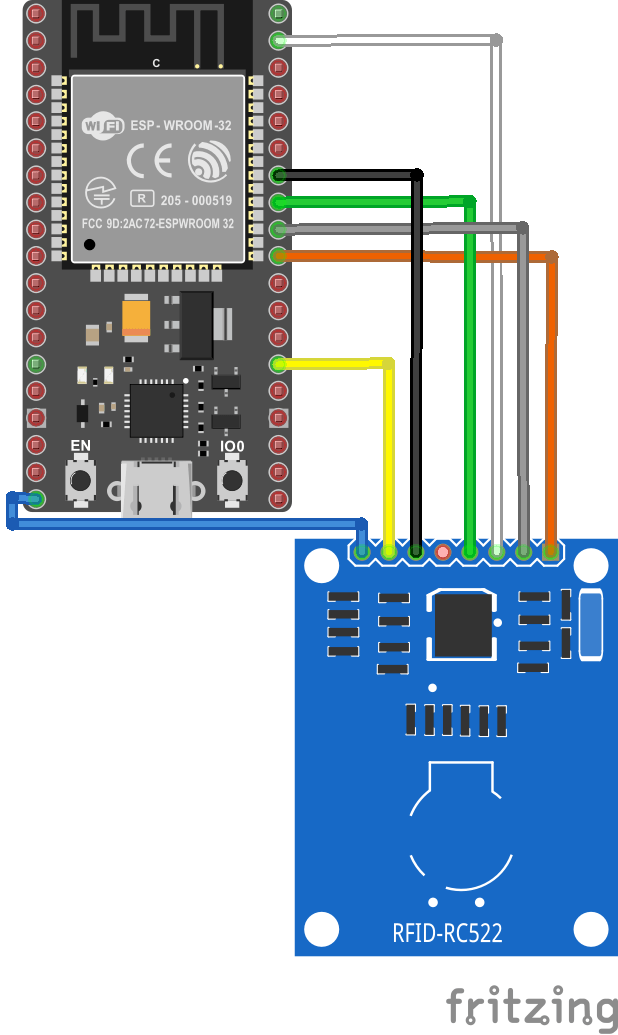
Scheme
The RC522 RFID module uses the SPI protocol to communicate with the ESP32. The SPI communication uses specific boxes on this type of microcontroller.
The pinout is as follows (left side RC522, right side ESP32):
- Vcc <-> 3V3 (or Vin(5V) depending on the module version)
- RST (Reset) <-> D0
- GND (Masse) <-> GND
- MISO (Master Input Slave Output) <-> 19
- MOSI (Master Output Slave Input) <-> 23
- SCK (Serial Clock) <-> 18
- SS/SDA (Slave select) <-> 5
Warning: Depending on the version of the RFID module, the power supply voltage may be different (3.3V or 5V). Please check the power supply voltage of your module.
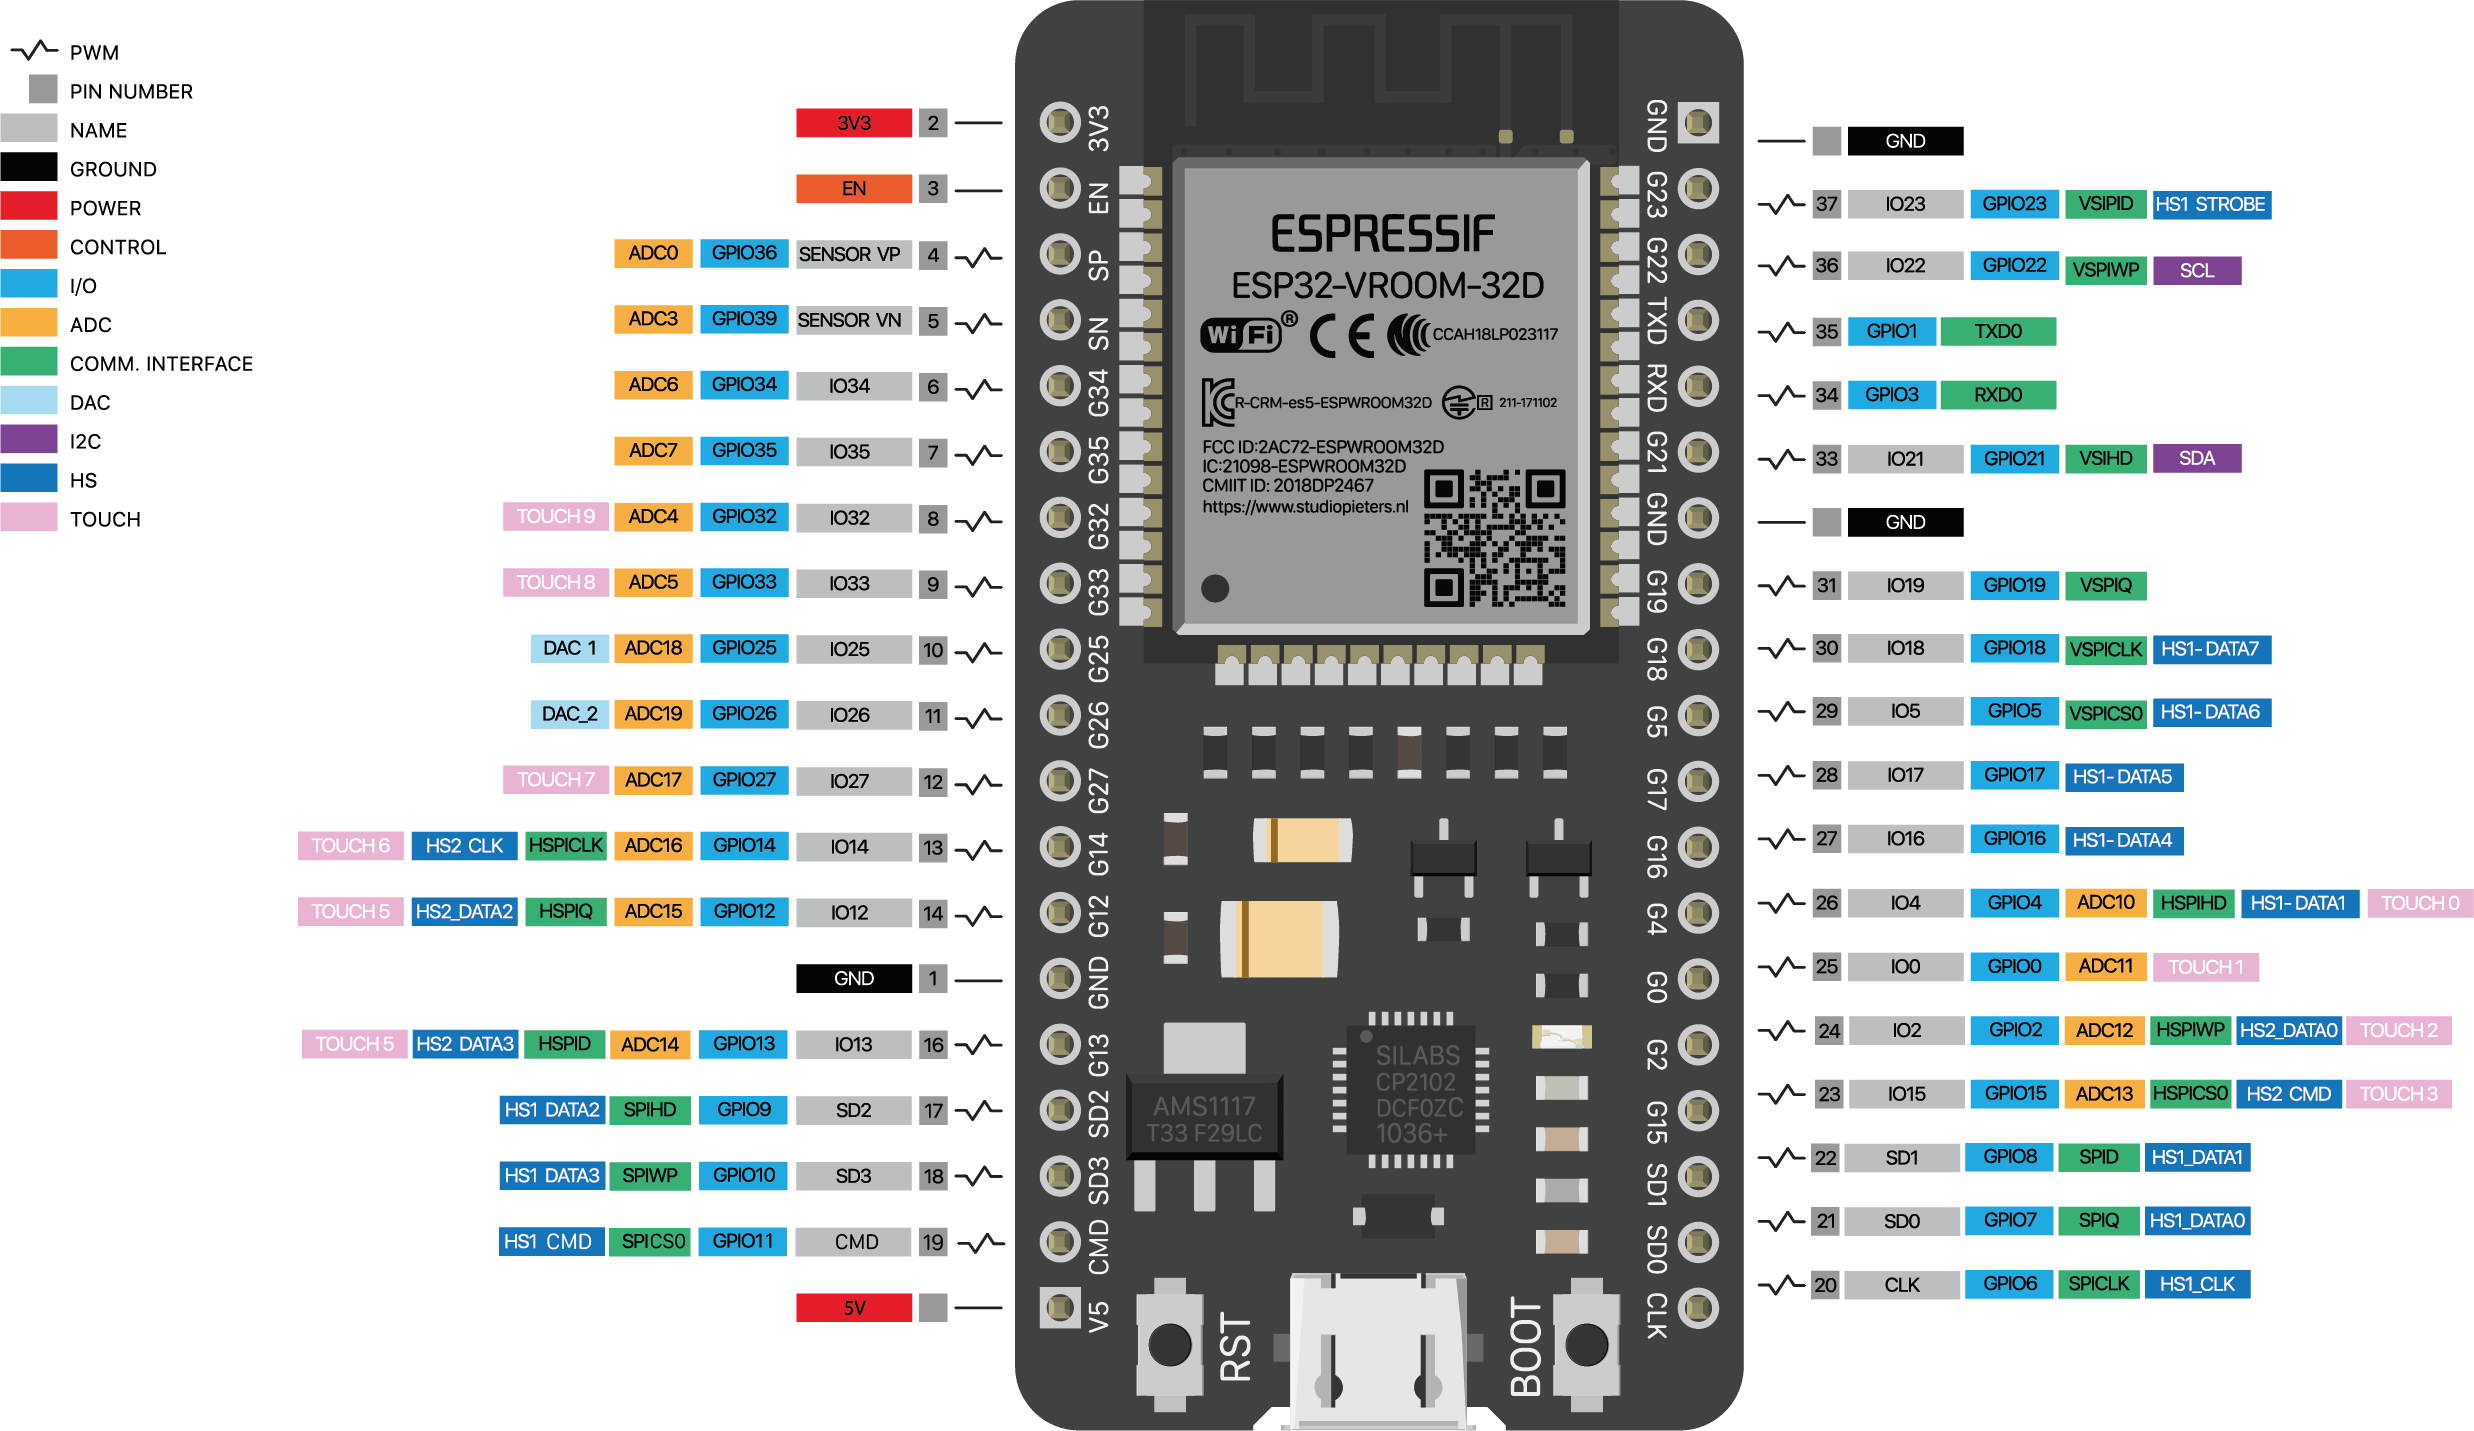
As a reminder, here is the pinout diagram of the ESP32 board.
Code to read an RFID card
To use the RFID RC522 module we use the SPI.h library which will allow us to establish the communication between the ESP32 card and the module; and the MFRC522.h library which will allow us to dialogue with the module.
//Libraries
#include <SPI.h>//https://www.arduino.cc/en/reference/SPI
#include <MFRC522.h>//https://github.com/miguelbalboa/rfid

//Constants
#define SS_PIN 5
#define RST_PIN 0

//Parameters
const int ipaddress[4] = {103, 97, 67, 25};

//Variables
byte nuidPICC[4] = {0, 0, 0, 0};
MFRC522::MIFARE_Key key;
MFRC522 rfid = MFRC522(SS_PIN, RST_PIN);

void setup() {
  //Init Serial USB
  Serial.begin(115200);
  Serial.println(F("Initialize System"));
  //init rfid D8,D5,D6,D7
  SPI.begin();
  rfid.PCD_Init();

  Serial.print(F("Reader :"));
  rfid.PCD_DumpVersionToSerial();
}

void loop() {
  readRFID();
}

void readRFID(void ) { /* function readRFID */
  ////Read RFID card

  for (byte i = 0; i < 6; i++) {
    key.keyByte[i] = 0xFF;
  }
  // Look for new 1 cards
  if ( ! rfid.PICC_IsNewCardPresent())
    return;

  // Verify if the NUID has been readed
  if (  !rfid.PICC_ReadCardSerial())
    return;

  // Store NUID into nuidPICC array
  for (byte i = 0; i < 4; i++) {
    nuidPICC[i] = rfid.uid.uidByte[i];
  }

  Serial.print(F("RFID In dec: "));
  printDec(rfid.uid.uidByte, rfid.uid.size);
  Serial.println();

  // Halt PICC
  rfid.PICC_HaltA();

  // Stop encryption on PCD
  rfid.PCD_StopCrypto1();

}


/**
   Helper routine to dump a byte array as hex values to Serial.
*/
void printHex(byte *buffer, byte bufferSize) {
  for (byte i = 0; i < bufferSize; i++) {
    Serial.print(buffer[i] < 0x10 ? " 0" : " ");
    Serial.print(buffer[i], HEX);
  }
}

/**
   Helper routine to dump a byte array as dec values to Serial.
*/
void printDec(byte *buffer, byte bufferSize) {
  for (byte i = 0; i < bufferSize; i++) {
    Serial.print(buffer[i] < 0x10 ? " 0" : " ");
    Serial.print(buffer[i], DEC);
  }
}
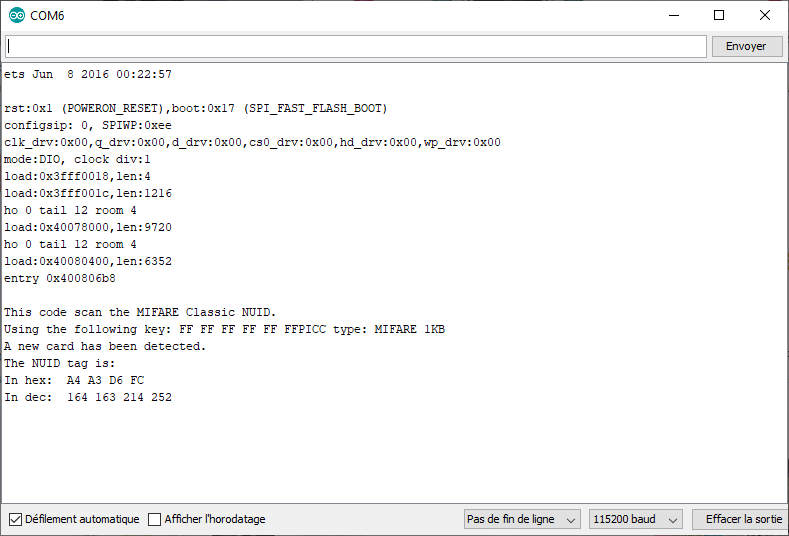
Result
When a card, badge or RFID chip is passed in front of the module, the identification address of the badge is displayed on the serial monitor.
Applications
- Develop a web interface that is only activated when the right badge is passed in front of the module


Thanks a lot for letting me know!
Did you wired one SDA per module?