When dealing with several servomotors and an extra number of outputs is needed to operate your robot (to control Hexana, for instance), a practical solution is to use a serial controller such as the Mini Maestro from Pololu.
Prerequisite: Programming on Raspberry Pi, Control a servo with Raspberry Pi
Material
- Computer
- Raspberry Pi3 (or Zero) + monitor + keyboard
- USB cable mini B to connect Maestro to computer
- Jumper cable F/F x4
- Serial Controller Mini Maestro x1
- Servomotor x1 or more
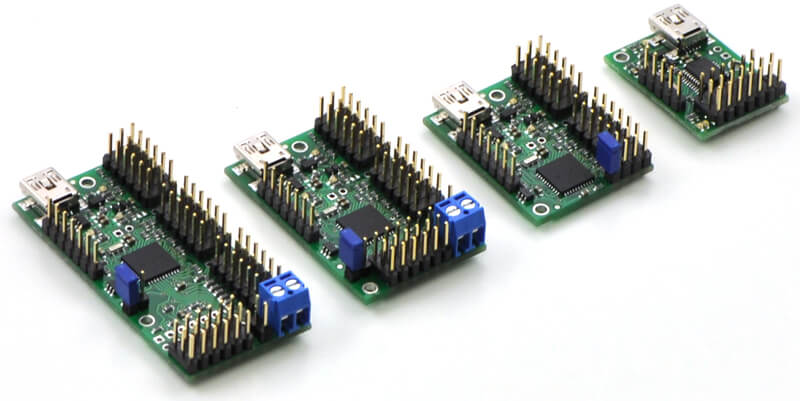
Overview of the serial controller Maestro
When several motors are used in a project, usually the number of outputs needed exceed the capacity of the Arduino board. In that case, it is necessary to use a servo driver (which can control up to 32 servomotors) that communicate with Arduino using a serial port and transmit the PWM to servomotors.
The one we used in this example is a Maestro board proposed by Pololu. It exists in different format 4,12, 18 and 24 channels.
With this solution, the main board ( Arduino or Raspberry Pi) send orders to the controller (Maestro) via the serial port which apply power and commands to the servomotrs.
This presents several advantages :
- protect material by separating high power circuit from logic circuit
- reduce cost by reducing the number of input/output of the main microcontroller
- using a different board to cimmunicate with the servo driver
More information on the Serial Controller Mini Maestro on Pololu website.
Configuration and testing of the serial controller Maestro
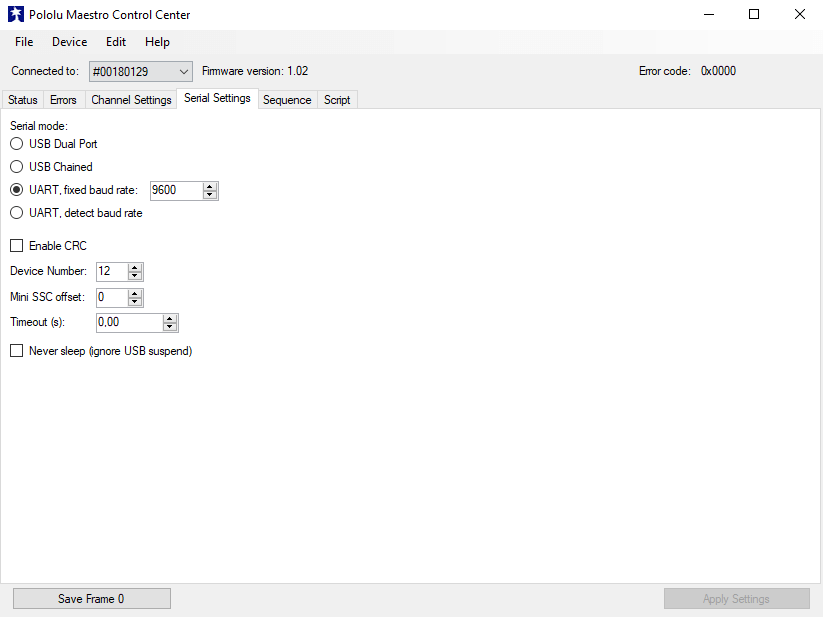
To configure the serial controller Maestro, you need to download the drivers and software for Windows (or Linux). You can find the installation guide by following those links Windows and Linux.
Once the Maestro Control Center and drivers are installed, plug the maestro to your computer.
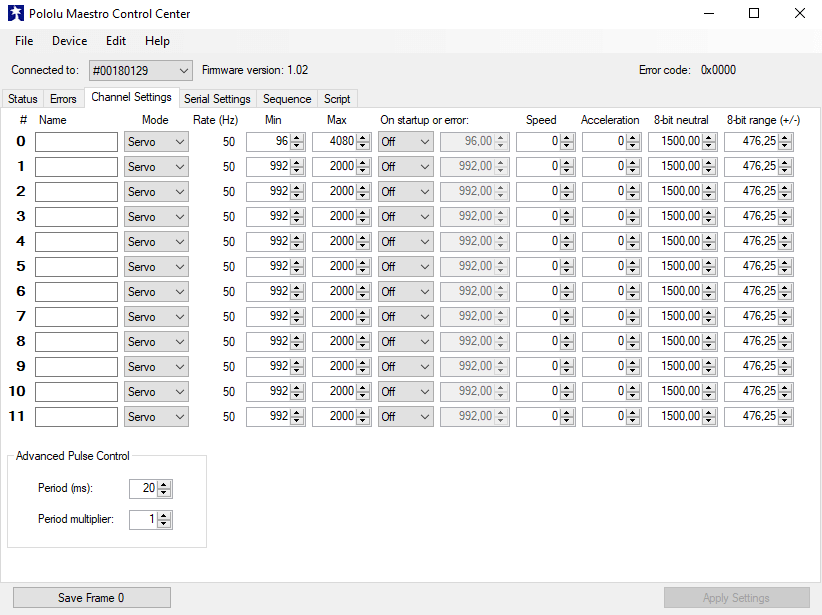
When the controller is connected, is ID will appear on the topp right side. You can find and modify the communication parameters under the tab “Serial Settings”.
You can test the serial controller Maestro and your servomotors under the tab “Status”.Don’t forget to power your servomotors with a external power supply.
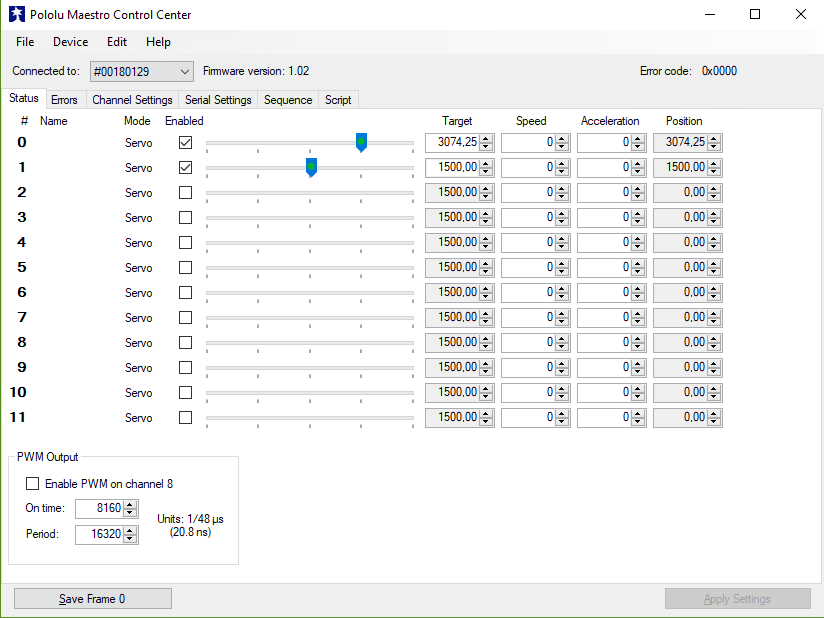
Servomotors may have different parameters. You can modify the Maestro output parameters under the tab “Channel Settings”. You need to test the parameters that are best suited for your servos.
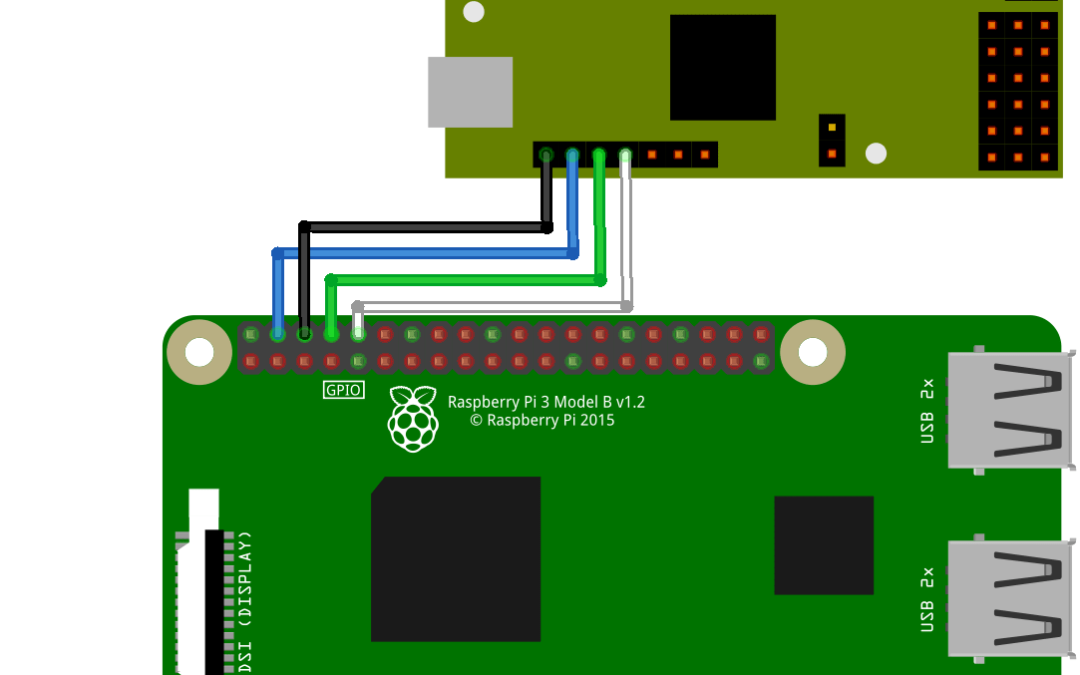
Wiring
Controller Maestro is powered by the Raspberry Pi 5V output. Pins 8(GPIO14 / UART0_TXD) and 10 (GPIO15/ UART0_RXD) of the Raspberry are connected to pin RX and TX of the Maestro respectively.
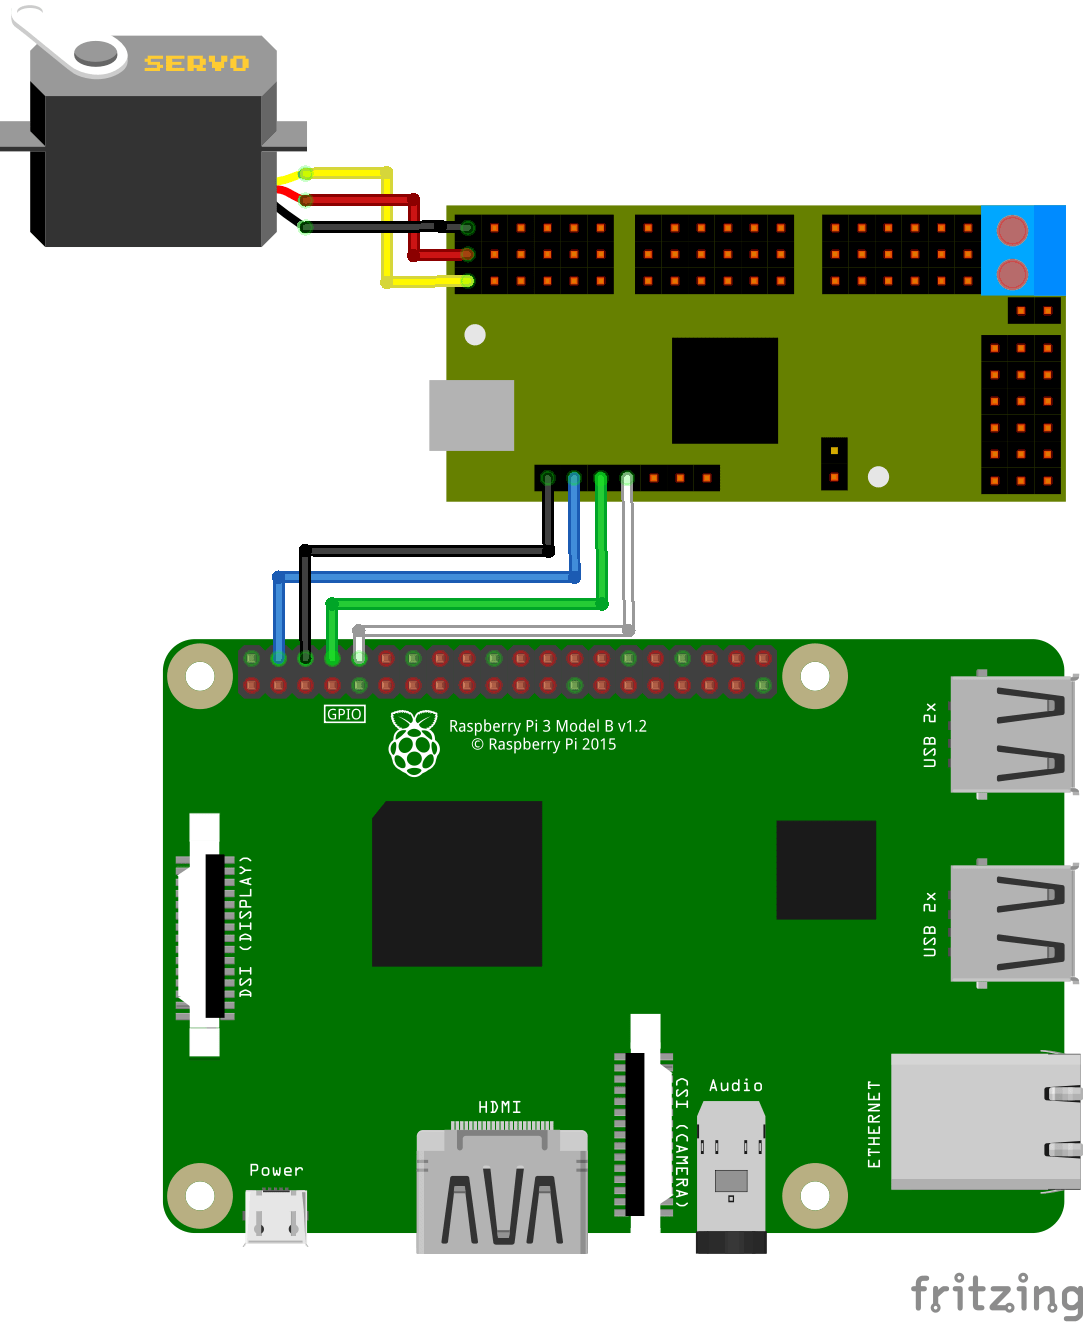
The wiring can easily be adapted to the other members of the Mini Maestro family by following the pinout schematics.
Raspberry Pi Configuration
Check that the module PySerial is installed on the Raspberry
In the terminal, enter:
$ python -m pip install pyserial
Then clone the Maestro module repository :
$ git clone https://github.com/FRC4564/Maestro
To communicate with the Maestro board you need a serial port. You can check the available ports by entering the command:
$ dmesg | grep tty
On the Raspberry Pi3, the serial port /dev/ttyAMAO is used by the embedded bluetooth module. We use the serial port /dev/ttySO to communicate with the Mini Maestro.
Basic code to use serial controller Maestro
To command the serial controller with Raspberry, a sequence of bytes need to be send via the serial port. The following code let the user send a position command to the several channels of a Mini Maestro with the Raspberry terminal.
For this we use the module Maestro.py previously downloaded (https://github.com/FRC4564/Maestro). Copy-paste the folder in the same folder as the code.
First, the serial port to communicate with the Maestro is intiliazied. Then, we write a function that receives data from the serial monitor and convert it into servo command.
#!/usr/bin/env python
# -*- coding: utf-8 -*-


import Maestro.maestro as maestro
import time

#define servo
servo = maestro.Controller(ttyStr='/dev/ttyS0')
min_imp=2000
max_imp=10000
step_imp=100

if __name__ == '__main__' :
	#infinite loop
	while 1:
		  #user input
		  msg=raw_input("Enter servo id and command: YxZZZZ:  \n")

		  #convert msg into id and cmd
		  sep=msg.find("x")
		  m1=msg[:sep]
		  m2=msg[sep+1:]
		  servoId=int(m1)
		  servoCmd=int(m2)

		  #saturate input
		  servoId=min(max(0,servoId),6);
		  servoCmd=min(max(min_imp,servoCmd),max_imp);

		  print(msg)
		  print("servoId : {}    servoCmd : {} \n".format(servoId,servoCmd))

		  servo.setTarget(servoId,servoCmd)
		  time.sleep(0.1)

	servo.close
Do not hesitate to leave a comment or write a message if you have any issue regarding your serial controller.
Applications
- Control multi-legged robot such as quadripode, hexapode or octopode
Sources
- maestro user guide https://www.pololu.com/docs/0J40
- Raspberry Pi Serial Port
Find other examples and tutorials in our Automatic code generator
Code Architect


