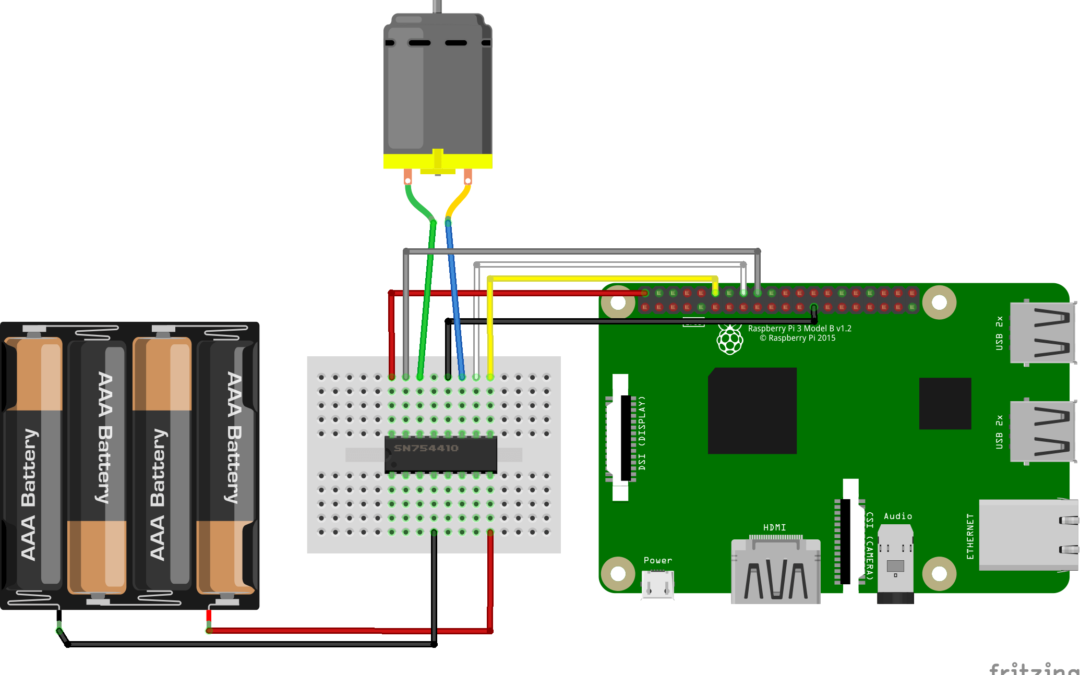
One of the main objectives in robotics is to make things move on their own. To give motion to a robot, electrical motors are oftenly used such as direct current (DC) motors especially for mobile robots. In this tutorial, we will see how to control such a motor using RaspberryPi and an H-bridge.
Prerequisite: Programming with Raspberry Pi
Material
- Screen
- HDMI cable
- Keyboard
- Raspberry PI 3 (with OS on micro SD)
- Mouse
- Power supply micro USB B
- DC Motor x1
- H-Bridge SN754410NE x1
DC Motor
Direct Current motors are oftenly used with a gearbox to increase the torque while keeping small dimensions. DC Motor is quite simple to use. To make it run, the only thing to do is to apply voltage to it. Sign and level of the voltage will determine the speed and direction of rotation.

To modulate the votage applied to the motor, an electrical relay or H-bridge can be used.
H-bridge
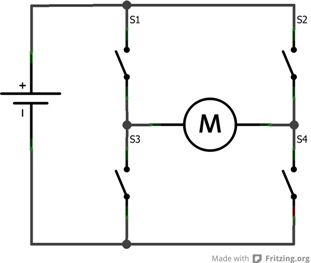
An H-bridge distributes power to electrical motor and modulate the voltage accroding to signals sent to its inputs. It can be drawn as four switches that will redirect current depending on the command from the microcontroller.
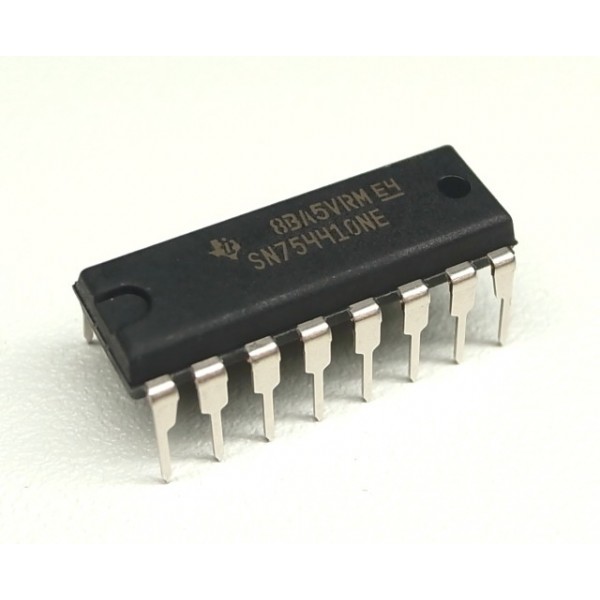
The device we use for this project is a SN754410NE. It can drive two dc motors and has several pins that have their own purpose.
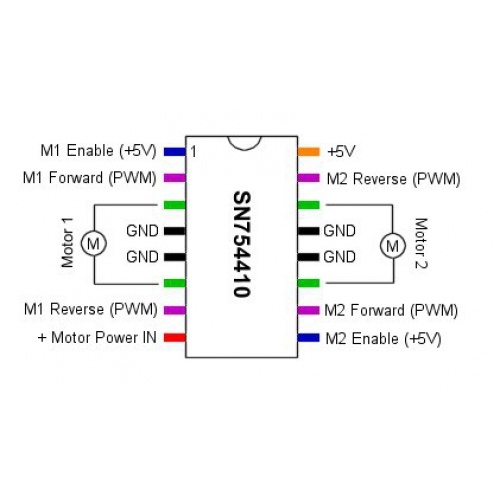
Little reminder on the pinout:
- GND are connected between them and need to be connected to the ground of the project.
- +5V recieve the power for the logic circuit, usually provided by the output 5V from Arduino
- M1 Enable and M2 Enable are used to activate the bridges. They recieved a HIGH/LOW voltage from the Arduino.
- M1/M2 Forward, M1/M2 Reverse recieve the PWM signals and correspond to the motor directions.
- +Motor Power IN recieve the motor power supply (5,6, 7V and sometimes 24V or more)
- Motor 1 and Motor 2 are connected to the motor’s wires.
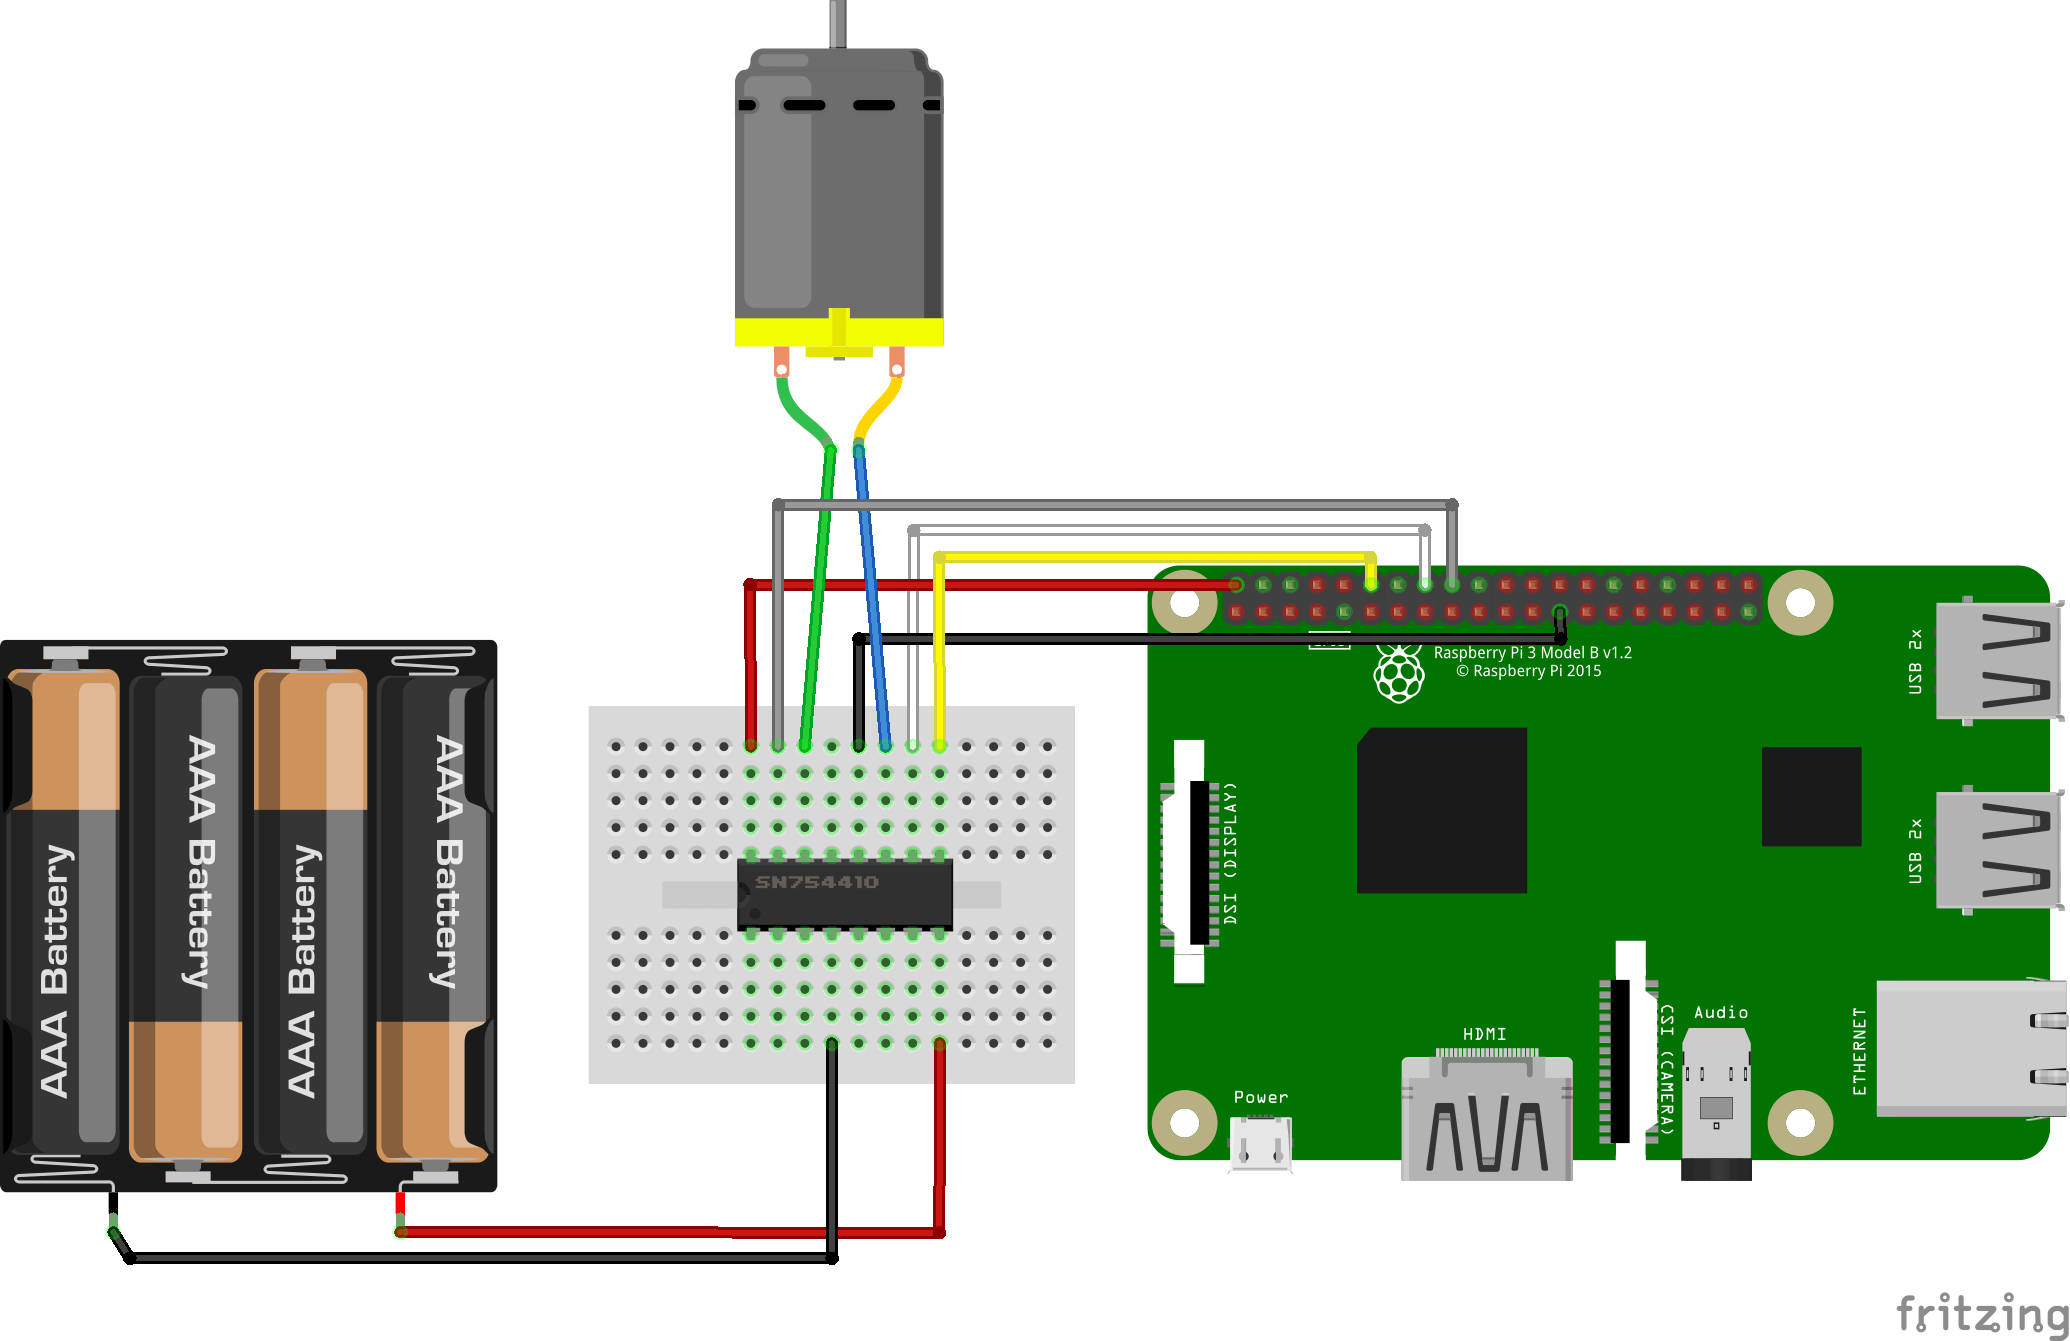
Wiring of DC Motor
Stepper is powered through the ULN2003A module. The module inputs from 1 to 4 are connected to the output 18,22,24,26 (GPIO24,GPIO25,GPIO8,GPIO7) of the RaspberryPi. Pins + and – of the module are connected to pin 5V and GND of the RaspberryPi.
Depending on the power required for the motor, the voltage output of the Raspberry Pi may be used but it is strongly advised to use an external power supply in order to protect the microcontroller.
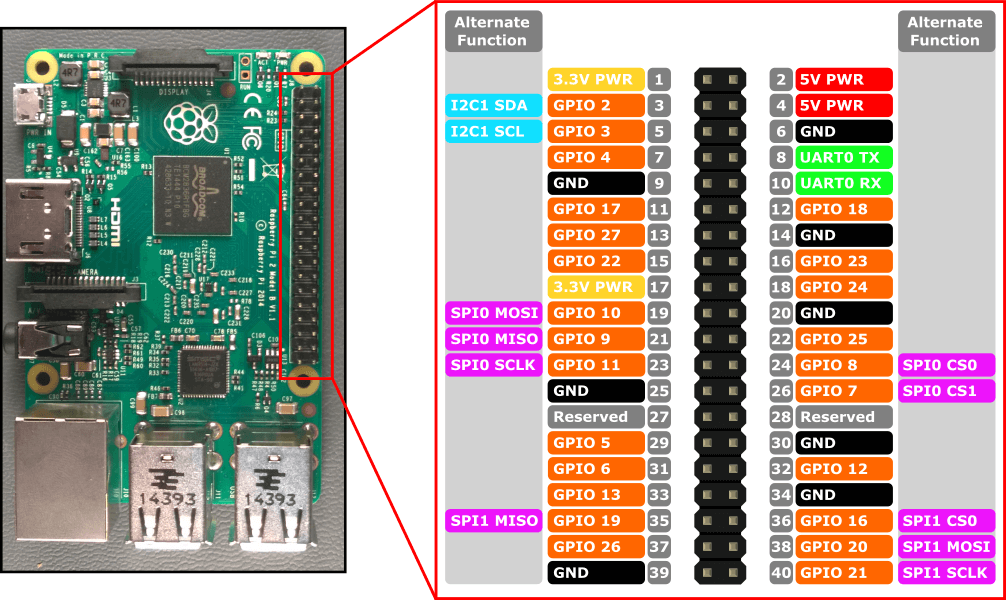
As a reminder, here is the pinout of the Raspberry Pi 3.
Basic code to control a DC Motor
To drive the motor, Hbridge should be enabled and a PWM signal should be sent to Forward or Reverse depending on the rotation direction.
#!/usr/bin/env python
# -*- coding: utf-8 -*-

import RPi.GPIO as GPIO
from time import sleep

GPIO.setmode(GPIO.BCM)
#Pins 18 22 24 GPIO 24 25 8
Motor1E = 24 #  Enable pin 1 of the controller IC
Motor1A = 25 #  Input 1 of the controller IC
Motor1B = 8 #  Input 2 of the controller IC


GPIO.setup(Motor1A,GPIO.OUT)
GPIO.setup(Motor1B,GPIO.OUT)
GPIO.setup(Motor1E,GPIO.OUT)

forward=GPIO.PWM(Motor1A,100) # configuring Enable pin for PWM
reverse=GPIO.PWM(Motor1B,100) # configuring Enable pin for PWM


if __name__ == '__main__' :
	forward.start(0)
	reverse.start(0)

	# this will run your motor in reverse direction for 2 seconds with 80% speed by supplying 80% of the battery voltage
	print "GO backward"
	GPIO.output(Motor1E,GPIO.HIGH)
	forward.ChangeDutyCycle(0)
	reverse.ChangeDutyCycle(80)
	sleep(2)


	# this will run your motor in forward direction for 5 seconds with 50% speed.
	print "GO forward"
	GPIO.output(Motor1E,GPIO.HIGH)
	forward.ChangeDutyCycle(50)
	reverse.ChangeDutyCycle(0)
	sleep(5)

	#stop motor
	print "Now stop"
	GPIO.output(Motor1E,GPIO.LOW)
	forward.stop() # stop PWM from GPIO output it is necessary
	reverse.stop()

	GPIO.cleanup()
N.B.: Be careful when copying Python code from the internet, you may encounter indentation issues which lead to compilation error.
Sources
Find other examples and tutorials in our Automatic code generator
Code Architect


