In this tutorial we will configure Visual Studio Code to run C# scripts
Installing Visual Studio Code
Then open Visual Studio Code
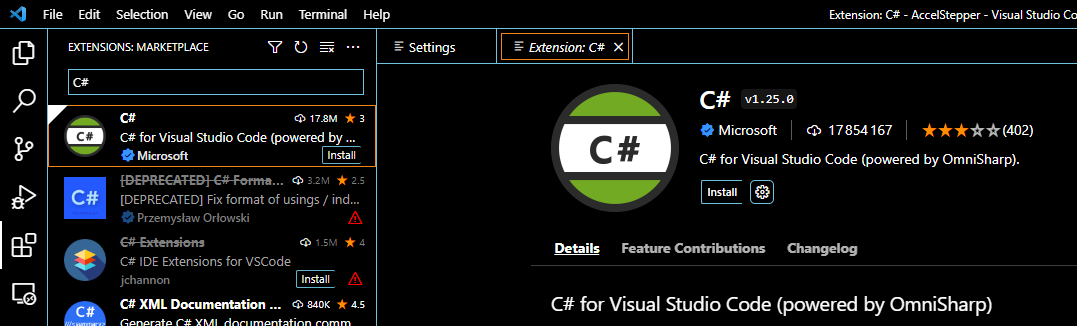
Installing the C# extension
Check .NET installation in terminal
dotnet --versionCreating a console application
Creating a new .NET project
dotnet new console -o app
cd app
code .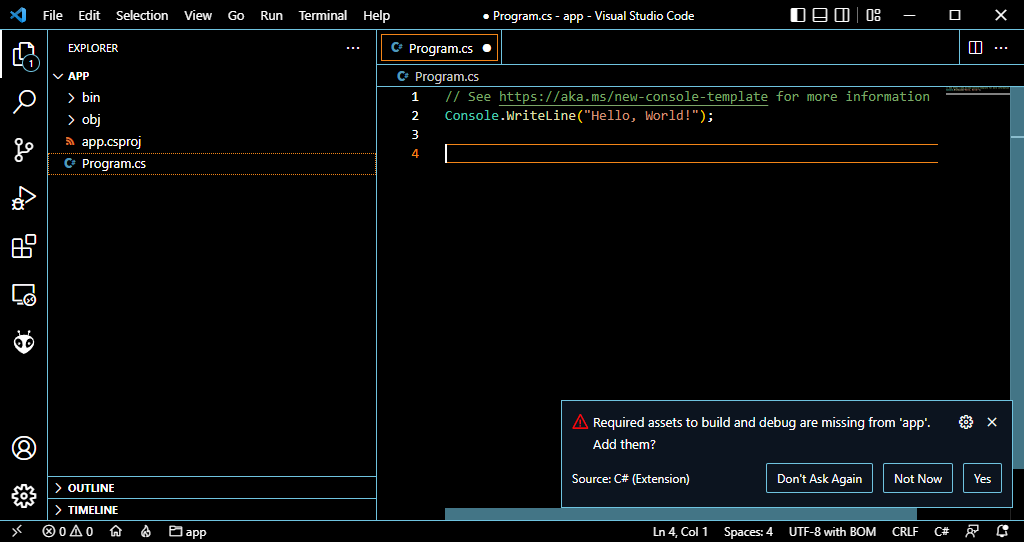
Select Yes to add compilation and debug configuration
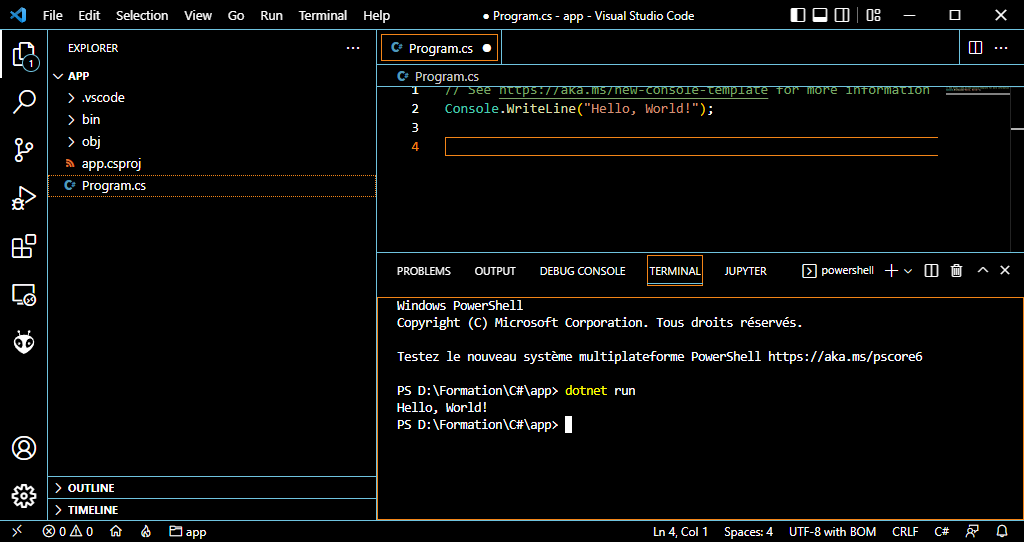
Run the C# script
To execute the C# code
dotnet runOr select Run > Start Debugging (F5)
Adding libraries
To add libraries, you can enter the following command, replacing with the name of the package you want to install
dotnet add package as an option you can select the version you want to install (e.g. 1.0.0)
dotnet add package --version Creating a graphical interface
You can create a graphical interface with C#
Enter the following command to create a new winforms project (Windows only)
dotnet new winforms -o appgui
cd appgui
code .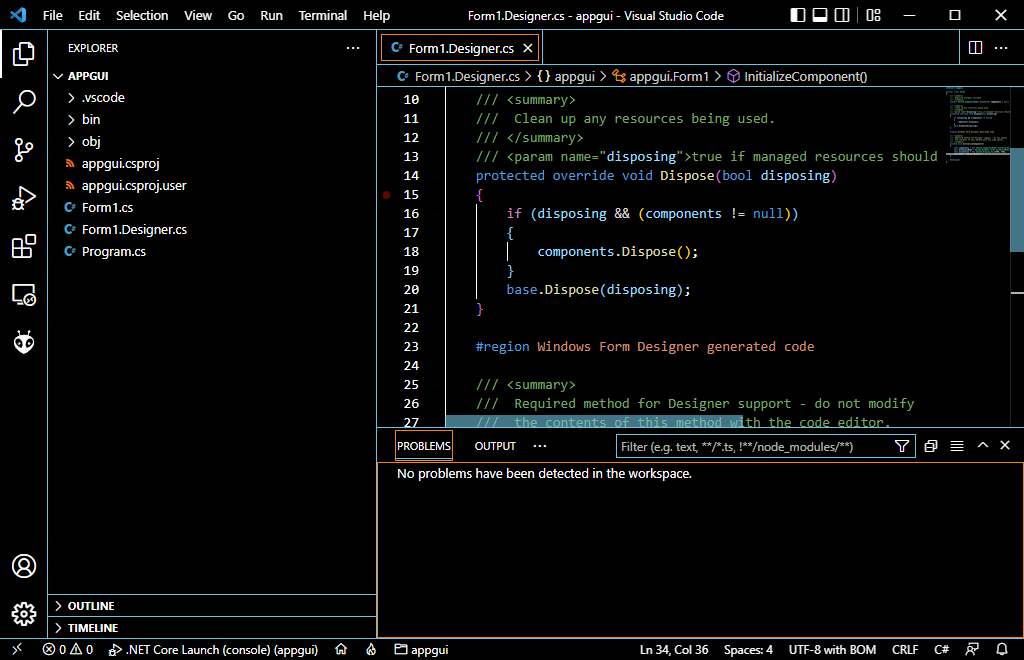
Visual Studio code will create several files to define a graphical interface. You can modify these three files to develop your interface. We’ll look at a simple example with a label and a button.
- Form1Designer.cs
This file contains the graphic definition of each interface component and their position.
In this example, we define a label and a button contained in a groupbox.
N.B.: For each element, you must:
- declare it: private System.Windows.Forms.Label label1;
- create an instance this.label1 = new System.Windows.Forms.Label();
- set parameters (if necessary) this.label1.Text = “Hello world!
- place it in a container this.grpbox.Controls.Add(this.label1);
namespace appgui;

partial class Form1
{
    /// <summary>
    ///  Required designer variable.
    /// </summary>
    private System.ComponentModel.IContainer components = null;

    /// <summary>
    ///  Clean up any resources being used.
    /// </summary>
    /// <param name="disposing">true if managed resources should be disposed; otherwise, false.</param>
    protected override void Dispose(bool disposing)
    {
        if (disposing && (components != null))
        {
            components.Dispose();
        }
        base.Dispose(disposing);
    }

    #region Windows Form Designer generated code

    /// <summary>
    ///  Required method for Designer support - do not modify
    ///  the contents of this method with the code editor.
    /// </summary>
    private void InitializeComponent()
    {
        this.components = new System.ComponentModel.Container();
        this.AutoScaleMode = System.Windows.Forms.AutoScaleMode.Font;
        this.ClientSize = new System.Drawing.Size(400, 250);
        this.Text = "Form1";

        // components
        this.label1 = new System.Windows.Forms.Label();
        this.button1 = new System.Windows.Forms.Button();
        this.grpbox = new System.Windows.Forms.GroupBox();

        // label1
        this.label1.AutoSize = true;
        this.label1.Location = new System.Drawing.Point(50, 50);
        this.label1.Name = "label1";
        this.label1.Size = new System.Drawing.Size(50, 10);
        this.label1.TabIndex = 3;
        this.label1.Text = "Hello world!";
        //button1
        this.button1.Location = new System.Drawing.Point(50, 70);
        this.button1.Name = "button1";
        this.button1.Size = new System.Drawing.Size(50, 20);
        this.button1.TabIndex = 0;
        this.button1.Text = "Click!";
        this.button1.UseVisualStyleBackColor = true;
        this.button1.Click += new System.EventHandler(this.button1_Click);

        //grpbox
        this.grpbox.Controls.Add(this.label1);
        this.grpbox.Controls.Add(this.button1);
        this.grpbox.Location = new System.Drawing.Point(10, 10);
        this.grpbox.Name = "grpbox";
        this.grpbox.Size = new System.Drawing.Size(380, 230);
        this.grpbox.TabIndex = 0;
        this.grpbox.TabStop = false;
        this.grpbox.Text = "Group Box";

        //layout
        this.Controls.Add(this.grpbox);

    }

    private System.Windows.Forms.Label label1;
    private System.Windows.Forms.GroupBox grpbox;
    private System.Windows.Forms.Button button1;

    #endregion
}- Form1.cs
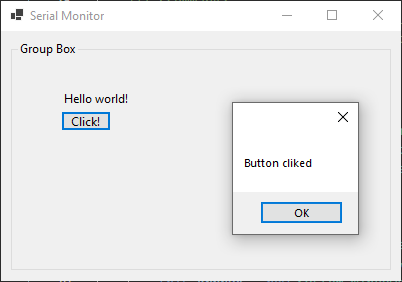
This file defines how the components will react.
In this example, when the button is pressed, a message is displayed in a new window
namespace appgui;

public partial class Form1 : Form
{
    public Form1()
    {
        InitializeComponent();
    }

    private void button1_Click(object sender, EventArgs e)
    {
        MessageBox.Show("Button cliked");
    }
}- Program.cs
This file is used to launch the application. You shouldn’t need to modify this file just yet.
namespace appgui;

static class Program
{
    /// <summary>
    ///  The main entry point for the application.
    /// </summary>
    [STAThread]
    static void Main()
    {
        // To customize application configuration such as set high DPI settings or default font,
        // see https://aka.ms/applicationconfiguration.
        ApplicationConfiguration.Initialize();
        Application.Run(new Form1());
    }
}
If you execute the code and press the button you should get the following result
Sources
https://dotnet.microsoft.com/en-us/download/dotnet/sdk-for-vs-code?utm_source=vs-code&utm_medium=referral&utm_campaign=sdk-install


