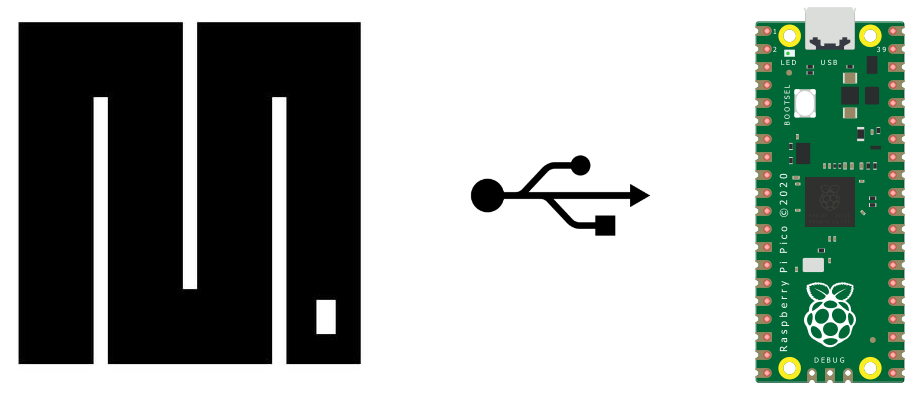
The Raspberry Pi Pico is a development board based on the RP2040 programmable with MicroPython. It has a large number of inputs
Hardware
- Computer
- Raspberry Pi Pico (standar H or W)
- USB A Male to USB Mini B Male cable
Installing drivers on the computer
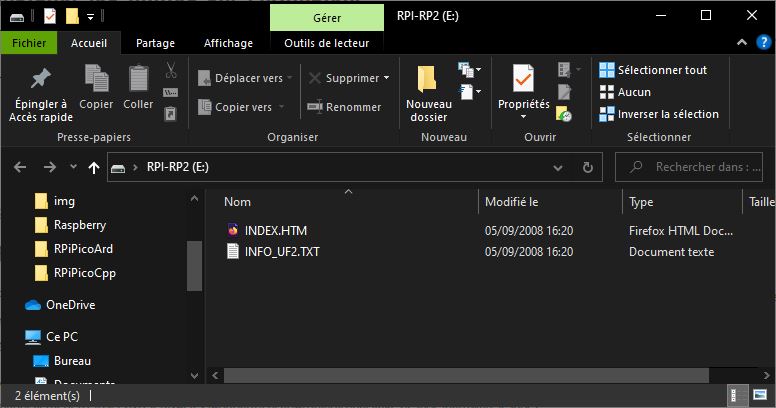
The Raspberry Pi Pico is recognized as a Fat32 USB storage device. No special driver needs to be installed to connect it to a computer. To convert the RPi Pico into a USB flash drive:
- Disconnect the Pico from its power supply
- Press the BOOTSEL button
- Connect the Pico to the computer using the USB cable
- Release the BOOTSEL button
Installing MicroPython on RPI Pico
Download the MicroPython UTF2 file corresponding to the version of your Pico
Then copy the file to your Raspberry Pi Pico window.
The Pico should reboot and launch MicroPython
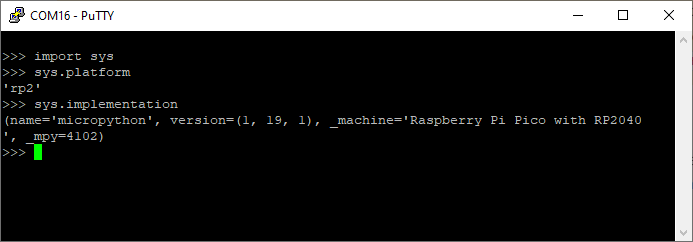
Check operation with Putty
Once MicroPython has been installed on your Pico, you can launch Python commands via serial communication. To do this you can use Putty
Find the port name used by the Raspberry Pi in the Device Manager.
In the Putty software, select Serial communication, enter the port name and the baud rate is 9600. You can also enter Python commands in the terminal.
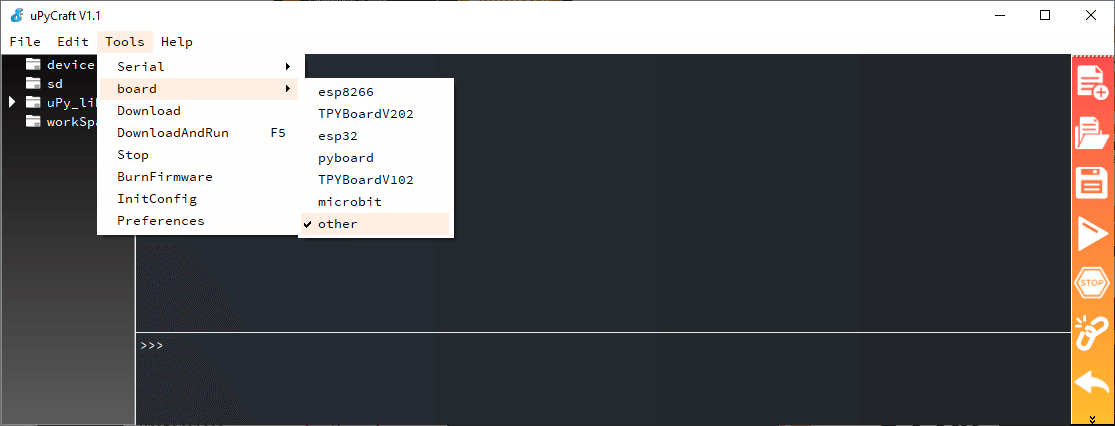
Launching a Python script with uPyCraft
Once MicroPython has been installed, you can launch a Python script using uPyCraft.
Download and install uPyCraft
In Tools, select the correct serial port and the “other” card type.
You can then create a main.py script
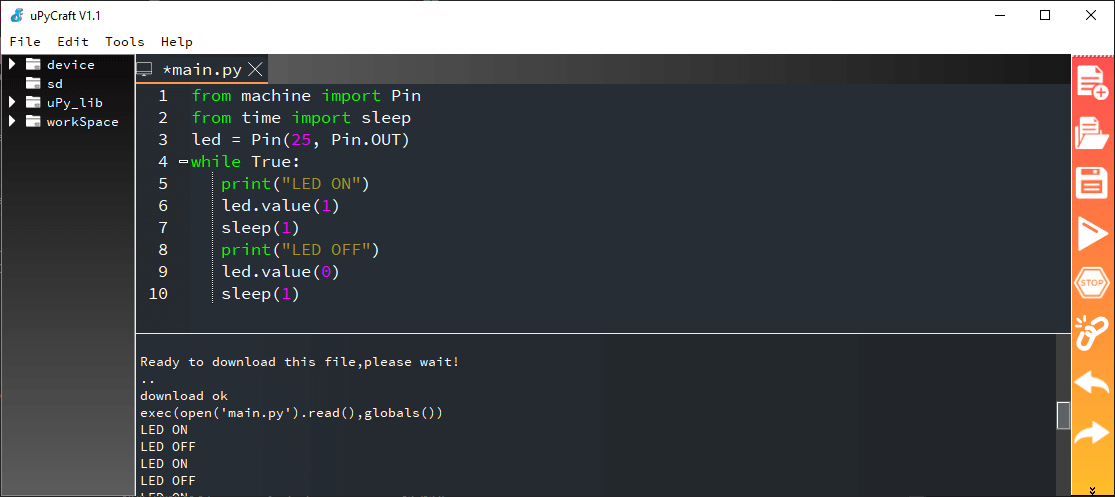
Example code
from machine import Pin
from time import sleep

led = Pin(25, Pin.OUT)
while True:
   print("LED ON")
   led.value(1)
   sleep(1)
   print("LED OFF")
   led.value(0)
   sleep(1)
If the upload is successful, this message should be displayed
Ready to download this file,please wait!
..
download ok
exec(open('main.py').read(),globals())
Results
Once the code has been loaded, you should see the text scroll in the console. You can stop the code with the “stop” button or Ctrl+c
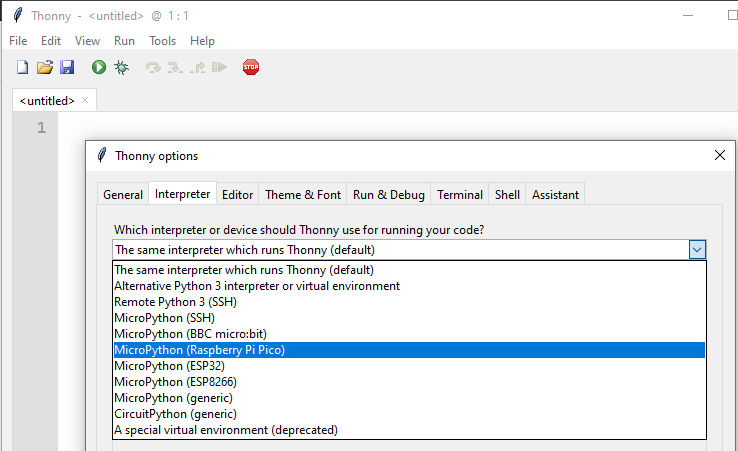
Running a script with Thonny
Another famous IDE for MicroPython development is Thonny.
Download and install the latest version of Thonny
In “Run> Select interpreter”, select “MicroPython (Raspberry Pi Pico)”, then select the serial port.
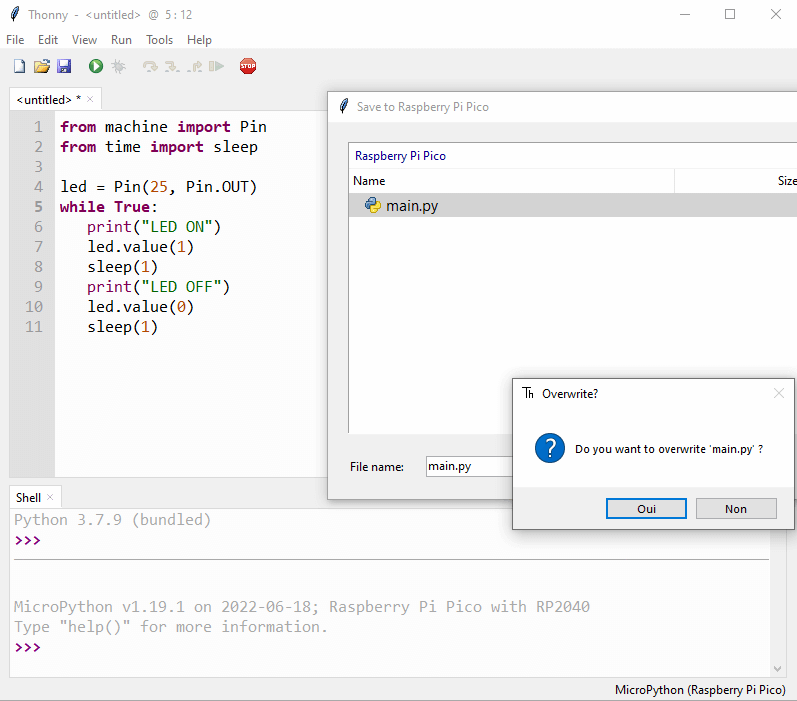
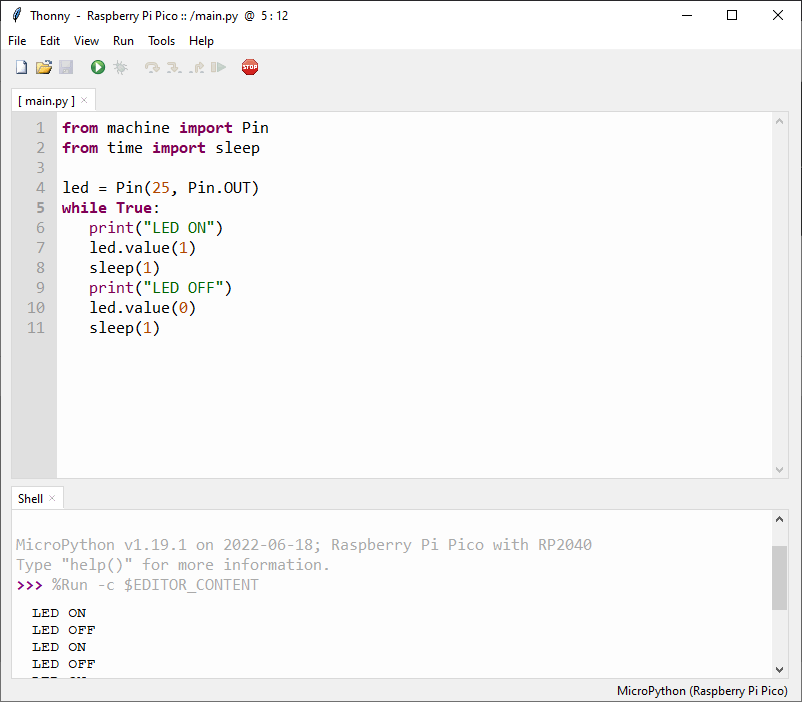
You can then copy the previous code and run it with the “Run” command.
You should see the LED flash and the text scroll.
There are a number of tools available for developing Micropython code on Raspberry Pi Pico or other platforms. Use the one that suits you best.


