When a microcontroller has a remote connection, it is interesting that it can communicate with the outside world and, in particular, send information in the form of mail. We will see in this tutorial how to send an email using an Arduino with a Wifi connection and a JavaScript script.
This tutorial can be applied to any microcontroller with a Wifi connection. It is enough to adapt the part of the code relating to the connection to the network. The only drawback is that the web interface must be opened in a web browser for the mail to be sent.
Material
- Arduino
- Wifi or Ethernet module
- Gmail account
As a reminder, some examples of modules with Wifi connection:
- Ethernet Shield VM04
- Ethernet Shield W5100
- WiFi Shield
- ESP-01
- NodeMCU ESP8266 ou ESP32
- Raspberry Pi
Principle of operation
To send an email with Arduino, we will use the SMTP protocol (Simple Mail Transfer Protocol), we will go through a server that manages the sending of mail. Like the smtp server of Gmail. To use this server, you need a Gmail account (free creation) and you have to activate the two-step validation.
Gmail account configuration
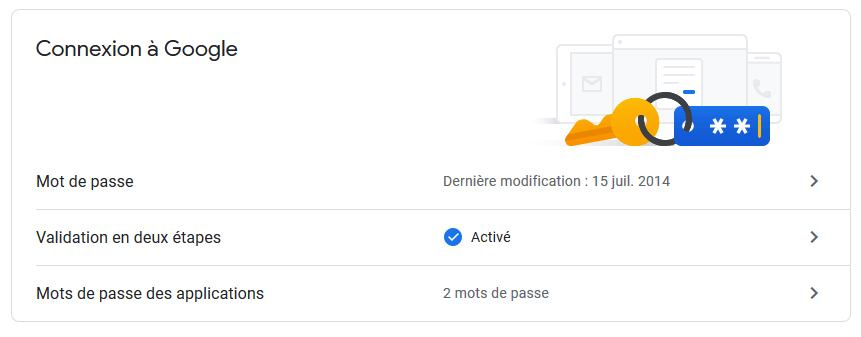
On the account management page, go to the “Security” tab, then look for the “Sign in to Google” box.
Add two-step validation.
Generate an account access password for a given application
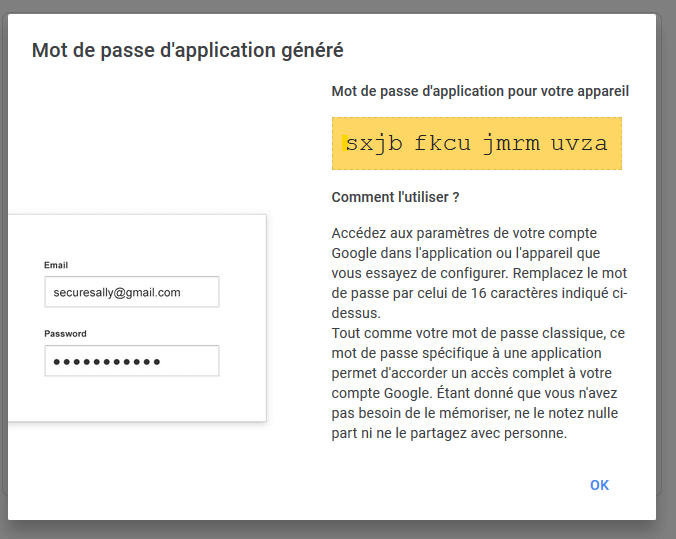
You just have to copy in the JavaScript code below, the user ID (the Gmail address) and the password issued by Google (yellow insert above).
JavaScript code to send an email
The code that will allow us to send emails is the JavaScript code present in the HTML code of the web interface. Before creating the mail sending function, we will import the smtp.js library
<script src='https://smtpjs.com/v3/smtp.js'></script>
Then we can add the definition of the sendEmail function.
  <script>
  function sendEmail() {
  Email.send({
    Host: 'smtp.gmail.com',
    Username : '*************@gmail.com',
    Password : '**********************',
    To : 'destinataire@gmail.com',
    From : 'emetteur@aranacorp.com',
    Subject : 'Data from "+nom+"',
    Body : 'The sensor value is : "+String(analogRead(A0))+"',
    }).then(
      message => alert('mail sent successfully')
    );
  }
  </script>
This function is voluntarily simplified to show the sending of mail but it is possible to modify it to send different subject, message body and information.
Full code with Ethernet Shield W5100
//Libraries
#include <Ethernet.h>//https://github.com/CisecoPlc/Arduino-W5100-W5200/tree/master/Ethernet

//Parameters
String request ;
String nom = "Arduino";
unsigned long refreshCounter  = 0;
IPAddress ip(192, 168, 1, 179) ;
byte mac [6] = {0x54, 0x34, 0x41, 0x30, 0x30, 0x31};

//Objects
EthernetServer server(80);
EthernetClient client;

void setup() {
  //Init Serial USB
  Serial.begin(9600);
  Serial.println(F("Initialize System"));
  //Init W5100
  Ethernet.begin(mac, ip);
  while (!Ethernet.begin(mac)) {
    Serial.println(F("failed. Retrying in 1 seconds."));
    delay(1000);
    Serial.print(F("Starting W5100..."));
  }
  pinMode(2, OUTPUT);
  server.begin();
  Serial.println(F("W5100 initialized"));
  Serial.print(F("IP Address: "));
  Serial.println(Ethernet.localIP());
}

void loop() {
  client = server.available();
  clientRequest();
  handleRequest();
}
void clientRequest( ) { /* function clientRequest */
  ////Get client request
  if (!client) {
    return;
  }
  // Wait until the client sends some data
  while (!client.available()) {
    delay(1);
  }
  request = client.readStringUntil('\r'); // Read the first line of the request
  Serial.println(request);
  client.flush();
}

void handleRequest( ) { /* function handleRequest */
  ////Handle web client request
  if (request.indexOf("/dig2on") > 0) {
    digitalWrite(2, HIGH);
  }
  if (request.indexOf("/dig2off") > 0) {
    digitalWrite(2, LOW);
  }
  if (request.indexOf("GET") >= 0) {
    webpage(client);
    client.stop();
  }
}

void webpage(EthernetClient client) { /* function webpage */
  ////Send wbepage to client
  client.println("HTTP/1.1 200 OK");
  client.println("Content-Type: text/html");
  client.println(""); //  do not forget this one
  client.println("<!DOCTYPE HTML>");
  client.println("<html>");
  client.println("<head>");
  client.println("<meta name='apple-mobile-web-app-capable' content='yes' />");
  client.println("<meta name='apple-mobile-web-app-status-bar-style' content='black-translucent' />");
  client.println("<script src='https://smtpjs.com/v3/smtp.js'></script>");
  client.println("<script>");
  client.println("function sendEmail() {");
  client.println("Email.send({");
  client.println("  Host: 'smtp.gmail.com',");
  client.println("  Username : '*************@gmail.com',");
  client.println("  Password : '**********************',");
  client.println("  To : 'destinataire@gmail.com',");
  client.println("  From : 'emetteur@aranacorp.com',");
  client.println("  Subject : 'Data from Arduino" + nom + "',");
  client.println("  Body : 'The sensor value is : " + String(analogRead(A0)) + "',");
  client.println("  }).then(");
  client.println("    message => alert('mail sent successfully')");
  client.println("  );");
  client.println("}");
  client.println("</script>");
  client.println("</head>");
  client.println("<body bgcolor = '#70706F'>");
  client.println("<hr/><hr>");
  client.println("<h1 style='color : #3AAA35;'><center> " + nom + " Device Control </center></h1>");
  client.println("<hr/><hr>");
  client.println("<br><br>");
  client.println("<br><br>");
  client.println("<center>");
  client.println("  Pin A0");
  client.println("  <input value=" + String(analogRead(A0)) + " readonly></input>");
  client.println("  </center>");
  client.println("<center>");
  client.println("Send email");
  client.println("<input type='button' value='Send Email' onclick='sendEmail()'/>");
  client.println("</center>");
  client.println("<br><br>");
  client.println("<center>");
  client.println("<a style='color : #3AAA35;' href='https://www.aranacorp.com'>www.aranacorp.com</a>");
  client.println("</center>");

  client.println("<br><br>");
  client.println("</body></html>");
  client.println();
  delay(1);
}
Result
You can open the web interface in a browser using the IP address displayed in the serial monitor. The following page should appear.
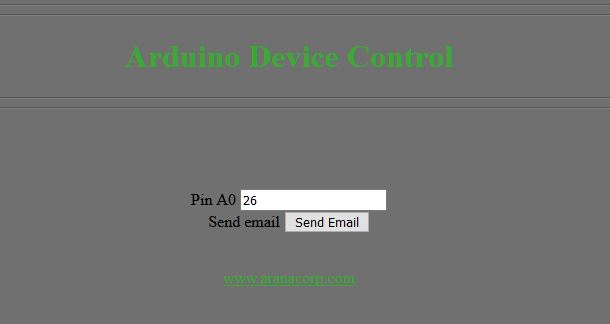
When the “Send Email” button is pressed, an email is sent according to the address and text written in the JavaScript function described above.
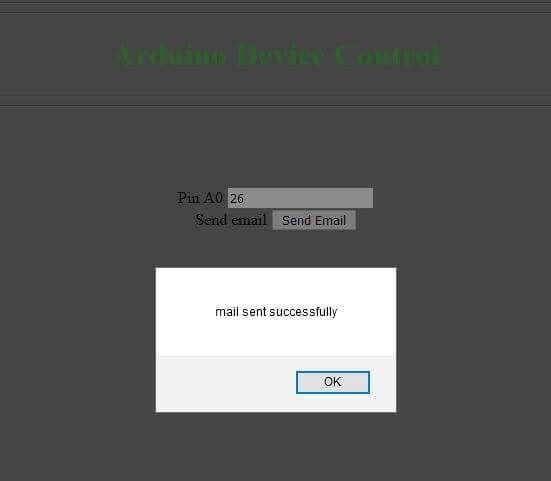
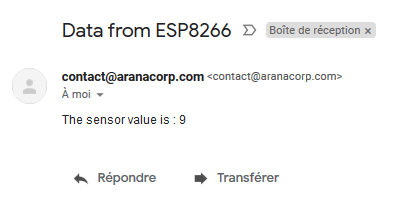
If you search your Gmail inbox, you should come across a similar message.


I need help:
email:55:4: error: ‘webpage’ was not declared in this scope
webpage(client);
^~~~~~~
C:\Users\Administrator\Documents\Arduino\email\email.ino: At global scope:
email:59:13: error: variable or field ‘webpage’ declared void
void webpage((EthernetClient client){/* function webpage */
^
email:59:30: error: expected primary-expression before ‘client’
void webpage((EthernetClient client){/* function webpage */
^~~~~~
email:59:30: error: expected ‘)’ before ‘client’
exit status 1
‘webpage’ was not declared in this scope
Invalid library found in C:\Users\Administrator\Documents\Arduino\libraries\OLED_I2C.h: no headers files (.h) found in C:\Users\Administrator\Documents\Arduino\libraries\OLED_I2C.h
Error in copy paste
email:59:30: error: expected ‘)’ before ‘client’