
Interrupts allow the microcontroller to execute a function when an event occurs on one of the interrupt pins. Instead of constantly reading the value of a sensor, the program will only be triggered when the value of the sensor changes. This solves many task layout problems.
Material
- Arduino UNO
- push button (or other sensor)
- USB A/ USB B cable
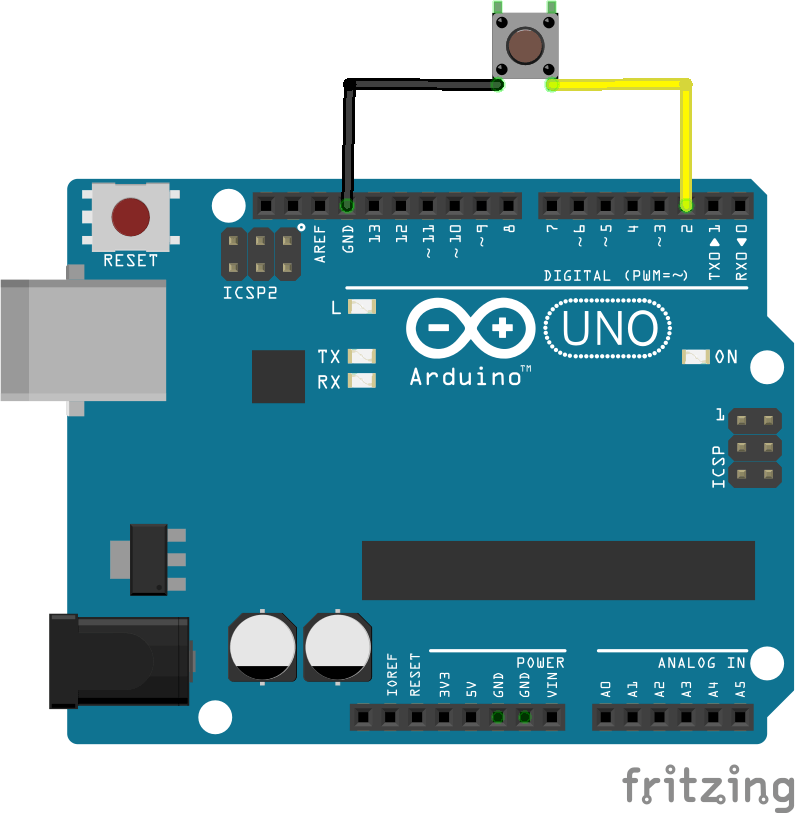
Scheme
On the Arduino UNO board, there are two pins that support the interrupts: pins 2 and 3. So we will connect the output of the button to pin 2 of the Arduino.
Reminder of the digital pins compatible with the interrupts
| Uno, Nano, Mini, other 328-based | 2, 3 |
| Uno WiFi Rev.2, Nano Every | all digital pins |
| Mega, Mega2560, MegaADK | 2, 3, 18, 19, 20, 21 |
| Micro, Leonardo, other 32u4-based | 0, 1, 2, 3, 7 |
| Zero | all digital pins, except 4 |
| MKR Family boards | 0, 1, 4, 5, 6, 7, 8, 9, A1, A2 |
| Nano 33 IoT | 2, 3, 9, 10, 11, 13, 15, A5, A7 |
| Nano 33 BLE, Nano 33 BLE Sense | all pins |
| Due | all digital pins |
| 101 | all digital pins (Only pins 2, 5, 7, 8, 10, 11, 12, 13 work with CHANGE) |
Interrupt management code
The syntax to initialize an interrupt is as follows:
attachInterrupt(digitalPinToInterrupt(pin), ISR, mode)With pin, the pin used, ISR, the function to activate when the event is detected and mode, the detection mode used.
- LOW to enable detection when the spindle is in the LOW state
- CHANGE to activate the detection when the state of the spindle changes
- RISING to enable detection when the pin status changes from LOW to HIGH
- FALLING to enable detection when the pin status changes from HIGH to LOW
const byte ledPin = 13;
const byte interruptPin = 2;
volatile byte state = LOW;

void setup() {
  Serial.begin(9600);
  pinMode(ledPin, OUTPUT);
  pinMode(interruptPin, INPUT_PULLUP);
  attachInterrupt(digitalPinToInterrupt(interruptPin), onEvent, CHANGE);
  Serial.println(F("Système intialisé"));
}

void loop() {
  digitalWrite(ledPin, state);
}

void onEvent() {
  state = !state;
  Serial.print(F("Switch LED 13 : "));
  if(state){
    Serial.println(F("ON"));
  }else{
    Serial.println(F("OFF"));
  }
}
Warning: In the onEvent() function, the millis() and delay() functions, which depend on interrupts, will not work.
Functions to know to go further in the management of interruptions
attachInterruptsdetachInterrupt(digitalPinToInterrupt(pin))disable the specified interruptinterrupts()re-enables interruptsnoInterrupts()to disable interrupts
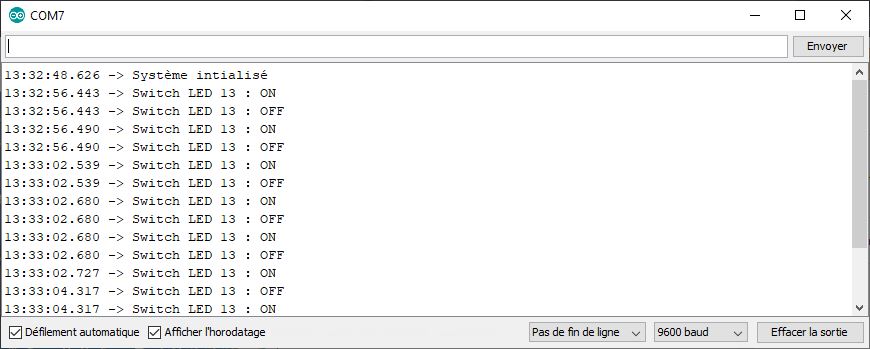
Result
Once the code is uploaded, if you press the button, the LED on the Arduino should turn on and off.
Sources
Retrouvez nos tutoriels et d’autres exemples dans notre générateur automatique de code
La Programmerie


