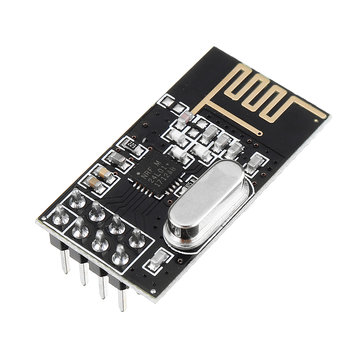
The radio module NRF24L01 is a transceiver for establishing a connection and transferring data from one device to another via radio waves.
Hardware
- Computer
- Arduino UNO x2
- USB cable A Male to B Male
- NRF24L01 x2
Principle of operation
The nRF24l01 module is a low-power transceiver that enables wireless data exchange over the 2.4GHz radio frequency band. It allows efficient communication between two devices over a medium distance (50m) when they are in direct view, i.e. without obstacles. If you wish to communicate over longer distances outdoors, an RF433 or LoRa module should be preferred. Indoors, if one or more walls are present between the transmitter and the receiver, it is preferable to use WiFi or Bluetooth communication.
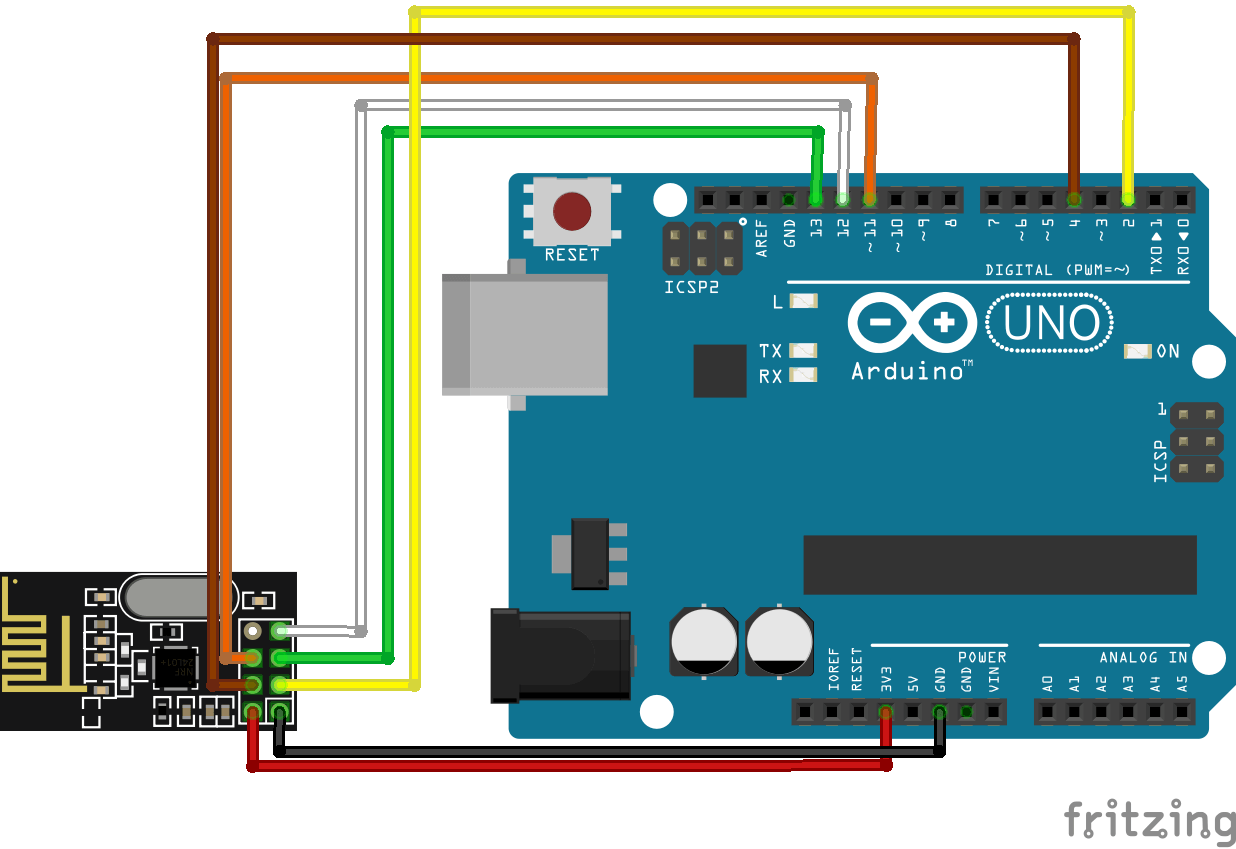
Schematic
The nRF24L01 module uses the SPI protocol to communicate with the microcontroller and must be powered between 1.9 and 3.6V. SPI communication uses specific boxes and is pinned as follows (left side NRF24L01, right side Arduino UNO):
- Vcc (Power) <-> 3V3
- CE (Reset) <-> 2
- GND (ground) <-> GND
- MOSI (Master Output Slave Input) <-> 11
- MISO (Master Input Slave Output) <-> 12
- SCK (Serial Clock) <-> 13
- CS (chip select) <-> 4
To improve the range and stability of the connection, it is advisable to solder a capacitor between the Vcc and GND pins on some modules.
Code
To manage the NRF24L01 module we use the RF24.h, nRF24L01.h and SPI.h libraries. In the following code, which works for the master (role=0) and the slave (role=1), we define a node for each module, one that will send data and the other that will receive it.
//Libraries
#include <RF24.h>//https://github.com/nRF24/RF24
#include <nRF24L01.h>//https://github.com/nRF24/RF24/blob/master/nRF24L01.h
#include <SPI.h>//https://www.arduino.cc/en/reference/SPI

//Parameters
byte addresses[2] [6] = {"Node1", "Node2"};
bool radioNumber  = 0;
bool role  = 0;

//Variables
int masterStatus  = 0;
byte cmd  = 0;
int slaveStatus  = 0;
unsigned long myData  = 0;

//Objects
RF24 radio(2, 4);

void setup() {
  //Init Serial USB
  Serial.begin(9600);
  Serial.println(F("Initialize System"));
  //Init radio rf24

  radio.begin();
  //radio.setChannel(125);
  radio.setPALevel(RF24_PA_LOW); // Set the PA Level low to prevent power supply related issues. RF24_PA_MAX is default.
  //radio.setDataRate(RF24_250KBPS);//(RF24_250KBPS);//(RF24_2MBPS);
  //radio.setAutoAck(1);                    // Ensure autoACK is enabled
  //radio.enableAckPayload();               // Allow optional ack payloads
  //radio.setRetries(2,15);                 // Smallest time between retries, max no. of retries
  //radio.setAddressWidth(3);
  //radio.setCRCLength(RF24_CRC_8);          // Use 8-bit CRC for performance
  //radio.setPayloadSize(16);                // Here we are sending 1-byte payloads to test the call-response speed
  //radio.printDetails();                   // Dump the configuration of the rf unit for debugging. Not working on nano


  // Open a writing and reading pipe on each radio, with opposite addresses
  if (radioNumber) {
    radio.openWritingPipe(addresses[1]);
    radio.openReadingPipe(1, addresses[0]);
  } else {
    radio.openWritingPipe(addresses[0]);
    radio.openReadingPipe(1, addresses[1]);
  }

  myData = 1.22;
  // Start the radio listening for data
  radio.startListening();
}

void loop() {
  testRF24();
}

void testRF24( ) { /* function testRF24 */
  ////Test RF24communication change radioNumber and radio to 0(receiver) or 1(transmitter)
  if (role == 1) {
    masterRole();
  } else {
    slaveRole();
  }
}

void masterRole( ) { /* function masterRole */
  ////emit data
  radio.stopListening();                                    // First, stop listening so we can talk.


  Serial.println(F("Now sending"));

  myData = micros();
  if (!radio.write( &myData, sizeof(myData) )) {
    Serial.println(F("failed"));
  }
  //Serial.print("width :  ");Serial.println(radio.R_RX_PL_WID );
  radio.startListening();                                    // Now, continue listening

  unsigned long started_waiting_at = micros();               // Set up a timeout period, get the current microseconds
  boolean timeout = false;                                   // Set up a variable to indicate if a response was received or not

  while ( ! radio.available() ) {                            // While nothing is received
    if (micros() - started_waiting_at > 200000 ) {           // If waited longer than 200ms, indicate timeout and exit while loop
      timeout = true;
      break;
    }
  }

  if ( timeout ) {                                            // Describe the results
    Serial.println(F("Failed, response timed out."));
  } else {
    // Grab the response, compare, and send to debugging spew
    radio.read( &myData, sizeof(myData) );
    myData = micros();

    // Spew it
    Serial.print(F("Sent "));
    Serial.print(myData);
    Serial.print(F(", Got response "));
    Serial.print(myData);
    //Serial.println(myData.value);
  }

  // Try again 1s later
  delay(1000);
}

void slaveRole( ) { /* function slaveRole */
  ////recieve data
  if ( radio.available()) {
    // Variable for the received timestamp
    while (radio.available()) {                          // While there is data ready
      radio.read( &myData, sizeof(myData) );             // Get the payload
    }

    radio.stopListening();                               // First, stop listening so we can talk
    Serial.print(F("Transmission "));
    Serial.println(myData);
    //myData.value += 0.01;                                // Increment the float value
    radio.write( &myData, sizeof(myData) );              // Send the final one back.
    radio.startListening();                              // Now, resume listening so we catch the next packets.
    Serial.print(F(" - Sent response "));
    Serial.println(myData);
    //Serial.print(F(" : "));
    //Serial.println();
  }
}
Applications
- Creating a remote control to control your Arduino project
- Exchanging data between two Arduinos
Sources
- https://github.com/nRF24/RF24
- https://github.com/nRF24/RF24/blob/master/nRF24L01.h
- https://www.arduino.cc/en/reference/SPI
Find other examples and tutorials in our Automatic code generator
Code Architect


